
If you’ve been thinking about streaming your gameplay on Twitch or YouTube, the good news is that getting started is more achievable than it looks. You don’t need a professional studio or a massive budget; you need the right gear in the right order, and a clear sense of what actually matters for your viewers.
This PC gaming streaming setup guide walks you through everything that goes into a PC gaming streaming setup, from the foundational stuff that every streamer needs to the upgrades worth considering once you’ve found your footing. Whether you’re just getting started or looking to level up a basic setup, here’s what you need to know before you buy anything.
Table of contents
- What do you actually need to start streaming?
- Video capture cards: do you need one?
- Webcams and cameras
- Lighting and green screens
- Audio
- Stream decks and scene controllers
- FAQs

What do you actually need to start streaming?
Before we get into specific gear, it helps to understand what a streaming setup is actually doing. When you go live, your PC is running two things at once: the game itself, and a piece of free software that captures everything on your screen, mixes in your microphone and webcam, and sends it all out to Twitch or YouTube in real time.
That means your PC is the real centrepiece of the whole setup. If your machine is struggling to run a game smoothly on its own, adding a stream on top of it will make things worse. As a general rule, a mid-range gaming PC with a current-generation CPU and GPU, plus at least 16GB of RAM, will handle most games and streaming simultaneously without issues. Check out gaming PC options at Best Buy Canada to find one that fits your needs.
Everything else in this guide, capture cards, webcams, microphones, lighting, builds on top of that foundation. None of it matters if the stream itself isn’t stable. So before spending money on accessories, make sure your PC and internet connection are up to the job. We’ll cover both below.
What streaming software should you use?
Your streaming software is what ties everything together; it’s the engine behind every stream, and the good news is that the best options are completely free.
- OBS Studio (Open Broadcaster Software): is the most widely used streaming application in the world. It gives you full control over your layout, audio mixing, scene switching, and encoding settings. It takes a bit of time to learn, but virtually every streaming tutorial online is built around it, so finding help is easy.
- Streamlabs: Built on top of OBS with a more beginner-friendly interface. It includes built-in stream alerts, overlays, and platform integrations that would take more effort to configure manually in OBS. If you want to get something that looks polished without spending an hour in settings menus, Streamlabs is a solid place to start.
Both applications are free. Both work with all the gear covered in this guide. Most streamers start with one and eventually get familiar with the other. There’s no wrong choice here.
Does your internet connection affect stream quality?
More than most people realise, and it’s often the first thing to fix before spending money on any gear. Streaming sends video to Twitch or YouTube in real time, which means it depends entirely on your upload speed, not your download speed. For 1080p streaming at 60fps, you generally want at least 6–10 Mbps of consistent upload bandwidth. Higher resolutions or frame rates will demand more.
Raw speed matters less than stability. A connection that averages 15 Mbps but drops unpredictably will cause your stream to buffer and degrade mid-broadcast, far more disruptive to viewers than a slower but rock-solid connection. This is why most serious streamers use a wired Ethernet connection rather than Wi-Fi. Plugging directly into your router eliminates the packet loss and jitter that wireless connections can introduce, especially in homes with multiple devices on the network.
If your router is in another room, a long Ethernet cable or a powerline adapter is one of the best investments you can make for streaming quality, and it costs a fraction of what a new microphone does. Shop networking gear and Ethernet cables at Best Buy Canada to get set up affordably.
Video capture cards: do you need one?
This is one of the most common points of confusion for new streamers, so let’s clear it up first.
- If you’re streaming PC games: You generally don’t need a capture card, your streaming software captures gameplay directly from your display output.
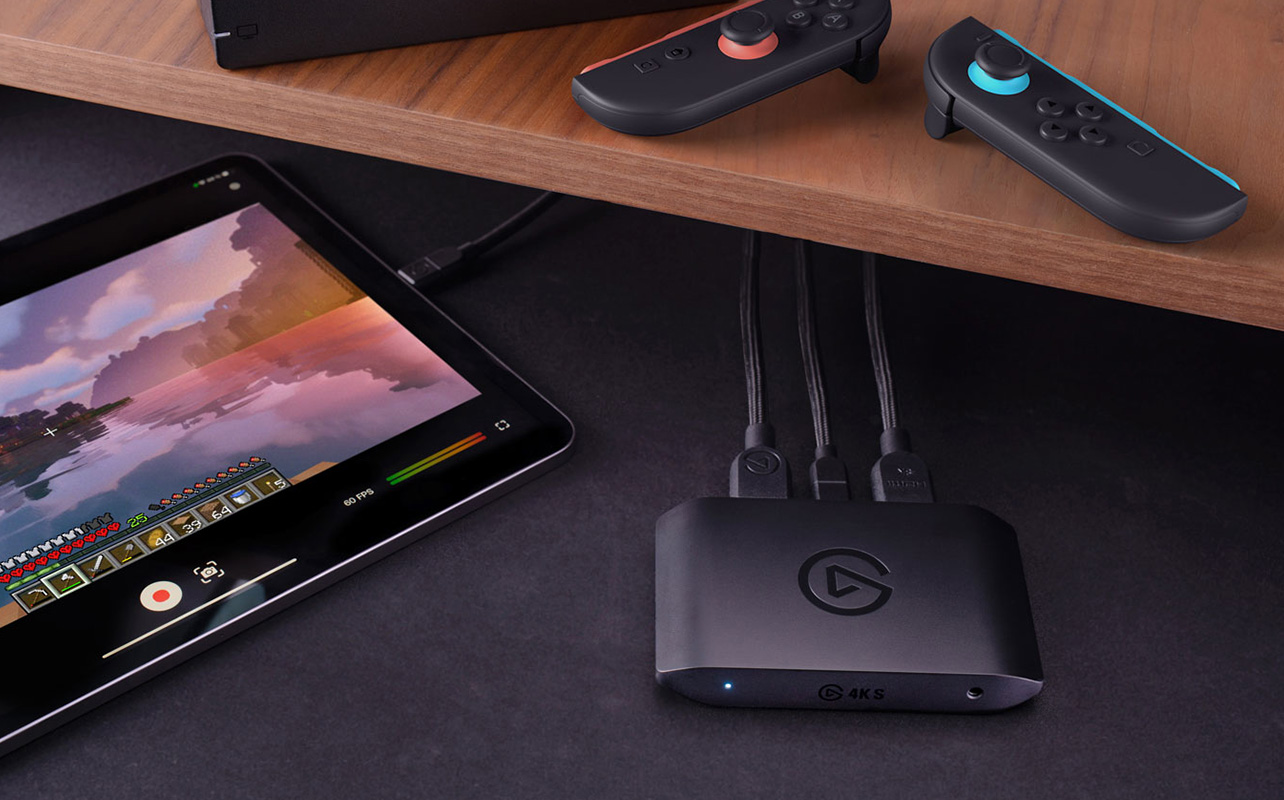
- If you’re streaming from a console (PlayStation 5, Xbox Series X|S, or Nintendo Switch): Yes, you do. A capture card takes the audio and video signal from your console and feeds it into your PC so OBS or Streamlabs can broadcast it. Your game still plays at full quality on your TV, the card just captures a copy for the stream.
Which capture card brand should you choose?
The two most popular capture card brands available at Best Buy Canada are Elgato and AVerMedia. Elgato is the more beginner-friendly option with clean software and easy setup. AVerMedia appeals to streamers who want more control over encoding or prefer an internal card. Either brand is a solid choice; it comes down to which model fits your setup and budget. Shop Elgato and AVerMedia capture cards at Best Buy Canada to compare options.
Comparing the top capture card options
The following table gives you a quick overview of the main options across both brands to help you choose the right one for your setup:
| Model | Brand | Connection | Max capture quality | Best for |
| Elgato HD60 X | Elgato | USB | 4K30 / 1080p60 | Console beginners, most PS5 and Xbox setups |
| Elgato 4K X | Elgato | USB | 4K60 HDR | PS5 / Xbox Series X with 4K HDR output |
| AVerMedia Live Gamer Portable 2 Plus | AVerMedia | USB | 4K30 / 1080p60 | Beginners wanting standalone recording without a PC |
| AVerMedia Live Gamer 4K | AVerMedia | PCIe | 4K60 HDR | Desktop streamers wanting an internal card with low latency |
- Elgato HD60 X connects via USB, works with Windows and Mac, and captures up to 4K at 30fps or 1080p at 60fps, a reliable starting point for most console streamers.
- Elgato 4K X steps things up with 4K60 HDR capture and passthrough, so your TV gets the full signal while the card records a high-quality copy for your stream. Worth it for PS5 and Xbox Series X setups.
- AVerMedia Live Gamer Portable 2 Plus matches the HD60 X on capture quality and adds a standalone recording mode, which can save gameplay directly to a microSD card without a PC running at all.
- AVerMedia Live Gamer 4K is an internal PCIe card that installs into your desktop motherboard, offering 4K60 HDR capture with lower latency than USB alternatives.
One honest tradeoff to be aware of, regardless of which card you choose: capture cards add a small amount of latency to your setup. You’ll notice a slight delay between what’s happening in the game and what appears in your streaming software preview. This is normal and doesn’t affect your viewers, but it’s worth knowing about before you start calibrating your layout.
Webcams and cameras
You don’t have to show your face on stream, but most successful streamers do, because a face cam creates a genuine connection with your audience. Watching someone react in real time is part of what makes streaming feel different from watching a pre-recorded video. Your expressions, your reactions, your personality, that’s the content your viewers are actually there for.
For most streamers, a 1080p webcam at 60fps is the sweet spot. Streaming platforms compress video significantly, so the visual difference between 1080p and 4K is largely invisible to your viewers. Spending extra on resolution alone isn’t worth it. What actually matters is frame rate, low-light performance, and field of view.
Here’s a quick breakdown of what to look for before you buy:
| Feature | Why it matters for streaming |
| 1080p / 60fps | 60fps looks noticeably smoother than 30fps in a face cam overlay |
| Low-light performance | Most streaming spaces aren’t perfectly lit — a wide aperture handles dim rooms far better |
| Field of view | Wider angles capture more of your space, which works well for reaction-style content |
| Auto-focus | Keeps you sharp if you lean in or move around during a stream |
Which webcam should you get?
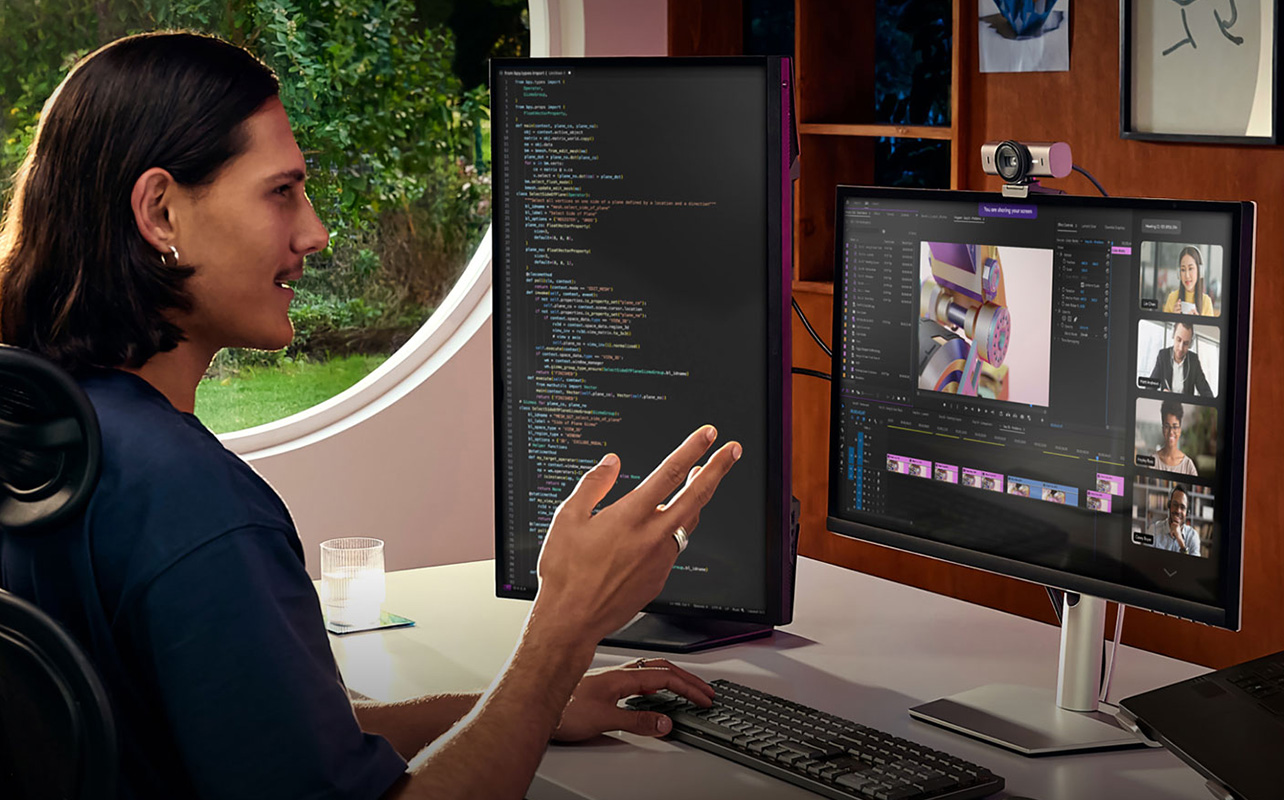
The Logitech Brio 500 is one of the most well-rounded streaming webcams available right now. It shoots at 1080p/60fps, handles mixed lighting environments well, and includes Logitech’s RightLight 4 technology, which adjusts automatically to keep your face properly exposed even when the lighting in your room isn’t ideal. It’s a reliable, no-fuss option that suits most streaming spaces.
If you want a step up in image quality, the Razer Kiyo Pro Ultra uses a significantly larger image sensor than most webcams. That translates into better low-light performance, softer, natural-looking backgrounds, and less grain in the image, all without needing a perfectly lit room. It’s a favourite among dedicated streamers who want their face cam to look genuinely good rather than just acceptable.
What about using a mirrorless or DSLR camera instead?
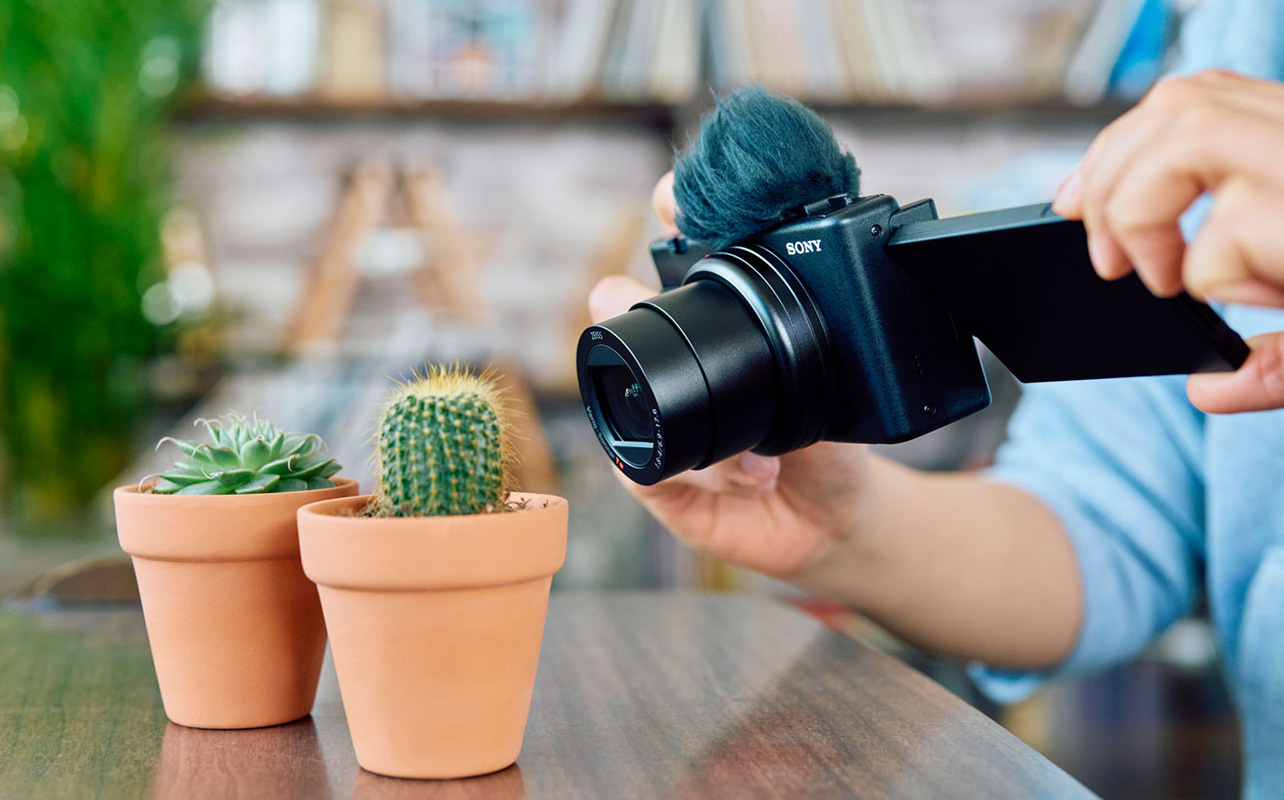
Cameras like Sony’s Alpha series can produce noticeably better image quality than any webcam, with cleaner backgrounds, more natural depth, and superior low-light output. The tradeoff is cost and complexity: you’ll need a capture card or USB capture adapter, a compatible lens, and the knowledge to configure the camera correctly for continuous streaming use (auto-shutoff settings, clean HDMI output mode, and so on). It’s a meaningful upgrade for an established streamer who wants a more professional look, but not a sensible first step for someone just getting started. Shop cameras and accessories at Best Buy Canada if you’re ready to level up.
Lighting and green screens
Here’s an honest truth about streaming lighting: the goal isn’t to look like a film set. The goal is to make sure your face is clearly visible, evenly lit, and free of harsh shadows or blown-out highlights. A webcam cannot compensate for a poorly lit room, no matter how much you spend on the camera itself; bad lighting will make the image look flat, grainy, or washed out. Check out various lighting options available at Best Buy Canada. A lighting setup is one of the cheapest and most impactful upgrades you can make to your stream’s appearance.
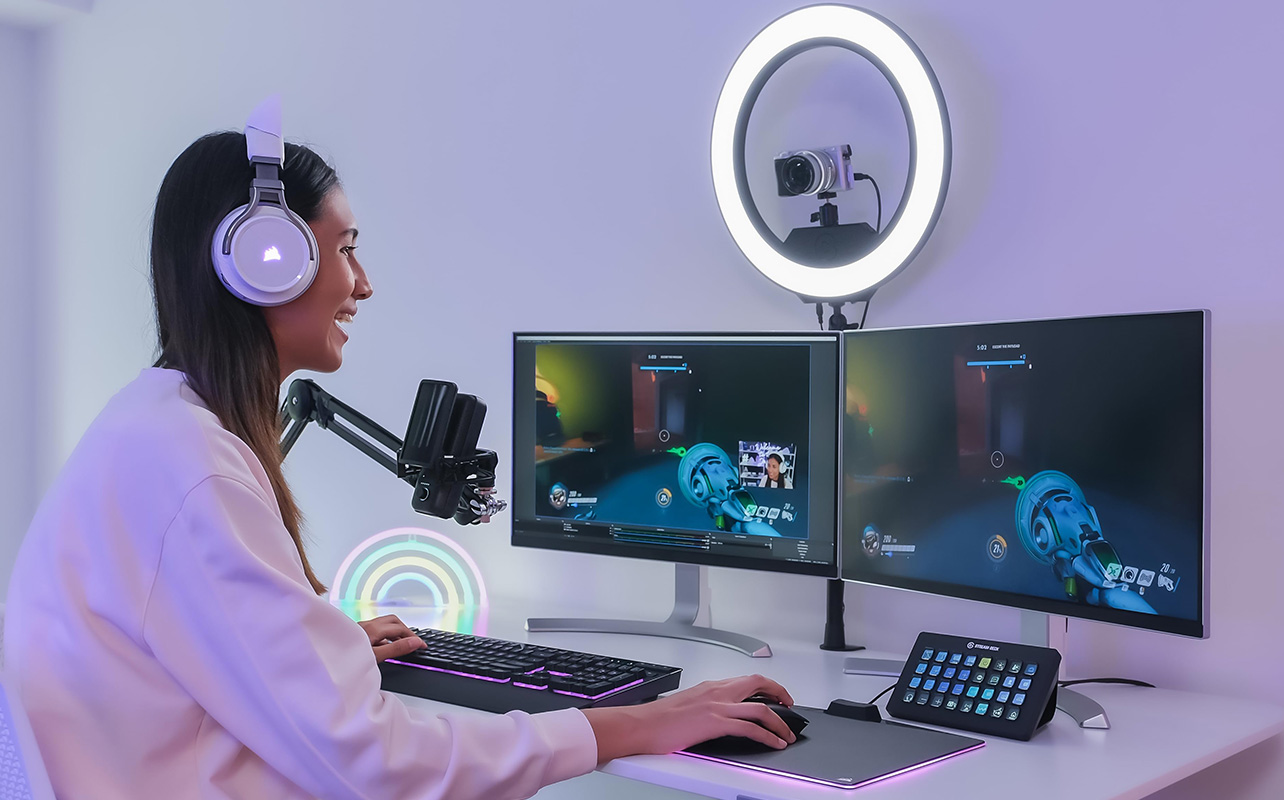
Ring lights
A ring light sits directly in front of you and casts even, circular light onto your face. It eliminates most unflattering shadows, is easy to set up, and makes an immediate visible improvement for streamers working in dimly lit rooms. Ring lights are the most popular starting point for a reason: they’re straightforward, they work, and they don’t require any lighting knowledge to use well.
One tradeoff worth knowing: the circular shape of a ring light is reflected in your eyes on camera. Most viewers don’t notice, but if you prefer a more natural look, a key light is a better option.
Ambient and accent lighting

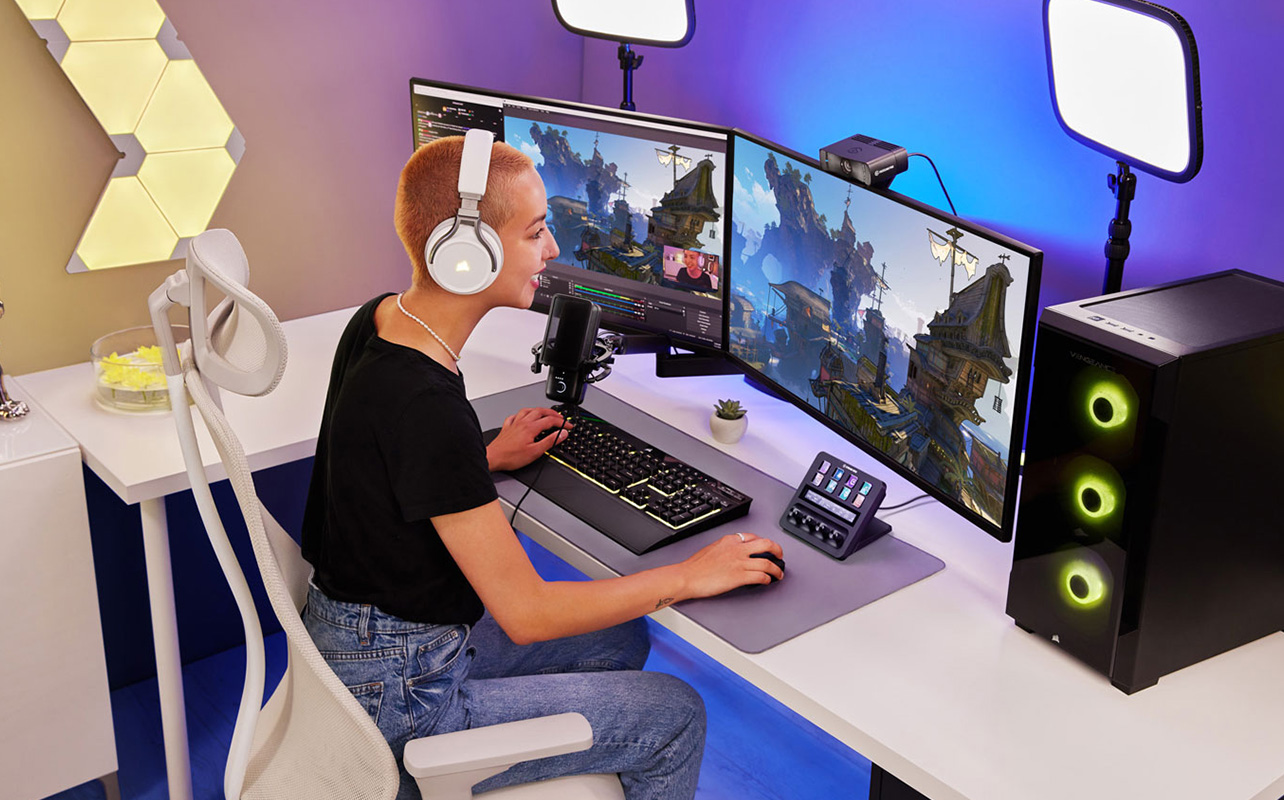
Beyond your face cam lighting, what’s behind you matters too. A plain wall or cluttered room background is a missed opportunity to build a visual identity for your stream. Nanoleaf smart lighting panels are popular among streamers for exactly this reason: they’re modular, vibrant, and can be set to react to in-game audio or switch colours to match the mood of what you’re playing. They don’t light your face (and aren’t meant to), but they transform a plain space into something that looks intentionally designed.
Key lights
A key light is a rectangular panel light positioned to one side of your face, the standard approach used in photography and video production. It creates more dimensional, natural-looking light compared to a ring light, and is generally preferred by streamers who want a polished, broadcast-quality appearance.
Colour temperature is worth understanding before you buy any streaming light. Measured in Kelvin (K), it describes how warm or cool the light appears. Warmer tones (around 3,000K) create a cosy, golden look; cooler tones (around 5,500K) feel clean and daylight-like. Most streamers land somewhere in the 4,000–5,000K range. A light with adjustable colour temperature gives you the flexibility to match your room’s existing lighting and avoid that mismatched, mixed-tone look.
Do you still need a green screen?
It depends on your background. A green screen lets you remove your physical environment entirely in OBS or Streamlabs and replace it with a custom backdrop, a branded overlay, a game environment, or simply a clean, distraction-free background.
Virtual backgrounds, where the software estimates your body shape and removes the background without physical hardware, have improved, but they still struggle at edges, with fine hair, or when there’s movement behind you. A physical green screen produces a much cleaner, more reliable result.
Audio
If you take one piece of advice from this entire guide, make it this: your audio matters more than your video. Viewers will watch a lower-resolution stream without complaint, but a muffled, echoy, or noise-filled microphone will drive people away within minutes. Your voice is your most important broadcast tool.
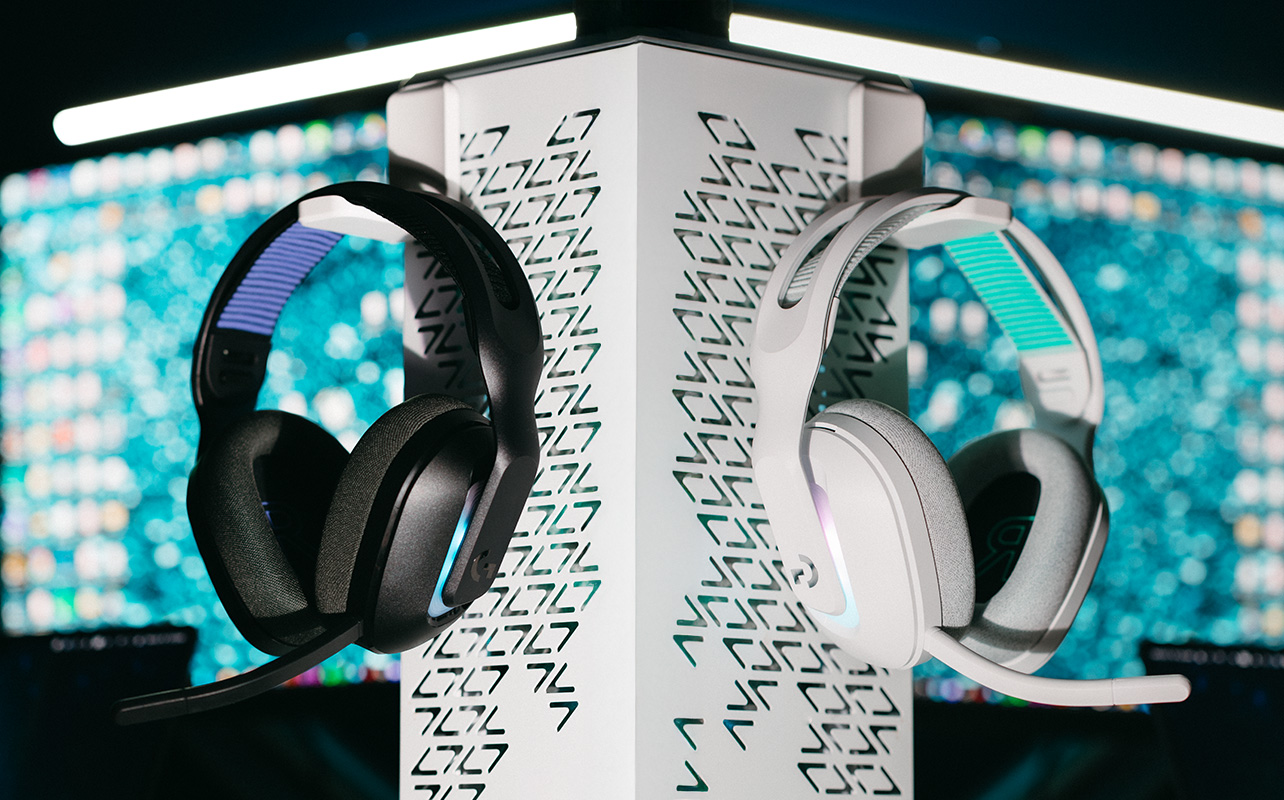
Can you start with a gaming headset mic?
Yes, and there’s no shame in it. If you already own a gaming headset with a decent built-in microphone, use it while you find your footing as a streamer. Most modern gaming headsets produce acceptable audio quality, and starting sooner with what you have is better than waiting until you can afford the perfect setup.
When you’re ready to upgrade, a standalone microphone makes a noticeable difference in how professional your stream sounds, and it’s one of the most visible upgrades your audience will appreciate.
USB vs. XLR microphones: which is right for you?
This is the question most streamers run into once they start researching microphones:
- USB microphones: Plug directly into a USB port on your PC. They have built-in audio processing and require no additional hardware. They produce excellent quality for streaming, are simple to set up, and are the right choice for the vast majority of streamers at every level.
- XLR microphones: Connect to an audio interface, a small device that handles the analogue-to-digital conversion, which then connects to your PC. XLR setups offer more precise control over your sound and are used in professional broadcast and podcast production. However, they require you to buy and configure both the microphone and the interface, which adds cost and complexity. For most streamers, that extra layer isn’t necessary.
For streaming, start with USB. If you grow into audio production or podcasting alongside your stream, XLR is worth exploring later. The following table summarises the key differences to help you decide:
| Feature | USB microphone | XLR microphone |
| Setup complexity | Plug and play | Requires audio interface |
| Cost | Microphone only | Microphone + interface |
| Audio quality | Excellent for streaming | Higher ceiling, more control |
| Best for | Beginners and most streamers | Advanced setups, audio production |
Which streaming microphones are worth considering?
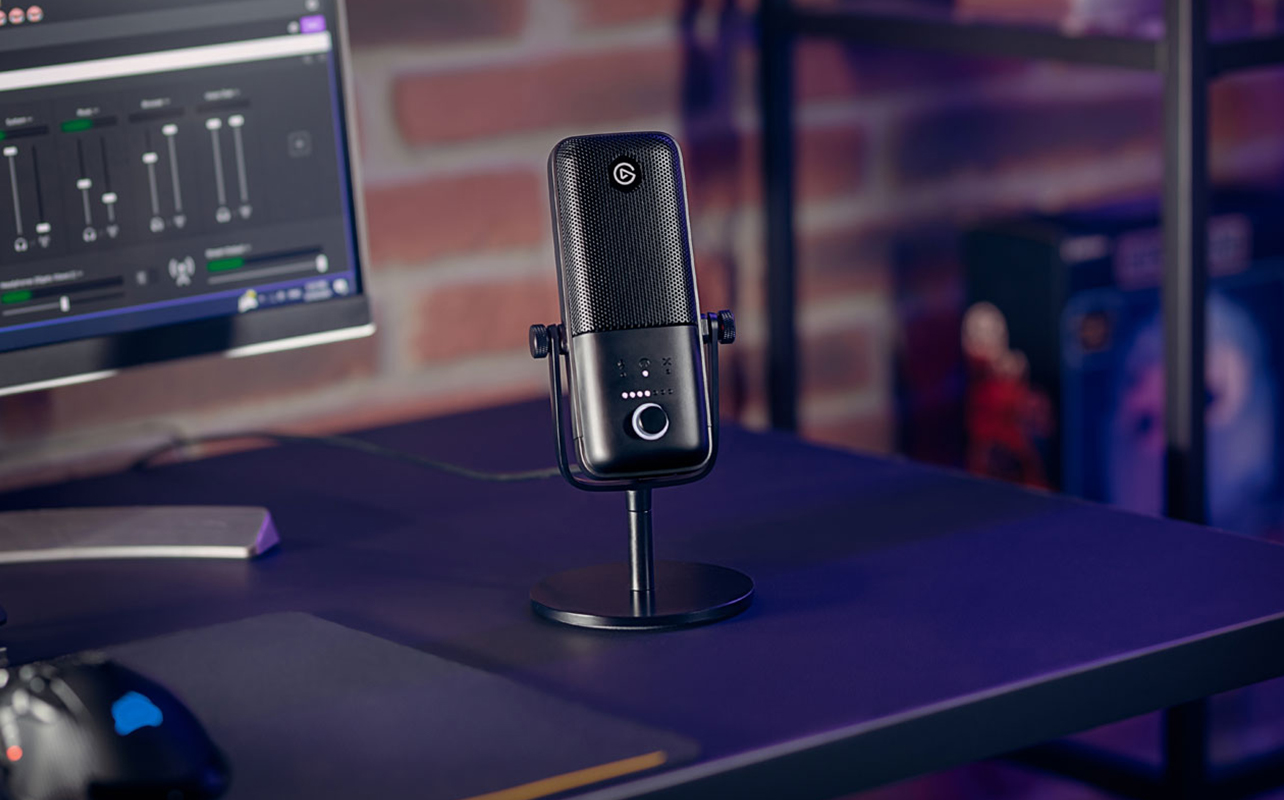
- Elgato Wave 3: One of the most streaming-specific USB microphones available. It records in a cardioid pickup pattern, which captures sound from the front while reducing what comes from behind, making it well-suited for a desk setup in an untreated room. It also includes Wave Link, a built-in digital mixer that lets you control the volume levels of your game, microphone, music, and chat independently during a live stream. That kind of real-time audio control is genuinely useful when you’re managing multiple audio sources on the fly.
- HyperX QuadCast S: A strong alternative with a bit more personality. It offers four selectable polar patterns: cardioid, bidirectional, omnidirectional, and stereo, along with a built-in shock mount to reduce desk vibration and customisable RGB lighting. The multiple polar patterns make it flexible: if you ever want to co-host a stream with someone sitting across from you, you can switch to bidirectional mode without needing a second microphone.
Both microphones connect via USB, work seamlessly with OBS and Streamlabs, and are available at Best Buy Canada. If you later decide to move to an XLR setup, the Elgato Wave XLR audio interface is designed to pair with any XLR microphone and integrates into the same Wave Link software ecosystem as the Wave 3, so your audio settings carry over when you upgrade.
Stream decks and scene controllers
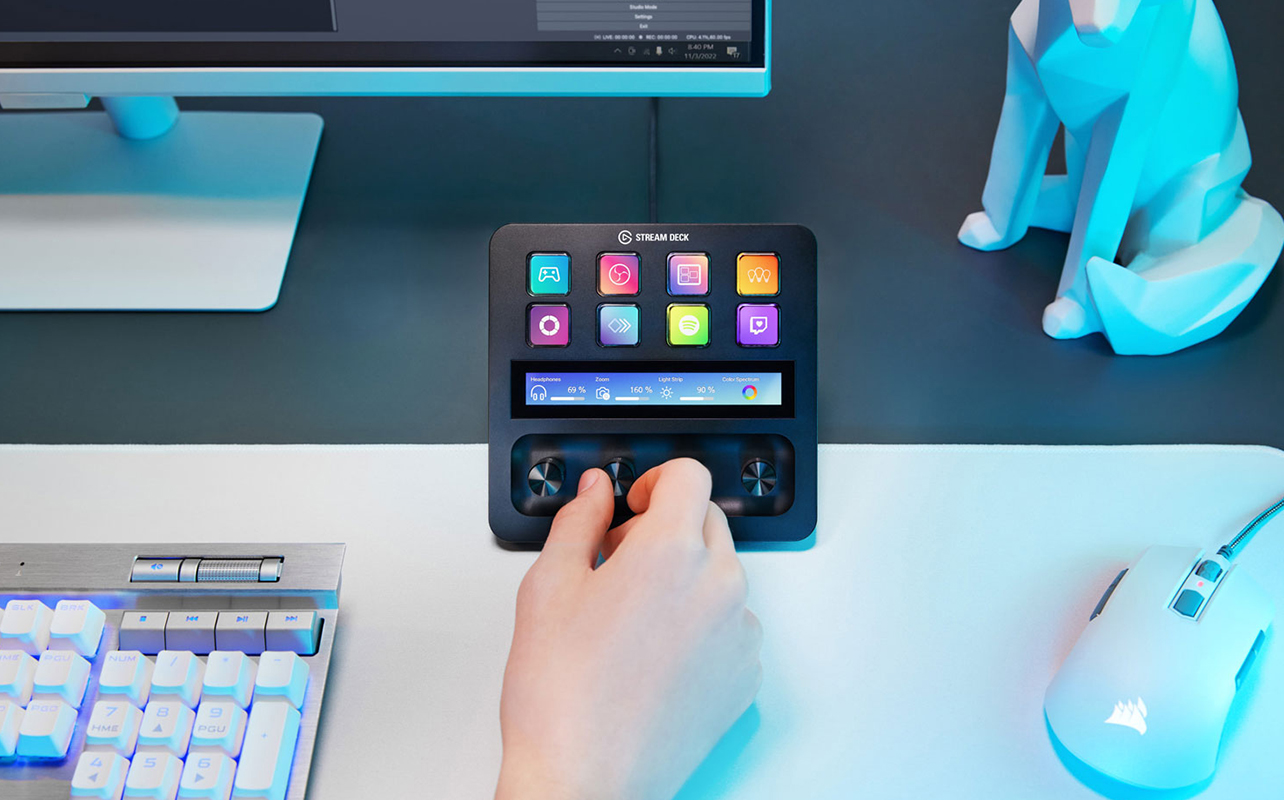
A Stream Deck is not a requirement, but once you try one, it’s difficult to go back. It is a compact device with a row of programmable LCD buttons that sits on your desk. Each button can be assigned to any action: switch your OBS scene, mute your microphone, trigger a sound effect, post a message to chat, launch a browser source, or start a clip. Instead of alt-tabbing out of your game mid-stream to manage things manually, every action is one tap on a dedicated button in front of you.
Which Stream Deck model is right for you?
Elgato makes several Stream Deck models, and the right one depends on how many shortcuts you actually need. Here’s a quick comparison:
| Model | Buttons | Best for |
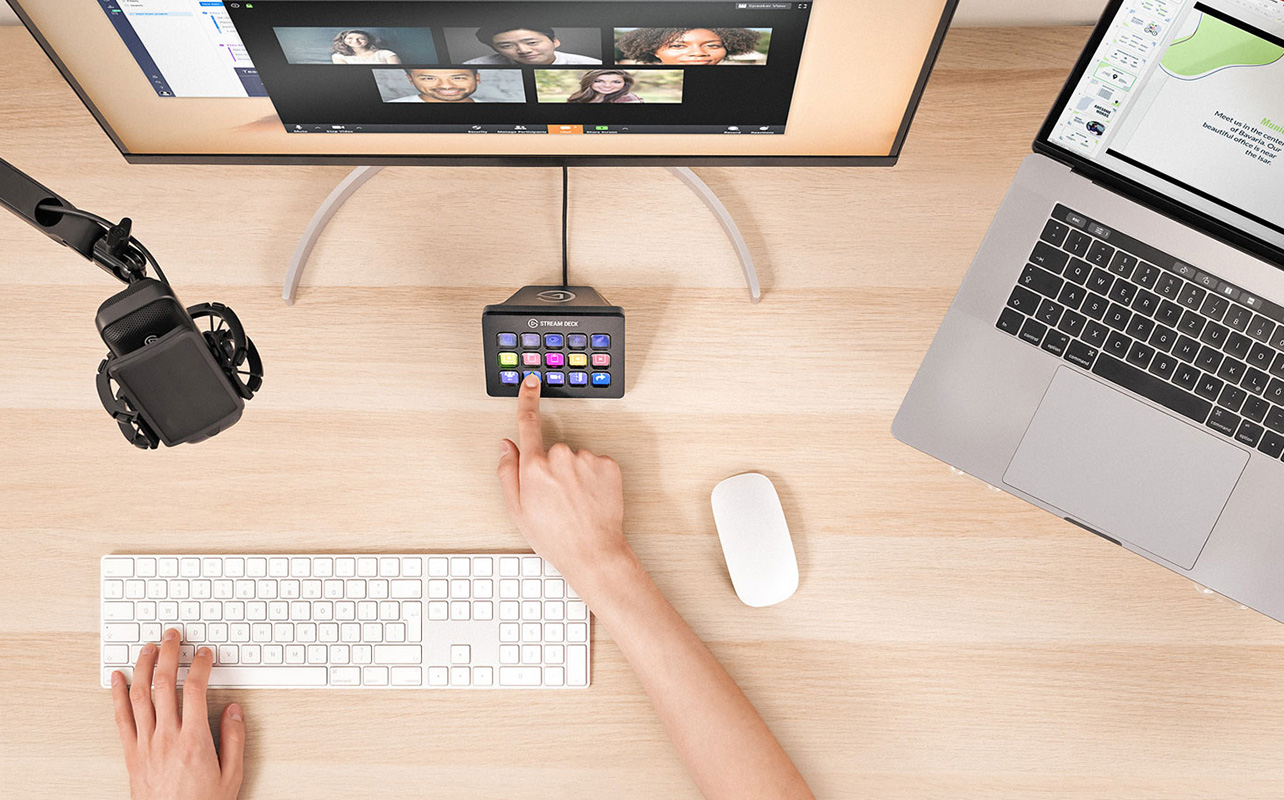
| Stream Deck Neo | 8 LCD buttons | Beginners, first-time Stream Deck users |
| Stream Deck Mini | 6 LCD buttons | Compact setups, tight desk space |
| Stream Deck MK2 | 15 LCD buttons | Most streamers, versatile everyday use |
| Stream Deck + | 8 LCD buttons + dials + touchscreen strip | Advanced users, audio mixing, clip control |
Breaking down each model
- Stream Deck Neo: The newest and most affordable model in the lineup, it was designed specifically for people getting started with stream automation and has a cleaner, simpler layout than the older Mini. It’s the natural starting point if you’re not sure yet how much you’ll use it.
- Stream Deck MK2: The most popular model overall. It’s 15 buttons cover most streaming workflows comfortably, and the detachable faceplate lets you personalise the look of the device.
- Stream Deck +: The adds physical dials and a touchscreen strip alongside the standard buttons, giving you hands-on control over audio levels, timelines, and other continuous adjustments. It’s the best option for streamers who are also managing music, clips, or more complex scene setups.
You don’t need a Stream Deck to start streaming. But if you find yourself constantly tabbing out of your game to manage your broadcast, it’s one of the most satisfying upgrades you can make.
Where to start: building your setup in stages
Not everything in this guide is a day-one purchase, and it doesn’t need to be. Here’s a practical way to think about building your setup gradually without overcommitting upfront.
- The essentials: Your gaming PC, streaming software (OBS or Streamlabs), and a stable internet connection. Stream a few sessions with your existing headset mic and get comfortable with the software. Find out what actually feels missing before spending anything.
- The first real upgrade: A dedicated USB microphone. Audio quality is the first improvement your viewers will notice, and it makes a more meaningful difference than any visual upgrade at this stage.
- The visual layer: A webcam and a basic light source. These work together, adding a webcam without addressing your room’s lighting will produce disappointing results. Get both at the same time.
- The finishing touches: A Stream Deck, improved lighting, a green screen, or a capture card (if you’re adding console gameplay). These are meaningful upgrades once you’re streaming regularly and know what your setup actually needs.
The best setup is the one that’s already running. Start streaming sooner rather than waiting for everything to be perfect. Your gear can grow with you.
Frequently asked questions
Do I need a capture card to stream PC games?
No. A capture card is only needed when streaming from a console. If you’re playing games on your PC, your streaming software captures gameplay directly, no additional hardware required.
What streaming software should I use?
OBS Studio and Streamlabs are both free and both excellent. OBS gives you more control; Streamlabs is more beginner-friendly with built-in overlays and alerts. Either works with all the gear in this guide.
What internet speed do I need to stream?
For 1080p streaming at 60fps, aim for at least 6–10 Mbps of consistent upload speed. More important than raw speed is stability. Use a wired Ethernet connection where possible to avoid buffering and drop-outs mid-stream.
Can I start streaming without a webcam?
Yes. Many successful streamers don’t use a face cam at all. It adds personality and connection with your audience, but it’s not required to get started.
What’s the difference between a USB and an XLR microphone?
USB microphones plug directly into your PC and require no additional hardware. They’re the right choice for most streamers. XLR microphones require a separate audio interface and offer more control, but add cost and complexity that most streamers don’t need until much later.
Is a gaming headset mic good enough for streaming?
It’s a perfectly reasonable starting point. Most modern headsets produce acceptable audio quality for a new stream. A dedicated microphone is a worthwhile upgrade once you’re ready, but it doesn’t need to be your first purchase.
Do I need a Stream Deck to stream?
No. It’s a quality-of-life tool that makes managing a live broadcast more convenient, but you can run a full stream entirely through keyboard shortcuts and your streaming software without one.
Do I need a green screen?
Only if your background is distracting or difficult to control. Virtual backgrounds have improved, but still struggle at edges and with movement. A physical green screen like the Elgato Green Screen gives cleaner, more reliable results.


I recently got a device called the Genki Shadowcast that allows me to connect any HDMI device to a USB-c input on my computer. I don’t know if it is available in Best Buy. I think I might invest in an Elgato HD 60 S+ in the future.
If I get more viewers to my streams I definitely want to think about getting a green screen.
Currently I’m just using my headset for audio. I think it is working good for now, but I might look into a microphone later.
Thanks Jon, this is a great article!