

Most students use their MacBook the same way they’d use any laptop: open a browser, type a document, repeat. These MacBook tips will help you get significantly more out of your device, because macOS is quietly packed with tools that can make studying faster, more organized, and a lot less stressful. The problem is that none of it gets explained when you first open the box.
This guide walks you through the most useful MacBook tips for students, from the first settings you should change to the shortcuts that actually save time in class. Whether you’re new to Mac, switching from Windows, or simply trying to get more out of a device you’ve owned for a year, there’s something here that can change how you work.

Table of contents
- Quick setup changes that make a real difference
- Essential MacBook keyboard shortcuts for students
- Study organization tools built into macOS
- Focus and battery habits for student use
- Connect and expand your setup
- FAQs

Quick setup changes that make a real difference
Before you start saving files to your desktop and wondering why things feel cluttered, it’s worth spending 20 minutes adjusting a few default settings. These are among the most practical MacBook tips you can apply, and they have an outsized effect on how comfortable and productive your MacBook feels day to day.
How should you set up a MacBook for school?
The first thing to do is get your Dock under control. By default, the Dock is oversized and filled with apps you’ll never open. Right-click any app you don’t need and select Remove from Dock. Then pin the apps you actually use: Notes, Safari, Calendar, and whatever your school uses for assignments (Google Docs, Microsoft Word, Notion). Make the Dock smaller by going to System Settings > Desktop & Dock and dragging the size slider down. A leaner Dock means less visual noise every time you open your MacBook.
Next, open Finder and customize the sidebar. Finder is macOS’s file manager, the equivalent of File Explorer on Windows. By default, it shows a lot of things you don’t need. Go to Finder > Settings > Sidebar and check off the folders you want quick access to: your home folder, Documents, Downloads, and any class folders you use regularly. This alone will cut down the amount of time you spend hunting for files.
A few other settings worth enabling early:
- Dark mode: go to System Settings > Appearance and switch to Dark. It’s easier on your eyes during late-night study sessions and makes the screen feel less harsh in low-light libraries.
- Night Shift: found under System Settings > Displays > Night Shift. It gradually warms the screen colour after sunset, which helps reduce eye strain over long sessions.
- Trackpad gestures: go to System Settings > Trackpad and explore what’s available. Two-finger scrolling, three-finger swipe between apps, and pinch-to-zoom are all enabled by default, but it’s worth seeing everything the trackpad can do. Tap to click is also worth turning on if it isn’t already.
What are the most useful accessibility and productivity features to enable?
A handful of macOS features sit quietly in Settings that most students never find. These are worth turning on:
- Hot Corners: lets you assign quick actions to each corner of your screen. Go to System Settings > Desktop & Dock > Hot Corners and set them up. A practical student setup: bottom-left corner locks the screen (useful when stepping away in a library or café), and bottom-right launches Mission Control so you can quickly see everything you have open. It takes one second and becomes second nature quickly.
- Dictation: lets you speak to type anywhere on your Mac. Go to System Settings > Keyboard > Dictation and enable it. By default, you can activate Dictation by pressing the fn (or Globe) key twice, though this shortcut can be customized in Keyboard settings. It’s useful for getting thoughts down quickly, drafting notes when your hands are tired, or working through ideas out loud. The accuracy on Apple Silicon MacBooks is genuinely good.
- Live Text: is a feature that recognizes text in photos and lets you copy it. If you photograph a whiteboard, a textbook page, or a handwritten note, you can open it in Photos or Preview and highlight the text just like you would in a document. Go to System Settings > General > Language & Region and make sure Live Text is enabled.
- Universal Clipboard: works automatically if you’re signed into the same Apple ID on your MacBook and iPhone. Copy something on one device, paste it on the other. No AirDrop, no emailing yourself links, it just works within a few seconds. You don’t need to enable anything; it’s on by default as long as Bluetooth and Wi-Fi are active.
Essential MacBook keyboard shortcuts for students that save time in class
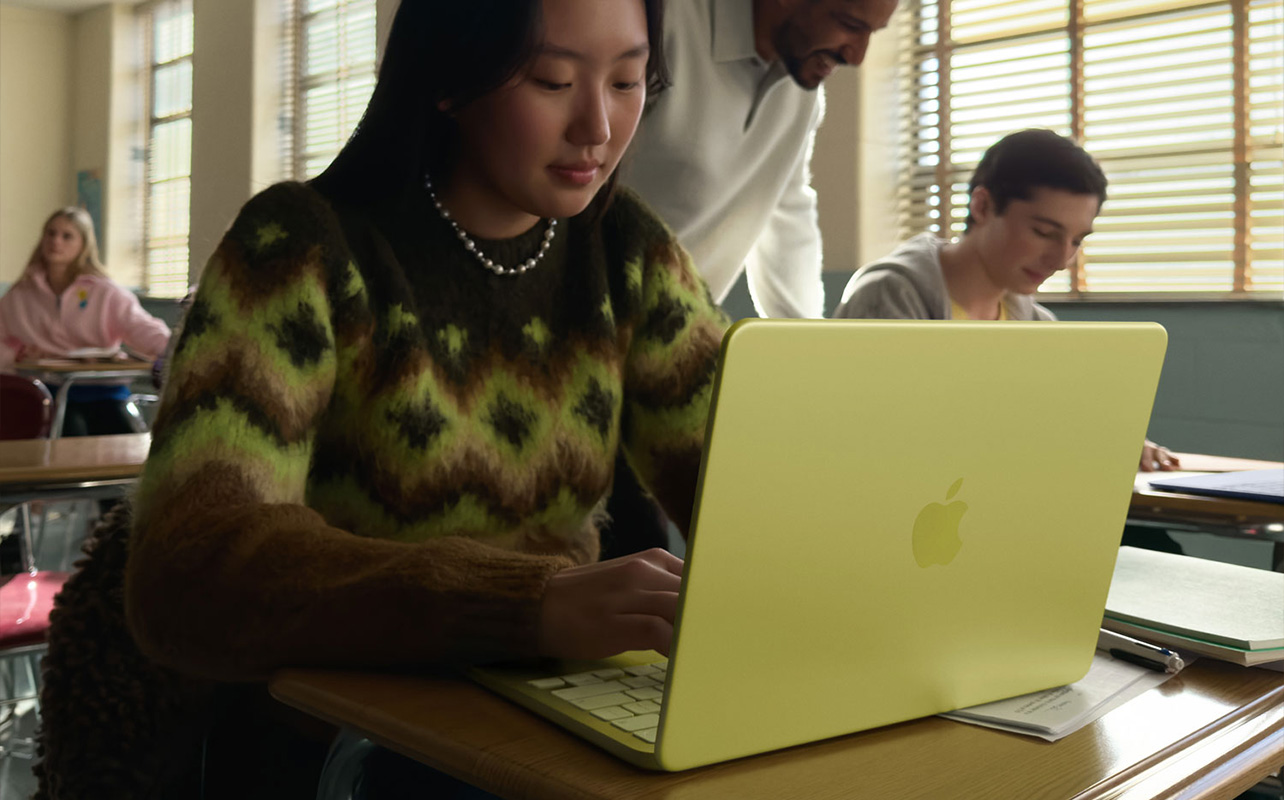
Keyboard shortcuts are some of the most actionable MacBook tips for students, and learning even a handful is one of the fastest ways to speed up everyday tasks.
If you’re switching from Windows: the biggest adjustment is that the Command (⌘) key replaces Ctrl for almost everything. So copy is ⌘ + C, paste is ⌘ + V, undo is ⌘ + Z, and so on. Once that clicks, the rest follows naturally.
Which MacBook shortcuts do students actually need?
Here are the shortcuts worth learning first, organized by what they do:
| Action | Shortcut |
| Screenshot (full screen) | Command + Shift + 3 |
| Screenshot (selected area) | Command + Shift + 4 |
| Screenshot / screen recording menu | Command + Shift + 5 |
| Spotlight search | Command + Space |
| Reopen closed tab | Command + Shift + T |
| Copy | Command + C |
| Paste | Command + V |
| Undo | Command + Z |
| Switch between open apps | Command + Tab |
| Close a window | Command + W |
| Quit an app fully | Command + Q |
| Find text on a page | Command + F |
How do you take a screenshot on a MacBook?
Press Command + Shift + 3 to capture the entire screen. Press Command + Shift + 4 to drag and select a specific area, useful for grabbing a chart from a slide or a table from a PDF without capturing the entire page. Screenshots save to your desktop by default as PNG files.
For more options, press Command + Shift + 5. This opens a small toolbar at the bottom of the screen that lets you capture a window, record the full screen, or record a selected portion. The options also let you set a timer before capture and choose where the file saves.
How do you screen record on a MacBook?
Use Command + Shift + 5 and select either Record Entire Screen or Record Selected Portion from the toolbar. Click Record to start. A stop button appears in the menu bar at the top of the screen. Click it when you’re done, or press Command + Control + Esc.
Screen recording is genuinely useful for students: record a lecture slide walkthrough, capture a video tutorial you want to revisit, or document a software error to show a professor or IT support. The recording saves as a .mov file to the desktop unless you’ve changed the save location in the same Command + Shift + 5 menu.
How do you multitask more effectively with Split View and Stage Manager?
Split View lets you run two apps side by side in full screen. To activate it, hover over the green full-screen button in the top-left corner of any window. A menu will appear. Select Tile Window to Left of Screen or Tile Window to Right of Screen, then click a second app to fill the other half. This is ideal for writing an essay with your notes open beside it, or working through readings while filling in a Google Doc.
Stage Manager is a newer macOS feature that organizes your open windows into a column on the left side of the screen, with your current app taking centre stage. It’s more fluid than Split View for students who juggle several things at once: a browser, a notes app, a doc, and a spreadsheet. Enable it under Control Centre in the menu bar, or through System Settings > Desktop & Dock > Stage Manager. It takes a little getting used to, but once it clicks, it’s a faster way to move between active tasks.
Mission Control gives you a bird’s-eye view of everything you have open. Press F3 or swipe up with three fingers on the trackpad. From here, you can create separate Spaces (virtual desktops), which are useful if you want to keep school work, personal browsing, and communication apps in separate areas.
Study organization tools built into macOS

One of the most common student mistakes is waiting until files are a mess before setting up any kind of system. Starting organized is far easier than cleaning up chaos mid-semester. The good news is that some of the best MacBook tips for staying organized don’t require any third-party apps; macOS already includes everything you need.
How do students organize files and notes on a MacBook?
Finder folders are the foundation. A practical folder structure for students looks something like this:
- School (top level)
- Fall 2026 or Year 2 (by semester or year)
- Course name (one folder per class)
- Lectures
- Assignments
- Research
- Readings
- Course name (one folder per class)
- Fall 2026 or Year 2 (by semester or year)
Keep the naming consistent. File names like essay-draft-final-FINAL2.docx are a trap. Use clear names like HIST101-essay-draft-v2.docx so you can find things at a glance.
- Finder colour tags are more useful than most people realize. Right-click any file or folder and assign a colour. A simple system: red for in-progress work, yellow for needs review, green for submitted or complete. You can filter by tag in the Finder sidebar, which makes it easy to see everything still outstanding across all your courses at once.
- Apple Notes is an underrated lecture note-taking app. It supports checklists, tables, images, sketches, and scanned documents, and it syncs instantly across your iPhone, iPad, and MacBook. Organize it by creating a folder for each course, then a note for each lecture or topic. The search in Apple Notes is fast and accurate. You can even search handwritten text within an image if you’ve used an iPad for notes.
- For assignment tracking, Reminders works well for simple task lists, but Calendar is better for deadlines with hard dates. Enter every assignment, exam, and project deadline into Calendar at the start of the semester. Colour-code by course. Set reminders a few days before anything is due. It takes 30 minutes at the start of the term and saves a lot of anxiety later.
How does Safari Reading List help with research?
When you’re doing online research, the temptation is to leave 25 tabs open and lose track of half of them. Safari’s Reading List is a cleaner solution. Click the Share button in Safari and select Add to Reading List, or press Command + Shift + D. Articles save for offline reading and sync across all your Apple devices via iCloud.
The Reading List is in the Safari sidebar (the book icon). It doesn’t replace a proper citation manager for academic work, but it’s useful for collecting sources quickly while you’re browsing, then going back through them in a focused session. Think of it as a staging area for research before you start writing.
Here’s a quick reference for matching study tasks to the right macOS tool:
| Task | Recommended tool |
| Lecture notes | Apple Notes |
| Assignment deadlines | Calendar & Reminders |
| Research sources | Safari Reading List |
| File and folder management | Finder with tags |
| Multi-device file access | iCloud Drive |
| Group project files | iCloud shared folders |
Focus and battery habits for student use
These MacBook tips for focus and battery life are easy to overlook, but a MacBook that’s constantly pinging you with notifications and dying before your afternoon lectures is not working hard enough for you.
How do Focus modes help students avoid distractions?
Focus is a macOS feature that filters which notifications reach you based on what you’re doing. There’s a built-in Do Not Disturb option, but the most useful thing for students is setting up a custom Study Focus profile.
Here’s how to do it: go to System Settings > Focus > + (bottom left) > Custom. Name it something like “Study.” From there, you can choose which apps and contacts can still send notifications to your university’s email, for example, or a group chat you actually need and silence everything else. You can also set it to turn on automatically at certain times, like weekday mornings, or when you open specific apps like Notes or Pages.
Once it’s set up, you can activate your Study Focus from the Control Centre in the top-right menu bar in seconds. The difference it makes during a two-hour study block is significant.
Screen Time is a related tool, found under System Settings > Screen Time. It lets you set daily time limits for specific apps or categories (social media, entertainment) and lock yourself out when the limit is hit. During exam periods, this is worth using seriously.
How can students improve MacBook battery life?
MacBooks have excellent battery life compared to most Windows laptops. Battery life varies between models. If you’re deciding between the two, our MacBook Air vs. MacBook Pro for students guide covers how they compare on battery and performance. But a few habits help stretch it further on long campus days:
- Lower screen brightness: the display is the biggest battery drain. Get into the habit of reducing brightness when you’re in a well-lit room.
- Turn on Low Power Mode: go to System Settings > Battery and enable Low Power Mode. It reduces background activity to extend battery life when you’re away from a charger.
- Limit background apps: apps running in the background consume power even when you’re not using them. Press Command + Q to quit apps you’re done with rather than just closing the window.
- Check what’s using the most energy: open Activity Monitor (search it with Spotlight) and click the Energy tab to see which apps are draining the battery. Some browser extensions and poorly optimized apps are surprising offenders.
- Keep macOS updated: Apple regularly releases updates that improve battery performance. Go to System Settings > General > Software Update and keep your Mac current.
How do you free up storage and uninstall apps on a MacBook?
Storage fills up faster than expected once you’re storing lectures, project files, and research. Here’s how to keep it manageable:
- To uninstall an app on a MacBook: open Launchpad (pinch with four fingers on the trackpad), hold down an app icon until it jiggles, then click the X to delete it. Alternatively, open Finder > Applications, find the app, and drag it to the Trash. Empty the Trash afterward to actually free the space.
- To see what’s taking up space: go to System Settings > General > Storage. macOS will show you a breakdown by category and offer recommendations, including a way to store files in iCloud and remove local copies. This is useful if you’re running low but not ready to delete anything permanently.
- Startup items are another source of drag. Apps that launch automatically when you start your Mac slow down boot time and quietly consume resources. Go to System Settings > General > Login Items and remove anything you don’t need running in the background.
- Time Machine is macOS’s built-in backup system. Connect an external drive, open System Settings > General > Time Machine, and select that drive as your backup. It backs up automatically in the background and keeps hourly snapshots. Losing a semester of work to a drive failure or spilled coffee is the kind of thing that only needs to happen once; back up regularly.
- A note on cleaning the MacBook keyboard: use a slightly damp (not wet) microfibre cloth for the surface and compressed air for dust between the keys. Never spray liquid directly onto the keyboard. Apple recommends avoiding aerosol sprays, solvents, or abrasive cloths.
Connect and expand your setup
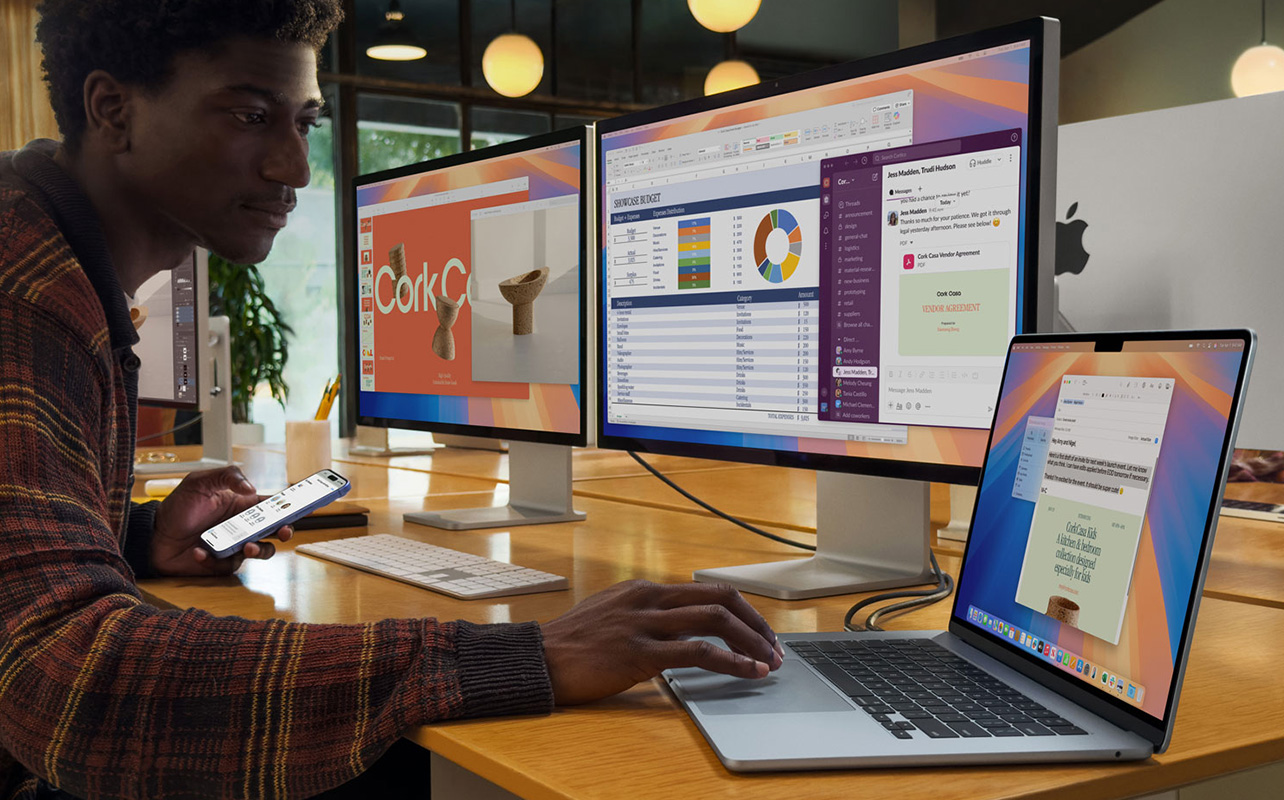
One of the more underused MacBook tips involves expanding beyond the built-in screen. At some point, one display isn’t enough, especially when you’re writing and researching at the same time, or working on a project that benefits from more screen real estate.
How do you connect a MacBook to a monitor?
Modern MacBooks use USB-C and Thunderbolt ports for everything, including display output. To connect an external monitor, you’ll need either:
- A monitor with a USB-C or Thunderbolt input (connect directly with a USB-C cable)
- An HDMI monitor and a USB-C to HDMI adapter
- A USB-C hub or docking station with HDMI output, which also adds extra ports for USB-A devices, SD cards, and Ethernet
Once connected, go to System Settings > Displays to arrange your screens. You can extend the display (two separate screens, giving you more workspace) or mirror it (both screens show the same thing, useful for presentations). For studying, extended mode is far more useful, keep your notes on one screen and your writing or research on the other.
How do you transfer data to a new MacBook?
If you’re setting up a new MacBook, Migration Assistant is the easiest route. It’s a built-in macOS app that transfers your files, apps, settings, and accounts from an old Mac, a Time Machine backup, or even a Windows PC. Open it from the Utilities folder inside Applications, or search it with Spotlight. The process is guided and straightforward; it typically takes between 30 minutes and a few hours, depending on how much data you’re moving.
If you prefer a lighter start, you can also set up iCloud Drive on your old device, let it sync your files to the cloud, and they’ll be waiting on your new MacBook when you sign in with the same Apple ID. For large files that aren’t in iCloud, video projects, design files, large downloads, an external SSD is the fastest transfer option.
What accessories genuinely help students with a MacBook?
The MacBook is a capable standalone device, but a few additions make a real difference for daily student use:
- USB-C hub: Modern MacBooks have only two or four USB-C ports. A hub adds USB-A ports, an SD card slot, HDMI output, and sometimes ethernet, all from one connection. If you use a mouse, an external drive, and a monitor at your desk, a hub is close to essential.
- External SSD: iCloud is convenient, but it has storage limits and requires a connection to access files. An external SSD is faster than a traditional hard drive, durable, and gives you a physical backup of anything important. Especially useful for students in programs that involve large files, such as video production, photography, architecture, or music production.
- Laptop stand: Raising the MacBook screen to eye level significantly improves posture during long study sessions. Most stands are lightweight and fold flat for a bag. Pair with an external keyboard if you’re at a desk for hours.
- Wireless keyboard and mouse: If you’re working at a desk with a stand or external monitor, a wireless keyboard and mouse free you from the awkward typing angle and give you a more comfortable setup. Apple’s Magic Keyboard and Magic Mouse pair seamlessly, but there are solid third-party options at various price points.
If you’re building out your full student setup beyond just the MacBook itself, our back to school buying guide covers everything worth considering before the semester starts.
Getting the most out of your MacBook starts early
The students who get the most from their MacBook aren’t necessarily the most technical; they’re the ones who took a little time at the start of the year to set things up properly. The MacBook tips in this guide—a clean Dock, a logical folder structure, a Study Focus profile, and a few key shortcuts—are genuinely enough to change how the school year feels.
Most of the tools covered here come built into macOS. You don’t need to buy anything extra to start using them. But if you’re looking to expand your setup with a monitor, a hub, a stand, or an SSD, you can explore the full range of MacBook accessories at Best Buy Canada or browse laptops and MacBooks if you’re still deciding on your next device. If you’re confused between a new or refurbished MacBook, our guide on refurbished vs. new laptops is worth reading first.
Frequently asked questions
How can students set up a MacBook for school quickly?
Start by customizing the Dock and Finder sidebar, setting up iCloud Drive for file syncing, enabling Focus modes, and creating a folder structure by course. These four things take under an hour and have the highest impact on daily workflow.
Which MacBook shortcuts save the most time for students?
When it comes to MacBook tips that pay off immediately, shortcuts are at the top of the list. The most useful daily shortcuts are Command + Space (Spotlight search), Command + Shift + 3 or 4 (screenshots), Command + Shift + 5 (screen recording), Command + Tab (switching apps), and Command + Shift + T (reopen a closed browser tab).
How do students keep files organized on a MacBook?
Use a folder hierarchy organized by semester and course, apply consistent file naming, and use Finder colour tags to track the status of assignments. Sync everything to iCloud Drive so files are accessible across devices.
How do students improve MacBook battery life during the school day?
Lower screen brightness, enable Low Power Mode under Battery settings, quit apps you’re not actively using, and keep macOS updated. These habits together can meaningfully extend a charge on a full campus day.
How do you connect a MacBook to a monitor?
Use a USB-C to HDMI adapter or a USB-C hub with HDMI output for most monitors. Newer monitors with USB-C or Thunderbolt ports can connect directly. Adjust your display layout under System Settings, Displays.
How do you uninstall apps on a MacBook?
Open Launchpad and press and hold an app until it jiggles, then click the X or drag the app from the Applications folder in Finder to the Trash. Empty the Trash to free up the storage.
How do students back up a MacBook with Time Machine?
Connect an external hard drive or SSD, go to System Settings, General, Time Machine, and select the drive. Backups run automatically in the background from that point on.