
If you’ve just pulled a failed print off the bed, or watched one curl, shift, or string its way into something unrecognisable, take a breath. You haven’t broken your printer, and you haven’t done anything wrong. What you’re experiencing is one of the most common rites of passage in 3D printing, and nearly every single issue has a clear, fixable cause. The frustrating part isn’t that 3D printing problems happen. It’s not knowing why they happen or where to even start looking.
That’s exactly what this guide is for. We’ll walk through the six most common 3D printing problems: bed adhesion failures, stringing, warping, layer shifting, clogged nozzles, and poor layer adhesion, explain what’s causing each one in plain terms, and give you the exact steps to fix them.
Whether you’re a few prints in or just getting started, you’ll find everything you need here to get back on track. And if you’re still shopping for your first machine, you can explore Best Buy’s full selection of 3D printers, including filament printers and resin printers.

Table of contents:
Quick fix guide: the most common 3D printing problems
Not sure what’s wrong yet? Start here. The table below maps the most common symptoms to their most likely cause and the quickest fix. Find the problem that matches what you’re seeing, then jump to that section for the full explanation and step-by-step solution:
| Problem | Most likely cause | Quick fix |
| Print not sticking to bed | Unleveled bed or dirty surface | Re-level bed, clean build plate |
| Stringing | Nozzle temperature too high | Lower temp, adjust retraction settings |
| Warping | Uneven cooling or poor adhesion | Use heated bed, improve adhesion |
| Layer shifting | Loose belts or speed too high | Tighten belts, reduce print speed |
| Clogged nozzle | Burnt filament or debris | Clean with needle, perform cold pull |
| Poor layer adhesion | Temperature too low | Raise nozzle temp, reduce fan speed |
Why do 3D printing problems happen in the first place?
Before diving into individual fixes, it helps to understand what 3D printing actually involves, because once you do, most problems start to make a lot more sense.
The most common type of 3D printer is an FDM printer, which stands for fused deposition modelling if you’re still getting familiar with how the whole setup works, the 3D printer buying guide covers everything from choosing a printer to running your first print. The process sounds straightforward, but it involves a surprisingly delicate balance of temperature, speed, mechanical calibration, material behaviour, and software settings. When even one of those variables is slightly off, the print shows it.
Most 3D printing problems trace back to one of four root causes:
- Temperature: Too high or too low affects how filament flows, bonds, and cools.
- Calibration: A bed that isn’t level or belts that are slightly loose can ruin a print entirely.
- Material: Different filament types behave very differently, and moisture absorbed by filament causes far more problems than most beginners expect.
- Settings: Slicer software (the program that translates a 3D model into printer instructions) controls speed, fan behaviour, retraction, and more. The default settings that come with a printer aren’t always right for every material or model.
Every 3D printer owner deals with failed prints. Not just beginners, but experienced users too. A warped base, a stringy finish, or a mid-print failure doesn’t mean you’ve done something wrong or that your printer is defective. It means one variable needs adjusting. That’s it. The difference between a frustrated beginner and a confident one isn’t luck, it’s knowing what to look for. By the time you finish this guide, you’ll have that.
Bed adhesion issues: why won’t my 3D print stick to the bed?
This is the single most common complaint from new 3D printer owners, and the good news is that it’s almost always resolved in a few minutes once you know what to check.
What it looks like
The first layer lifts or peels away from the build plate during printing, corners curl upward, or the entire print detaches mid-job. Sometimes the sign is subtle, a slightly raised edge you notice early on, and sometimes the print slides completely off the bed and the printer keeps running over nothing.
Why it happens
The build plate (also called the print bed) needs to be at a very consistent distance from the nozzle across its entire surface, typically somewhere between 0.1 and 0.2mm. If any part of the bed is too far from the nozzle, the filament won’t press down firmly enough to bond with the surface. If it’s too close, the nozzle scrapes and blocks proper extrusion.
This distance is set through a process called bed leveling either manually, using adjustment knobs underneath the bed, or semi-automatically through the printer’s built-in leveling assistant. Many beginners assume this is a one-time setup step. It isn’t. Bed level drifts over time due to vibration, temperature changes, and normal handling, which means it needs to be checked regularly, ideally before longer print sessions or whenever you switch materials.
Beyond bed level, the other common causes are:
- A dirty build plate: Oils from your fingers or accumulated dust break the bond between filament and surface.
- Bed temperature too low for the material: Filament needs warmth to adhere properly. If the bed is too cold, the first layer cools too quickly and lifts. PLA bonds well at 50–60°C; ABS needs 90–110°C. Printing at the wrong temperature for your material is one of the most overlooked causes of adhesion failure.
- A smooth glass surface without adhesion support: Smooth glass on its own is a poor surface for most filaments, especially without an adhesion aid.
How to fix it
- Re-level the bed: Run your printer’s leveling routine and take your time with it. For manual leveling, a sheet of standard printer paper used as a feeler gauge works reliably. Slide it under the nozzle at each corner and centre point. It should catch slightly when you pull, but still move. Adjust until it’s consistent across the whole surface.
- Clean the build plate: Wipe it down with isopropyl alcohol before every print session. After cleaning, don’t touch the print surface with bare hands; skin oils transfer immediately and reduce adhesion.
- Set the right bed temperature: Confirm your bed temperature matches your filament type. PLA: 50–60°C. PETG: 70–85°C. ABS: 90–110°C. Even a 10°C difference can be enough to cause first-layer failure.
- Use an adhesion aid: A light coat of a standard glue stick, hairspray, or a purpose-made 3D printing adhesive can dramatically improve first-layer grip. Apply it thinly and evenly.
- Consider a PEI build plate: A PEI (polyetherimide) textured spring steel sheet is one of the most popular, affordable upgrades for filament printers. Unlike smooth glass, the textured surface gives the filament something to grip. Prints adhere firmly during printing and often release on their own once the plate cools, no scraping required. For many users, a PEI plate eliminates adhesion problems entirely and is worth considering if you’re dealing with recurring first-layer failures.
Stringing: why does my 3D print have thin plastic threads all over it?
Stringing can take a print that looked promising and make it look like it was attacked by a hot glue gun. The cause is almost always temperature or settings-related, and the fix is usually a matter of a few small adjustments.
What it looks like
Fine, hair-like strands of plastic stretch between different sections of your print, especially across open gaps or spaces the nozzle has to travel over. On complex models, stringing can be severe enough to obscure detail entirely.
Why it happens
Stringing happens when the nozzle oozes molten filament while it’s moving from one part of the print to another, essentially dripping as it travels across open space. The three main reasons:
- Nozzle temperature too high: The hotter the filament, the more liquid and runny it becomes. Above a certain point, it drips freely rather than extruding cleanly
- Poor retraction settings: Retraction is a slicer setting that briefly pulls the filament back into the nozzle just before the print head moves, preventing it from drooling across gaps. If retraction distance is set too low, or if retraction isn’t configured at all, stringing is almost inevitable on any model with open sections
- Moist filament: Filament is hygroscopic, meaning it absorbs moisture from the surrounding air over time. When a moist filament enters the hot nozzle, that moisture turns to steam, which causes tiny bursts and oozing during printing, resulting in stringing even when temperature and retraction settings are correct
How to fix it
- Lower the nozzle temperature: Drop it by 5°C at a time and run a small test print between each adjustment. A model with lots of open gaps or towers works well as a stringing test. For PLA, aim for the lower-middle of the recommended range, typically 190–210°C, rather than the upper end.
- Adjust retraction in your slicer: Open your slicer software (Cura, PrusaSlicer, and Bambu Studio are among the most widely used) and locate the retraction distance and retraction speed settings. For direct drive extruders, a retraction distance of 1–3mm is a good starting point. Bowden-style setups generally need more, try 4–7mm. Increase retraction distance in small increments and test between each change.
- Dry your filament: If filament has been sitting in open air for weeks or months, moisture is very likely contributing to the problem. You can dry most filaments in a food dehydrator or a conventional oven at low heat, around 45–65°C depending on material, for a few hours. Going forward, store all filament in airtight containers with silica gel desiccant packs between print sessions. It’s a simple habit that prevents a surprising number of problems.
Warping: why do my prints curl or lift at the corners?
Warping is especially common when printing large, flat objects, and it’s a problem that varies dramatically depending on which filament material you’re using.
What it looks like
The base of the print pulls away from the build plate at the corners or along the edges during printing. In mild cases, you’ll notice a slightly raised corner. In severe cases the entire base curves upward, making the print unusable.
Why it happens
As filament is deposited and begins to cool, it contracts slightly. If different areas of the print cool at different rates due to air drafts, an insufficient bed temperature, or the absence of an enclosure, those uneven stresses cause the material to pull inward and warp.
This problem varies significantly by material. ABS (acrylonitrile butadiene styrene) is the most notorious for warping because it shrinks considerably as it cools. It almost always requires a heated bed and an enclosure, a box around the printer that maintains a consistent ambient temperature, to print successfully. ASA behaves similarly.
- PLA (polylactic acid) is far more forgiving and is the recommended starting material for beginners for exactly this reason. It has a much lower shrinkage rate, adheres more easily to most surfaces, and doesn’t require an enclosure.
- PETG sits comfortably in the middle, stronger and more heat-resistant than PLA, while being significantly less warp-prone than ABS. It’s a natural next step once you’re confident with PLA basics.
If you’re still deciding which printing technology suits your projects, it’s also worth knowing that resin printers handle warping very differently from FDM. The tradeoffs go beyond just material choice.
How to fix it
- Use a heated bed at the right temperature: PLA: 50–60°C. PETG: 70–85°C. ABS: 90–110°C.
- Add an enclosure: If you’re printing ABS or ASA, an enclosure isn’t optional; it’s practically essential. Some printers include one; others can be fitted with aftermarket enclosures or DIY solutions.
- Use a brim or raft in your slicer: A brim is a thin, flat extension printed around the base of your model that increases the surface area sticking to the bed, reducing the lifting force at corners. A raft is a disposable base layer the model prints on top of. Both are available as settings in most slicer software and are among the most effective warping fixes for large flat prints.
- Improve bed adhesion: Better first-layer grip reduces the mechanical force that causes corners to lift. Apply a glue stick or adhesion aid, and confirm your bed surface and temperature are appropriate for your material.
- Eliminate air drafts: Print away from open windows, fans, or air vents. Moving air pulls heat away unevenly and accelerates warping.
- Switch to PLA or PETG: If you’re a beginner and warping is a recurring problem, the most practical fix may simply be to change materials. PLA removes the problem for most users entirely.
Layer shifting: why do my prints look misaligned halfway through?

Layer shifting is hard to miss. Your print looks completely normal up to a certain point, then everything above that point is shifted sideways as if someone knocked the printer mid-job. It’s almost always a mechanical issue rather than a settings one.
What it looks like
Layers up to a certain height are correctly aligned, then all layers above that point are offset in one direction. The model’s overall shape may still be visible, but it looks like it was built in two separate pieces that don’t line up.
Why it happens
The print head is positioned and moved by drive belts, rubber or reinforced fibre loops that run along the X and Y axes of the printer frame. When these belts become loose, the print head can slip during fast movements, and those small slips accumulate into visible offsets over the course of a print.
Beyond belt tension, two other causes are worth distinguishing:
- Mechanical resistance: This is separate from belt tension and refers to physical friction or obstruction along the printer’s movement axes. A worn bearing, a screw that’s worked itself into the path of a moving component, a kinked cable, or debris on the linear rails can all create resistance that causes the print head to slip or stall mid-movement. The belt may be perfectly tight, but if something is interrupting smooth travel, layer shifting will still occur.
- Print speed too high: Fast movements generate more inertia and vibration, which puts more stress on the drive system. Tall, narrow models are especially vulnerable because they flex slightly under the rapid back-and-forth motion.
How to fix it
- Tighten the drive belts: Most printers have accessible belt tensioners on both the X and Y axes. A properly tensioned belt should feel firm when you pluck it, similar to a guitar string with a little give but no slack. Many printers include a belt tension indicator in the settings menu as a reference. Don’t overtighten; a belt that’s too rigid can wear out faster and strain the motors.
- Check for mechanical resistance: With the printer powered off, manually slide the print head along both axes and move the bed back and forth. Motion should be smooth and consistent. If you feel a catch, friction, or resistance at any point, stop and inspect that area. Look for debris on the rails, loose screws, worn bearings, or cables that may be catching on moving parts.
- Reduce print speed: In your slicer, try dropping the overall print speed by 20–30%. This is particularly effective for tall or narrow models where vibration is a known factor.
Clogged nozzle: why has filament stopped flowing?
A nozzle clog can appear with no warning. One minute, the print is running fine, the next, there’s no filament coming out at all. It’s frustrating, but it’s also one of the 3D printing problems most users can fix themselves without any specialised tools.
What it looks like
Filament stops extruding completely, or comes out in inconsistent amounts, thin in some areas, and absent in others. You may hear a clicking or grinding sound from the extruder motor as it tries to push filament through a blocked path. In some cases, the printer continues running through its motions normally, but nothing is actually being deposited on the build plate.
Why it happens
- Debris in the filament: Lower-quality filament occasionally contains small impurities or inconsistencies that accumulate inside the nozzle over time.
- Burnt filament: Printing at too high a temperature, or leaving the nozzle heated for extended periods without actively printing, causes filament to degrade and carbonise inside the nozzle. That residue builds up and eventually restricts or blocks flow entirely.
- Dust accumulation: Filament picks up airborne dust as it passes through the extruder, and that dust gradually accumulates.
How to fix it
- Use a cleaning needle: Many printers include a small metal needle for exactly this purpose. With the nozzle heated to printing temperature, carefully insert the needle into the nozzle opening and work it gently back and forth to break up and dislodge the blockage. Don’t force it.
- Perform a cold pull: This is the most thorough cleaning method, and it’s simpler than the name suggests. Heat the nozzle to normal printing temperature and manually push filament through until it flows cleanly. Then lower the nozzle temperature to around 90°C for PLA (check material-specific guides for other filaments). Once it reaches that temperature, grip the filament firmly and pull it out in one smooth, deliberate motion. The tip that comes out should be shaped like the inside of the nozzle, with any debris embedded in it. Repeat two or three times until the pulled filament comes out completely clean.
- Replace the nozzle: Nozzles are consumable components, not permanent hardware. If cleaning doesn’t resolve the clog, or if the same nozzle has been in use for a long time, replacing it is the most practical fix. A standard brass nozzle costs just a few dollars and takes minutes to swap out. Don’t hesitate to replace one it’s routine maintenance, not a sign that something is seriously wrong.
How to prevent clogs
Prevention is easier than the fix. A few habits go a long way: always print within the recommended temperature range for your filament, purge the nozzle with a short extrusion when switching between filament types or colours, and avoid leaving the nozzle heated for long periods without printing. If you’re pausing a print for more than a few minutes, lower the nozzle temperature to a standby setting rather than leaving it fully hot.
Poor layer adhesion: why does my print feel weak or crack apart?
Poor layer adhesion is one of the more deceptive problems because the print may look complete from the outside, right shape, right size, but it’s structurally weak, prone to splitting along layer lines, or visibly separated when you look closely.
What it looks like
Layers peel apart or crack under light pressure. The finished print feels lighter or more fragile than it should. In some cases, you can see thin gaps or lines between layers when you hold the model up to the light.
How to tell it apart from similar problems
It’s easy to confuse poor layer adhesion with stringing or warping, but the causes are quite different:
- Stringing is caused by too much heat. The filament becomes too liquid and oozes. Poor layer adhesion is typically caused by too little heat, as layers don’t melt together enough to bond. Adjusting in the wrong direction makes things worse.
- Warping is a bed adhesion issue that affects the base of the print. Poor layer adhesion is an internal structural issue that affects the integrity of the print throughout its full height.
Why it happens
- Nozzle temperature too low: For layers to bond properly, each new layer needs to be hot enough to slightly re-melt the surface of the layer below it, creating a molecular bond. If the temperature is too low, layers sit on top of each other without fusing; they’ll hold their shape but separate easily under stress.
- Cooling fan too aggressive: The part cooling fan is important for print accuracy and detail, but if it’s running at full speed from the very beginning of the print, it can cool each layer too rapidly for the next one to bond properly. This is especially problematic for materials like ABS, which is why many users run the fan at 0% for ABS entirely.
- Under-extrusion: This means the printer isn’t depositing enough filament, resulting in layers that are too thin to bond reliably. Under-extrusion can be caused by a partially clogged nozzle, a worn extruder gear that’s slipping rather than gripping the filament, or a flow rate setting that’s been accidentally reduced in your slicer.
How to fix it
- Raise the nozzle temperature: Increase it by 5°C at a time and test a small print between each adjustment. You’re looking for the temperature at which layers bond solidly without causing stringing.
- Reduce fan speed: In your slicer, lower the part cooling fan to 50% or below and check whether layer strength improves. For ABS and ASA specifically, running the fan at 0% is standard practice.
- Check your flow rate (extrusion multiplier): In your slicer settings, find the flow rate or extrusion multiplier. It should be at or near 100%. If it’s been set lower, even slightly, layers may not be getting enough material to bond adequately. Restore it to 100% and test.
- Inspect for partial clogs: If you’ve ruled out temperature and fan settings, a partial nozzle clog causing under-extrusion may be the issue. Refer to the clogged nozzle section above for cleaning steps.
Tips to avoid 3D printing problems before they start
Most of what’s covered above is reactive; you’re fixing a problem that’s already shown up. These habits are preventive. Build them into your routine, and you’ll deal with far fewer issues overall:
- Keep your filament dry: Moisture is one of the most consistently underestimated causes of print problems. Filament absorbs water from the surrounding air, and moist filament causes stringing, weak layer adhesion, bubbling during extrusion, and inconsistent flow. Store every spool in an airtight container with silica gel desiccant packs when it’s not in use. If you print frequently, a dedicated filament dry box with a built-in hygrometer is a practical investment that pays off quickly.
- Start with PLA: If you’re still building confidence with your printer, PLA is the most forgiving material you can use. It adheres well to most surfaces, doesn’t warp easily, and works reliably on virtually all FDM printers. If you want a clear breakdown of how PLA, ABS, and PETG actually differ before you experiment with materials, the filament guide covers each one in plain terms.
- Level your bed before major print sessions: Bed level drifts gradually due to vibration, temperature changes, and normal use. A quick check before any longer session and always after moving the printer or switching to a new filament prevents the majority of first-layer failures. It takes two minutes and saves a lot of wasted filaments.
- Clean your build plate before every print: A quick wipe with isopropyl alcohol removes skin oils, dust, and residue from previous prints. After wiping, don’t touch the surface with bare hands; oils transfer immediately and undermine adhesion.
- Use the correct temperature profile for your material: Different filament types have meaningfully different temperature requirements, and even different brands of the same material can vary. Always check the temperature range printed on the spool and start in the middle of that range, adjusting from there based on results.
- Maintain your printer regularly: Beyond the build plate, regular maintenance extends to the printer as a whole, wiping down linear rails and rods to remove dust and debris, checking that the extruder gears are clean and free of filament residue, inspecting the area around the hot end for built-up material, and checking belt tension periodically. A clean, well-maintained printer is significantly less likely to produce unexpected failures mid-print.
- Calibrate after any significant change: New filament, a nozzle replacement, a firmware update, or moving the printer any of these can be enough to shift your settings. Running a quick calibration print (a small calibration cube is the standard test) after major changes catches problems before they show up in a long print.
When to troubleshoot and when to consider upgrading
The straightforward answer is: troubleshoot first, almost every time. The overwhelming majority of 3D printing problems, including all six covered in this guide, come down to settings, calibration, or material issues rather than hardware failure. Adjusting a setting or leveling the bed costs nothing and resolves most problems completely.
That said, there are genuine situations where troubleshooting reaches its limit. Here’s a simple guide to telling them apart:
| Situation | Recommendation |
| Problem appeared after a settings change or new filament | Troubleshoot; almost certainly settings-related |
| First-layer, stringing, or warping issue | Troubleshoot; these are nearly always fixable with adjustments |
| Printer is relatively new and otherwise working normally | Troubleshoot; hardware failure in new printers is uncommon |
| Belt, rod, or extruder gear is physically worn or damaged | Upgrade the component, continued use will worsen the problem |
| Nozzle clogs keep returning after repeated cleaning | Investigate the heat break; upgrade if necessary |
| Printer is several years old and mechanical parts are worn out | Component upgrade or new printer depending on availability |
| You’ve outgrown the build volume or material range | Upgrade the component; continued use will worsen the problem |
| Same hardware fault keeps recurring despite multiple repairs | New printer; ongoing reliability issues often signal the end of a machine’s useful life |
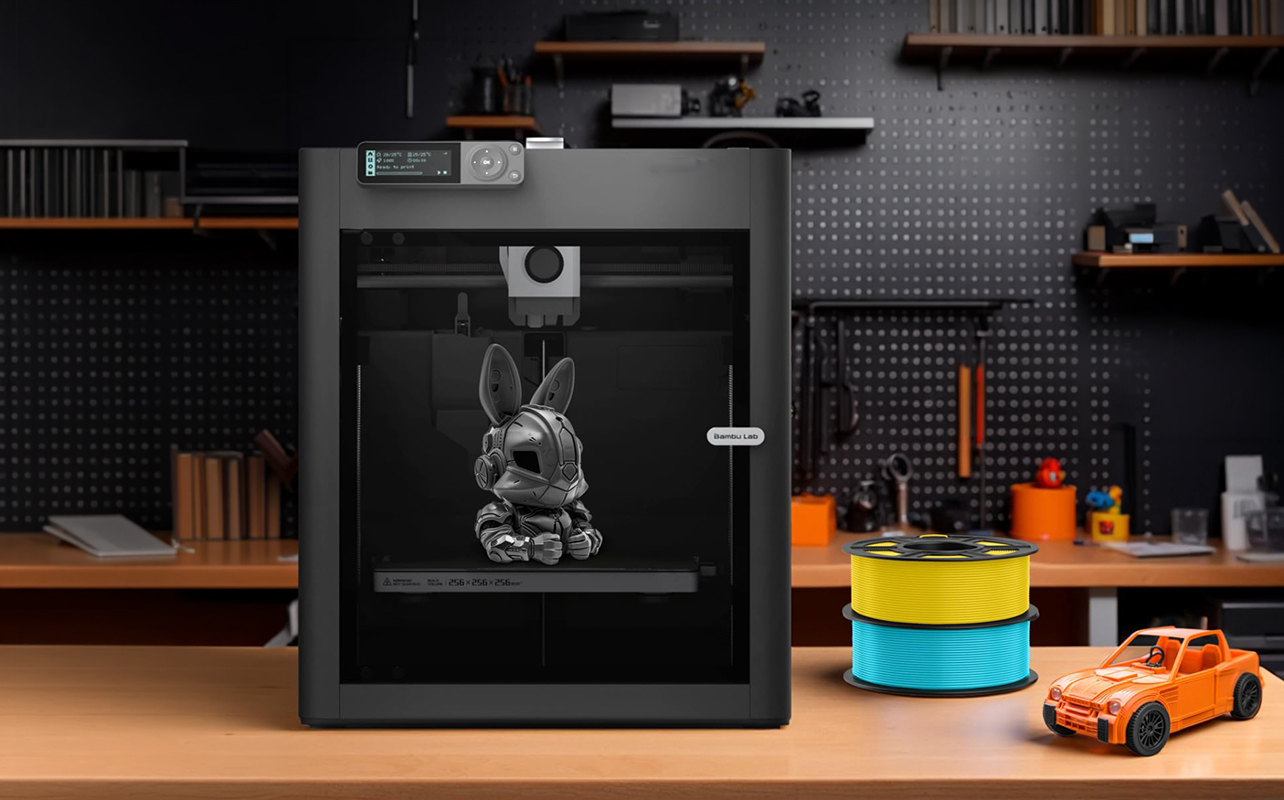
If you’ve reached the point where a new printer makes sense, a side-by-side comparison of Bambu Lab vs Creality is a practical starting point. They’re the two most popular brands for Canadian buyers and cover most budgets and use cases.
Troubleshooting checklist
When something goes wrong, work through this list in order before making any major changes. Most 3D printing problems are diagnosed within the first two or three steps:
| Step | Action | What to check |
| 1 | Check bed leveling | Re-level if you haven’t recently. Look for inconsistent first-layer thickness; too thick in some areas, too thin or scraped in others |
| 2 | Verify temperature settings | Confirm nozzle and bed temperatures match your filament type and the range printed on the spool |
| 3 | Inspect filament | Check for brittleness, discolouration, or uneven diameter. If it’s been exposed to air, consider drying it before the next print |
| 4 | Clean nozzle and build plate | Wipe the plate with isopropyl alcohol. If extrusion is uneven, perform a cold pull or use a cleaning needle |
| 5 | Adjust speed and retraction | If stringing is present, increase retraction distance. If layer shifting is occurring, reduce print speed. Make one change at a time and test |
Keeping the prints coming
The 3D printing problems in this guide, bed adhesion failures, stringing, warping, layer shifting, clogged nozzles, and poor layer adhesion, are the ones that trip up almost every new 3D printer owner at some point. They’re also, without exception, fixable. Most of the time it comes down to a single variable: a temperature that needs adjusting, a belt that needs tightening, a bed that needs leveling, or filament that needs drying.
Every failed print is diagnostic information. Once you’ve worked through a problem once, you’ll recognise it immediately the next time and resolve it in minutes. That’s how confident 3D printing actually works, not by avoiding problems, but by knowing how to read them.
Keep experimenting, keep the filament dry, and don’t let a bad print discourage you. The next one will be better. If you’re looking to explore new printers or stock up on filament, you can browse Best Buy’s selection of filament 3D printers and resin 3D printers to find the right fit for where you are in your printing journey.
Frequently asked questions
Why is my 3D print not sticking to the bed?
The most common reasons are an unleveled bed, a dirty build plate, or a bed temperature that’s too low for the material you’re using. Re-level the bed, wipe the surface with isopropyl alcohol, and confirm your bed temperature matches the recommended range for your filament. If adhesion is still poor, try a glue stick or consider upgrading to a PEI build plate.
How do I fix stringing in 3D printing?
Lower your nozzle temperature in 5°C increments and increase the retraction distance in your slicer settings. Also, check whether your filament has absorbed moisture, moist filament causes oozing even when temperature and retraction are correctly set. Drying the filament before printing often resolves persistent stringing on its own.
What causes warping in 3D prints?
Warping is caused by uneven cooling, as parts of the print contract at different rates, pulling the base away from the bed. It’s most common with ABS filament. A heated bed, an enclosure, adhesion aids, and avoiding air drafts are the most effective solutions. Using a brim in your slicer adds surface area at the base and significantly reduces corner lifting. Switching to PLA or PETG eliminates warping for most beginner situations entirely.
How do I unclog a 3D printer nozzle?
Start with a cleaning needle inserted into the heated nozzle to break up the blockage. If that doesn’t clear it, perform a cold pull: heat the nozzle fully, push filament through manually, then lower to approximately 90°C for PLA and pull the filament out in one firm motion. Repeat until the pulled filament tip comes out clean. If the clog persists, replace the nozzle; they’re inexpensive and quick to swap.
Why are my layers shifting?
Layer shifting is almost always mechanical. Check your drive belts first; they should feel firm when plucked, not slack. Then manually move the print head and bed with the printer off to feel for any friction, catches, or resistance that could indicate debris or a mechanical obstruction. Reducing print speed in your slicer also helps, particularly for tall or narrow models.
What causes poor layer adhesion?
Poor layer adhesion usually means the nozzle temperature is too low for layers to bond properly, the cooling fan is running too aggressively, or the printer is under-extruding due to a partial clog or a flow rate set below 100%. Raise the temperature in small increments, reduce fan speed, and check your extrusion multiplier in your slicer settings.
Why do my prints fail halfway through?
Mid-print failures typically come down to three causes: the print detached from the bed due to an adhesion issue, a layer shift occurred because of loose belts or a mechanical obstruction, or the nozzle clogged and stopped extruding. Check the bed, the belts, and the nozzle in that order; one of the three is almost always the culprit.
How can I improve 3D print quality overall?
Proper bed leveling, dry filament, accurate temperature settings, and calibrated retraction settings account for the majority of print quality improvements. Starting with PLA and learning its behaviour before moving to more demanding materials is one of the most effective things a beginner can do. Regular maintenance, clean rails, clean build plate, and clean nozzle keeps the printer performing consistently over time.
Read more articles on 3D printing:
- 3D printer buying guide: how to choose your first 3D printer
- Essential 3D printer accessories every beginner needs
- Useful things you can make with a 3D printer | Best Buy Blog


