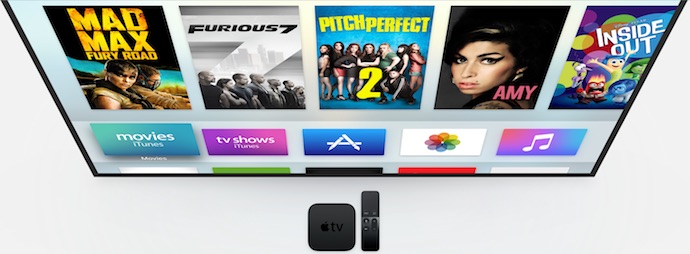
It’s worth noting that although it’s an Apple product, the Apple TV is largely platform agnostic. Those who own an iOS device can save a few minutes in the initial setup, but the iOS Remote app doesn’t work with the new Apple TV, so iPhone owners are on equal footing there with Android and Windows device users. Apple’s iTunes is closely tied in for video and music content, but the streamer also supports popular third party media sources like Netflix.
The primary area where Apple owners will see an advantage is with apps and gaming. Apps can be universal, allowing them to be bought once and used on both iOS devices like the iPhone and iPad, as well as AppleTV. Some games support local multiplayer mode using Wi-Fi so long as you have an iOS device running the same app; you can’t do this with an Android device, even if it is running the same game title. As with the previous Apple TV, Apple product owners also have the ability to use AirPlay to stream content from their devices to the Apple TV for display on the television screen. There are third party solutions for Android, but AirPlay is not officially supported for other platforms.
Now, let’s get that new Apple TV set up!
I’ve put together a quick guide to setting up and using your new 4th generation Apple TV. I’m not getting into all the shortcuts, advanced options and special features people have discovered—that would be a very long post that keeps growing—but this covers the basics to get you up and running.
Connecting to Your TV
The new Apple TV is just as easy to connect to your TV as previous generations.
On the back of the black box you’ll see just a few ports. HDMI connects to an HDMI input on your TV (you’ll have to supply the HDMI cable) and power (cable supplied) plugs into an electrical outlet—no bulky power brick required. There’s also a USB-C port, but that’s used for service only, and an Ethernet port if you choose to connect it directly to your router rather than using Wi-Fi.
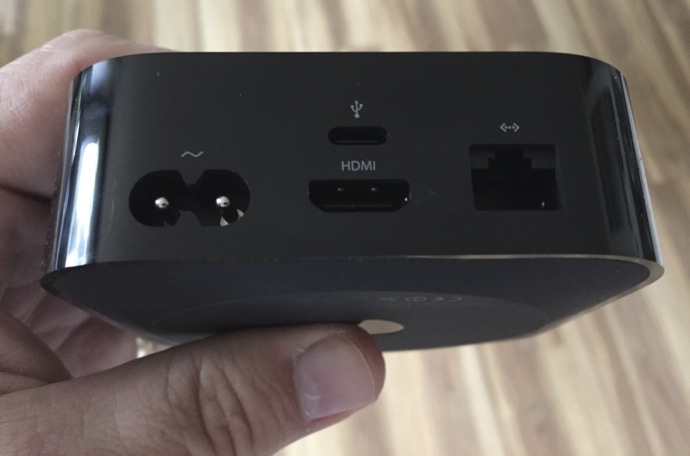
If you own a previous generation Apple TV, you’ll notice the Optical Audio out port is gone on the new box. Audio is purely through HDMI to the television, although with the Apple TV 4 you do gain the ability to output audio through Bluetooth headphones or speakers.
Turn on your TV, select the HDMI input the Apple TV is connected to and prepare to follow the onscreen instructions. There should be a white light on the front of your Apple TV indicating it has power and is awake; if not, push any button your Siri remote to wake the Apple TV.
Configuration: Here’s Where iPhone Owners Have an Edge
The Apple TV is a media streamer, and that means to do anything it needs to be connected to your network. The vast majority of owners connect using Wi-Fi, so that’s the method I’ll focus on.
If you own an iOS device such as an iPhone (running iOS 9.1 or higher), you get to save a few steps in setup. Make sure you have Bluetooth enabled on your device, then hold it up to the Apple TV. Key information like your Wi-Fi network and password and Apple ID will be automatically configured on the Apple TV.
Everyone else will be required to enter this information as prompted, using the touchpad on the Siri remote like a trackpad (push down on it to select, like a mouse click) and the virtual keyboard displayed onscreen. Basically, you need to select the Wi-Fi network to connect to, enter the password and enter your Apple ID if you have one.
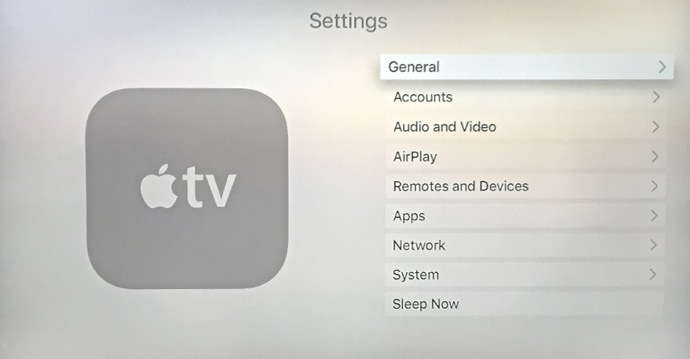
Within the Settings screen, there are many opportunities to tweak your configuration further, including selecting screen saver sources, adjusting touchpad speed and adding Bluetooth devices.
It’s not quite plug and play, but to get the Apple TV 4 from the box to playing its first video is pretty quick and easy.
 Using the Siri Remote
As I mentioned in the previous section, you use the Siri Remote’s touchpad to navigate, swiping in any direction to move around the screen. Rather than a cursor, you track your progress by watching the icons; when you are directly over an app, its icon gets larger. If you want to use that app, you push the trackpad to click it.
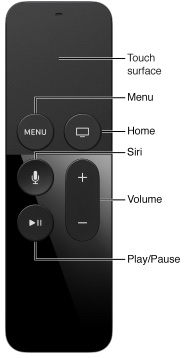
One of the key new features of the Apple TV 4 is the fact that the new remote incorporates Siri, Apple’s personal digital assistant, and you interact with her simply by talking to her. Two microphones built into the Siri Remote capture your voice when you hold the Microphone button (don’t worry, Siri is not always listening).
You don’t get the full Siri treatment that you would with an iPhone or iPad, but the Apple TV version of Siri is still very useful. You can can ask Siri about the weather forecast, sports scores or the time and the results will be displayed on your TV screen.
 Siri can be used to search for videos, songs and apps, which saves considerable time and effort over typing in search queries on the virtual keyboard. Siri search doesn’t work with all services, but it’s not limited to just Apple options. Search for a movie and if you’re a Netflix member, the search result will include a link to iTunes and a link to Netflix (assuming they both offer it).
You can also ask Siri to open an app, fast forward a video, and many other tasks.
There are several physical buttons on the Siri Remote. The key one for finding your way around is the Home button. Get lost or confused? Push the Home button to get back to the Home Screen. If you hold that Home button down, you get the option to put the Apple TV to sleep, and if your television is paired with the remote (if it didn’t do so automatically at setup, you can pair it in the Settings screen), this will also turn off the TV. If the Siri Remote is paired with your TV, the Volume buttons control the TV volume. Play/Pause is used while playing video or listening to music. Menu takes you to the previous screen.
The touchpad itself is also used for many functions. For example, while playing media, pressing the right or left edge of the touchpad will fast forward or rewind 10 seconds, respectively.
Home Screen
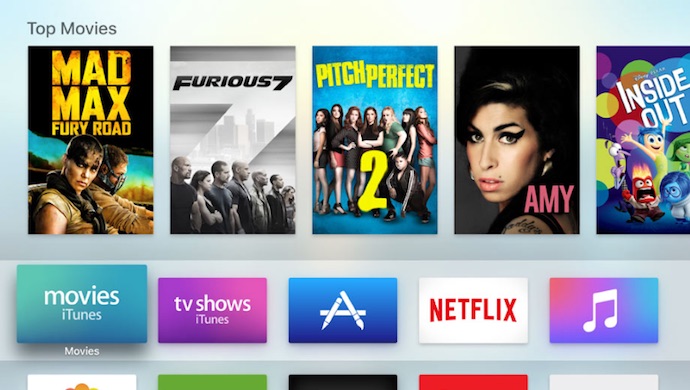
The Home Screen is where all the action is. All your apps are here, including the top row icons that are key features like the App Store, Apple Music and iTunes. The top pane of the Home Screen is used for displaying information—popular purchase and rental movies on iTunes, for example.
App Store
The big news with the new Apple TV is apps. This little black box does a lot more than just stream media—although the media services that used to come pre-installed (like Netflix) now get downloaded as an app.
The Apple TV has a dedicated App Store, which you’ll see as a prominent icon at the top of the Apple TV Home Screen (it looks like the letter “A” made of a pencil, ruler and paint brush). When searching the App Store, if you’ve previously purchased an app, it shows with an iCloud icon. If it’s free, “Get” will download it, or you can buy apps. If you’ve previously purchased a universal app for iOS, it will show up in the App Store Purchased tab, along with any apps you download or buy using the Apple TV.
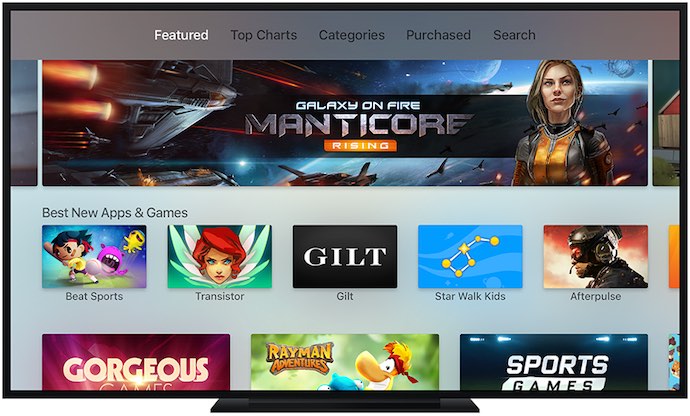
If you happen to download a game, Apple requires that all apps be usable with the Siri Remote, in its guise as a Wii-like motion controller. You can also buy optional third party Bluetooth controllers.
App Management
There are two Apple TV 4 models, a 32GB version and a 64GB version, and the differences between the two are all about app management. The more storage you have, the more apps you can have installed.
You can check Settings to see how much storage space each app is taking up and if you need more room, you can delete an app. Don’t worry, once you’ve paid for an app you can download it again on demand, so deleting isn’t as permanent as it sounds.
With the new tvOS operating system, the new Apple TV 4 user interface gains some close similarities to iOS. If you’ve used an iPhone, iPad or iPod Touch, you’ll be familiar with the app management process. On the Home Screen, use the Siri Remote to navigate to any app, then press and hold the touchpad. The apps on the screen will begin to jiggle. You can now move the selected app anywhere you’d like, then tap the Touchpad to release it. While the app is jiggling, if you press the Play button on the Siri Remote, you’ll have the option to delete it.
Home Sharing
I want to touch on Home Sharing because this is a feature that many Apple TV owners—myself included—have long used as a key feature.
As with previous Apple TVs, with Home Sharing active (in Settings) you can select a computer on the network that’s hosting an iTunes library. When you configure the Apple TV to connect to that computer (Mac or Windows PC), you gain access to the media in its iTunes library, so you can stream video or music locally to the Apple TV. You can also use its local photos as screen savers. Unfortunately, Siri voice search doesn’t work with content in your iTunes library.
That’s it for the Apple TV basics. As I said, there is a lot more detail that I could go into if I had the space, but this should be enough for you to set the box up and begin using it. If you get stuck with anything, I’d suggest looking on Apple’s support site. The company publishes very thorough Apple TV documentation, including step-by-step instructions for everything from changing the screen savers to setting up parental controls and using headphones.


