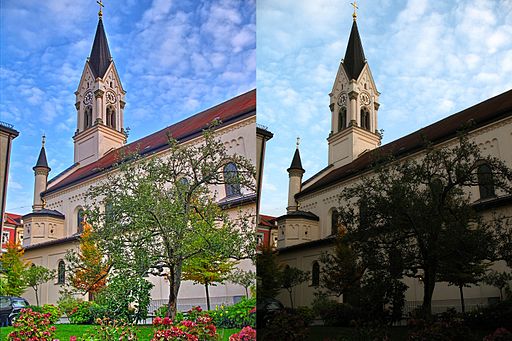
 ‘HDR’ has been a bit of a buzzword in photography circles over the last number of years (or should that be ‘buzz acronym’??), and lately we’ve even started hearing it referenced in relation to TV screens. It stands for ‘High Dynamic Range’, and refers to the range of visible light intensities. To put it in practical terms, we’re talking about how much detail you can see in the highlight areas, where the light is most intense, versus the shadows, where the light is weakest.
Exposure
In order to fully grasp the concept we need to think about the term ‘exposure’. If I told you that a photo was underexposed or overexposed I’m sure you’d understand me. An underexposed image is too dark, and an overexposed image is too bright, and in both cases we’re not seeing the detail we were hoping for; information has been lost. So there’s an area between under and overexposed which is the area of acceptable exposure. You can see detail where you want to see it. There may still be areas of the image that are under and overexposed, for example the sky is often overexposed, or ‘blown out’ as photographers say, but the main subject of the image looks good.
Now imagine that your leeway for achieving acceptable exposure was increased. This would mean that you would see more detail in the bright and the dark areas at the same time.
The Human Eye
Everything has a limited dynamic range, whether it captures light or displays it; cameras, TVs, even our eyes. Our eyes are incredibly adept at compensating for variations in light, but you know how it is when you walk into a darkened room on a sunny day; it takes some time for your eyes to adjust. The light variations are so extreme that they test your eyes’ dynamic range. Same thing when you’re lying in bed and someone walks in and turns on the light. You have to squint or shield your eyes while they adjust.
In photography when we create a HDR image, we artificially reveal lots of detail where ordinarily it wouldn’t be possible due to the variation in light intensities. We’re sort of by-passing the camera’s limitations if you like. We do this not by shooting a single image, but by shooting a number of images and using software to combine them. The result often has a fantastical, otherworldly feeling to it, and this is what draws many photographers to the process.
So how do you go about making your own HDR images?
First of all you need a tripod to mount your camera on, because each image in your series must be framed identically, so that they can be overlaid later on. HDR does not work well when you hand-hold your camera. You’ll need to take a minimum of 3 frames, but I suggest you try 5 to 7. Each frame needs to be taken at a different exposure, so you’ll need to work in manual mode. Set your aperture, your f-stop, to 11. Then adjust your shutter speed until your exposure meter is balanced in the middle. Now you’re going to reduce the shutter speed (making a longer exposure) until it’s all the way to the left. Take your first frame. Now increase the shutter speed until the exposure meter is halfway to the center. Take your next frame. Now increase the shutter speed again until the exposure meter is balanced in the middle. Take your third frame. You now have one very underexposed image, one quite underexposed image, and one correctly exposed image. Continue this process to get an overexposed image and a very overexposed image. You now have 5 separate exposures and you are ready to start playing on your computer.
HDR Software Tools
When I create a HDR image I do so through Photoshop. There is a tool within the program to generate your HDR image, but I find it’s not brilliant so I use a third-party plugin, specifically HDR Efex Pro from Google’s Nik Collection. The Nik Collection is a very useful suite of image processing tools, and completely free. You can also access HDR Efex Pro through Lightroom, but not Photoshop Elements.
It is actually possible to create a pseudo-HDR image if you shoot your images in RAW mode. (Click here to read more about the difference between RAW files and jpeg files). RAW files have much more information than jpegs, and you can really pull out a lot of detail from the shadow areas and the highlight areas. If you do both simultaneously, and to an extreme degree, your image will start to get that ‘otherworldly’ feel.
You can actually open just one file in HDR EFX Pro, and it will create this pseudo-HDR effect, but it works better if you use 5 to 7 images.
When To Shoot HDR
So what kind of scenes lend themselves to good HDR photography? Most often the technique is used in landscape and architectural photography, in situations where there are no moving subjects present. If anything within your frame moves during the exposure it can throw the whole thing off, so it’s not commonly used for portraiture, although we did manage to create a HDR portrait back in photography school by getting the subject to sit very still.

Interiors
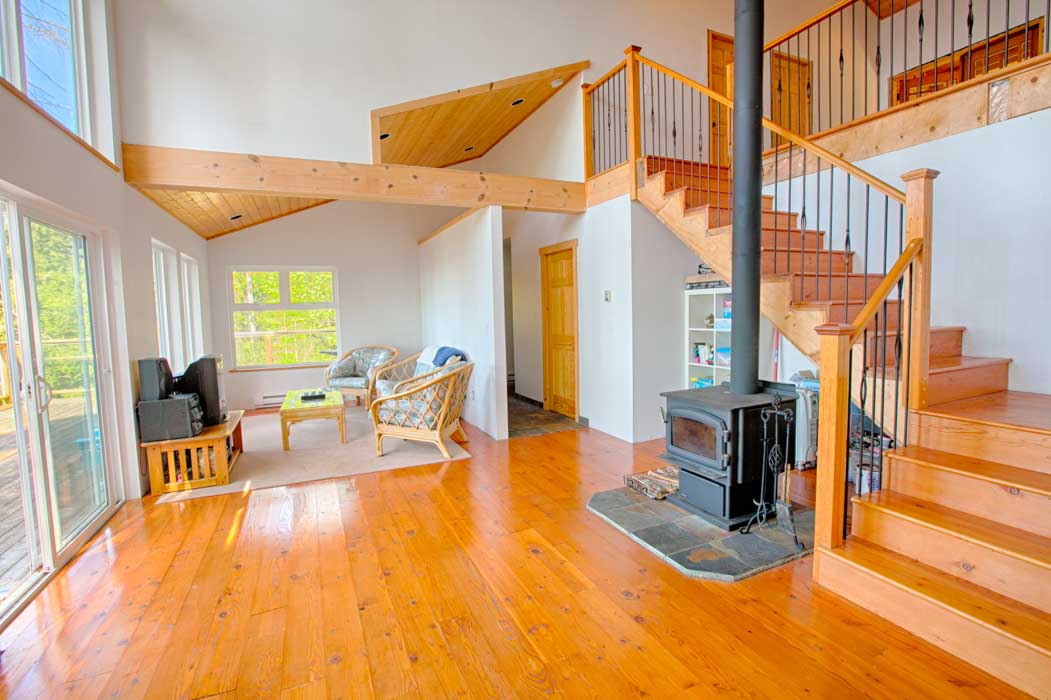
I recently used HDR to shoot some interior shots, and while the results were good, they weren’t quite what I had hoped. The big challenge with interior shots is trying to balance the light inside and outside. If, for example, a room has a great view, it’s very hard to show that view and show the interior at the same time, in fact it’s basically impossible in most circumstances without using studio strobes or flash units. The problem is that it’s so much brighter outside than inside, and you can’t expose correctly for both. I took as many as 7 frames for some of the spaces, but what I found when I processed the images was that the exterior views started to look really whacky. One easy solution would be to place a shot with a correctly exposed exterior on top of the HDR image and then mask out everything except the window, but this can become a time intensive exercise.
Bear in mind that HDR is an enhancement, not a fix. To create a great final image, you need a strong image to start with. Good composition and good light will trump everything, else every single time. HDR is just the salt and pepper on your steak. Bad steak is bad steak.
Hopefully I’ve given you some clarity on the world of HDR, but if you have any questions please feel free to post a comment below. In the meantime, a little joke for you:
What’s a pirate’s favourite type of photography? HD-ARRRRRRRR!!
Feature image by Richard Huber (Own work) [CC BY-SA 3.0 or GFDL], via Wikimedia Commons
Best Buy has a huge selection of camera and accessories for all of your photography needs.


Thoughts…
I am a proficient producer of HDR pictures and have been doing so before it became mainstream hehe. You can find me around as “zjemily” and see the numerous examples of my work.
iOS: Now defunct iCamera HDR which was hands down the best iOS app to offer HDR capabilities, and was reintroduced as a simpler app with “interiors/architecture/real estate” goals in mind. I always prefered the rough contrasts in tone-mapping I could achieve with that app. Nowadays, I use the likes of Snapseed, Pro HDR X (long time user of its predecessor, although simple, having interesting renders), TrueHDR and Mobile HDR allowing use of 3 photos instead of the usual two for mobile software. As for generating bracketing for apps that support loading of source images, Bracket Mode which does the work elegantly and efficiently since the days of my ol’ trusty iPhone 4 (circa 2009).
On PC, HDR Efex and the whole Nik Software suite is obviously a goto location, but I really appreciate Photomatix. And who knows, maybe will there be a Windows version of Trey Ratcliff’s Aurora software (unfortunately only for OS X, one of the rare OSes I don’t regularly use.
You can see some of my work as a Google Maps Local Guide @ https://goo.gl/maps/4zBpCNkMaYE2
Additional thoughts…
https://www.google.ca/search?q=nikon+auto+hdr+continuous+frames
Comments are closed.