Not satisfied with the default ringtones in iOS 7? Many iPhone owners are happy enough with “Cosmic,” “Stargaze” or classics like “Old Phone.” But if you’re bored with the ringtones you get as part of iOS 7 or you’re tired of reaching for your phone (along with dozens of people around you in the mall) every time you hear that familiar ring, maybe it’s time to change things up. Maybe you’d like a riff from your favourite song instead. While you can buy pre-made music ringtones directly from your iPhone, it’s easy to create your own from your iTunes music library. Here’s how.
You’ve already paid for the song, why not use it for your ringtone? In this example, I’ll make a ring tone out of the Gary Numan song “The Fall.”
Step 1
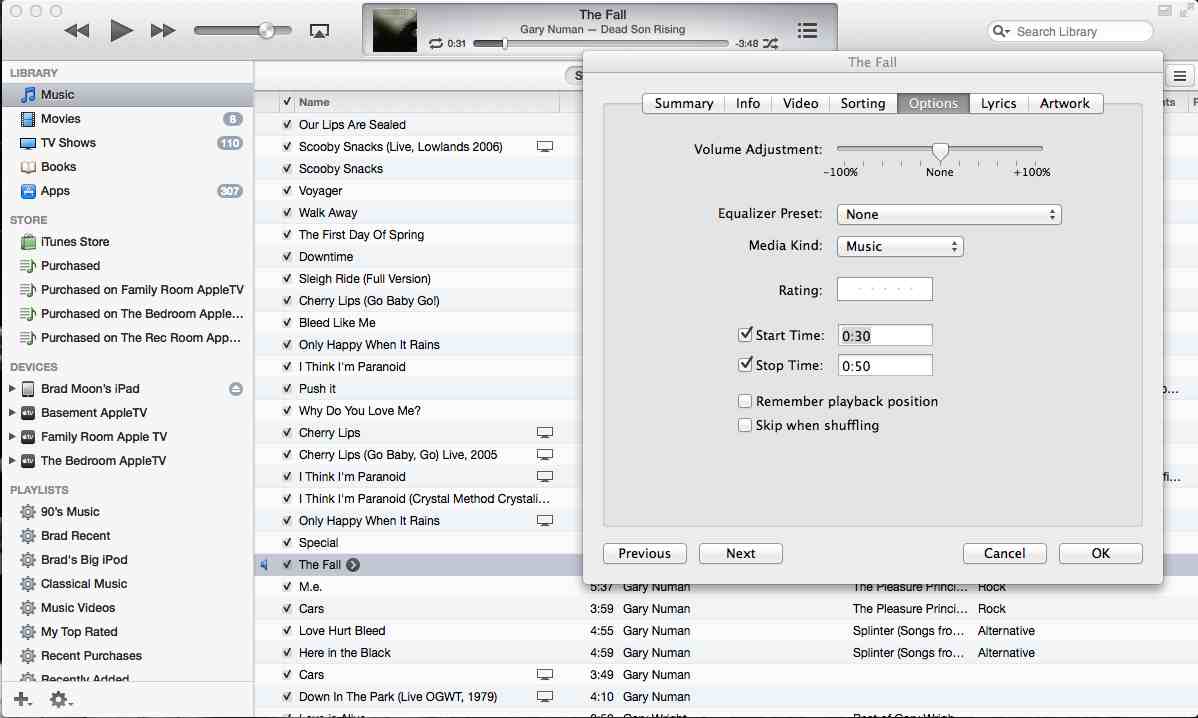
Select the target song in your iTunes library and Get Info to bring up the information box. Next, click Options and you’ll see a Start Time and a Stop Time. You’ll want to listen to the song to determine the start and finish of the snippet you want. It can be a maximum of 30 seconds —if you haven’t answered your phone after half a minute, chances are you’re not going to … You may have to play around a little to get this exactly right, then click OK to save it. Double-click on the song in iTunes to hear it (don’t worry, the change is not permanent).
Step 2
Once you’re happy you’ve nailed the snippet, select the song again in iTunes. CRTL-Click on the song (Right-click if you’re on a Windows PC) and choose Create AAC Version from the options. You’ll see a copy of the song file appear below the original. If you double-click the copy, you’ll find it is just the snippet you wanted, not the whole song. Now go back to the original song and remove those start and stop times.
 Step 3
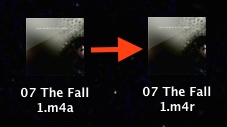
Select the song copy (the snippet) and drag it to your desktop. You’ll see it appear as an m4a file. Delete the copy you made in iTunes —not the original file. Now click in the name field of the file on your desktop and change the extension from m4a to m4r.
Step 4
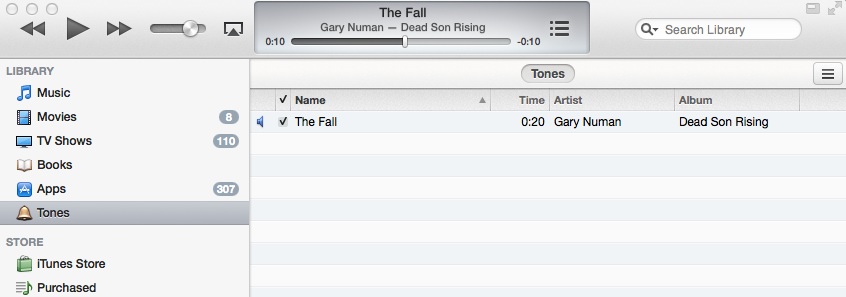
Drag the m4r file into iTunes. It will automatically be sorted into the Tones section. You can throw away the m4r file that’s on your desktop.
Step 5
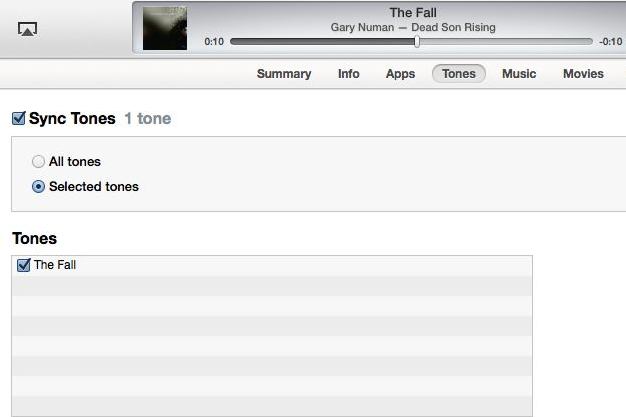
Synchronize your iPhone. Make sure you’ve selected Sync Tones and that you’ve selected the ringtone you just created.
Step 6
Now the easy part. On your iPhone, got to Settings, then Sounds, then Ringtone. You should see the ringtone you created in the list of available options. Select it and the iPhone will play it for you —the last check to make sure the quality is up to snuff.

And that’s it. Now when you hear ”Cosmic” or “Old Phone” chiming, you won’t be one of the people checking pockets to make sure it’s not their iPhone that’s ringing. You have your entire iTunes library to choose from to ensure your ringtone is unique.




There’s something about Android phones that isn’t exactly available with iPhones and my buddies who have an Android phone do make fun of it: you can’t easily have custom ringtones on the iPhone. Now, that’s something Apple should be working on but knowing things, one would judge better.
Apple doesn’t have an easy way out to create custom ringtones. But as the saying goes, it’s tough but not impossible. In this short little post, that’s what we’re going to do: create custom ringtones in iTunes and sync them with your iPhone.
Comments are closed.