 The romanticized notion of the gallivanting freelance photographer, jetting off to the world’s most beautiful locations, filling their days with glamorous photoshoots, is one we all love to buy into as aspiring and emerging photographers. The reality however is that the front-end work, the glory work, the rock-and-roll, is but a fraction of a photographer’s existence. There is so much work that happens behind-the-scenes, including of course the work that brings in work, the business side of things, and also the post-production.
“It’s photoshopped!”
We’ve heard so much in the last few years about “photoshopped” images, images that have been radically altered from their original state. The phrase has now a firm fixture in our everyday lexicon. I’ve lost track of the number of times subjects have jokingly asked to be photoshopped into an idealized version of themselves, including the lady who asked for the Julia Roberts look!
Photoshop is an incredibly powerful and adaptable piece of software from software giant Adobe, a leader in multimedia and creativity software. As well as photo retouching, it is also widely used in graphic design, and is even capable of editing video in it’s latest versions.
Lightroom
Adobe has another photo editing program in it’s arsenal called Lightroom (a clever play on the old darkroom concept) which has gained a huge following among digital photographers in recent years. In fact photographers are using Photoshop less and less as Lightroom has become more feature rich, reserving it for those really intensive retouching jobs and photo-montage work, where multiple images are used to create a single final image.
Whether you’re an accomplished photographer or a relative newb, the clicking of the shutter, the capture of the image, is just the first step in the creation of the final image. Every image, no matter how carefully created will require some degree of manipulation in ‘post’, as we creatives like to say. Let me say outright that the capturing of the image is the most important step, by a long way, because like a great meal, there is a direct correlation between the results and the quality of the raw ingredients.
File formats
Speaking of raw, my very first piece of advice regarding post-processing is to capture your images in the very highest quality possible, i.e. RAW format. By default your camera will write jpeg files (pronounced ‘j-peg’) to your memory card which are compressed versions of RAW files. In the compression process, a lot of useable information is ditched, and in order to give us the most amount of leeway in post-processing it is preferable to retain this information. RAW files are bigger and will take up more room on your memory card, but high capacity memory cards are cheap nowadays. Did you know you can now get a 256 gigabyte card at BestBuy.ca?
Techniques
So let’s talk techniques. The very first step in the post-processing workflow (after you’ve archived your images) is to rate your images and decide which ones you are going to work on. It’s tempting to just jump in and start tweaking, but you’ll waste a lot of time and energy that way. Ruthlessly cull the weaker images and give yourself a manageable body of work to tackle. When you’ve done this you are ready to work on the exposure.

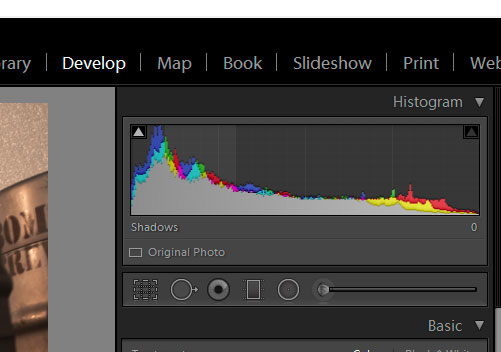
Exposing images correctly is, in itself, a tricky challenge. I wrote a little bit about this in a recent piece, but suffice to say that it’s very rare that an image will come out of your camera perfectly exposed. Depending on the subject of your image you’ll likely increase or decrease the exposure. One of the tools photographers use to judge their exposure is something called the histogram. This is a graph which charts the distribution of light intensities within the image, from the jet black areas to the fully white areas. Generally we like to avoid clipped shadows and highlights, that is, areas that are so under or over-exposed that they reveal no detail whatsoever. In the histogram, these appear as straight lines at either end of the graph (blacks to the left, whites to the right).
The reason we use the histogram instead of just eye-balling it is because of the variance that can occur due to monitor brightness combined with the lighting conditions in the space in which we’re editing. I don’t tend to get too engrossed in the histogram, but it’s a handy reference.
Now if you like where the subject of your image is in terms of exposure, but you’re seeing some clipping of the highlights and shadows, you can then start targeting the shadow areas and the highlight areas. There are a number of ways to achieve this, but most image processing programs have a set of sliders which will allow you to target just the highlights and shadows and recover that detail.
White Balance
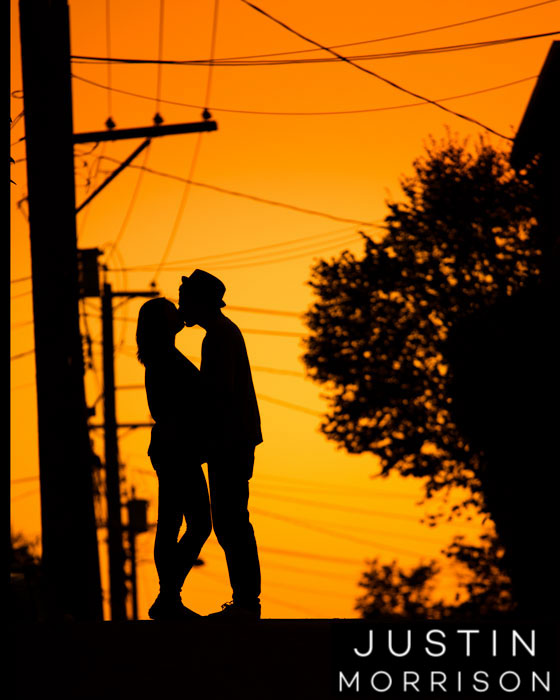
The next adjustment I usually make is to the white balance. The white balance is related to the color temperature of the light in an image. We often refer to ‘warm’ or ‘cold’ light, and it’s kind of an intuitive concept. The light cast by a golden sunset, for example, is very warm, and while our eyes are somewhat attuned to it (and become more so the more we pay attention to it) our cameras are very sensitive to color temperature. Thankfully it’s very easy to alter the white balance after the fact, particularly if you shoot in RAW mode. White balance directly correlates to mood, so if you like a nostalgic feel just increase the white balance.
Dodge And Burn
The final technique I want to mention today is what was known as ‘dodging and burning’ in the old darkroom days. This is where we alter the exposure in localized parts of the image, in order to draw attention to certain parts of the image and away from others. The addition of something called a ‘vignette’ is a way to apply this concept to the overall image, where the edges of the frame are darkened in order to encourage the viewers eye to explore the centre of the frame. RAW editors like Lightroom allow you to make these adjustments in a non-destructive way, meaning that you can roll back any changes that you make.
I’ve really just scratched the surface of the possibilities available in post, and it’s a topic I would be happy to revisit in the future. If you have any questions or comments please feel free to share them below.


