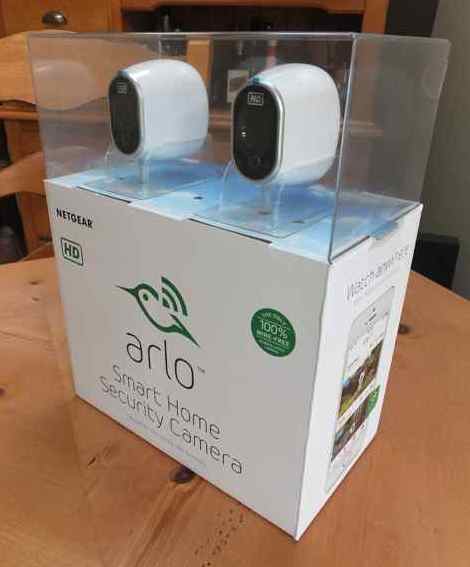
Home security systems can bring a lot of peace of mind, especially when away from home. And video surveillance systems have become much more affordable so are no longer only for the rich and famous. But putting in a decent system to protect your home usually requires a team of professional installers wiring your home. Or a very ambitious DIYer could spend a lot of time climbing ladders, fishing wires in walls, crawling in tight attic spaces. It’s a big job—until now! With the Arlo home security camera system you could literally set up a system using 5 or 6 HD cameras surrounding your home in less than an hour.
I was particularly interested in testing out Arlo so I could see how it compares to my surveillance system. I have had an 8 camera Q-See system around my home for about a year. It was professionally installed by Geek Squad, which took a couple of experts a full day to do all the wiring. I like my system but am very intrigued by Arlo’s unique system design. Their approach is greatly simplified, while adding a lot of flexibility.
 Arlo Design
When I first saw the Arlo cameras in the box, I could immediately see that this is a different kind of security system. They don’t look anything like the typical black cylindrical cameras that come with most systems. They have a very futuristic design with all the edges rounded kind of like an egg. A shiny white hard plastic case makes them look like something you would imagine on a Jetsons cartoon.
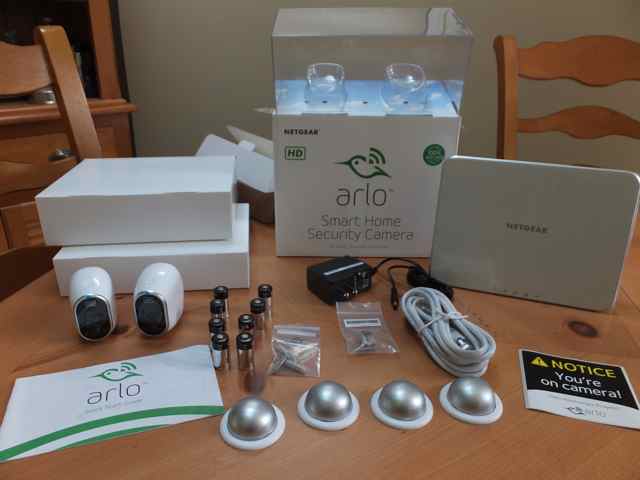
I particularly like the camera mounts that come with the system. The two-camera kit comes with four dome-shaped metal mounts that require one screw to attach them to the wall or eave or wherever. The camera has a strong magnet that magnetically attaches to it. No screws to mess with and extremely easy to adjust, which is brilliant.
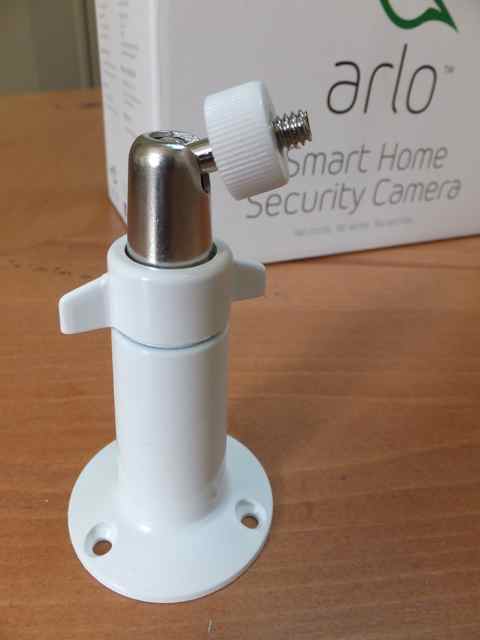
There are also other mounts available for the camera that might suit different situations. For instance, I also had a small pole mount that could extend the camera 4 or 5 inches off the wall rather than the dome mounts that keep the camera relatively flush. This pole mount screwed into the bottom of the camera but I also liked the design because it is easily fully adjustable in every direction.
 System Setup
I was able to test out the two-camera system package, but Arlo also comes in a one, three, and four-camera package. With all these systems you can add as many cameras as you need to provide the level of security you desire. The two-camera package also comes with four dome-shaped mounts, 8 batteries, a base unit, a power supply for the base unit, an Ethernet cable, and a quick-start guide.
The quick-start guide walked me through the setup like a breeze. Only five simple steps and the security cameras were operating. Step one was to download the free Arlo app on my Smartphone (although I could have used my tablet too). Then power up the base unit using the power supply and connected it to my router with the supplied Ethernet cable. I then set up an account with Arlo using the app. I then added the batteries to each camera and synched them to the base station.
The base station is what wirelessly communicates with the cameras and connects them to the Internet. Synching the cameras was as simple as pushing a button on the base station (a light will start blinking) and then pushing a button on the camera. A few seconds later it was synched (and the light stops blinking). I then repeated this with the other camera. The cameras were then fully operating so all I had to do is mount them. I used the pole mount with one camera for my backyard, and I just magnetically attached the other one to a metal surface for my front yard. The only trouble with using a shelf is that it is harder to adjust the direction.
I purposely placed my two cameras at two opposite ends of my house in order to test the range of the base station. I also wanted to monitor the front and back of my house. The base station had no problem communicating with both cameras despite the fact there were quite a few walls between the cameras and the base station. This was surprising to me because the Arlo wireless network seemed to work better than my Wi-Fi network. Arlo claims the base station has a 150 foot range and I tend to believe them.
 Monitoring App and Video Storage
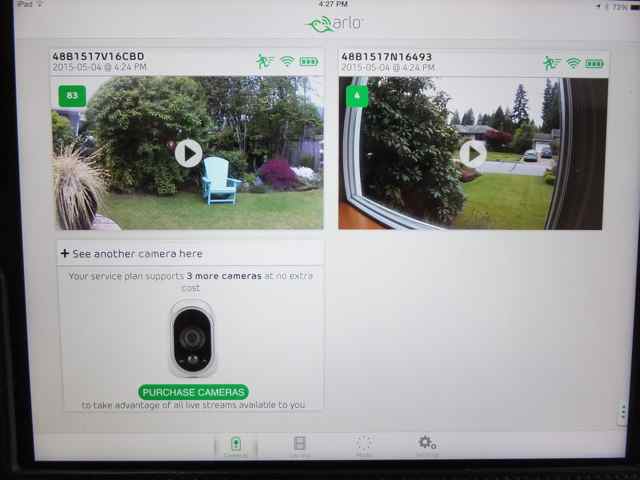
Unlike my Q-See system, Arlo has no DVR to record the videos. Instead the videos are stored in the cloud. There are three levels of cloud storage packages available. The basic one is free and gives you 1Gb of storage and 7 days of cloud storage. At the end of each week you need to delete unnecessary recordings so you can go another 7 days. For a monthly fee you can upgrade the cloud storage to get as much as 100 Gb of cloud storage and 60 days of cloud recordings before you have to delete and maintain the storage.
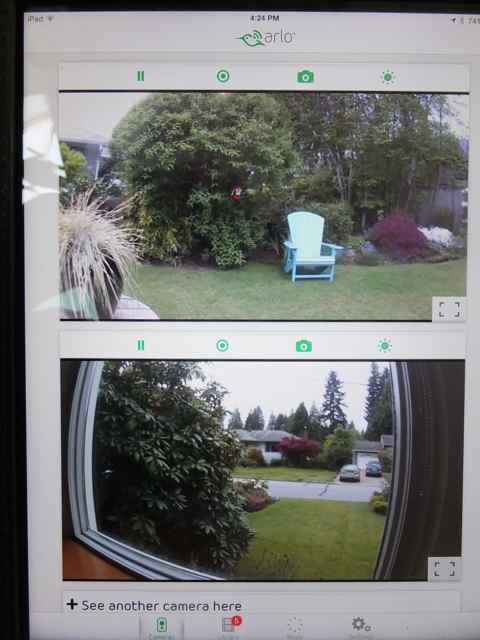
I found the Arlo app almost as simple to use as the system was to setup. Because the system is Internet based, you can view your cameras real-time from anywhere in the world that you have an Internet connection. With the app you can see up to four cameras at once. If you are interested in looking at one camera in particular you adjust it to see it full screen. You can also start recording, or simply take a photographic snapshot by tapping on the app. So when at home you might have motion detection off, but you can still quickly photograph or film someone you don’t know who comes to your front door.
The app is the best way to control, view, or modify the settings for each of the cameras. It allows you to turn motion sensors on or off, and adjust the sensitivity of the sensors. You can also turn email alerts on or off, and establish schedules for each day of the week by time of day to turn motion sensitivity on or off. For instance, if you are at work during the week you can automatically schedule the motion sensitivity on during those times but not necessary when you are at home. I particularly like how you can set the sensitivity of motion detection because I found with my Q-See system every insect that flew in front of the camera or leaf that fluttered would trigger recording another video. With Arlo it was easy to decrease the sensitivity so there were far fewer unnecessary recordings.
 Video Quality
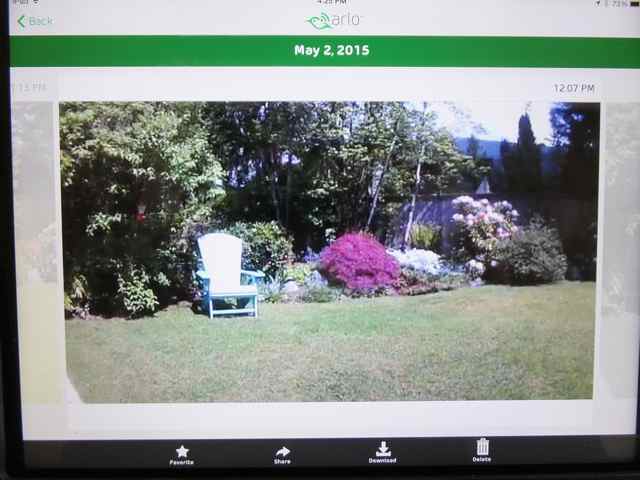
The Arlo cameras are all high-definition 720p resolution, and I was very favourably impressed with the quality of video , at least during daylight. When I compare it to my Q-See system the Arlo was definitely clearer with much better colour. I did notice with really bright daylight the colour becomes a little washed out but nothing that would impact the surveillance qualities of the camera.
The night vision capability of the Arlo camera was not nearly as good as my Q-See system. I am not surprised because the infrared of the Arlo was less intense than my current system. The Arlo night viewing distance is rated about 15 to 20 feet, whereas my Q-See system will easily cover twice that. This is something to consider from a security perspective. If your night monitoring requires greater distances then either Arlo is not a good solution or you need to consider placing an extra camera in the area, which is easy to do.
 Flexibility
I found the best feature of the Arlo surveillance system, besides the simplicity, is the flexibility to quickly change how you are using it. The cameras are fully wireless (data and power) and fully weatherproof so they will work inside or out. This gives you the ability to move the cameras any place you need them on a moments notice. Depending on what you are doing, you can more effectively use the system.
So if you are home and feel less of a need for security cameras, use them as a baby monitor or keep an eye on the new pet. Monitor the new bird feeder and film all the new birds showing up for a feed. Use them to monitor the elderly in-laws in the suite downstairs. Then when leaving for the day or for a weeks vacation move them to your entry doors to perform as a security system.
When you move a camera that is all you have to do. Pull it off one magnetic steel mount and place it on a different one. All the while, the camera remains synched to the base station and is operational—still ready to record.
Comparisons
The Arlo system compared to my Q-See system has a lot of benefits. It is tremendously simpler to set up and use. Both allow you to monitor cameras anywhere in the world through using the Internet. Arlo, being fully wireless gives a lot of flexibility in being able to move cameras around. The downside to that is that it is battery powered so you need to consider the cost of batteries each year. They claim to last about 6 months. Arlo video clarity is great, better than my system, but the night range is not as good. The last difference is that Arlo has no DVR, instead uses cloud storage. The basic free package is too bare-bones and so getting low maintenance storage will cost a monthly fee.
Overall, the Arlo security camera system works extremely well, and has the benefit of simplicity, mobility, and flexibility. The downside is the need to keep feeding it batteries and the potential cost of additional storage, depending on what your needs are.

