
With Bluetooth speakers and other smart devices already making useful additions to any home, why not also enjoy the feeling of security and utility offered by a dedicated, wireless digital security camera system like the Arlo Pro 5S?

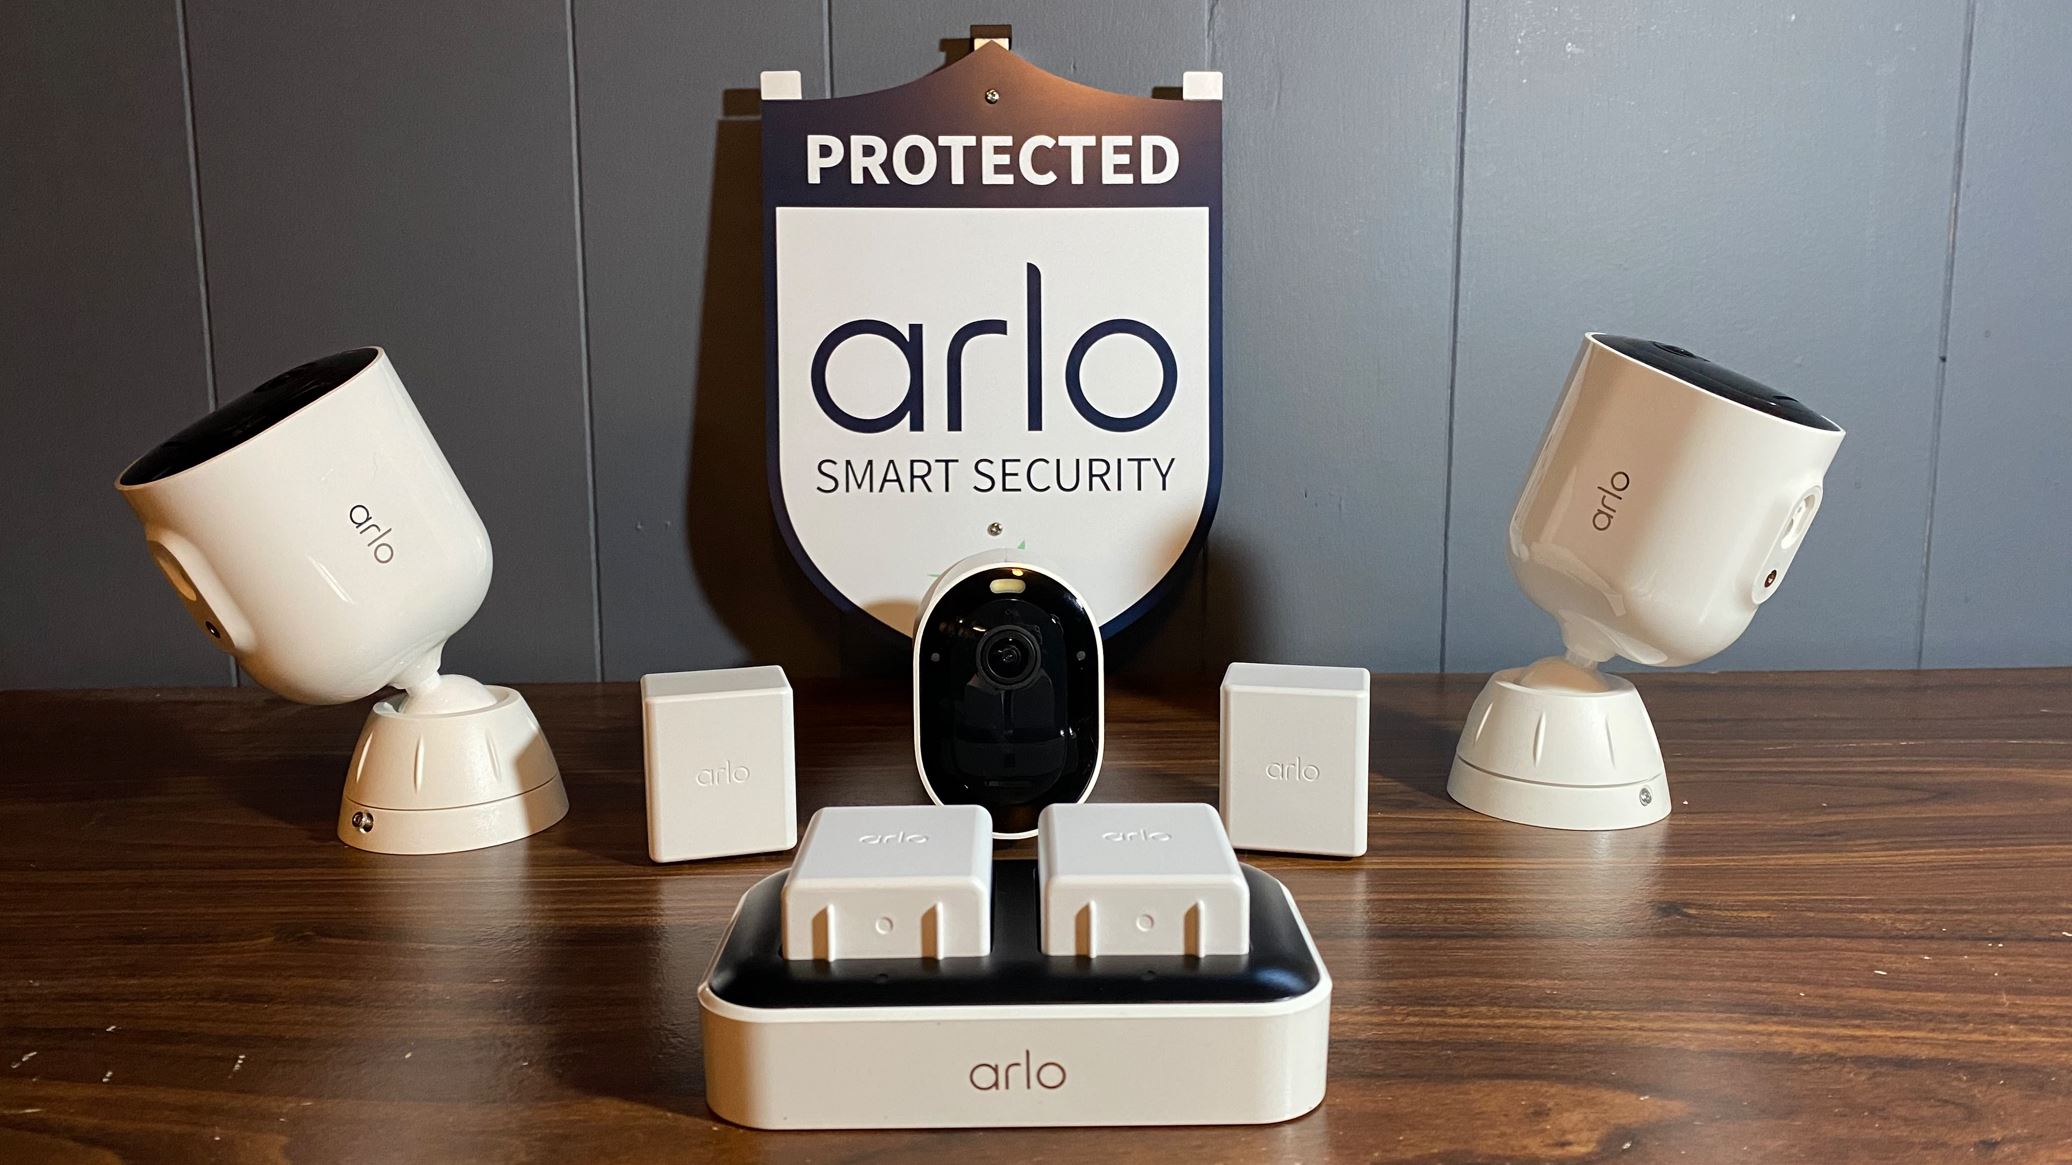
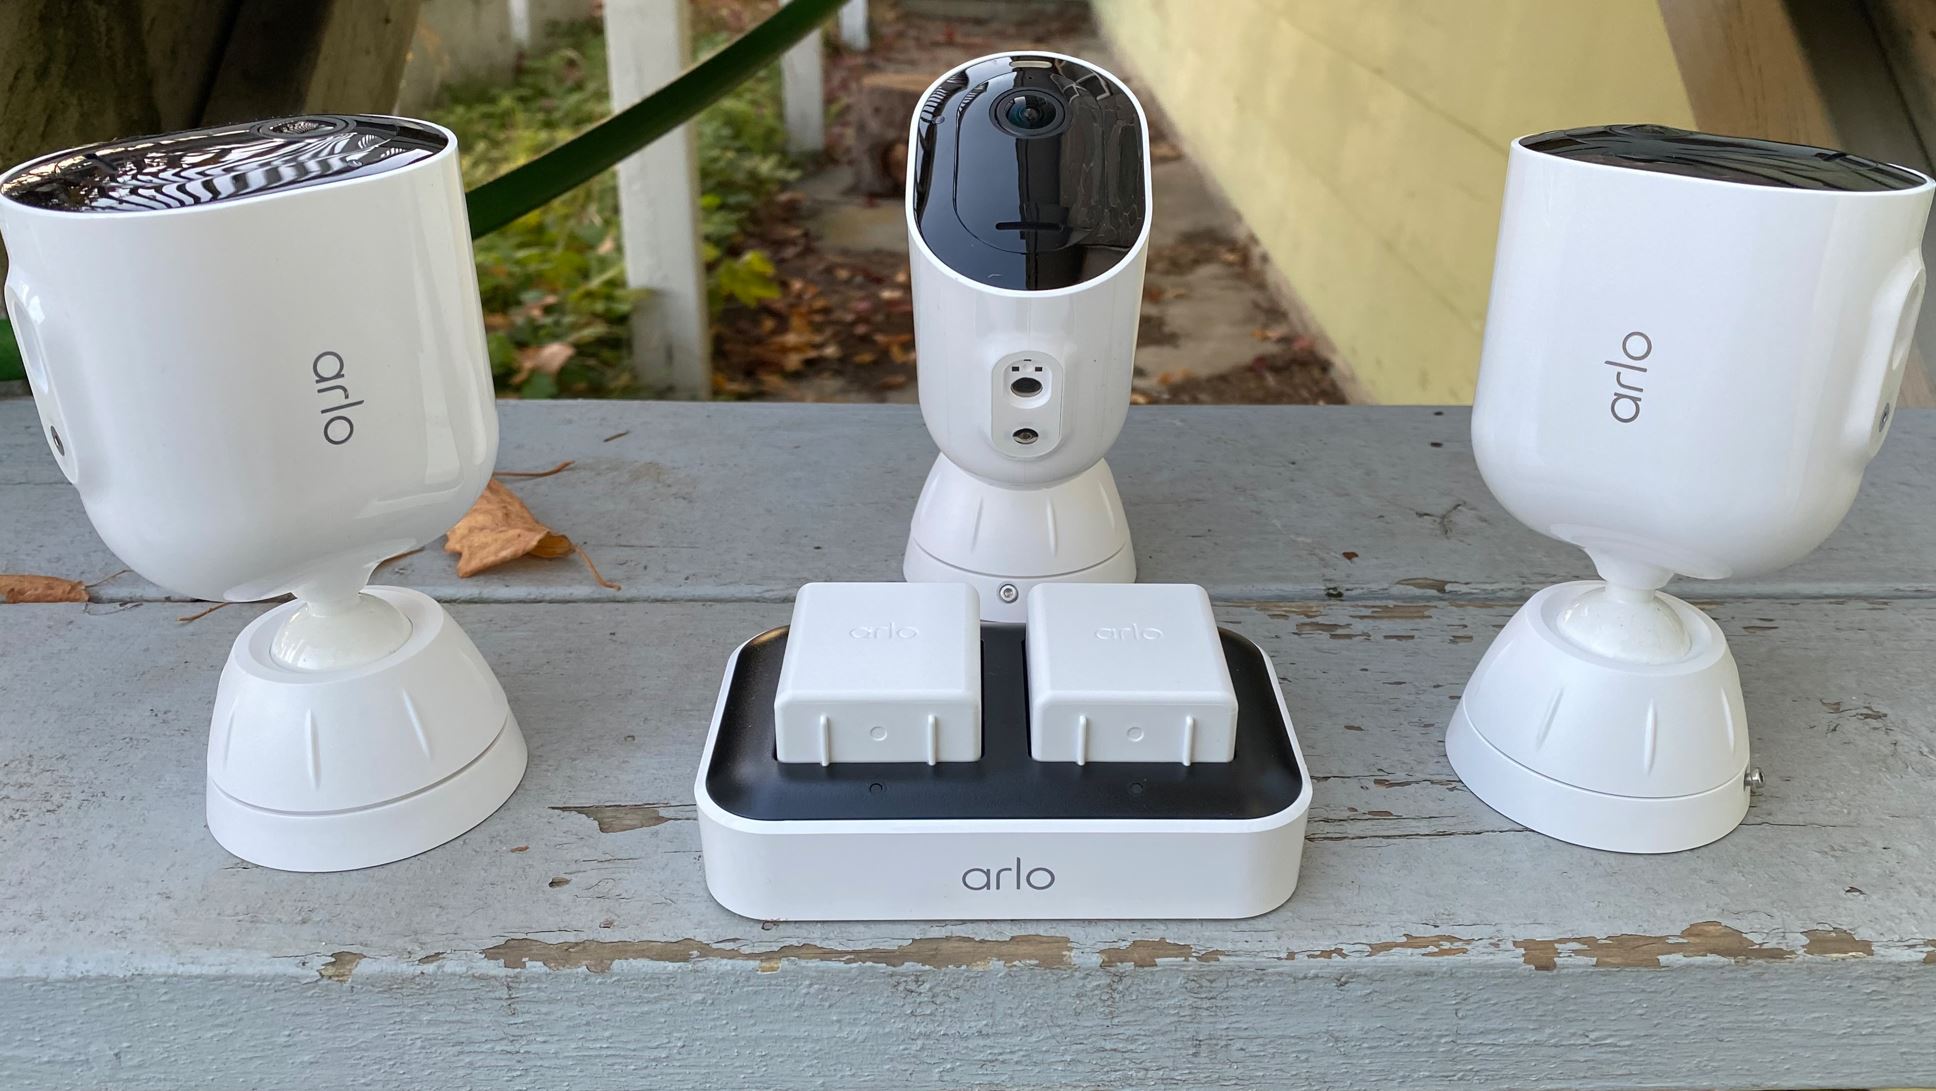
In this full package of the camera system you’ll get everything you need including three fully independent, wireless cameras featuring built-in anti-theft designs. The Pro 5S 2K cameras also feature weather durability, advanced video features, and plentiful options to control and customize your devices. The reliability of Arlo’s high-quality cameras will make sure your home is consistently better protected, no matter the time of day.
Features of the Arlo Pro 5S security system
- Enhanced battery performance for months of coverage with power-saving settings enabled
- Excellent image quality with 2K HDR video for zooming in on crucial details
- 4 rechargeable batteries and a multi-battery charger in addition to theft-proof mounts
- Wide 160° viewing angle and colour-enhanced night vision for complete and easy viewing
- Motion, sound, and light detection alongside a spotlight for deterrence and colour details
- Completely wireless setup and use with automated schedules and shortcuts
- Remote monitoring to view from anywhere with two-way echo-cancelling calls
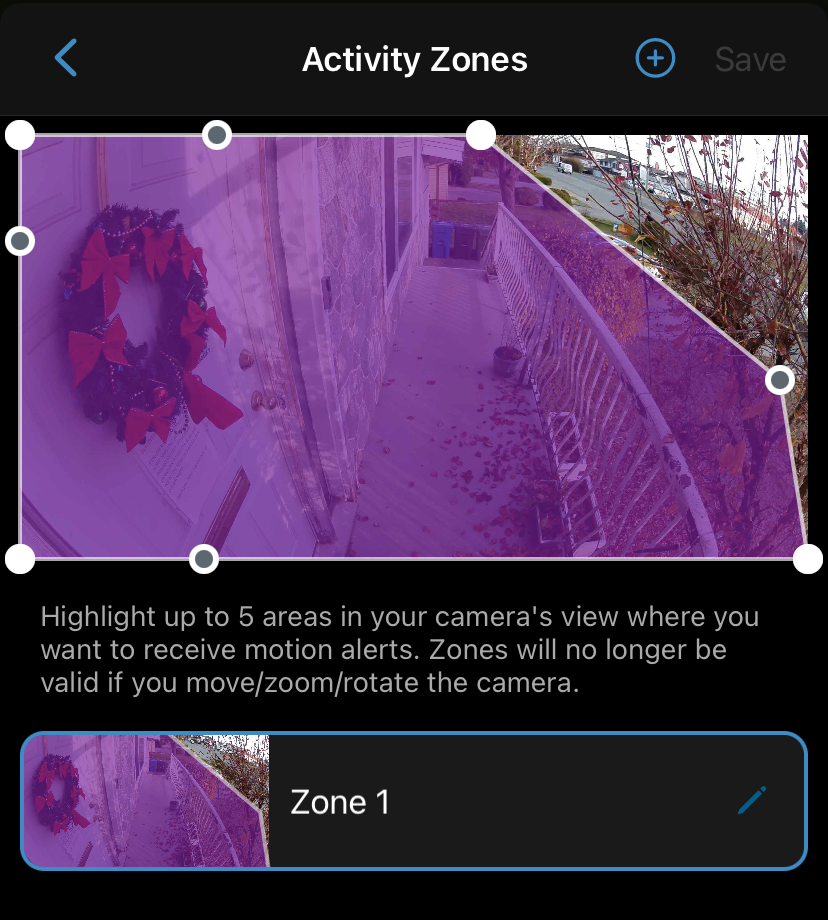
- Customizable notifications, activity zones, and more settings to receive only your selected alerts
- Plenty of personalization options for setting up different locations with individual settings
- All weather protection for use in any location from rain, storm, or snow
- Advanced Privacy controls for more secure personal information and recording
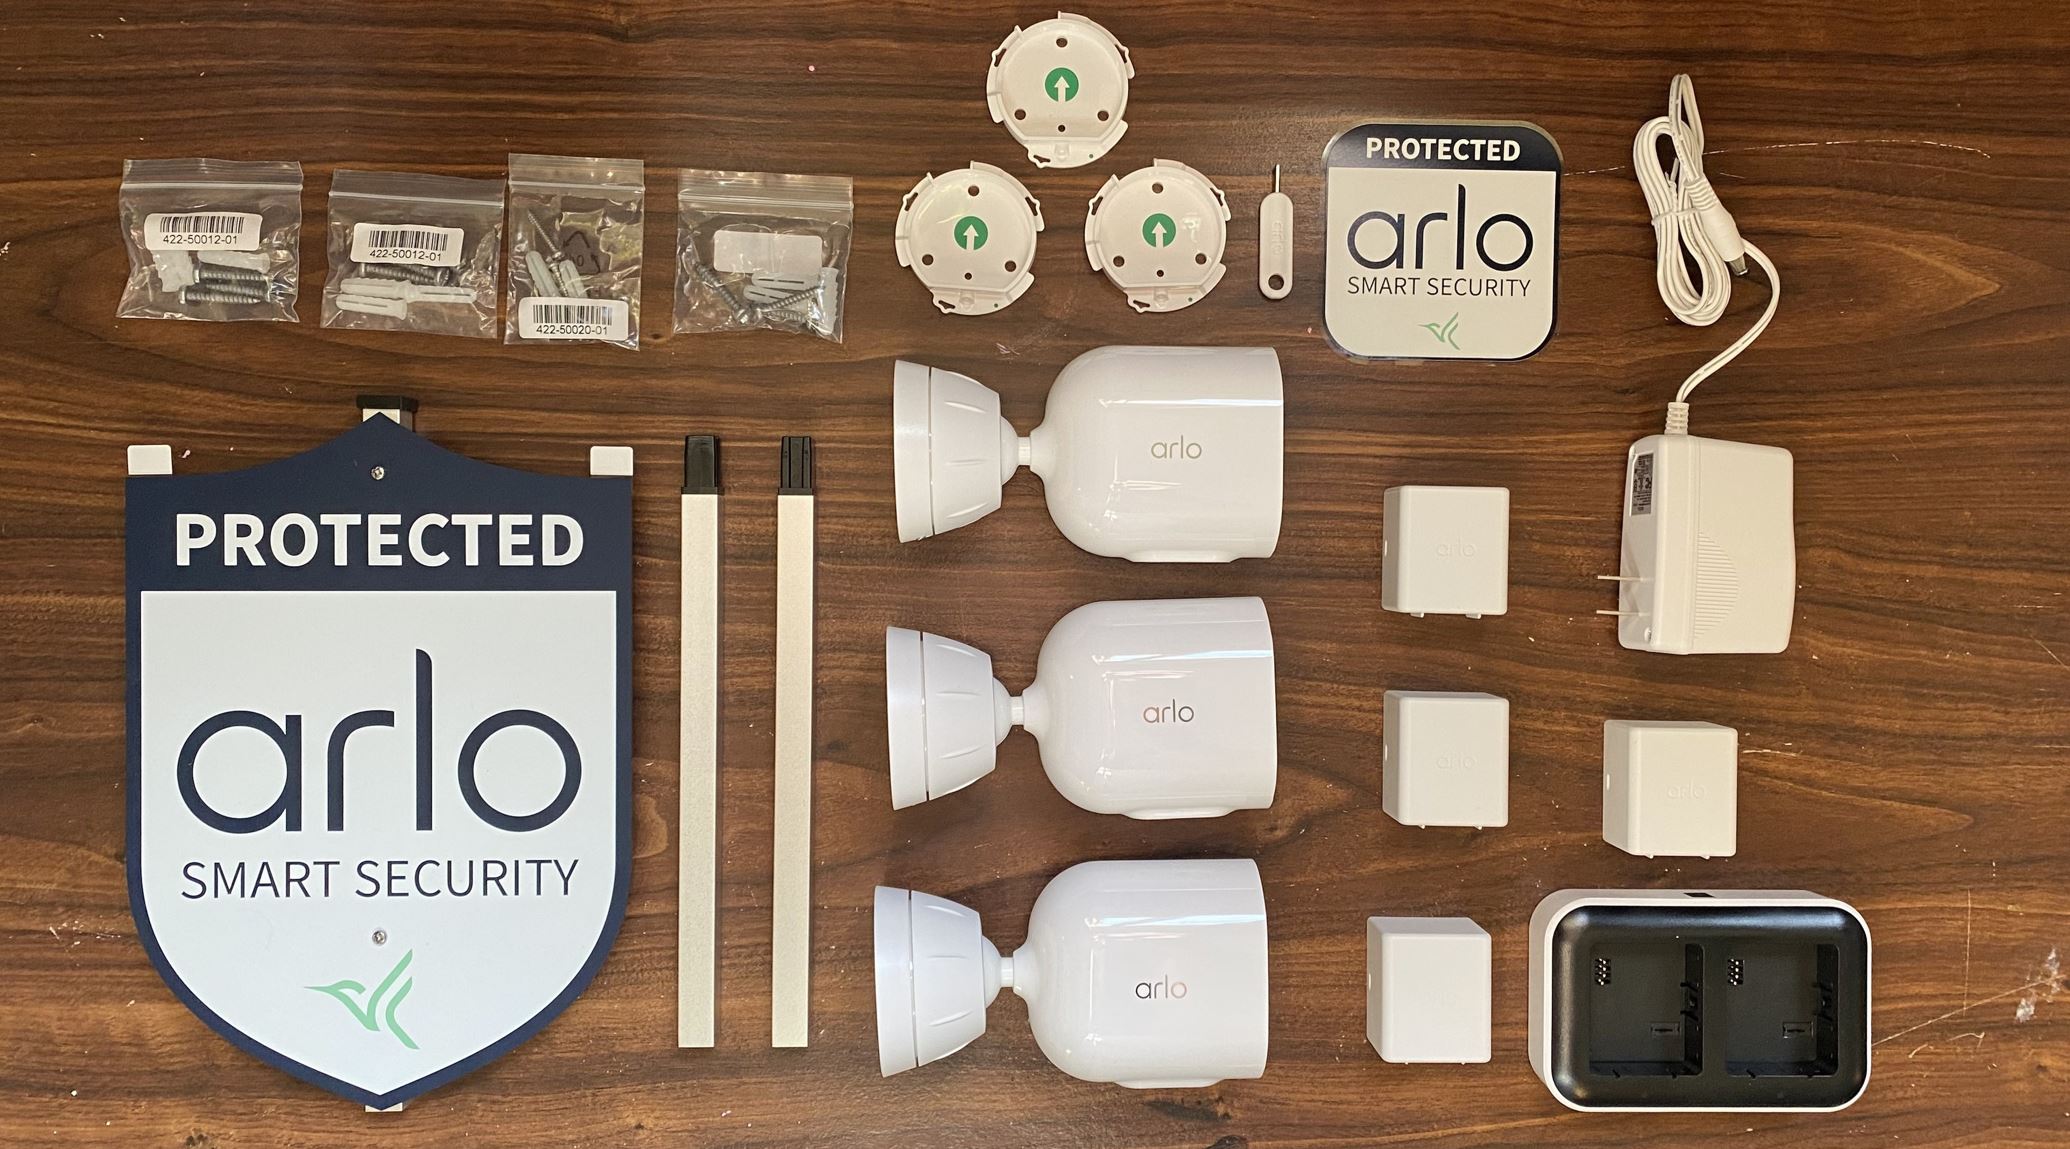
Unboxing the Arlo Pro 5S security camera system
After taking everything out of the box I was relieved to see how simple it would be to set up the cameras. Inside the box came the three independent cameras, theft-proof mounts, a key to open them, four batteries and a multi-battery charger, and an Arlo security sign and sticker. I appreciated that all the screws and other pieces needed to set up your devices came fully included. The theft-proof mounts and screws even came with drywall anchors for indoor use.
While it is a more traditional method, the added Arlo sign and sticker to display on your property do help as an added layer of deterrence. The sign itself matches the quality of the robust security system with its sleek design and quality materials. The only thing not included in the box of course is a smartphone used to control and access all the various features of your new wireless cameras.
Charging and inserting the Arlo Pro 5S camera batteries
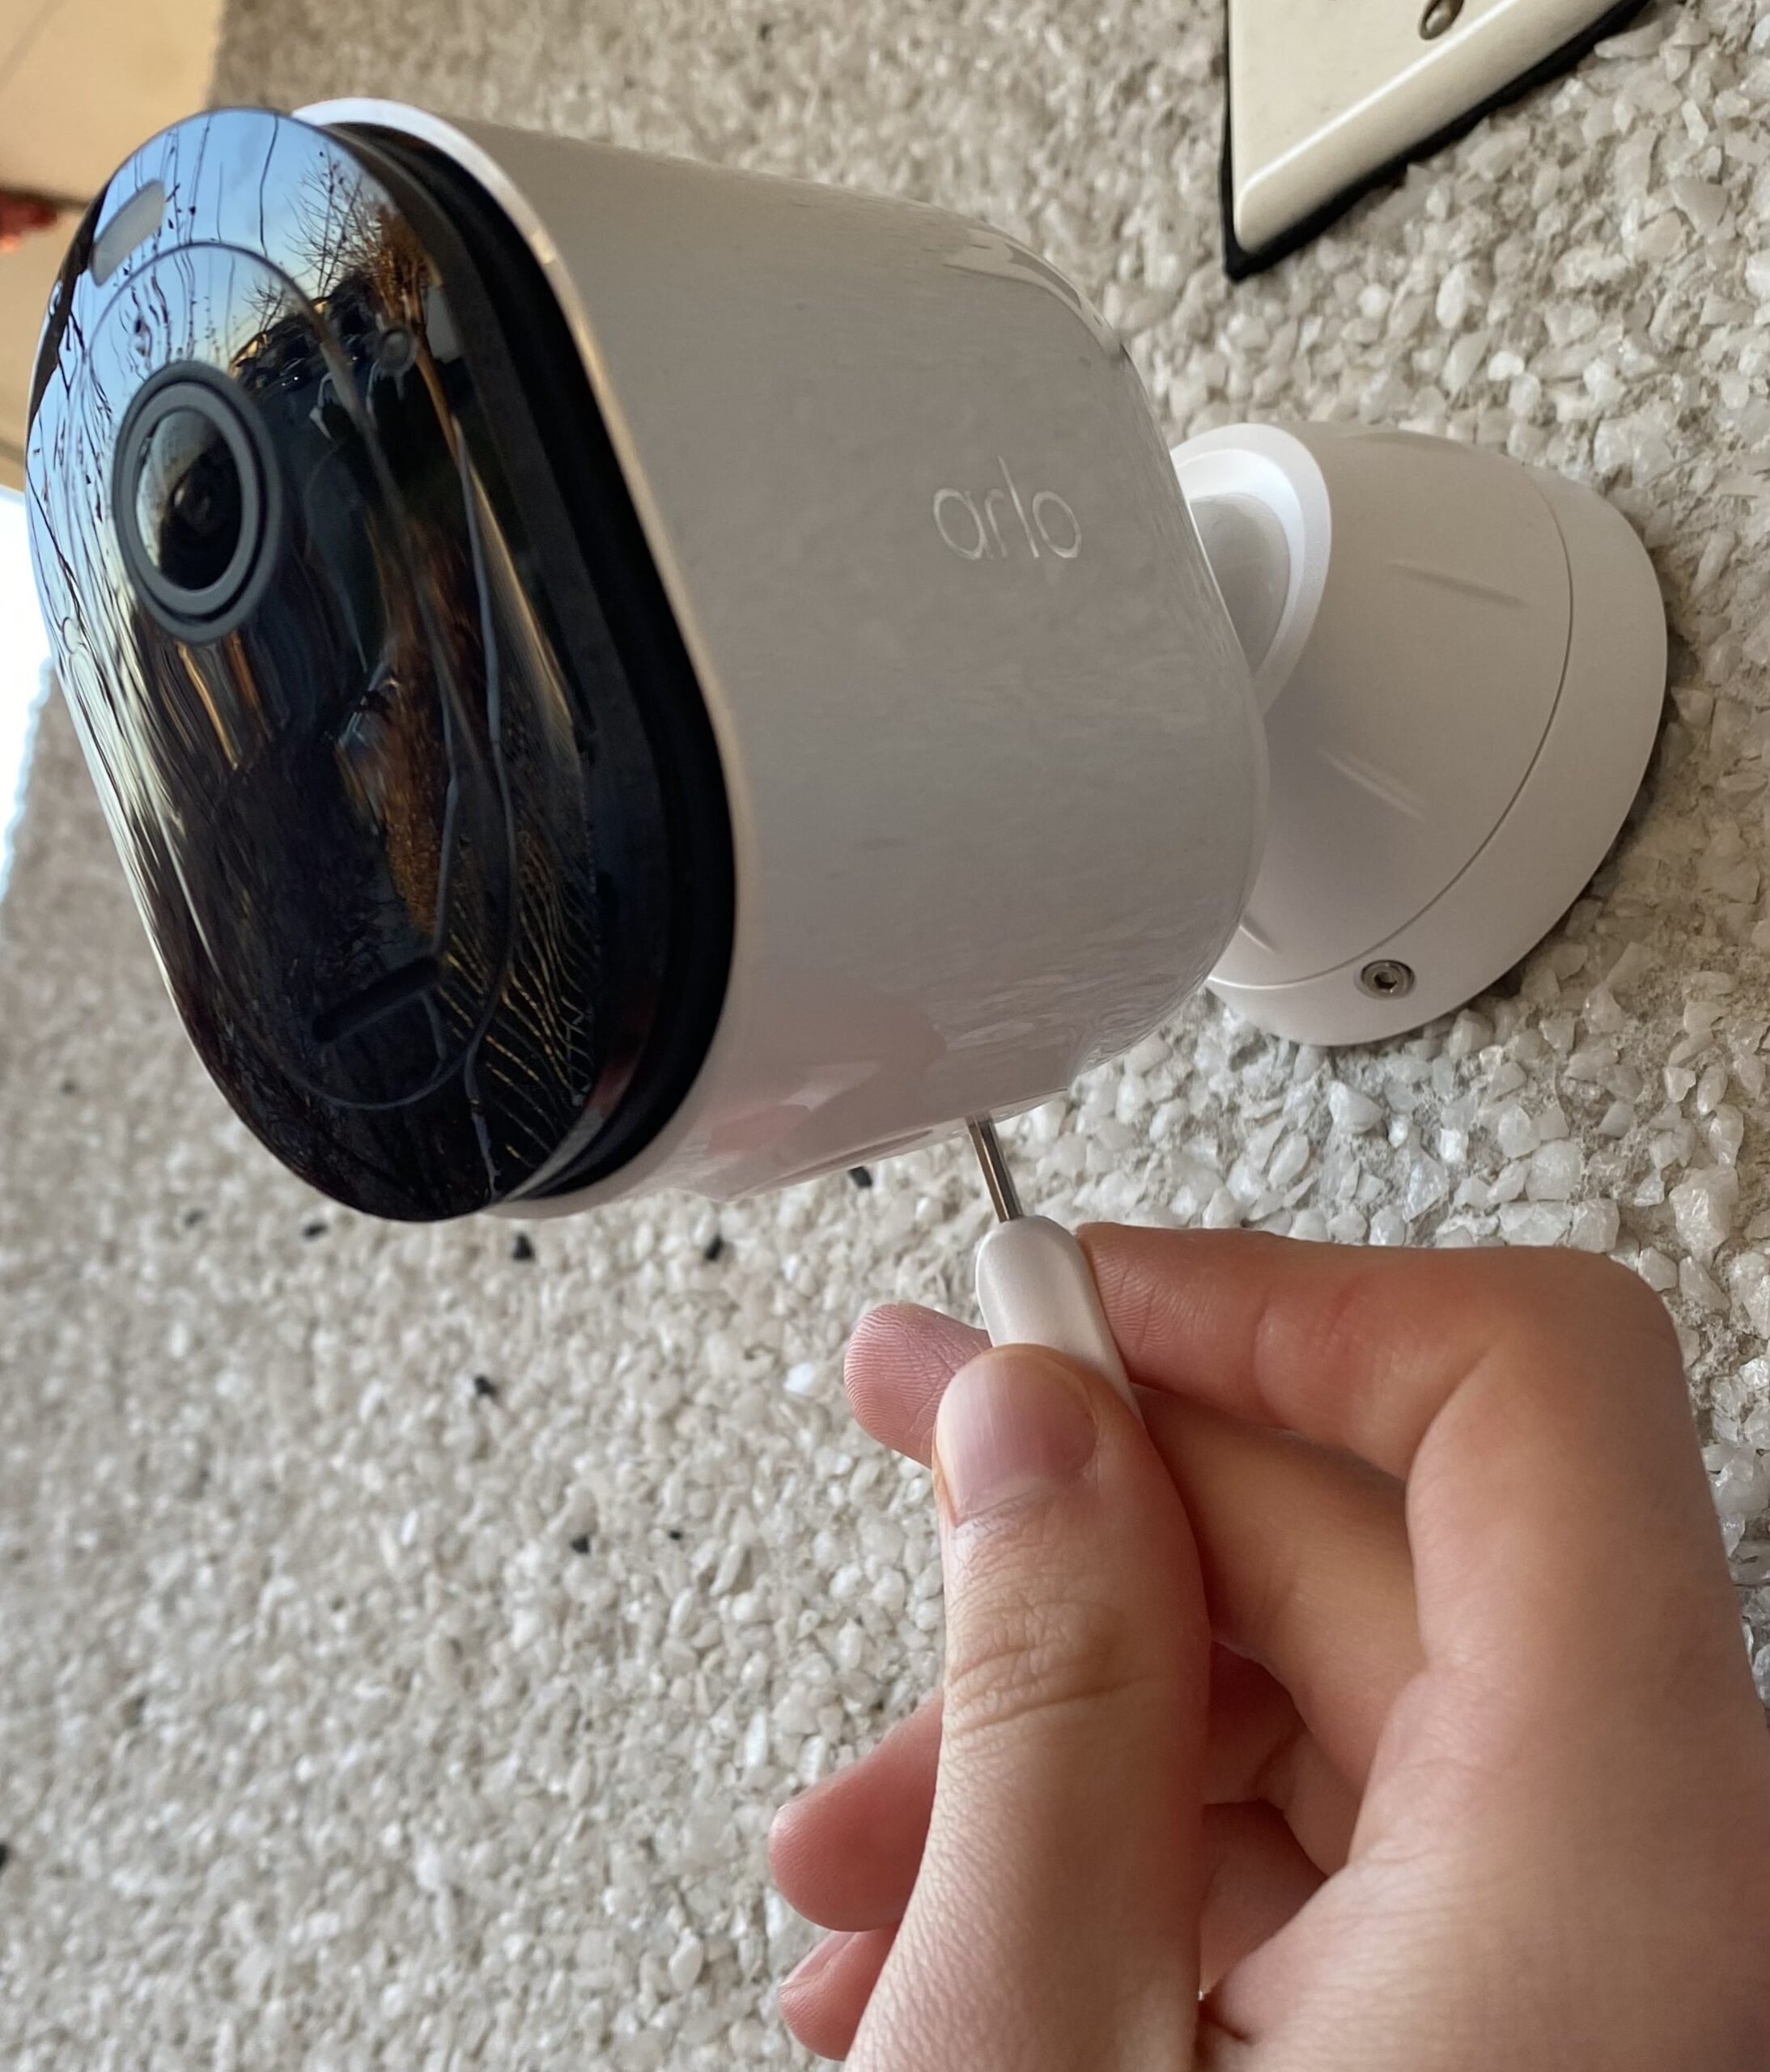
Once you’ve set up your Arlo Pro 5S camera system the first thing you need to do is insert the removable batteries. I’d recommend charging your batteries beforehand, after which is where the Arlo security key comes in. To replace a battery you have to use the provided key in a half-clockwise motion, letting you remove the camera from the shell. The design is similar to what you would use to remove the SIM card of a smartphone. Thankfully, this design can’t be opened with a simple paperclip alternative. The best part about this removable battery design is that you don’t have to take down your cameras to charge them like older models once set up. This design prevents even more vulnerabilities in other security systems, by making sure your smart cameras are up and running at all times.
The screwless design makes your cameras thief-proof unless you have the exact Arlo key required. After all, what’s the point of a security camera if just anyone can remove the battery to disable it? Still, with the security tool, keeping your batteries charged is a breeze. Not that you’ll need to replace them often when they can last for months without running out, though it’s always good to ensure your batteries are well charged and swapped out often, as you don’t want to realize it was out of charge at a vital time.
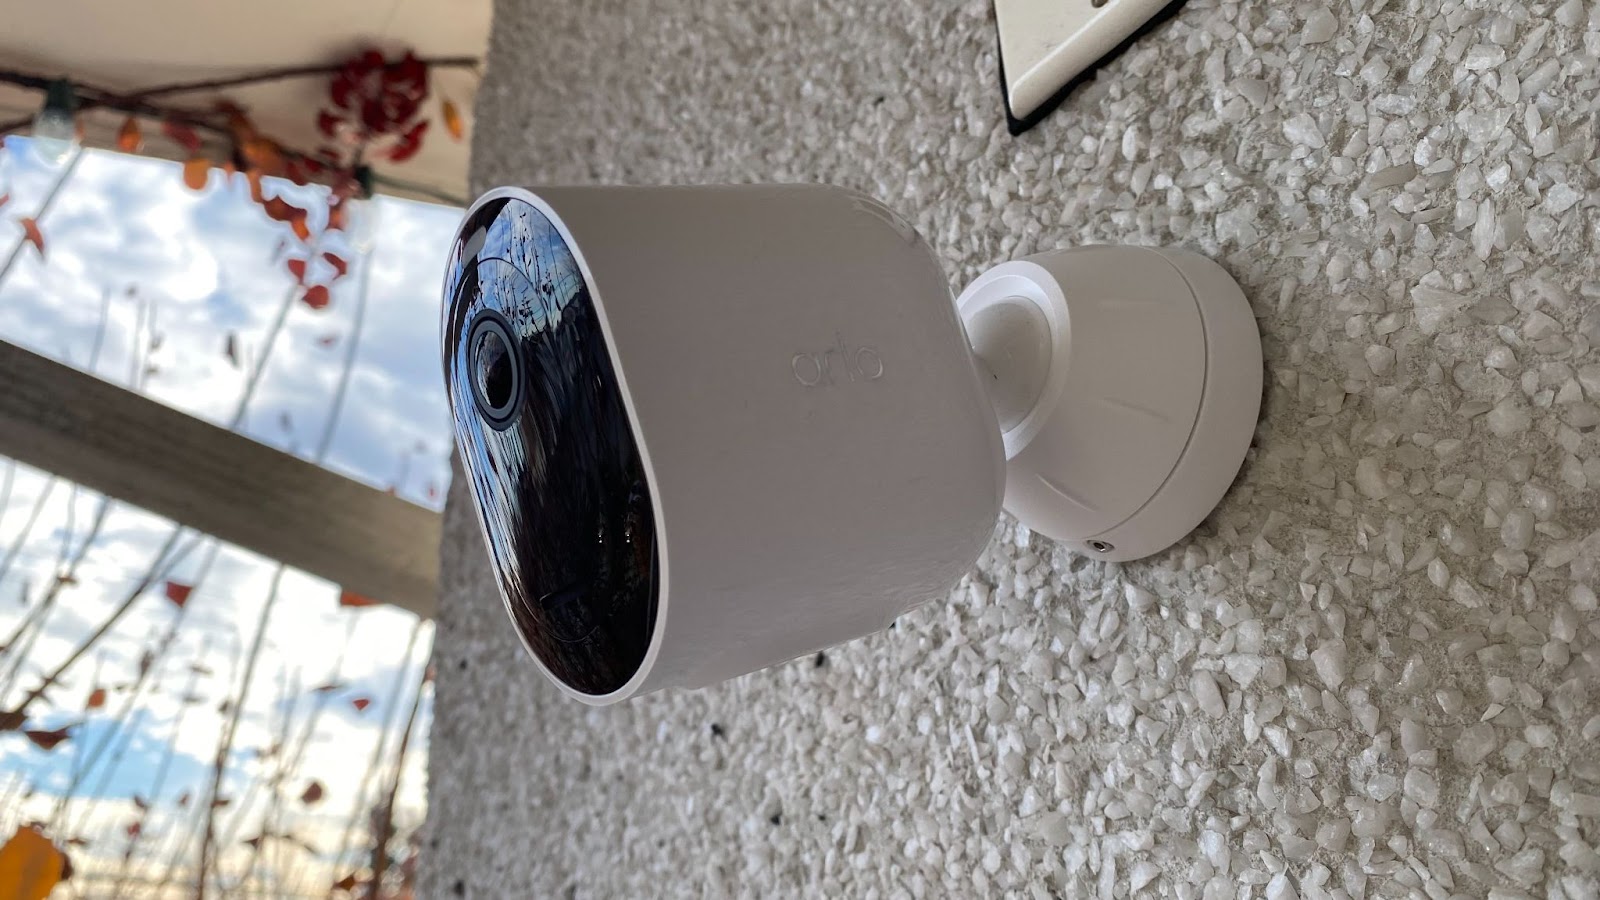
Fully setting up your Arlo security cameras
When it comes to any security camera, location is the most important factor in your overall experience. When figuring out the optimal installation position, I would recommend starting above head height in an area with an entirely unobstructed view. An ideal spot like this ensures you can see everything in a wide area, while still being able to make out close details like faces and packages. I would also recommend connecting your cameras to the app beforehand for a live preview of what the camera will see. My preview let me see the best possible angle without having to repeat the drilling and installation process again.
The app was very straightforward to use and set up given the detailed virtual step-by-step instructions. All I had to do was download the app, make an account, connect to my Wi-Fi, and it was ready to go. Once the app is prepared, you can connect your cameras using a scannable QR code to sync with your mobile device. When putting a battery into your camera the first time it will automatically enter sync mode, but there is also a sync button if you miss the pairing window on the camera itself. After a few seconds, a blue light will start flashing letting you know it’s ready to pair. I did have a bit of trouble getting the camera to scan properly, but I was able to after a few minutes of trying. Overall it wasn’t too difficult, it just takes a bit of patience to line up the appropriate angle and distance it needs with the few-second delay. Even with this process, the entirely wireless design of this security camera system makes it much easier to set up and manage compared to a traditional wired setup with cable routing.
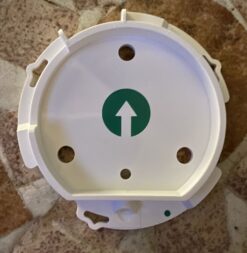
At first, I tried mounting my camera under the overhang of my roof, but without the proper tools I chose to opt for a standard wall mount instead. Luckily for me, there was already a drill hole at a decent position I could reuse. But if you’re installing somewhere for the first time make sure to double-check your screw alignment with the anti-theft wall mount, using a pencil or pen to mark off where you need to drill. The anti-theft mount is much smaller and lighter than the entire camera shell, making it drastically easier to prepare, especially with an added directional arrow painted on for proper alignment. I found the drilling was the most difficult part of the setup, with everything else that came after being a breeze in comparison.
Video quality and features of the Arlo security cameras
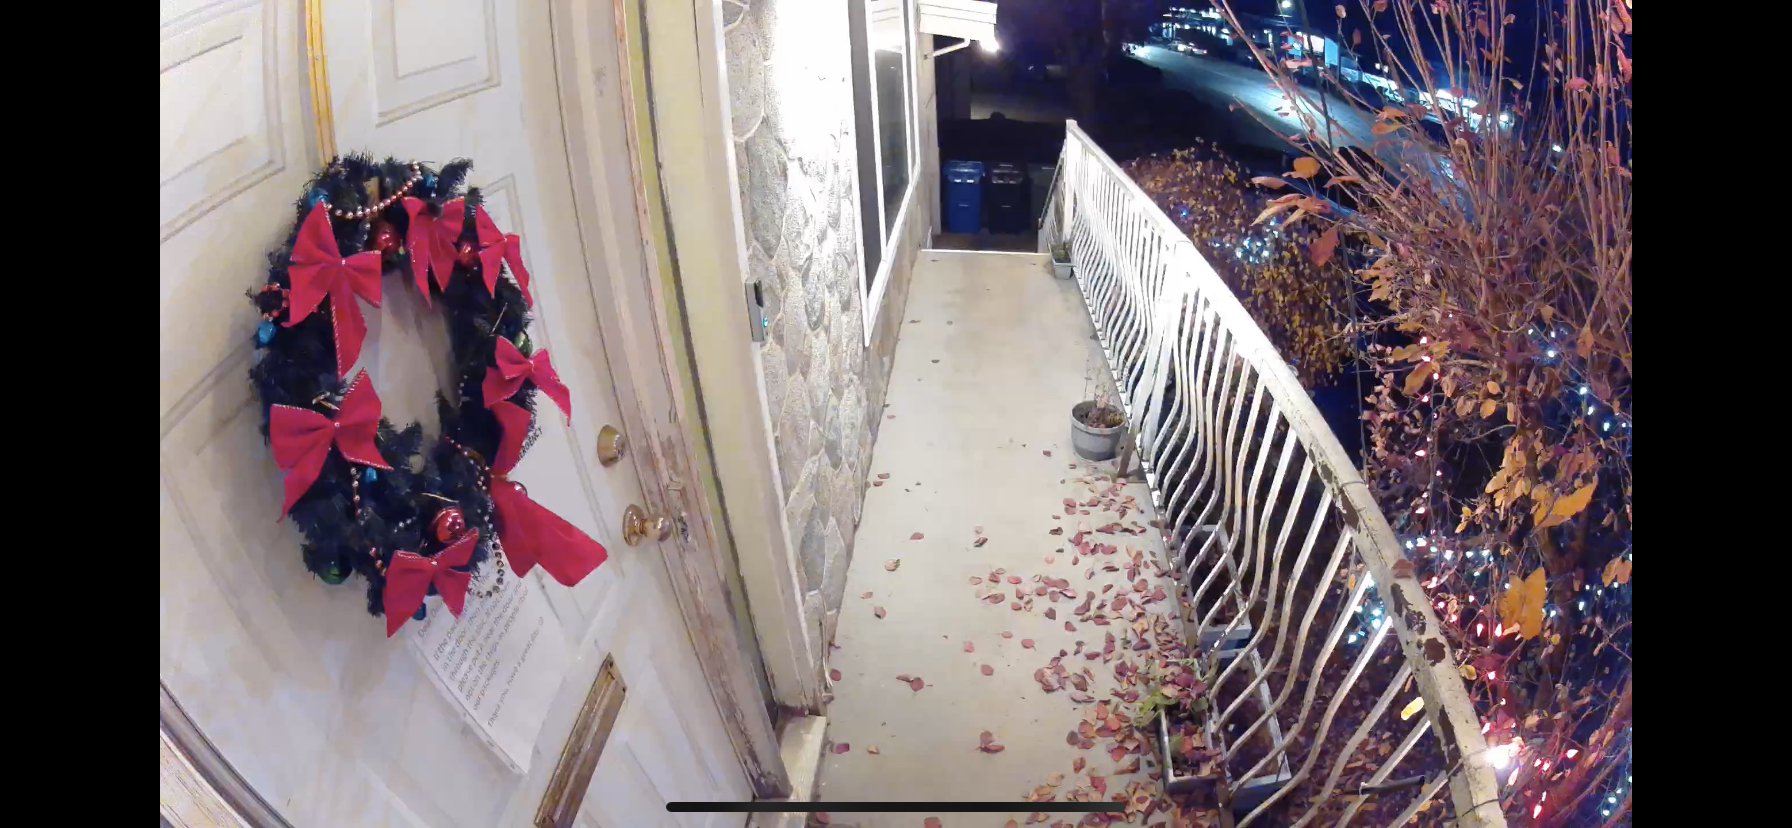
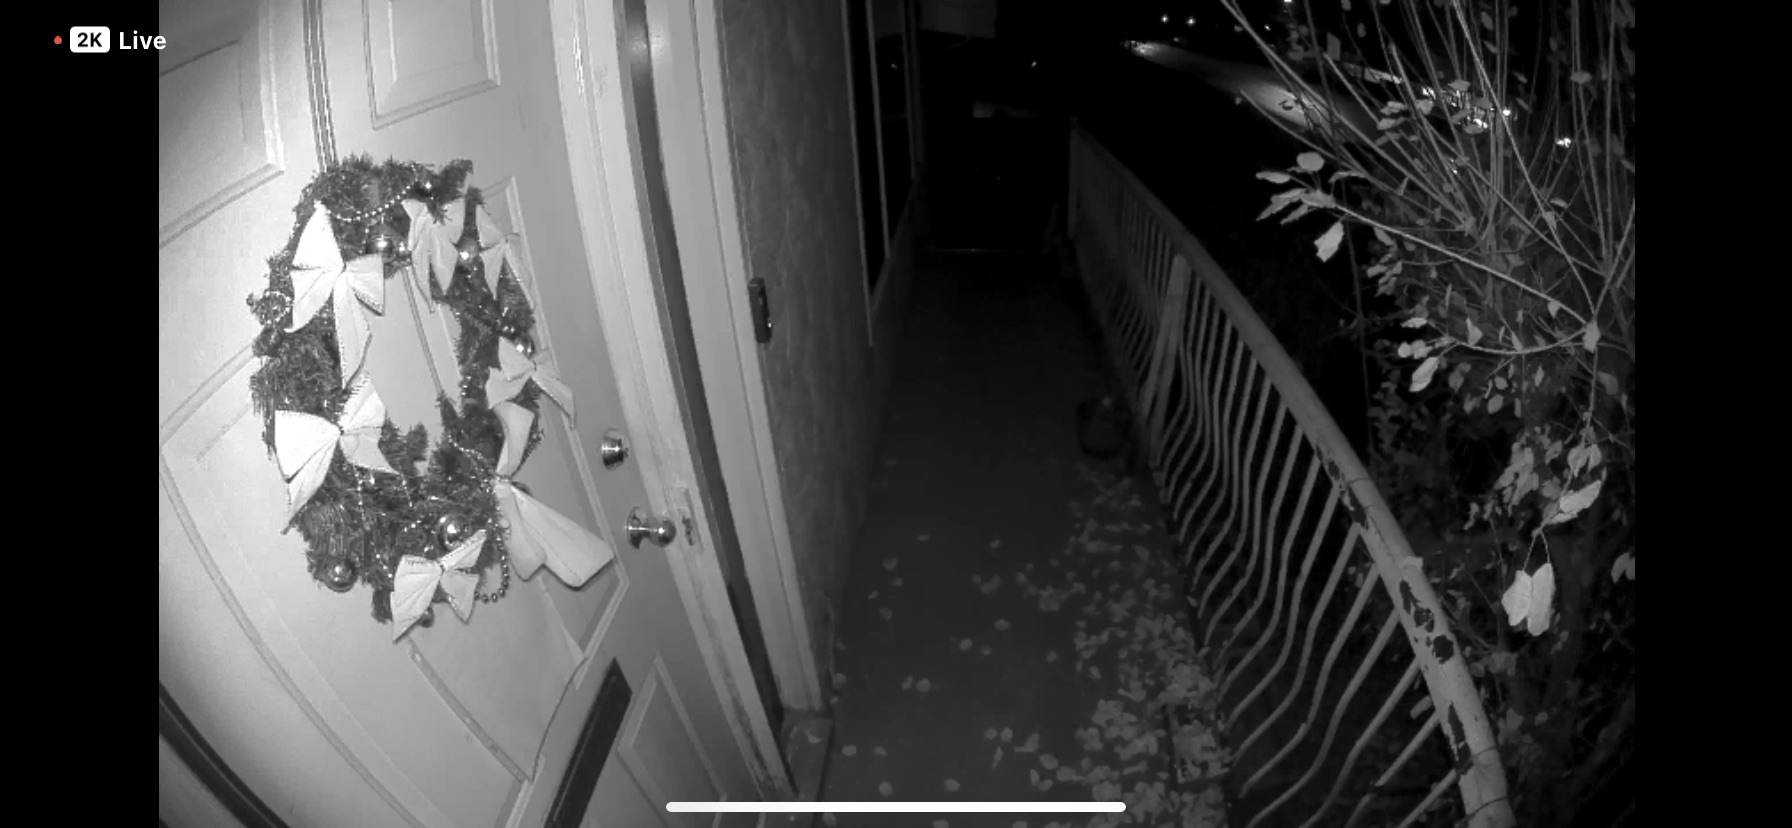
The most important part of a security system is the security cameras themselves. At this price point, the Arlo Pro 5S is one of the best options out there in terms of camera quality and features. Each of the Arlo cameras has a high-fidelity 4MP HDR camera for recording footage at 2K resolution video. On top of being able to take 1080p Full HD screenshots, it does this all in a wide 160° viewing angle. These cameras also have a powerful night vision mode for picking up details late in the day. Meanwhile, the included spotlight can turn on from motion or sound. The light not only deters potential intruders but also allows your camera to pick up a full-colour spectrum to see crucial details.
The video quality even boasts being able to take screenshots and recordings of license plates or faces. After using the 12X zoom I can say it’s powerful enough to back up this claim, but you might have some trouble making out these details at longer distances. Other features of the camera itself include a microphone with two-way audio recording, allowing you to converse with anyone at your door that triggers the motion sensor without worrying about any echo. I found the delay between activity on my camera and phone to be about 4-5 seconds on average. However, the delay time can vary based on internet speeds and your router location.
All-in-one access from the Arlo Secure app
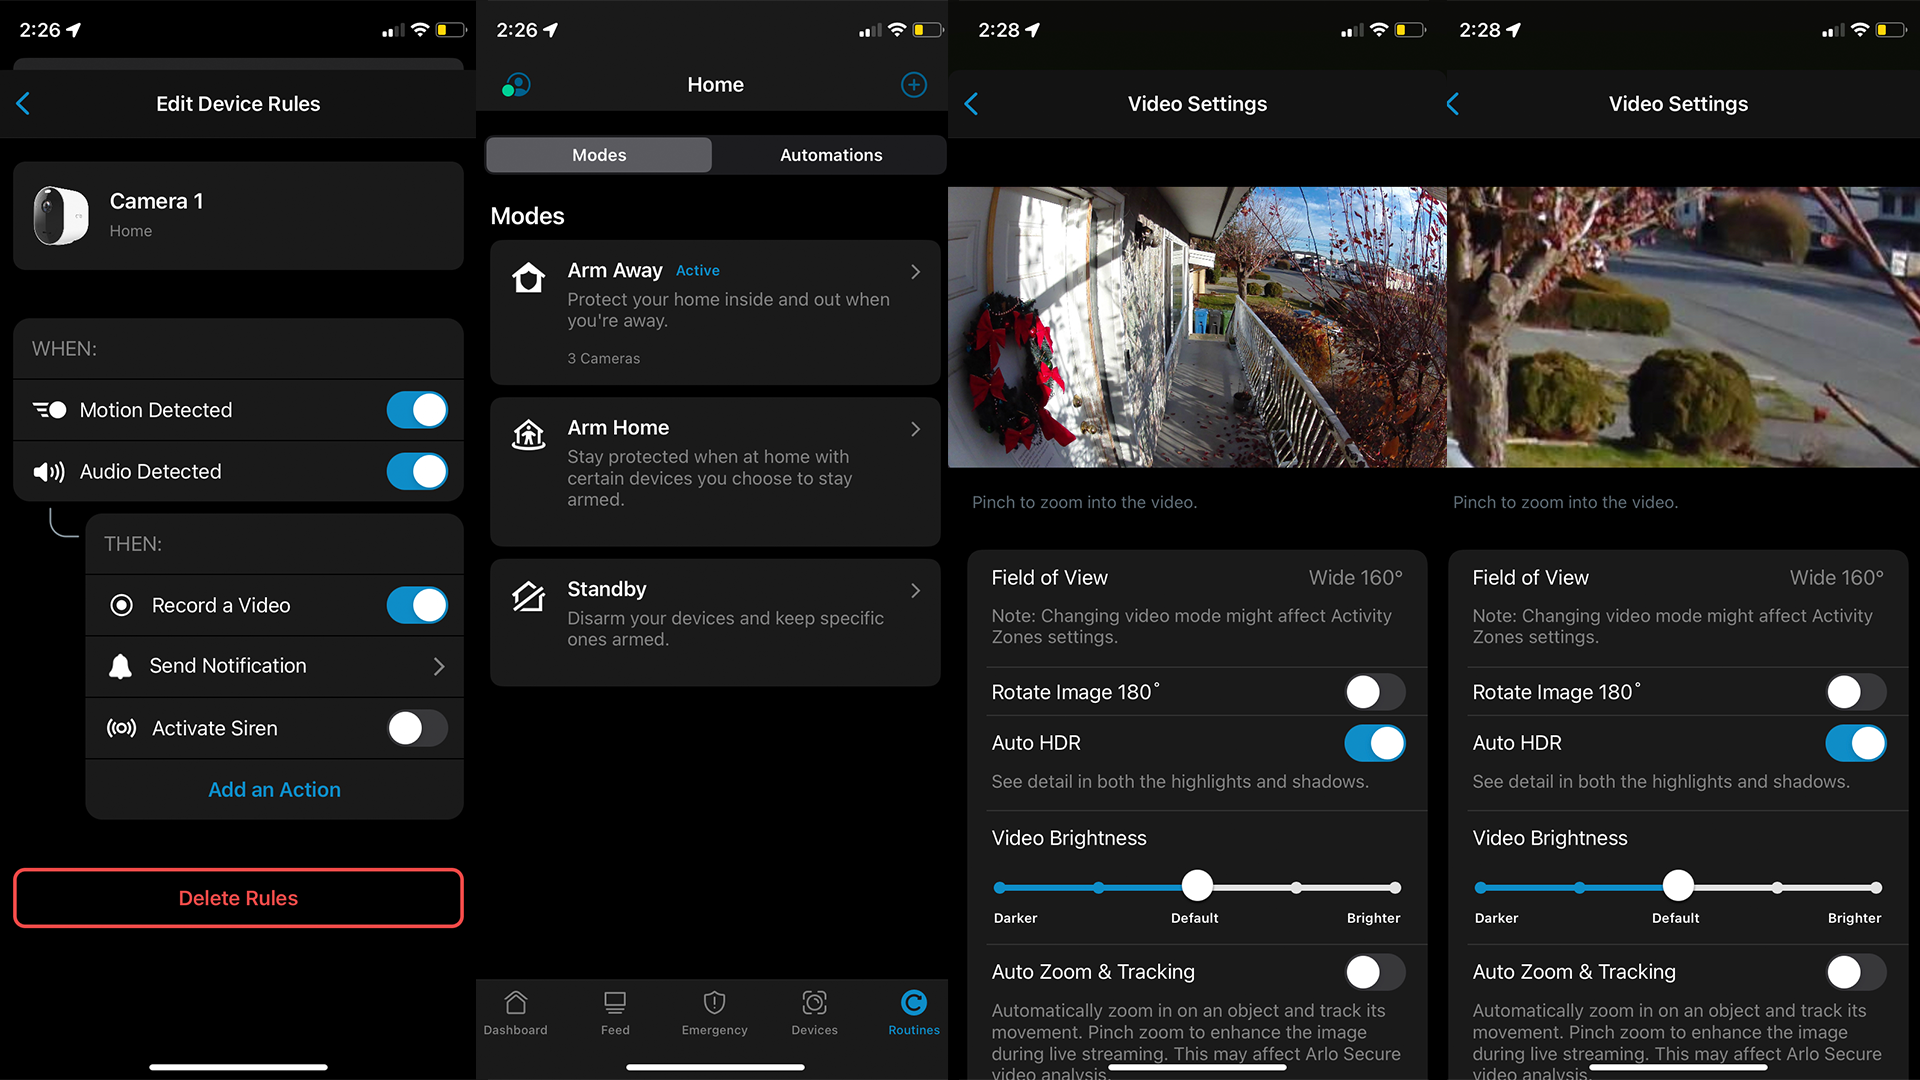
Since the app is what you’ll be looking at the most when using your Arlo security cameras, the design and ease of use are all the more vital. After using it extensively I can say the Arlo app does not disappoint. Offering plenty of customization for the location of shortcuts, custom commands, and easy-to-navigate menus.
One of the settings I disabled right away was the car and sound alerts. Since my camera was positioned close to a road with cars driving by in view, it would be set off multiple times a minute. The best part is all these settings can either be applied globally across all your cameras or only to select devices. This allows you to have custom settings for cameras located around different parts of your home. One example is having stricter motion settings for areas like the front of my garage, where indoor cameras would only be activated after a certain time of day to detect any suspicious activity or break-ins. You can even set activity zones to focus exclusively on where you want to be notified. This feature prevented excessive recordings of pedestrians and cars driving by, which is especially handy depending on where your camera is positioned.
Arlo Secure with a premium experience
Another thing to keep in mind is the Arlo Secure premium subscription plan. This plan offers features like package detection, access to cloud recording, and smart interactive notifications. While some may be concerned about the additional monthly cost, it’s not required to use. I also didn’t find the advanced features essential or that they take away from the experience of the basic free plan.
I did really enjoy being able to try out the premium features for a month for free with a purchase of the device, especially when I didn’t have to sign up with any payment information like a traditional trial. This free period is great for trying out all the features firsthand to see if the upgraded utility would be a better fit for your security needs.
My favourite feature of the premium plans, aside from the cloud recordings, was the package delivery alerts. These notifications let me know exactly when my packages are delivered, alongside a recording of the delivery. For holidays or any season of travel, I can easily see this feature being a lifesaver for avoiding added stress. It can prevent headaches and schedule conflicts over delivery times when waiting for packages to arrive. Also, a security camera on its own deters porch pirates from ruining your day. The package smart notification feature allows me to contact family or neighbours to pick up deliveries on my behalf while I’m away as well. Just make sure to remember to turn this setting on, as it isn’t enabled by default.
Getting the most out of your Arlo Pro 5S batteries
If you want to get the most out of your battery I would recommend turning off less important notifications. Over time frequent recordings can not only fill up your feed but drain the battery a lot faster. By using fewer notifications and more power-saving options, your Arlo security camera battery can last you up to a whole 6 months, and even longer when paired with the Arlo Secure Link SmartHub. This hub uses dedicated Wi-Fi channels to minimize battery use. Not only does the hub increase the efficiency of transmission speeds, but it also allows for physical recording storage via a MicroSD slot.
The SmartHub is by no means necessary, but it could be a worthwhile upgrade in the future. Another feature that saved me when testing these out was the Low Battery mode. The cameras automatically enter this power-saving mode below 10% charge, which can prolong the lifespan a lot longer until you’re ready to replace the battery. The only issue I had was having a bit of trouble getting one of the batteries to come out at first. After a bit of research, I found a simple solution. All you have to do is push the camera fully back into the case, then quickly twist the security key clockwise which pushes it out just enough to be removed by hand.
What do you need in a smart security system?
By offering three independent cameras and a multi-battery charger, this Arlo system will cover almost everything you could want from a wireless security setup. Given the Arlo app and all the provided features, I think the added protection of a smart security system is definitely worth it if you can utilize all three cameras. After all, it’s hard to put a price on the feeling of added security and knowing that there is an extra layer of protection for your home and loved ones at all times.
No matter where you live, security is something you shouldn’t have to stress about. After having used these cameras myself they definitely made me feel safer knowing I have recordings and live previews of anything happening outside my home. Thanks to the many features and utility options, the Arlo Secure app was also enjoyable to use and easy to navigate.
You can find these Arlo Pro 5S security cameras and all of Arlo’s other devices at Best Buy. If you’re invested in the Arlo brand but want to see other device options, you can also find my review of the 2nd generation Arlo indoor/outdoor security camera pack on the blog.


