
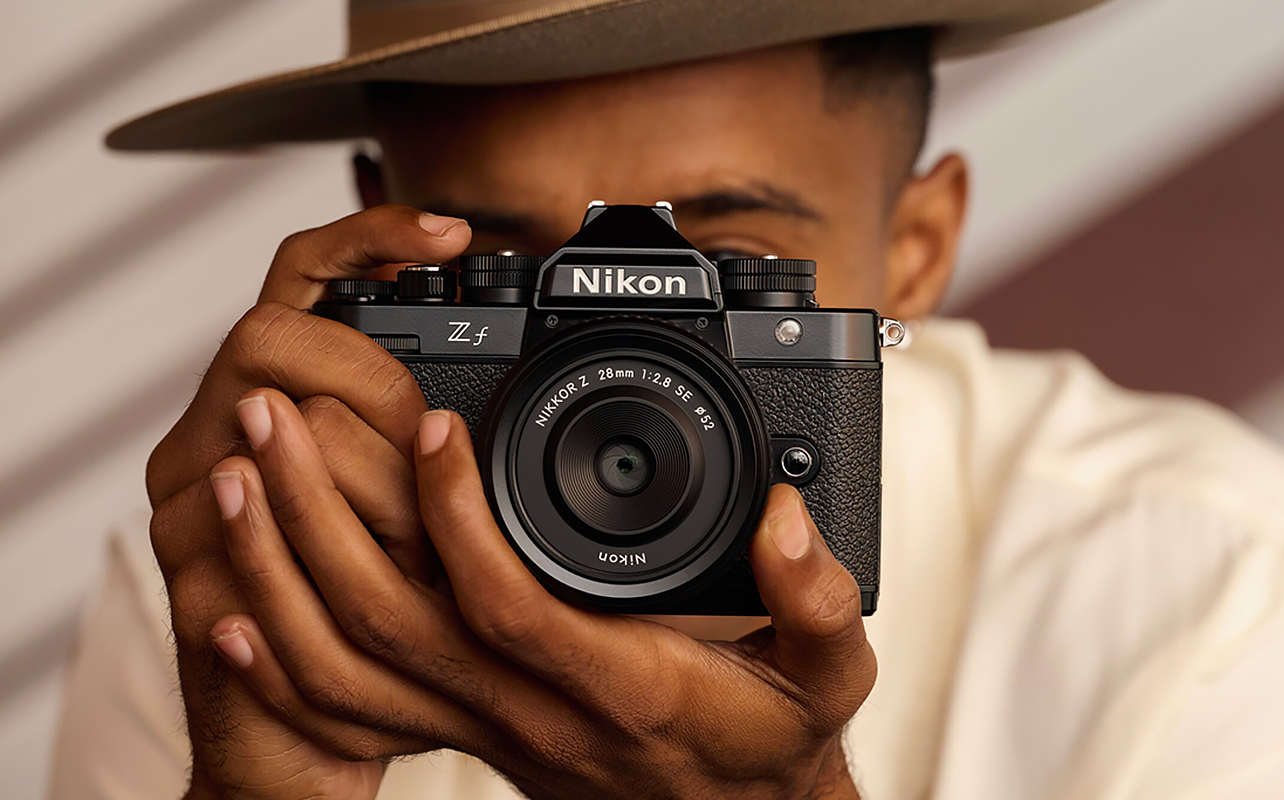
Photographers like manual controls because they offer unparalleled creative freedom. Whether you’re capturing the ethereal glow of a sunset or the dynamic energy of a bustling city street, manual mode lets you tailor your settings to the unique demands of each scene. It’s particularly beneficial in challenging lighting conditions or when striving for a specific artistic effect. When you have full control over your photos—lighting, motion, depth—you won’t have to rely on your DSLR or mirrorless camera to make decisions for you.
If you’ve been relying on auto mode and feel like your creativity is stuck in neutral, this photography guide will help shift things to another gear. We’ll walk through what shooting in manual mode really means, break down key camera settings in simple terms, and show you how to balance them to take beautifully exposed photos.

What is manual mode on a camera?
Shooting in manual mode puts you in the driver’s seat for all three parts of what’s called the “exposure triangle,” namely ISO, shutter speed, and aperture (which you’ll learn more in the next section). Setting these yourself gives you full control over exposure settings instead of letting the camera decide how bright or dark your photo should be. It gives you control and creative freedom, whereas the automatic mode lets your camera do the thinking. Using semi-automatic mode (like Aperture Priority or Shutter Priority), the camera still adjusts one or two settings for you.
Want to capture silky-smooth waterfalls or blur out a distracting background? You’ll need manual mode to do that well. While some cameras may have special modes to help capture those scenes, manual controls are far more reliable. It’s how pro photographers get the exact look they want—and you can, too.
Breaking down the exposure triangle
The exposure triangle is a fundamental concept in photography, representing the interplay between ISO, shutter speed, and aperture. Since photography is ultimately the manipulation of light, all three settings must work together because they control how light or dark your photo turns out. Adjust one, and you may need to tweak the others to keep the exposure balanced. The more you understand how they interact, the easier it becomes to master manual mode.
ISO: Controlling your camera’s sensitivity to light
ISO determines how sensitive your camera’s sensor is to light. Think of it as your camera’s ability to see in the dark.
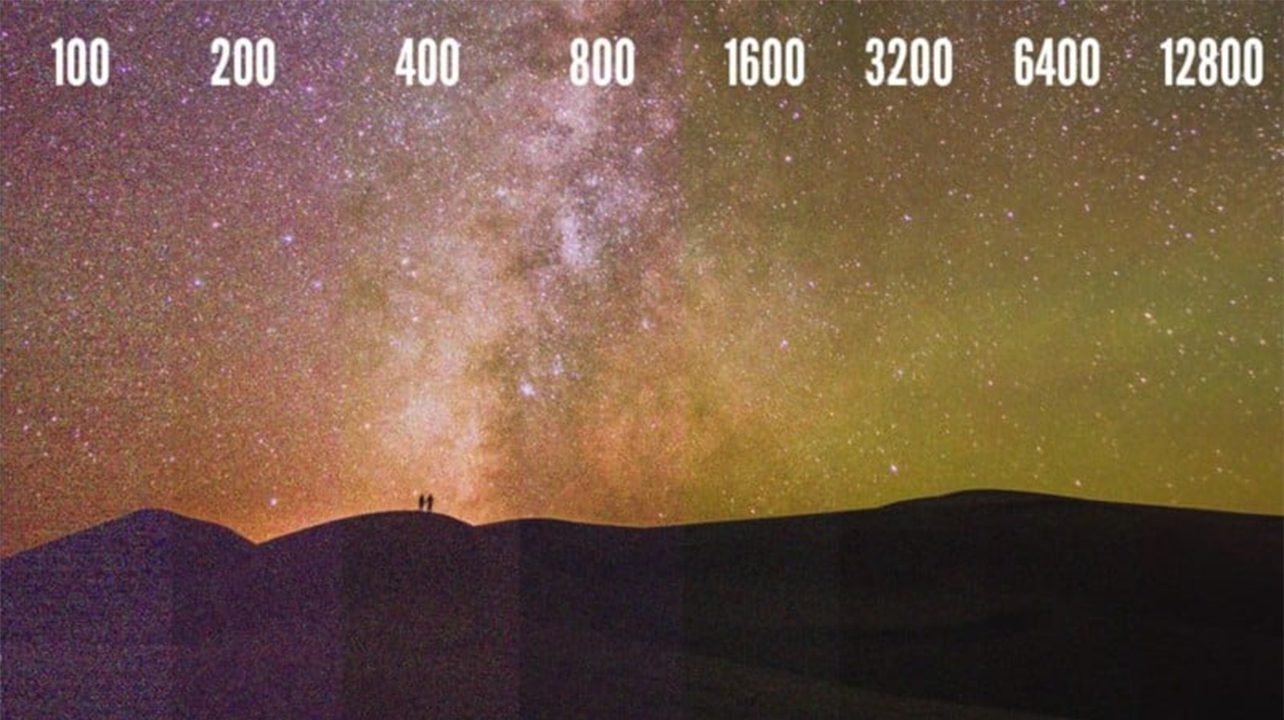
- Low ISO (100–400): Ideal for bright conditions, such as sunny outdoor scenes. Low ISO settings produce crisp, clean images with minimal noise.
- Medium ISO (400–800): Suitable for shaded areas or indoor settings with ample light. It offers a balance between sensitivity and image quality.
- High ISO (1600 and above): Useful in low-light situations, like nighttime photography or dimly lit interiors. However, higher ISO settings can introduce grain or “noise” into your images.
As a general rule, aim to use the lowest ISO possible for the lighting conditions to maintain image quality.
Shutter speed: Freezing or blurring motion
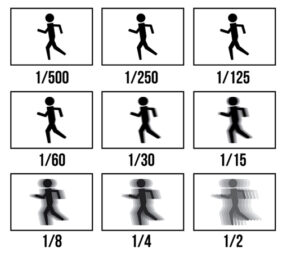
Shutter speed controls the duration your camera’s shutter remains open to expose the sensor to what you see through the lens, affecting how motion is captured. A fast shutter freezes motion. A slow shutter creates motion blur.
- Fast shutter (1/500s, 1/1000s): These speeds freeze motion, making them ideal for action shots, such as sports or wildlife photography.
- Medium shutter (1/125s, 1/250s): Suitable for everyday handheld shots, providing a balance between motion capture and exposure.
- Slow shutter (1/30s or slower): Allows more light into the camera, useful for low-light situations or creative effects like motion blur. A tripod is recommended to prevent camera shake at these speeds, especially when you plan to do what’s called a long exposure.
Tips for hand-held vs. tripod shooting:
When shooting handheld, a good rule of thumb is to use a shutter speed that’s at least 1/focal length of your lens (e.g., 1/50s for a 50mm lens) to minimize blur. For slower shutter speeds, using a tripod ensures stability and sharpness.
Aperture: Shaping depth and brightness

Aperture is the opening in your lens. A wider opening (low f-number) lets in more light and gives you that dreamy blurry background. A narrower opening (high f-number) keeps more of the image in focus.
Narrow aperture (f/11, f/16): A narrow aperture lets in less light but increases the depth of field, keeping more of the scene in focus. Ideal for landscapes.
Wide aperture (f/1.8, f/2.8): A wide aperture allows more light in and creates a shallow depth of field, resulting in a blurred background. This is great for portraits where you want the subject to stand out.
Mid-range aperture (f/5.6, f/8): Offers a balance between light intake and depth of field, suitable for general photography.
The lower the f-number, the brighter your image and the blurrier the background. The higher the f-number, the darker the image and the more that’s in focus.
How to balance ISO, shutter speed, and aperture
When shooting in manual mode, getting the right exposure is all about balance. Adjusting one setting affects the others. Here’s a simple way to think through the process:
- Start with ISO. Set it based on the lighting. Outdoors on a sunny day? Try ISO 100. Indoors? ISO 400 or higher.
- Set your aperture based on the depth of field you want. Portraits? Go wide (f/2.8). Landscapes? Go narrow (f/11+).
- Adjust your shutter speed last to get a balanced exposure. Use your camera’s light meter (in the viewfinder or screen) to guide you—it should be centred or close to zero.
Common exposure scenarios:
Most modern cameras come equipped with a built-in light meter, which helps you gauge whether your current settings will result in an underexposed, overexposed, or properly exposed image. This meter is usually visible through the viewfinder or on your LCD screen and acts as a handy guide when adjusting ISO, shutter speed, and aperture. While it’s not foolproof—especially in tricky lighting—it’s a great starting point for beginners learning to balance the exposure triangle manually.
To put this into practice, let’s look at a few common exposure scenarios.
- For a bright daylight portrait: you might use ISO 100, an aperture of f/2.8 to get that nice background blur, and a fast shutter speed like 1/1000s (or higher) to compensate for the bright light.
- For shooting an indoor still life with moderate lighting: try ISO 800, f/5.6 for depth, and a slower shutter speed like 1/60s—even better if you can use a tripod to avoid blur.
- For a sunset landscape: ISO 200, a narrow aperture like f/11 to keep everything in focus, and a slow shutter speed of around 1/30s would work well; again, a tripod is highly recommended to keep the image sharp.
Bear in mind these settings could change slightly based on what you’re trying to capture. A sunset could be affected by blurry clouds if the shutter speed is too slow. You might also need to readjust with an indoor scene where the subject isn’t sitting still. Play around with your settings and take multiple shots to gauge what works. It’s the trial and error that eventually leads to your ability to adapt as a photographer.
Tips to build confidence with manual mode
You won’t master manual mode in a day—but you’ll get there faster with these tips:
- Start in good lighting. Natural daylight gives you more flexibility without pushing ISO too high.
- Use your camera’s display. Most cameras let you see a live preview. Adjust settings and watch how the brightness changes.
- Check your histogram. It shows the exposure spread. Aim for a curve that doesn’t entirely skew to either end.
- Take test shots. Then adjust your settings based on what you see. It’s part of the process.
- Use a tripod. Do this especially when experimenting with slow shutter speeds or in low light.
- Keep notes or use cheat sheets. You’ll start to remember common settings for different scenarios with practice.
Helpful gear for manual photography
While your camera is the star of the show, a few accessories can make shooting in manual mode a lot easier—and more fun.
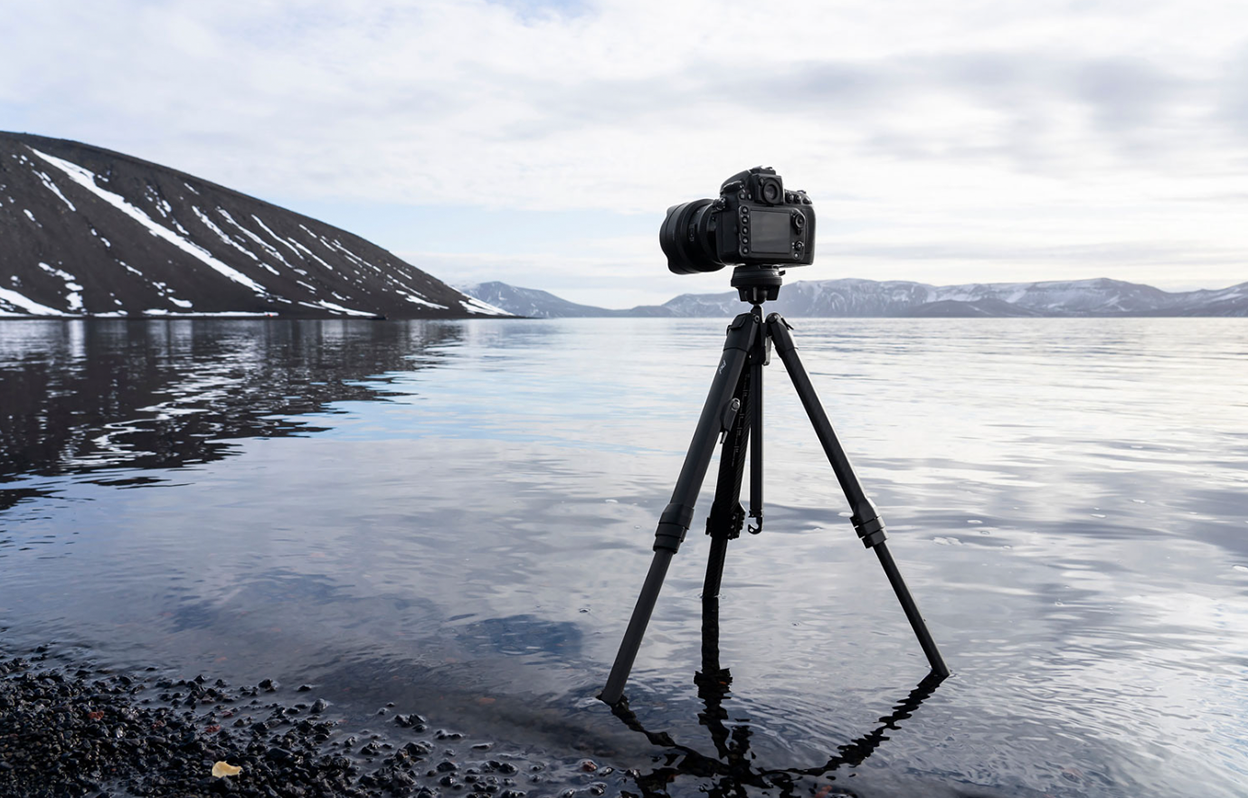
Tripods
A tripod is essential for stability, especially when using slow shutter speeds or shooting in low light. It helps prevent camera shake and ensures sharp images.
Light meters or apps
External light meters or smartphone apps can provide more accurate exposure readings, particularly in challenging lighting conditions.
ND filters
Neutral Density (ND) filters reduce the amount of light entering the lens, allowing for slower shutter speeds even in bright conditions. This is useful for creating effects like smooth waterfalls or motion blur in daylight.
External flashes
An external camera flash provides additional lighting, offering more flexibility than the built-in flash. It’s beneficial for indoor or low-light photography. However, it works best when not pointed directly at your subject, instead bouncing off a ceiling or wall to reflect softer light.
Practice makes perfect: Beginner-friendly exercises
Still feeling unsure? Try these quick exercises to get comfortable with how to shoot in manual mode.
1. Learn how your camera’s focusing works
You may already be familiar with your camera’s autofocus system based on how you took photos in auto mode. It doesn’t hurt to learn any other nuances you might have skipped over. For example, face and eye detection are now pretty standard in many DSLR and mirrorless cameras, as are flexible focal points where you can select what you want to focus on in the frame. Learn manual focus for macro photography or long exposure scenes where you don’t want the autofocus to stray.
2. Shoot a stationary object at different apertures
Set up a still subject and take photos using various aperture settings (e.g., f/1.8, f/5.6, f/11). Observe how the depth of field changes, affecting the background blur and overall sharpness. Try different perspectives, position the object to the left or right of the centre of the frame, and see how it affects results.
3. Capture motion with different shutter speeds
Photograph a moving subject, like flowing water or passing cars, using different shutter speeds. Notice how faster speeds freeze motion, while slower speeds create a sense of movement. You likely won’t have to adjust ISO in these situations, but you can play around with the aperture to see if more light needs to pass through the lens.
4. Adjust ISO indoors vs. outdoors
Take photos in both indoor and outdoor settings, adjusting the ISO accordingly. Observe how higher ISO settings affect image brightness and introduce noise, especially in low-light conditions. Make a point of magnifying the image after you’ve taken it to see noise levels.
Each time you shoot, review your photos and look at what settings you used. Take notes if you feel it helps. That real-world feedback is golden.
Learn more photography tips for better photos every time.
Take control and unlock your creative potential

Shooting in manual mode might seem like a big leap, but it’s one of the most rewarding skills you can learn as a photographer. Once you understand the exposure triangle and start making intentional choices with ISO, shutter speed, and aperture, you’ll see your photography improve—not just in quality, but in creativity. The best part? You’re not guessing anymore. You’re crafting every shot. So grab your camera, step out of auto, and give manual mode a go. Start with some test shots, learn from your mistakes, and keep experimenting. That’s how every great photographer starts.
Need gear to get started or level up? Check out cameras and camera accessories at Best Buy Canada. From beginner-friendly DSLRs to must-have tripods and flashes, everything you need is just a click away.

This article was drafted using AI technology and then reviewed, fact-checked, and revised by a member of our editorial team.


Great tips on shooting in manual mode! As a photo editing company
Photo Background Remove (PBR) , we see how much properly exposed and well-shot images make editing so much easier. Mastering manual mode really helps bring out the best in every photo!
Comments are closed.