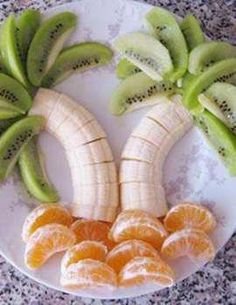
 It’s spring break on the West Coast, and I’ve had my kids home for two weeks. Like any break from school, spring break has meant I’ve had to get creative with how we spend the days, and that includes what we eat. I could have just made them lunches, dinner, and snacks like I always do, but I decided I could entertain them and feed them at the same time with some seriously fun kid-friendly food.
Kid-friendly food doesn’t have to mean chicken nuggets or mac and cheese (although those can be good too sometimes). For us, kid-friendly means it’s so delicious any adult will want to eat it, but the kids can help make it. Take the basic Panini for example: have you ever tried a PB & J Panini? It’s just the usual sandwich you’d make, but you pop it in your press, add a few pieces of fruit and a glass of milk, and you have a lunch any kid (and mom) will love.
Here’s a few of my spring break kid-friendly favourites.
PB & J Banana Pancakes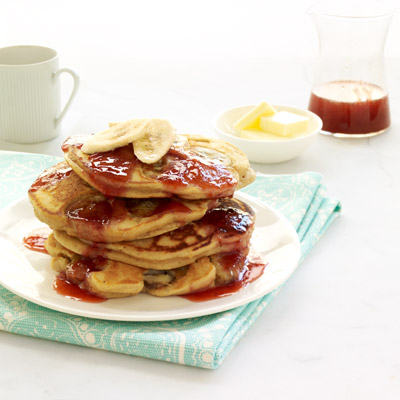
I love peanut butter and jam, so when I saw this recipe I knew it was something both the kids and I would enjoy. They enjoyed adding all the ingredients together, and the warm jam syrup was a hit with everyone. Photo and recipe from from Womansday.com.
| Ingredients: 1½ c. all-purpose flour
¼ c. granulated sugar 1 tsp. baking powder ½ tsp. baking soda ½ tsp. kosher salt 2 large eggs ½ c. creamy peanut butter 1 c. whole milk 1 banana ½ c. Strawberry jam 2 tbsp. water
|
Directions
In a large measuring cup or bowl, whisk together the flour, sugar, baking powder, baking soda, and salt.
In a separate bowl, whisk together the eggs and peanut butter until combined, then whisk in the milk. Add the milk mixture to the flour mixture and whisk until fully incorporated (a few small lumps are fine). Stir the sliced banana into the batter.
Heat a large nonstick skillet over medium-low heat. Check the heat by sprinkling the skillet with water — when the water bubbles and evaporates immediately, pour 3 scant 1/4 cups of batter into the skillet.
Cook the pancakes until bubbles begin to appear around the edges and in the center, about 1 to 2 minutes. Using a spatula, peek under the pancakes to check if they are golden brown, then carefully flip them.
Cook the pancakes 1 minute more, peeking to make sure the underside is golden brown. Transfer them to a baking sheet and cover loosely with foil to keep warm. Repeat with remaining batter (if your pancakes stick, wipe the skillet with 1 teaspoon canola oil before cooking the next batch).
In a small skillet, whisk together the jam and 2 tablespoons water. Warm over medium heat (add an extra teaspoon water if the jam is too thick). Serve over the pancakes with additional sliced bananas, if desired.
Pizza Pot Pies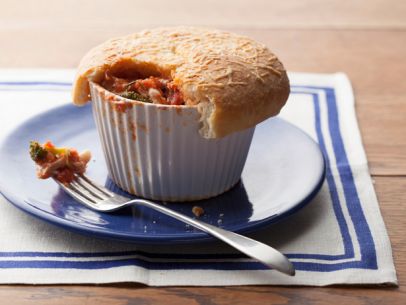
Chicken pot pie isn’t a favourite around here, but when these Pizza Pot Pies definitely were. Kids love playing with any extra pizza dough you have left over, and they can shred the cheese to help. Recipe and photo from Foodnetwork.com.
| Ingredients: Tomato Sauce:
1 tablespoon olive oil 2 cloves garlic, minced 1 teaspoon fresh minced rosemary leaves 2 ounces diced pancetta 1 (28-ounce) can crushed tomatoes 1/4 teaspoon salt 1/4 teaspoon freshly ground black pepper Pizza Pot Pies: 3 cups Tomato Sauce 2 cups diced roasted chicken 2 cups broccoli cut into small, bite-sized pieces 1 1/2 cups diced mozzarella cheese 1/2 teaspoon salt 1/4 teaspoon freshly ground black pepper 1 1/2 pounds pizza dough 1/3 cup olive oil 6 tablespoons grated Parmesan
|
Directions
Special equipment: 6 (10-ounce) ramekins
For the Tomato Sauce: Warm the olive oil in a small saucepan over medium heat. Add the garlic, rosemary, and pancetta. Saute until the pancetta is crisp and golden, about 5 minutes. Add the tomatoes, stir to combine, and simmer over very low heat for 15 minutes. Add the salt and pepper. Set aside.
Preheat the oven to 400 degrees F. In a large bowl combine the Tomato Sauce, chicken, broccoli, mozzarella, salt, and pepper. Stir to combine. Divide the chicken mixture evenly between the ramekins. Roll out the pizza dough and cut circles with a pairing knife that are 1-inch wider in diameter than the ramekins. Place the circles of dough over the filled ramekins and press down to seal, making sure to pull the dough over the edge of the ramekin. Brush the top of the pizza dough with olive oil and sprinkle with Parmesan cheese. Cut a small slit in the top of the pizza dough with a pairing knife. Bake until the pizza crust is golden, about 25 minutes. Remove from the oven and let cool slightly before serving.
Grape Jelly Tarts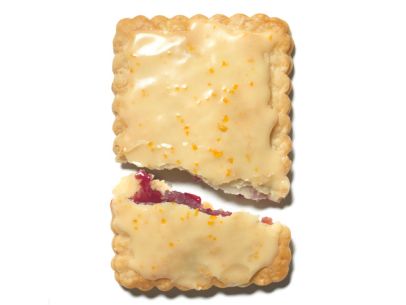
Who doesn’t love pop tarts? I buy the organic types every chance I get, and eating them always reminds me of when I was a kid. I wouldn’t eat them for breakfast now, but the kids and I like them for a snack during the afternoon. Photo and recipe from the foodnetwork.com.
| Ingredients: For the Tarts:
3 cups all-purpose flour, plus more for dusting 2 teaspoons granulated sugar 1 teaspoon salt 4 tablespoons cold shortening, cut into small pieces 2 sticks cold unsalted butter, cut into small pieces 1/2 cup grape jelly 1 large egg, beaten 1/3 cup milk For the Glaze: 1 tablespoon granulated sugar Juice of 2 oranges 3/4 cup confectioners’ sugar Grated orange zest, for topping
|
Directions
Make the tarts: Pulse the flour, granulated sugar and salt in a food processor until combined. Add the shortening and about one-quarter of the butter and pulse until they disappear into the flour, about 30 seconds. Add the remaining butter and pulse a few times, until the mixture looks like coarse meal with pea-size bits of butter. Add 1/2 cup ice water and pulse once or twice, until the dough just comes together. Turn the dough out onto a piece of plastic wrap, form into a disk and wrap tightly; chill at least 1 hour and up to 1 day. (For quicker tarts, use refrigerated pie dough and skip this step.)
On a lightly floured surface, roll out the dough into a 10-by-14-inch rectangle, about 1/8 inch thick. Cut out ten 4-by-3-inch rectangles using a toaster pastry press or a paring knife. Transfer to a parchment paper-lined baking sheet. Chill at least 15 minutes.
Spread 5 of the dough rectangles with a heaping tablespoonful of jelly each, leaving a 1/2-inch border all around. Brush the edges with the beaten egg, then cover with the remaining 5 dough rectangles. Crimp the edges with a fork or use the toaster pastry press to seal. Chill at least 30 minutes. Meanwhile, preheat the oven to 400 degrees F.
Bake the tarts until flaky and golden, 20 to 25 minutes, brushing with the milk after 10 minutes. Transfer to a rack to cool.
Meanwhile, make the glaze: Bring the granulated sugar and orange juice to a simmer in a large skillet over low heat; cook until reduced by half, 5 to 7 minutes. Remove from the heat and whisk in the confectioners’ sugar until smooth. Let cool. Brush the glaze on the tarts, sprinkle with the orange zest and let set, 5 minutes.
Make a few of these kid-friendly recipes this spring break or on any weekend morning, and if you need a few small appliances and kitchen gadgets to help you and the kids create, here are some of my top picks:
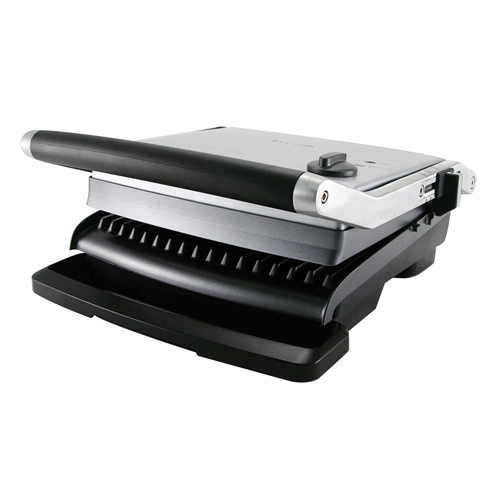 Grill up some kid-friendly PB & J in a panini press |
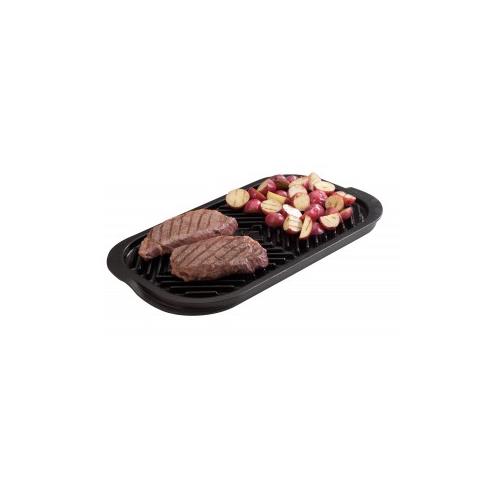 A griddle helps you quickly make enough food to feed a small army |
 The fun doesn’t end when you’re done cooking, espeically when you serve lunch or dinner on Star Wars dinnerware |


I showed this article to my wife and commented on how good the fruit palm tree looked. The next day she surprised me with one. It was awesome!
LB
That’s awesome @Leo_Bond! I’ve had one too. It’s so good.
I think the banana should be dipped in chocolate! Allow me to illustrate:
I completely agree with you @BBYMartin. Yum!
Comments are closed.