 One challenge many carseat-buying parents face nowadays is finding one that fits. I’m not referring to just lifestyle or safety fits, I’m talking a literal fit in your vehicle. I drive a mid-size SUV and so fitting a huge seat (like a Clek) into my middle backseat is easy. However, for more compact interior SUVs (like a Ford Flex) or family sedans, this is a huge challenge. My wife drives a Toyota Corolla and there is no way a convertible carseat the size of a Clek fits comfortably (or at all.) In fact, many convertible carseats just don’t fit.
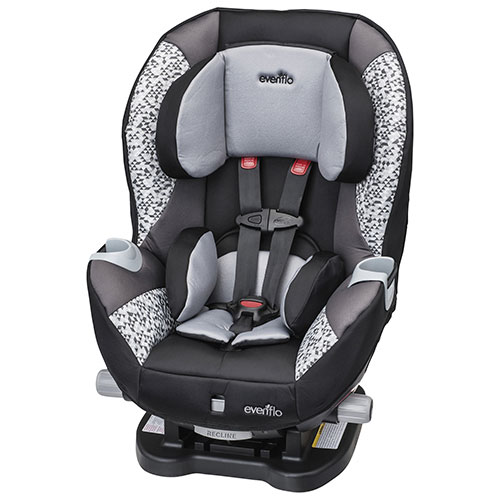
If you had read the previous daddy blog “The Adventures of Dad” that I did here between March 2014/Feb 2015, you may remember that I’ve been certified in Child Passenger Safety. As a result, I’ve been privy to installing and examining a lot of different carseats in cars of all shapes and sizes. We had to recently undertake the difficult challenge of finding a seat that was both convertible and fit inside my wife’s car and my mom’s SUV. The challenge of the latter is that it’s more of a luxury build and the middle seat isn’t really your standard one. In fact, the Universal Anchoring System (UAS or UAT in some cases) is on the passenger side seats because it isn’t safe to hook it up through the middle. It took a little while, but we finally found one and coincidentally, Best Buy has it. Let’s take a look today at the Evenflo Triumph LX 3-in-1 Deluxe Convertible Car Seat.
The only car seat you may need
The Triumph LX is one of those seats that will guide your child from the time they’re ready to leave the hospital to the time they’re ready to be out of carseats all together. With a weight load of 5-65lb, you can feasibly make this your all-in-one if you wish, or you can go the route of the infant-specific carseat and purchase this for later on like we did. It doesn’t require any additional hardware for infant mode and all of the appropriate belts and buckles required are already attached.
It comes fully installed out of the box. There aren’t many removable or moving pieces you need to worry about with the exception of the usual foam inserts that you’ll be removing as your child grows. The seat design even spreads a bit at the bottom to accommodate for children who sit with wider stances or for taller rear facing babies. That’s something I personally appreciate about this seat. My daughter is very tall for her age and sits with her legs spread out because she’d be kicking the seats otherwise. This seat allows for that possibility rather than having her legs spill over the sides of the bucket-style seat that you see from companies like Graco and even Clek.
Once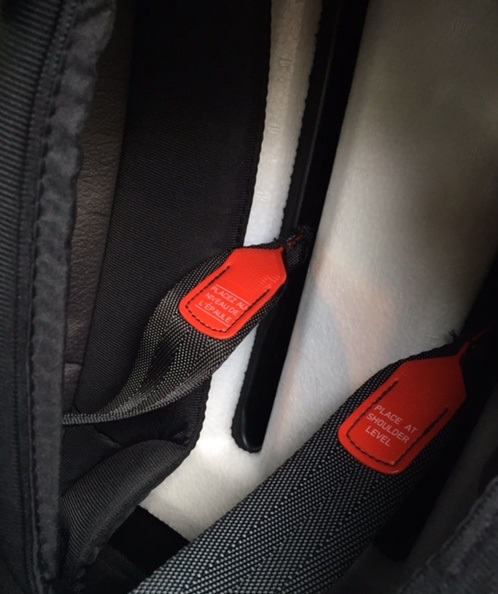 you’ve taken the seat out of the box, the only thing you need to do (besides installation) is adjust the shoulder straps (shown at left) and learn the tightening system, neither of which I’ve ever seen before in a car seat. In fact, if you’re familiar with modern infant car seats and/or convertibles, you should throw that knowledge out the window with this seat because it’s nothing you’ll ever have encountered before.
Not easy, but not difficult installation
Installation on this seat is interesting. I wouldn’t call it the easiest seat I’ve ever installed, but it definitely isn’t the hardest. One thing I really don’t like about doing rear facing UAS installation is the fact that most seats (including this one) only have one tightening buckle on the side. On one hand, it leads to a lower buckle failure rate (with only one possibility of it instead of two) but it makes it a little bit more difficult to install and tighten.
Regardless, I installed the seat in 3 vehicles for the purpose of this test. Rather than belt latch paths, I went with the anchor systems since I have the option to do so. I also installed it without any help.
From the time I first put the seat in the vehicle to the time it was properly installed, here is how long it took to do so successfully on each:
2008 Nissan X-Terra: 3 minutes
2012 Toyota Corolla: 10 minutes
2010 Toyota Highlander: 7 minutes
If you’re unfamiliar with installing car seats, I’d say your installation time should be double or triple my numbers. 20 minutes might be a good estimate. You’ll get better as you install and de-install the seat as you need it.
Successful rear installation requires two integral aspects: The carseat must be level per whichever method your seat encourages. Some carseats just have a sticker level line. Some have actual liquid levels and some have ball bearings levels. This one was a sticker. The seat must also move no more than 1.5 inches side to side to allow for some impact consideration in an accident. It’s ok for the seat to move up and down. You want to allow for some of that impact absorption in the event of an accident. What you don’t want is your seat being completely stiff. There’s not going to be enough leeway to offset part of the impact in an accident. Just remember to read and follow the instructions and you should be fine. For this seat (and many other convertibles of the sort,) you’ll also have to put the seat into reclining mode prior to installation.
If you’re doing a forward installation, it should take you a little bit less time since you’re basically just going to be using the tether up top and then securing the UAS or belt path. You could realistically be in and out with a successful installation in around 5 minutes.
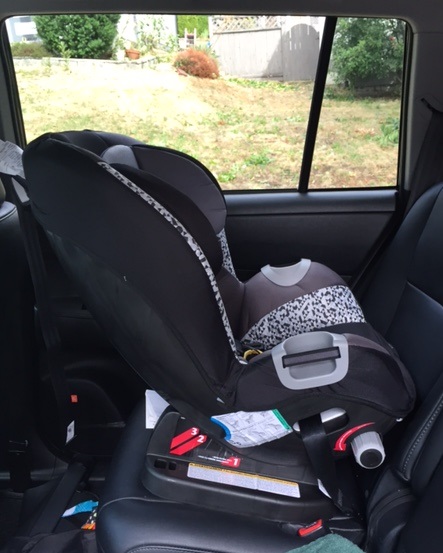 Of the three vehicles, the Highlander was the hardest to install in. With the way the carseat is contoured, it didn’t allow me much room to climb in to leverage my weight against the UAS installation. I did eventually get it, but it required a fair bit of maneuvering on my part to make it work.
Seating your child comfortably
It’s time to discuss the harness system and seating your child safely. Let’s start by discussing the shoulder system, which I thought originally could be a safety hazard but is actually great innovation. Rather than the standard manually adjusting slots pretty well every seat has, this one is more of a freeform lockdown. The shoulder straps run on a track which you simply pull and push on to adjust to your child’s height. My concern was that with a freeform system like this, the shoulder straps would come loose if the child rocked back and forth enough and tried to fight being put in the seat enough. As the father of an active and playful 17 month old who currently treats everything like a game, that was not the case. Once the shoulder straps are snug, they will remain snug while the child sits.
However, the loosening and tightening system are kind of the weird part of this seat. Many standard seats these days use a strap-tighten system: you seat the child, clip all of the applicable harness points in and pull a strap at the bottom of the seat to tighten things into place. In order to loosen, you pull up on a latch release, pull the harness away from the child and then unclip the access points to let them out. The harness loosening usually leads from the shoulders.
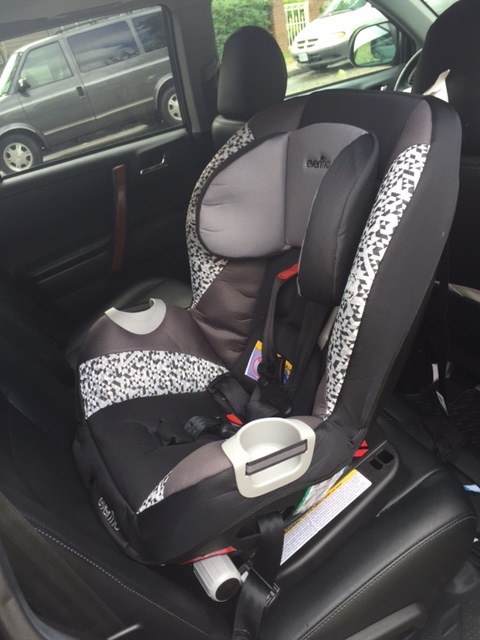 On this seat, it’s a new learning experience to say the least. First of all, the latch release presses down, which isn’t a big deal. The harness loosens from the bottom which also makes sense if you consider everything I just mentioned about that freeform shoulder system. What I’m not completely sold on, however, is the way things tighten. Tightening is done through a crank-like system which can be activated on either side of the seat. In the photos, the large knobs you see at the bottom are said cranks. In theory, it’s a great idea. It’s less “messy” than the traditional system and children can’t play with it. However, it makes it difficult to gauge safe tightness and I worry that most people will under or overtighten the harness. The nice thing about the manual strap system is that you’re forced to do it right because you are your own quality assurance check. It’s difficult with this crank to get it right the first time and you have to keep operating on a trial and error basis until you get it right.
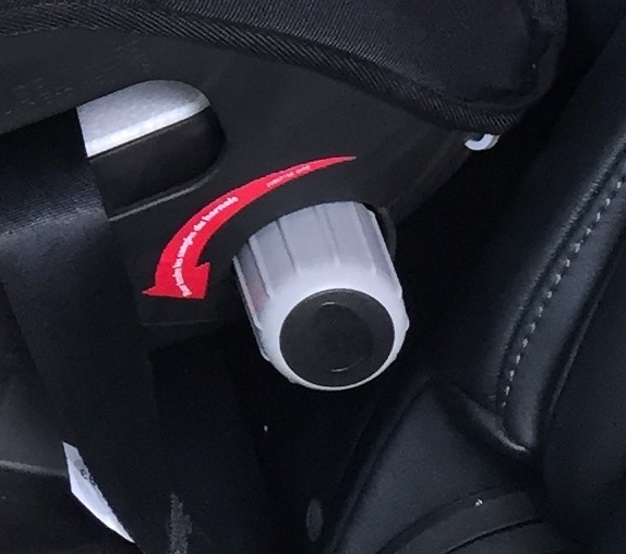 The crank system is also difficult if you have oddly shaped seats in your vehicle. This shouldn’t be a problem if you’re able to put the seat in the middle. The crank shouldn’t be hindered at all. However, if you have a back seat where the middle doesn’t have a full side passenger area and your UAS are located behind the full seats on the driver or passenger side (a perfect example of this would be the last generation of Toyota Highlanders,) this could be a problem. If the seats are shaped like a driver or navigator seat and it contours upward, you won’t have comfortable access to both sides of the crank and may have some unintended resistance courtesy of the hindered crank.
Despite my unhappiness with the crank tighten, I would still recommend this carseat. In my opinion, the crank is more of an inconvenience than a safety issue and doesn’t override the fact that this is a comfortable and safe car seat that is easy to install and compact enough to fit in most cars, no matter how small. That alone would be reason enough to make me recommend it to you. As I had mentioned previously, there’s no extra hardware required to make this seat work for infants and everything just works as it is out of the box. My daughter the finicky car rider enjoys this seat a lot and has actually climbed into it on her own (book or stuffie in hand) while it sat at grandma’s house in the entry way uninstalled. That’s probably the highest praise a car seat can receive coming from somebody who would scream through any car ride that was over 5 minutes long in her old infant car seat. This seat is now a permanent fixture in my mom’s car and we’ll soon be adding another for rides in my wife’s car.
The Evenflo Triumph LX 3-in-1 Deluxe Convertible Car Seat is available now online at BestBuy.ca

