
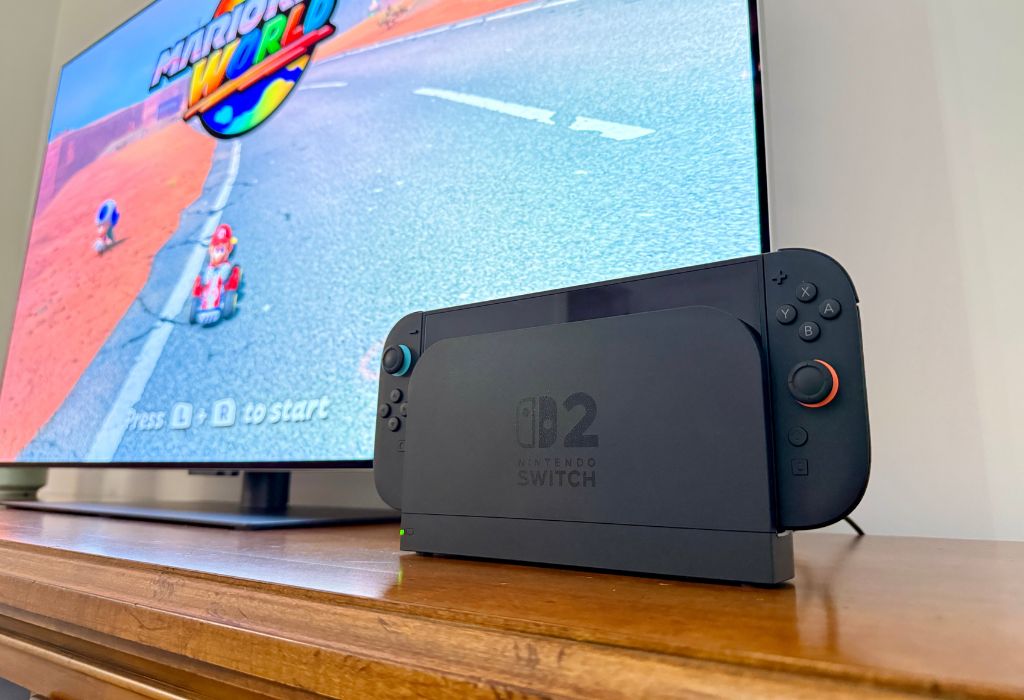
Nintendo Switch 2 keeps one of the best parts of Nintendo’s hybrid console design: the ability to play in handheld mode, tabletop mode, or on the big screen. Handheld play is great for travel, quick sessions, and relaxing at home, but connecting your Nintendo Switch 2 to a TV is where the console really shines.
Whether you’re jumping into a solo adventure, playing local multiplayer with family, or setting up your Nintendo Switch 2 console for the first time, TV mode gives you a bigger screen, better living room comfort, and a more traditional console experience. The good news is that connecting the Nintendo Switch 2 system to your TV is quick and simple.
This guide walks you through what you need, how to set up the Nintendo Switch 2 dock, what to do if there is no signal on your TV, and which settings are worth checking once everything is connected.

What you need before you start
Before connecting your Nintendo Switch 2 to a TV, it helps to lay everything out first. This makes the setup faster and helps avoid the most common “No Signal” issues.
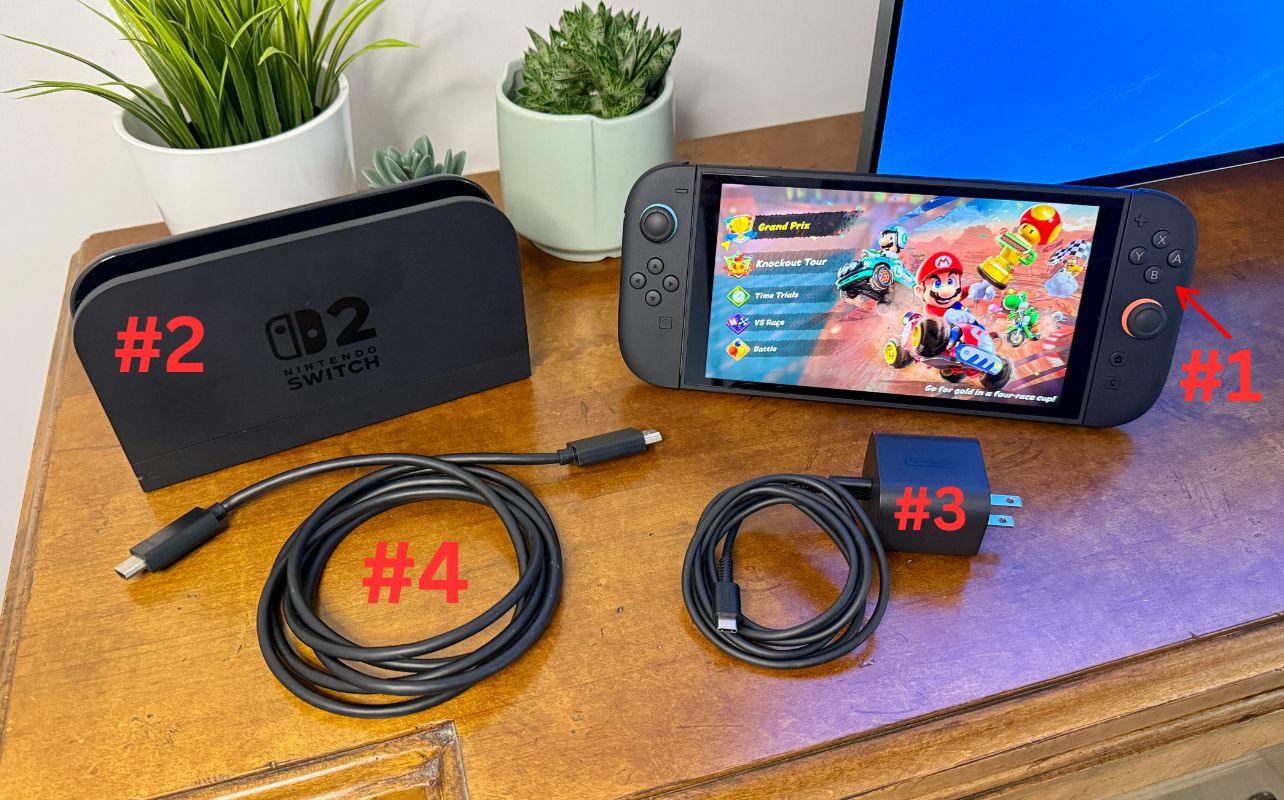
You will need:
1) Nintendo Switch 2 console
2) Nintendo Switch 2 dock
3) Official Nintendo Switch 2 AC adapter
4) Ultra High-Speed HDMI cable
5) TV or monitor with an HDMI input
A high-speed Internet connection is optional but important for system updates.
The most important thing to keep in mind is that the Nintendo Switch 2 is designed to use its own dock, AC adapter, and Ultra High-Speed HDMI cable for TV mode. The official Nintendo Switch 2 AC adapter is required to properly power the dock for TV mode. The original Nintendo Switch AC adapter can charge the Nintendo Switch 2 console directly. But it does not properly power the Nintendo Switch 2 dock when connecting to a TV.
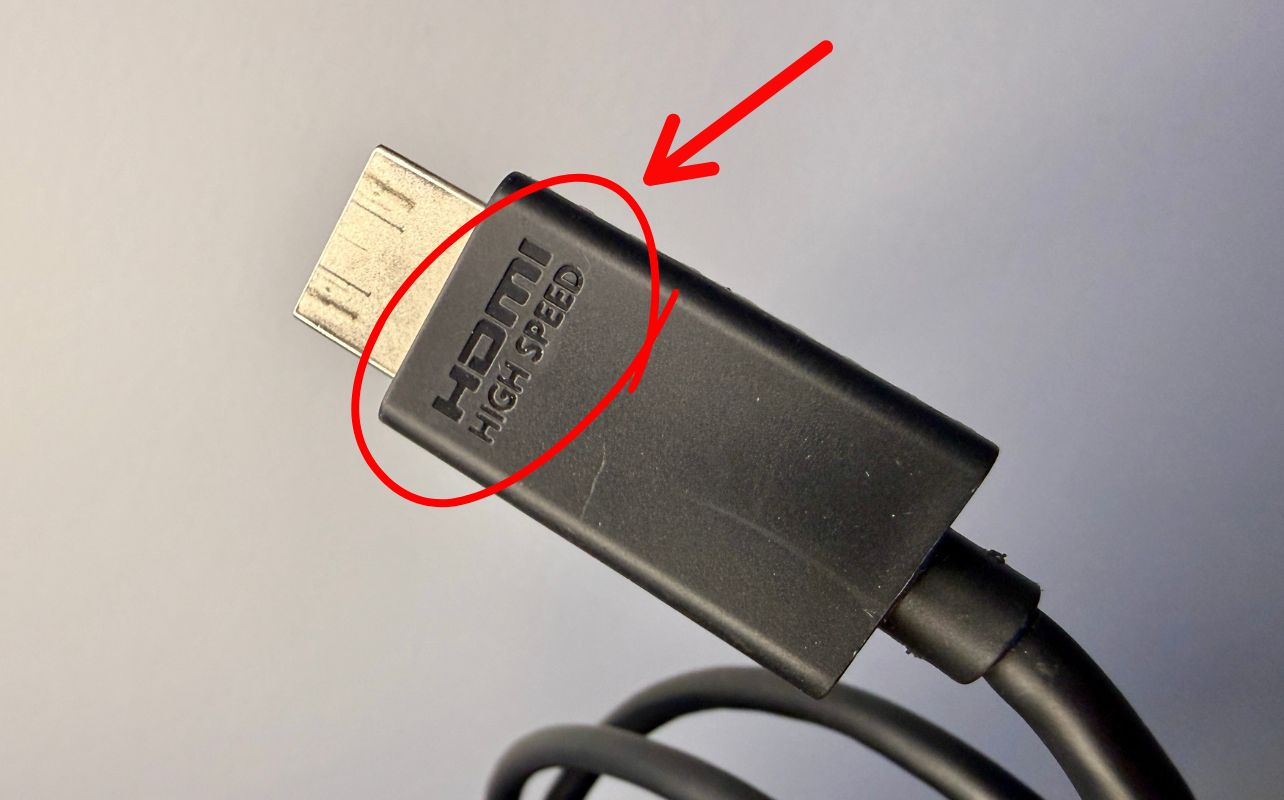
The type of HDMI cable also matters. An Ultra High Speed HDMI cable is the best fit for a proper Nintendo Switch 2 TV connection. It supports the Nintendo Switch 2 system’s advanced features like 4K resolution at 60Hz, 1440p resolution at 120Hz, Variable Refresh Rate, and Auto Low Latency Mode. In everyday terms, that means the right cable helps your Nintendo Switch 2 system deliver sharper image quality, smoother motion, less screen tearing, and lower input delay when your TV supports those features. The original Nintendo Switch HDMI cable may work in some situations, but it is not ideal for Nintendo Switch 2 TV mode.
How to connect Nintendo Switch 2 to a TV step-by-step
Step 1: Set up the Nintendo Switch 2 dock
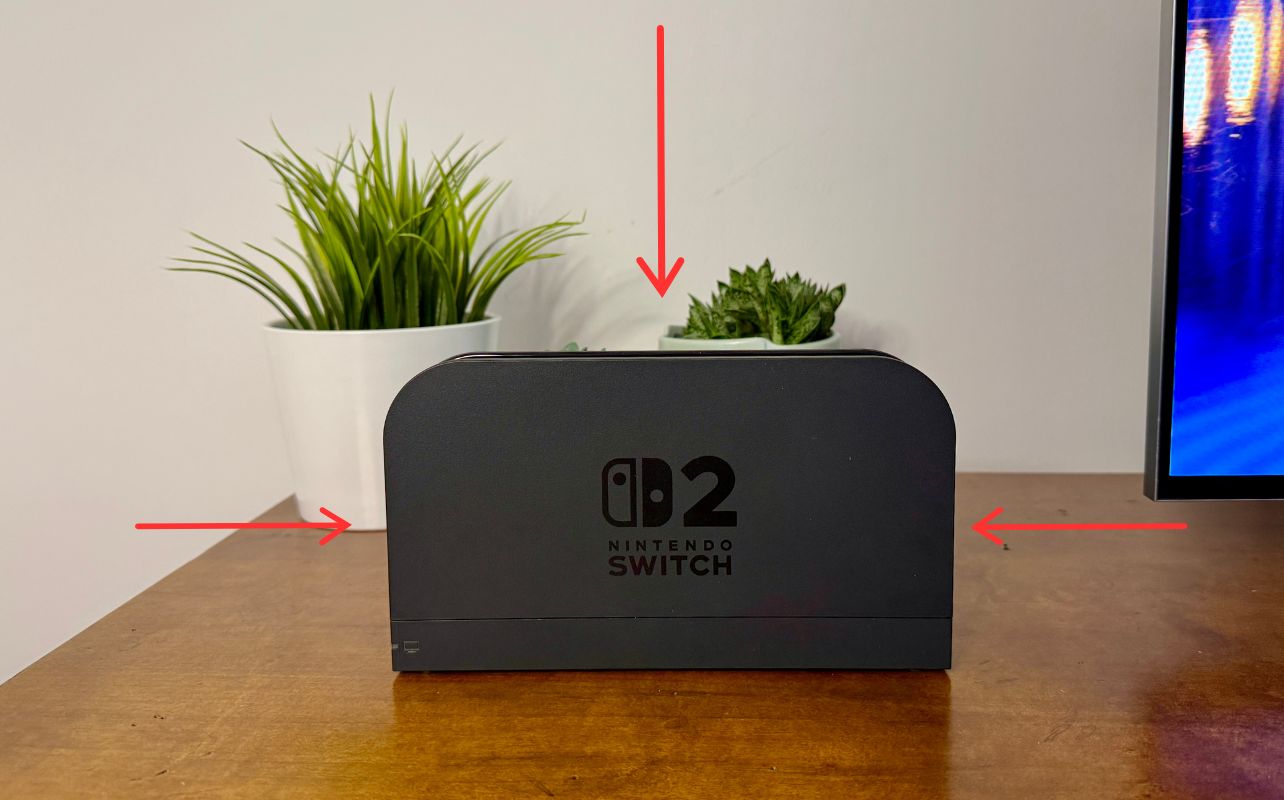
Start by placing the Nintendo Switch 2 dock near your TV or monitor. Make sure it is on a flat surface with enough space around it. You also need enough clearance so the console can slide in and out of the top easily.
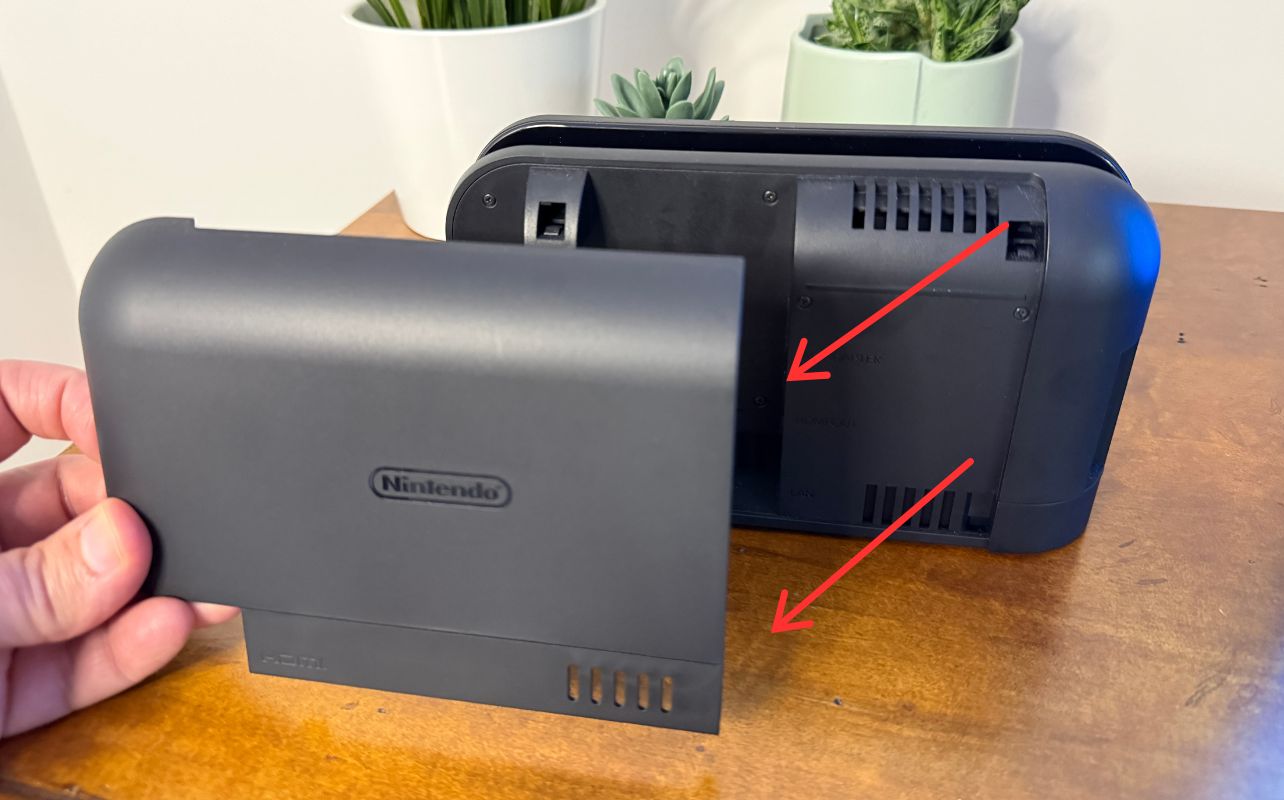
Open the back panel of the dock to access the ports.
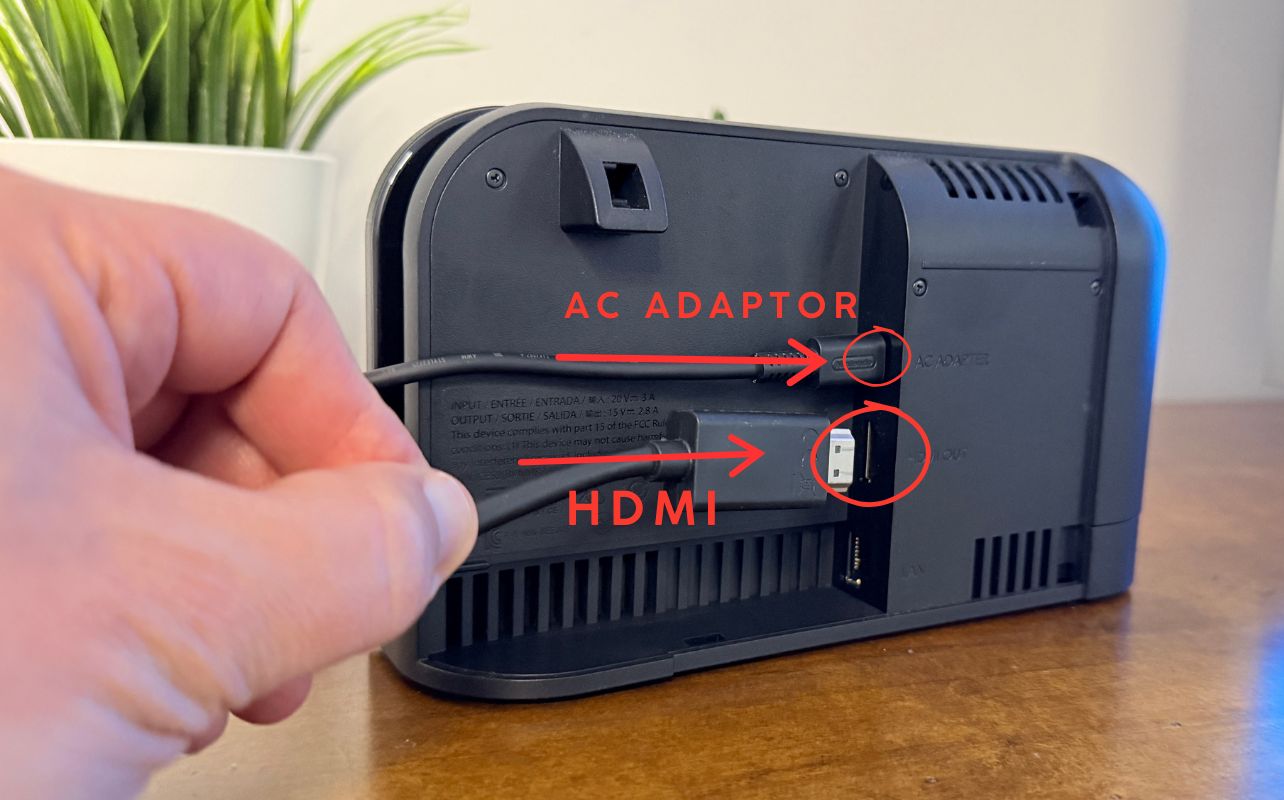
Connect the Nintendo Switch 2 AC adapter to the dock’s AC adapter port. Then plug the adapter into a wall outlet. After that, connect one end of the Ultra High Speed HDMI cable to the HDMI port on the dock.
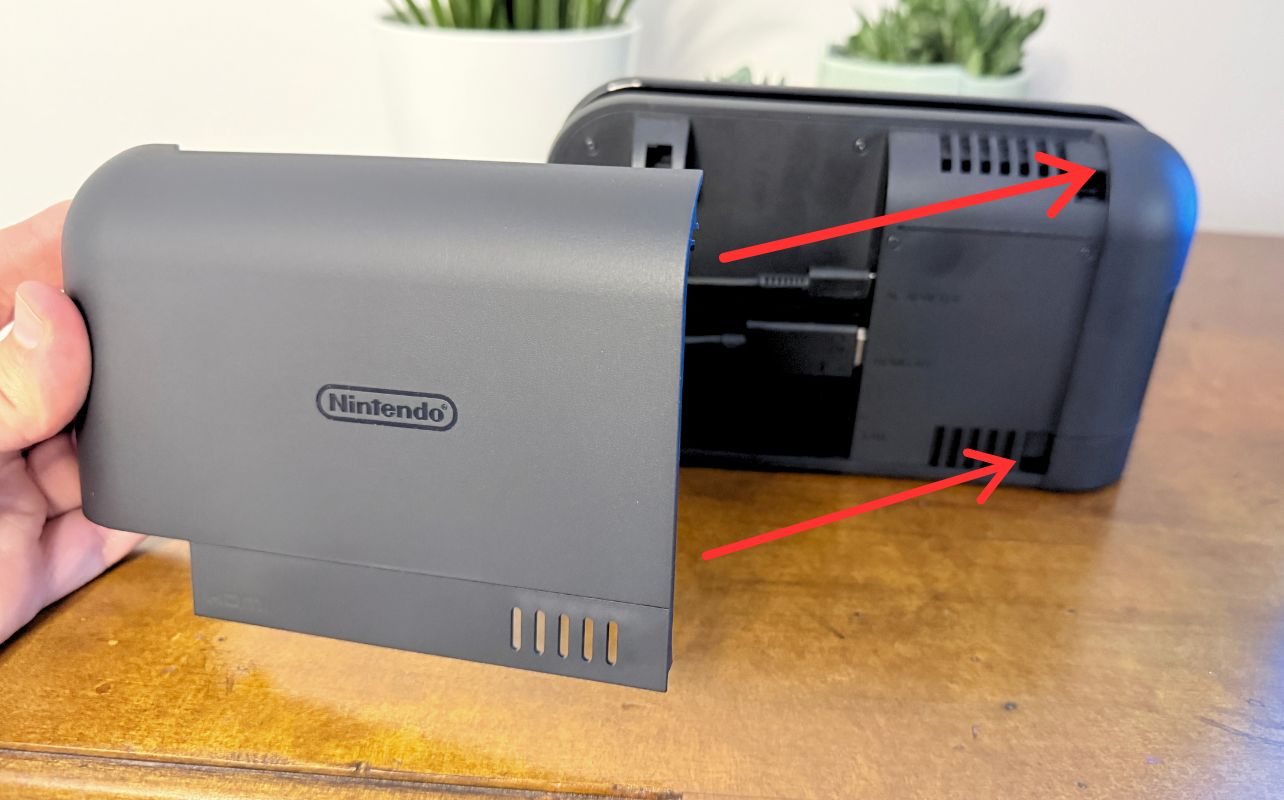
Once both cables are connected, you can close the dock’s back panel to help keep your setup neat and organized. Using the correct AC adapter and HDMI cable is one of the easiest ways to avoid setup issues.
Step 2: Connect the dock to your TV
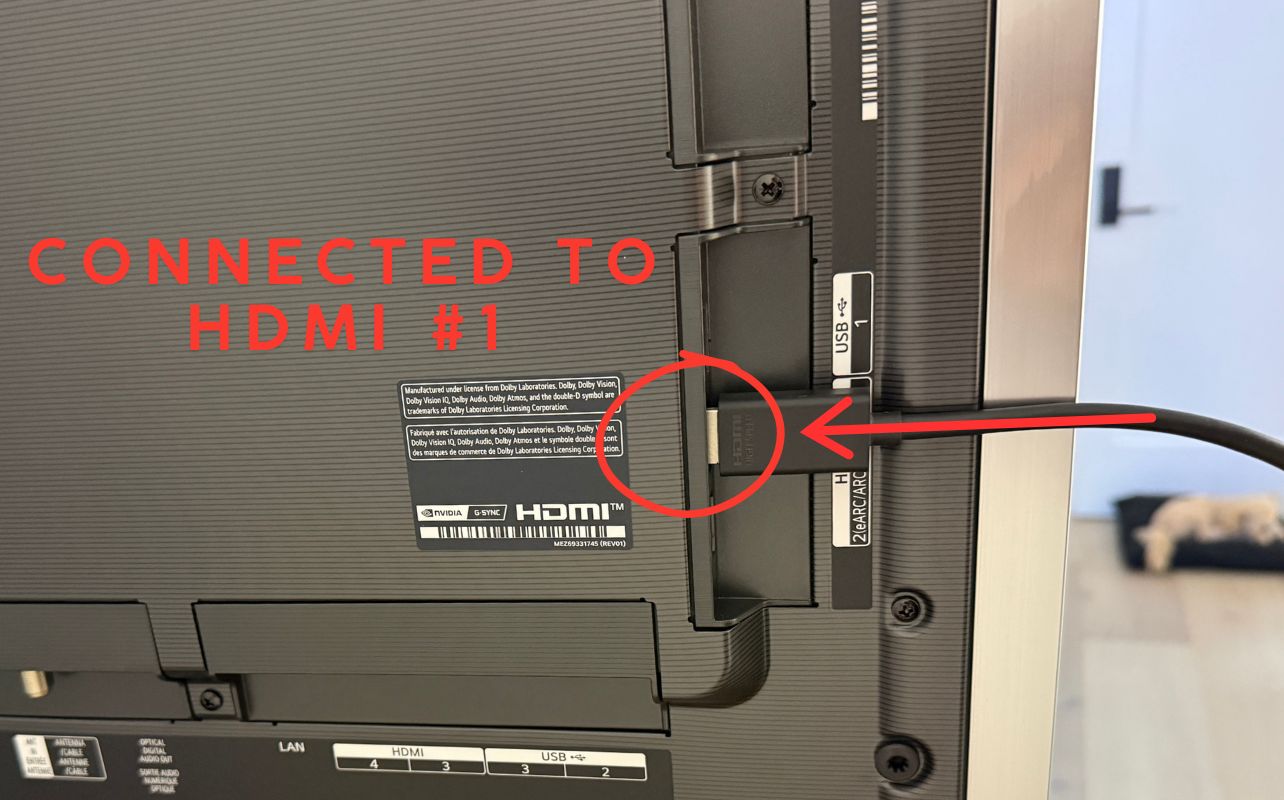
Next, take the other end of the Ultra High Speed HDMI cable and plug it into an available HDMI port on your TV or monitor. Most TVs label these ports as HDMI 1, HDMI 2, HDMI 3, and so on.
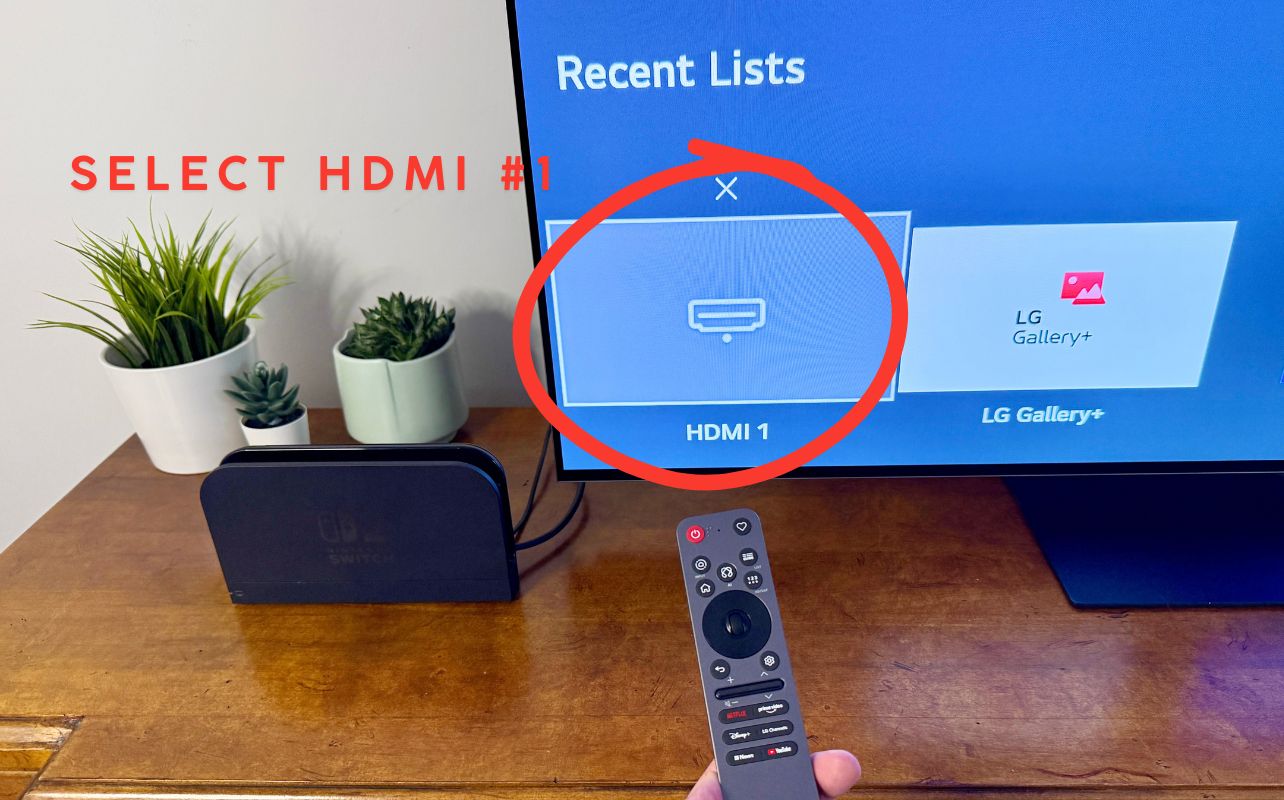
Make a note of which HDMI port you used. This will matter when you switch your TV to the correct input. For example, if the cable is plugged into HDMI 1, your TV input needs to be set to HDMI 1 as well.
Step 3: Dock the Nintendo Switch 2 console
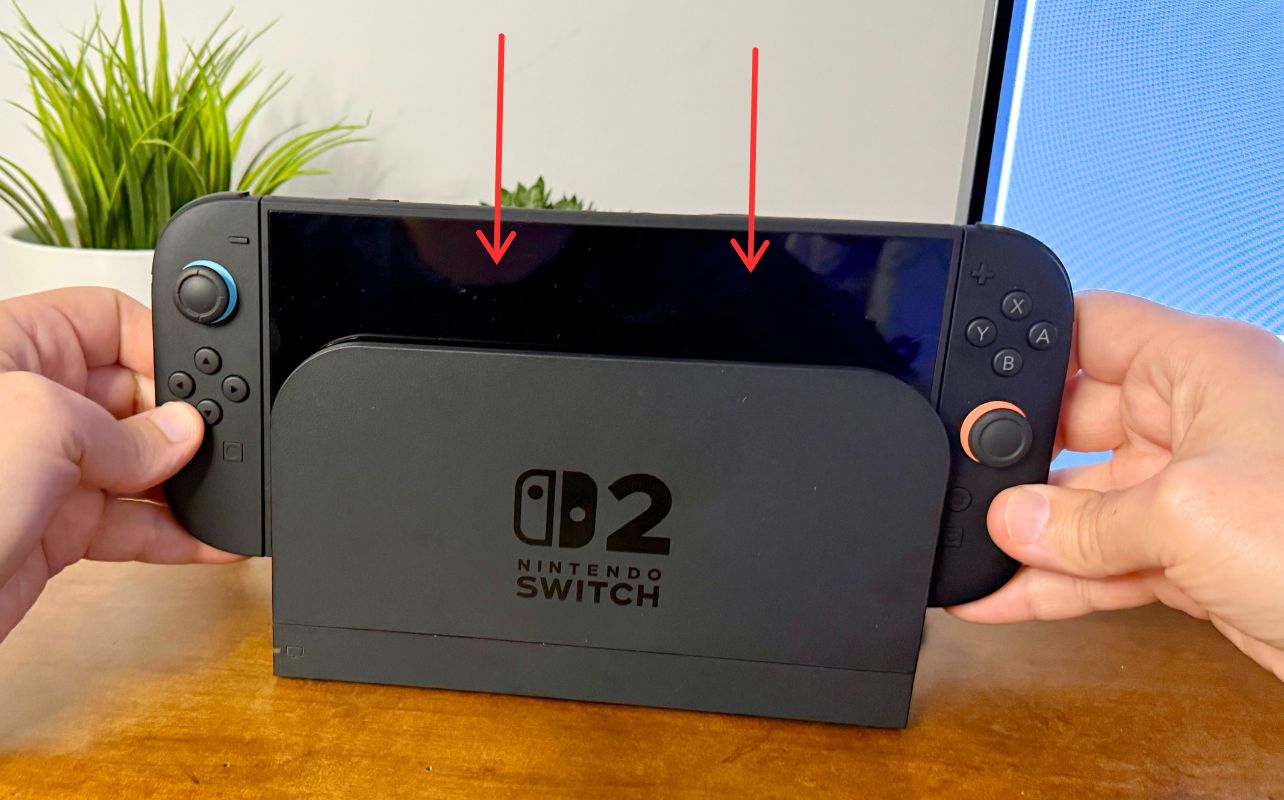
Now place the Nintendo Switch 2 console into the dock. Make sure it is facing the correct direction and seated properly. When the Nintendo Switch 2 is docked, the handheld screen will turn off, which is normal. That usually means the system is switching from handheld mode to TV mode.
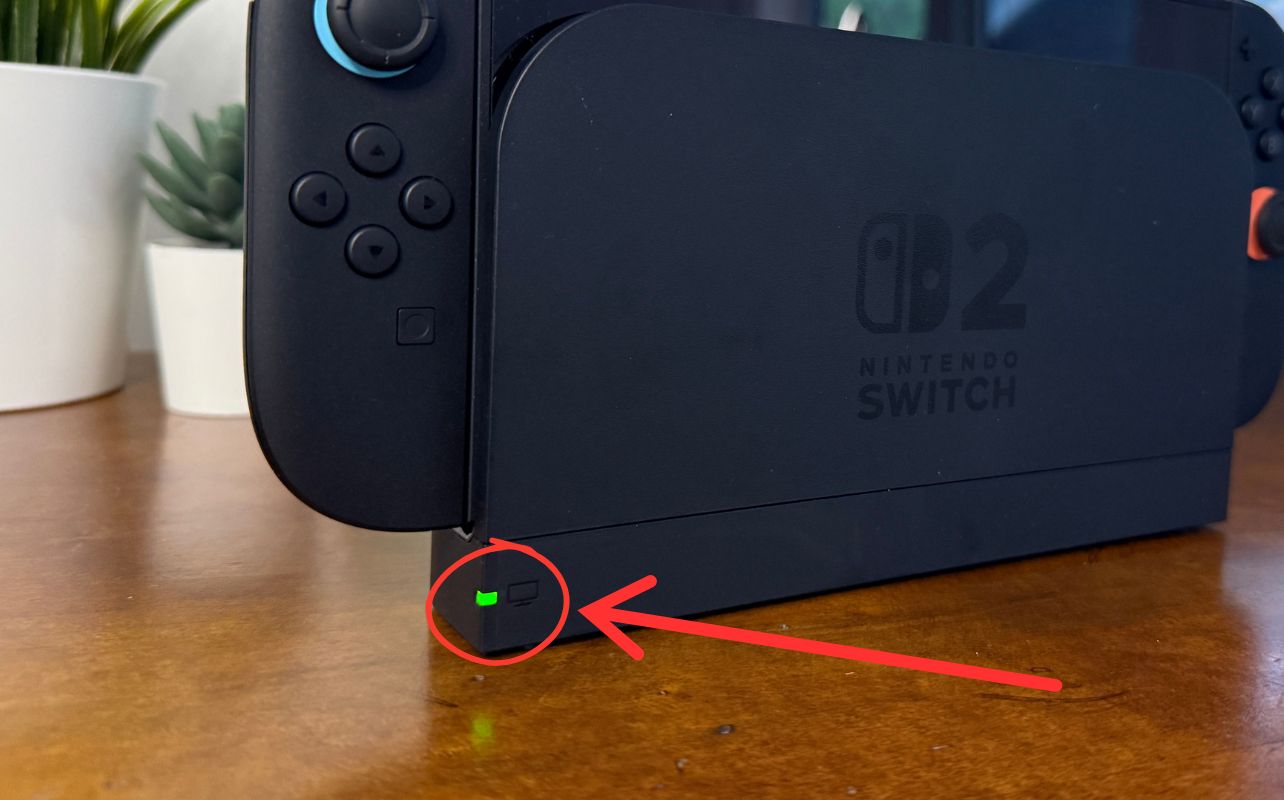
Check the dock’s indicator light as well; it should be lit up green like in the picture above. If the dock has no power, the console may not output to the TV. A loose power connection, the wrong AC adapter, or a cable that is not fully connected can all prevent TV mode from working properly.
Step 4: Turn on TV mode
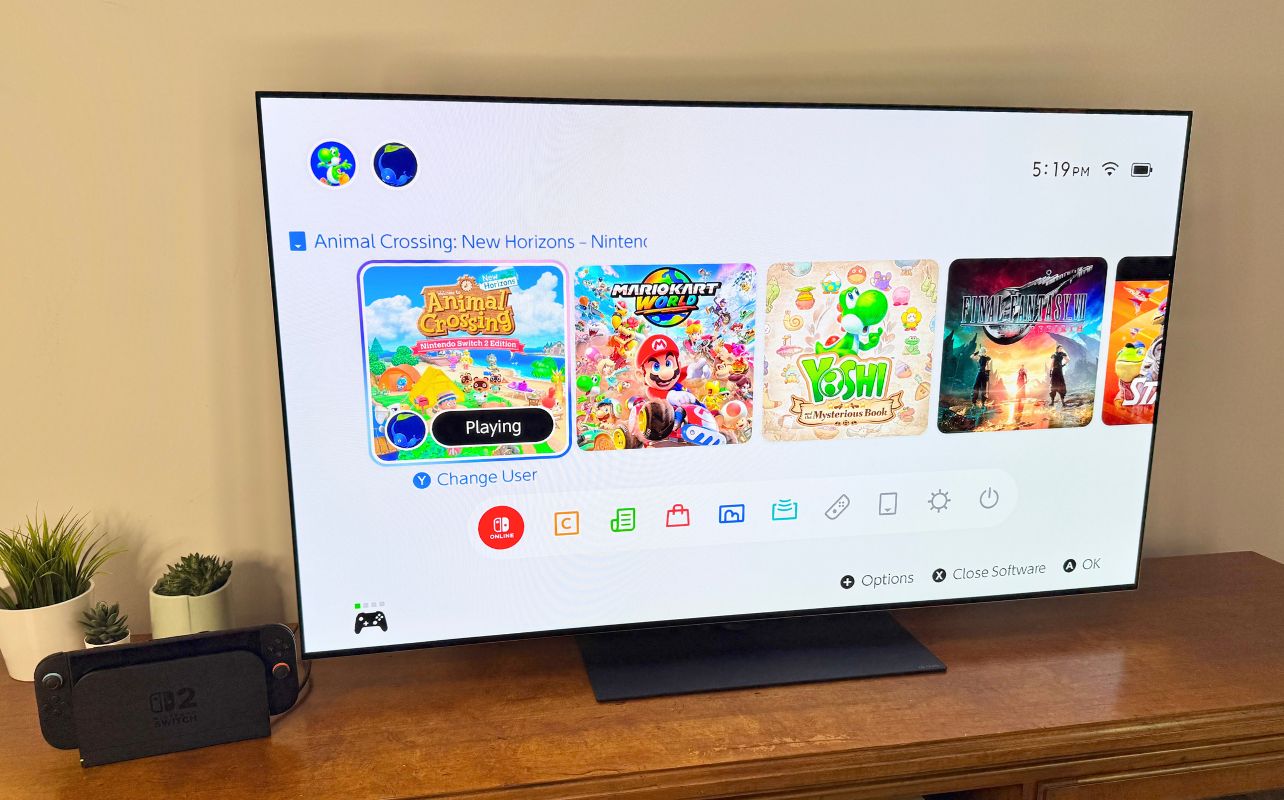
Turn on your TV and select the matching HDMI input. If your Nintendo Switch 2 is powered on and seated correctly in the dock, the home screen should appear on your TV.
If the image does not appear right away, don’t worry. In many cases, the issue is simply the wrong HDMI input, a loose cable, the console not sitting fully in the dock, or the dock not receiving enough power.
Why your Nintendo Switch 2 isn’t showing on the TV
If your Nintendo Switch 2 is connected but your TV says “No Signal,” work through these quick fixes first:
- Make sure the TV is set to the correct HDMI input.
- Confirm the HDMI cable is an Ultra High Speed HDMI cable.
- Check that the dock power light is on.
- Make sure you are using the official Nintendo Switch 2 AC adapter.
- Remove the console and place it back into the dock carefully.
- Try another HDMI port on the TV.
- Check that the TV or monitor is turned on before docking the console.
- Restart the console and try again.
The AC adapter and HDMI cable are especially important with the Nintendo Switch 2. The original Nintendo Switch AC adapter can charge the Nintendo Switch 2 console directly, but it does not provide sufficient power to the Nintendo Switch 2 dock in TV mode. The HDMI cable should also be an Ultra High Speed HDMI cable for the best setup experience. Using both helps ensure your Nintendo Switch 2 delivers the most reliable big-screen performance.
Can you connect Nintendo Switch 2 to a TV without the dock?
For Nintendo Switch 2, the dock is required for standard TV mode. That means the easiest and most reliable way to connect the console to your TV is by using the official Nintendo Switch 2 dock, the official Nintendo Switch 2 AC adapter, and an Ultra High Speed HDMI cable.
This is an important difference from how some players use accessories on the original Nintendo Switch. Do not treat USB-C-to-HDMI adapters or random HDMI hubs as guaranteed replacements for the Nintendo Switch 2 dock. If you want the most stable setup, especially for everyday play, stick with the official, dock-based method.
This also helps avoid confusion when upgrading from the Nintendo Switch console. Your older Nintendo Switch accessories may physically look similar, but they don’t deliver the right power or HDMI standard for Nintendo Switch 2 TV mode.
Best display settings for Nintendo Switch 2 on TV
After you connect your Nintendo Switch 2 to the TV, double-check your display and audio settings. For most players, automatic resolution settings are the easiest place to start. This lets the console and TV choose a compatible output. If something looks off, you can check the TV output settings from the system menu and adjust the resolution manually.
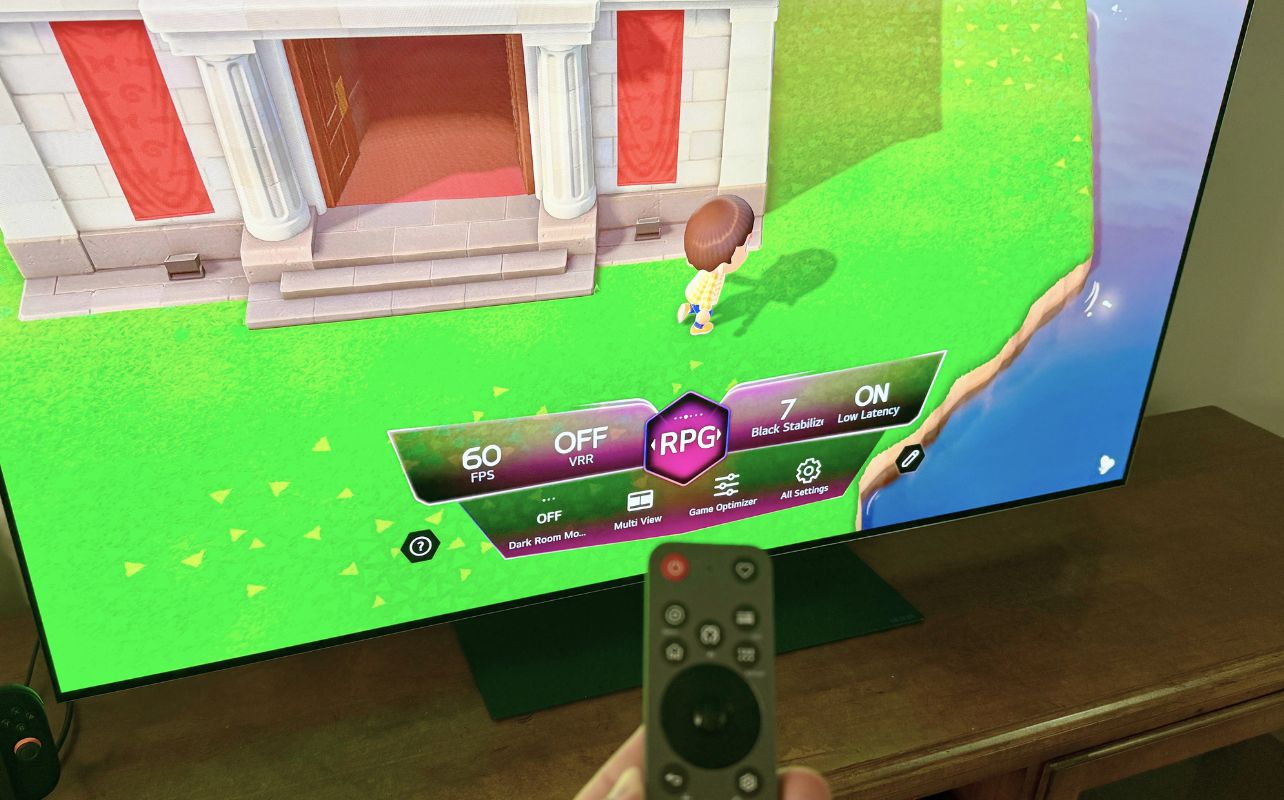
I also recommend turning on your TV’s Game Mode if it has one. Game Mode can help reduce input delay, which is especially useful for racing games, platformers, sports games, and action titles where timing matters.
For audio, your Nintendo Switch 2 console should automatically send audio through the HDMI cable to your TV. If you do not hear anything, turn up your TV volume, unmute the TV, and select the correct audio output on your television or sound system.
How do you connect Nintendo Switch 2 to a monitor instead of a TV?
Connecting Nintendo Switch 2 to a monitor works much like connecting it to a TV. You still need the Switch 2 dock, official AC adapter, and Ultra High-Speed HDMI cable. Plug the HDMI cable from the dock into the monitor’s HDMI input. Make sure to select the correct input on the monitor and dock the Nintendo Switch 2 console.
The main difference is audio. Some monitors have built-in speakers, while others do not. If your monitor has no speakers, you may need headphones, external speakers, or another audio setup depending on your gaming space.
Frequently asked questions
Does the Nintendo Switch 2 work on any TV?
The Nintendo Switch 2 should work with TVs and monitors that have an HDMI input. For the best experience, use the official dock setup, the official Nintendo Switch 2 AC adapter, and an Ultra High Speed HDMI cable.
Can I use my Nintendo Switch HDMI cable?
It is better to use an Ultra High Speed HDMI cable with the Nintendo Switch 2. The original Nintendo Switch HDMI cable may work for basic setups, but it is not ideal for the Nintendo Switch 2 TV mode.
Can I use my old Nintendo Switch AC adapter for TV mode?
The original Nintendo Switch AC adapter can charge the Nintendo Switch 2 console directly, but it does not properly power the Nintendo Switch 2 dock for TV mode. For TV play, use the official Nintendo Switch 2 AC adapter.
Why does my TV say “No Signal”?
A “No Signal” message usually means the TV is not receiving the video signal from the Nintendo Switch 2 dock. Check the HDMI input, power the dock, seat the console fully in the dock, and use the proper AC adapter and Ultra High Speed HDMI cable.
How do you get sound on the TV from Nintendo Switch 2?
Sound should pass from the Nintendo Switch 2 dock to the TV through HDMI. If there is no sound, check your TV volume, mute settings, HDMI input, and any soundbar or receiver settings connected to your TV.
The bottom line: Nintendo Switch 2 TV setup is quick once you have the right gear
Connecting your Nintendo Switch 2 to a TV is simple with the right setup. The Nintendo Switch 2 dock handles the connection, the official AC adapter powers TV mode, and the Ultra High Speed HDMI cable sends video and audio to your screen.
Connect everything properly, and you are ready to enjoy Nintendo Switch 2 games on the big screen. Whether you are setting up your console for the first time or moving it to another room, a few quick checks can help you avoid the most common setup issues. Now that your Nintendo Switch 2 is ready for TV mode, grab your Joy-Con 2 controllers, settle in, and enjoy the full big-screen experience.
If you are looking for extra controllers, HDMI cables, storage, or more Nintendo Switch 2 accessories, you can find what you need online at BestBuy.ca.


