
Microscopes are thought of as a device you’ll use in science classes or if you work in a lab. Until I was asked to review the 40X – 1600X National Geographic microscope, I couldn’t imagine why I’d want one at home. Even with four kids in different grades at school and two of them interested in science, I never thought a microscope would be something I’d use.
Now that I’ve tested out the National Geographic microscope, I just can’t stop making slides to view with it. It’s been so fun testing it, now I want to own one.
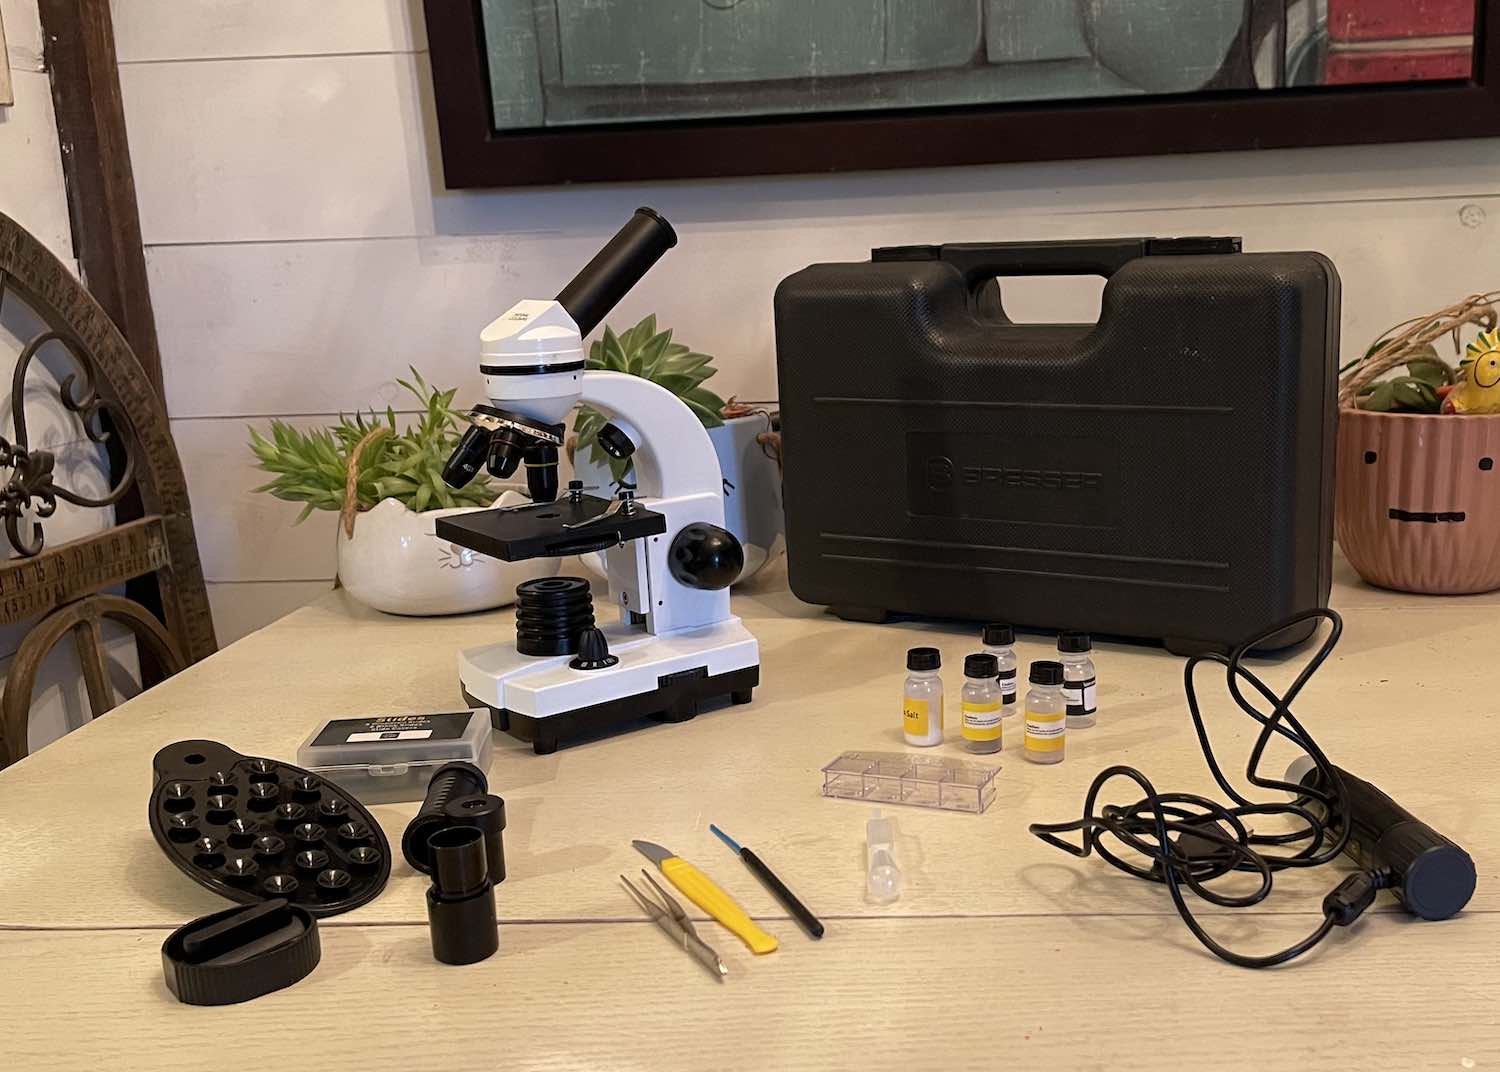
Here’s a look at the specs on the National Geographic microscope, how it works, and why it’s such a great device to have at home.
Features on National Geographic microscope
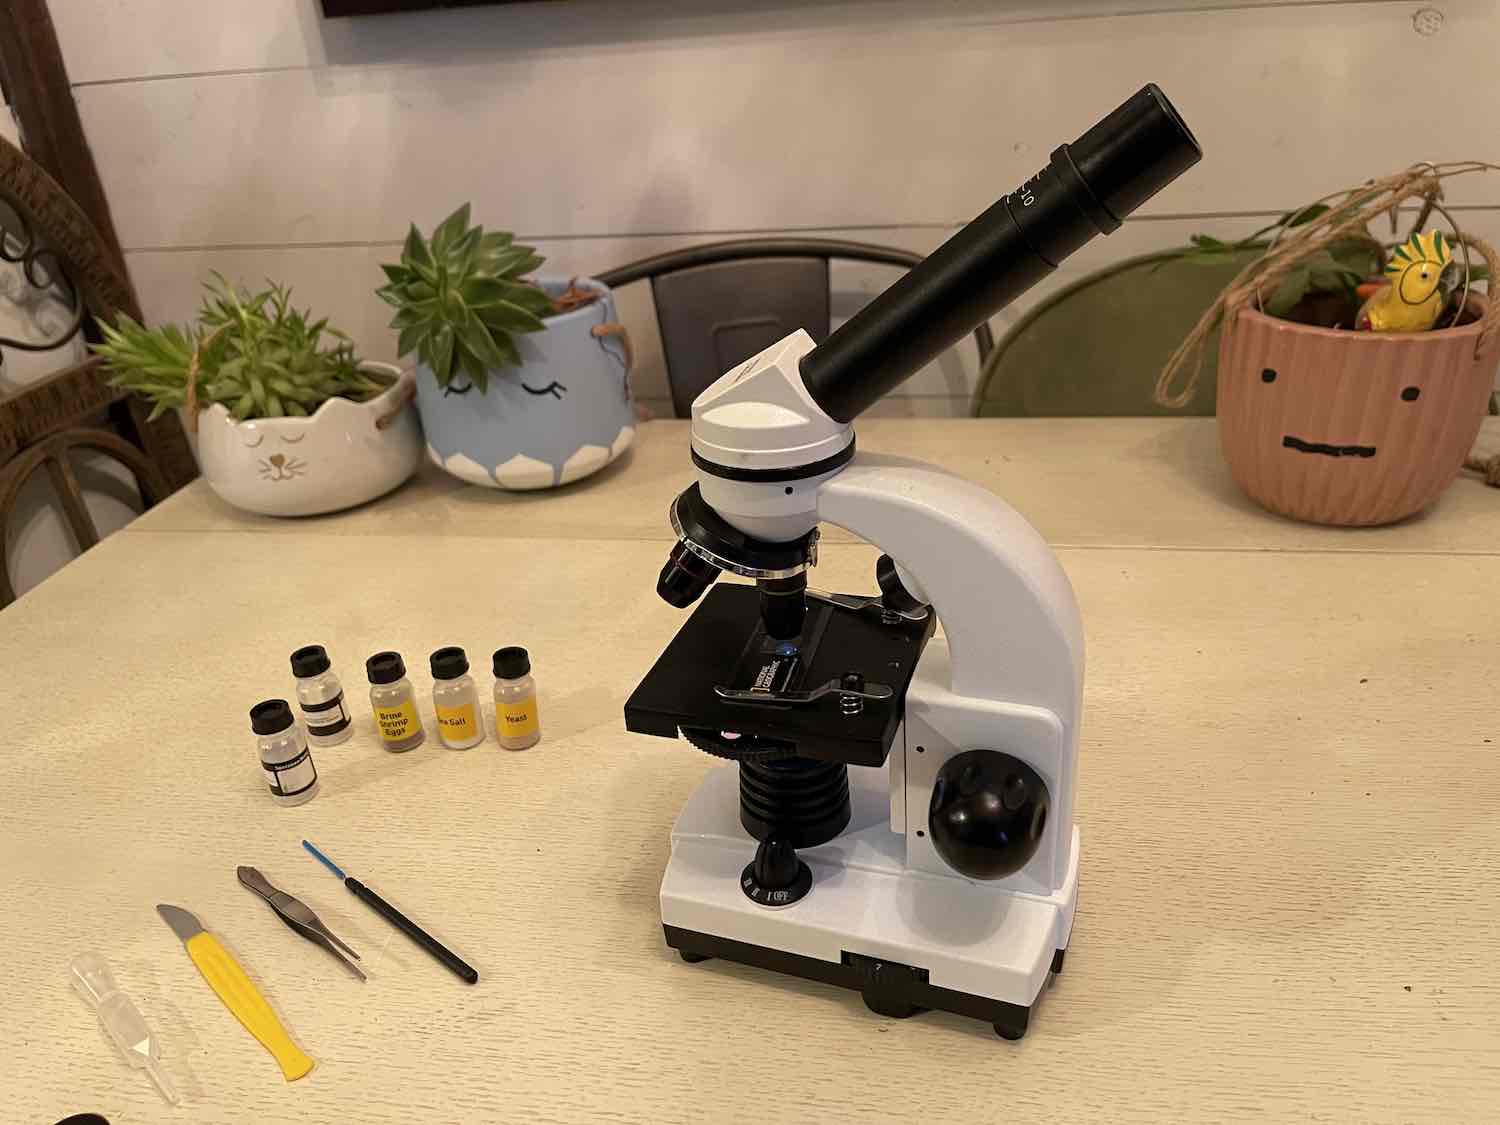
The National Geographic microscope is a standard-sized microscope. It’s white with black trim and it feels sturdy when you hold it. It’s packaged in a carrying case with a variety of other tools you can use to scoop up samples, slice them, and view your samples on your phone or computer.
- Microscope with single ocular tube design and three magnification powers
- Range of 40X to 1600X magnification
- Colour filter lets you see detail in colourless samples like water
- Turn dial for light lets you adjust the illumination for different slides
- Smartphone adapter lets you mount your phone’s camera over the lens and record what you see
- USB eyepiece works with your PC so you can connect to your computer
- Includes 2 Barlow lens so ou can see your slides in different ways
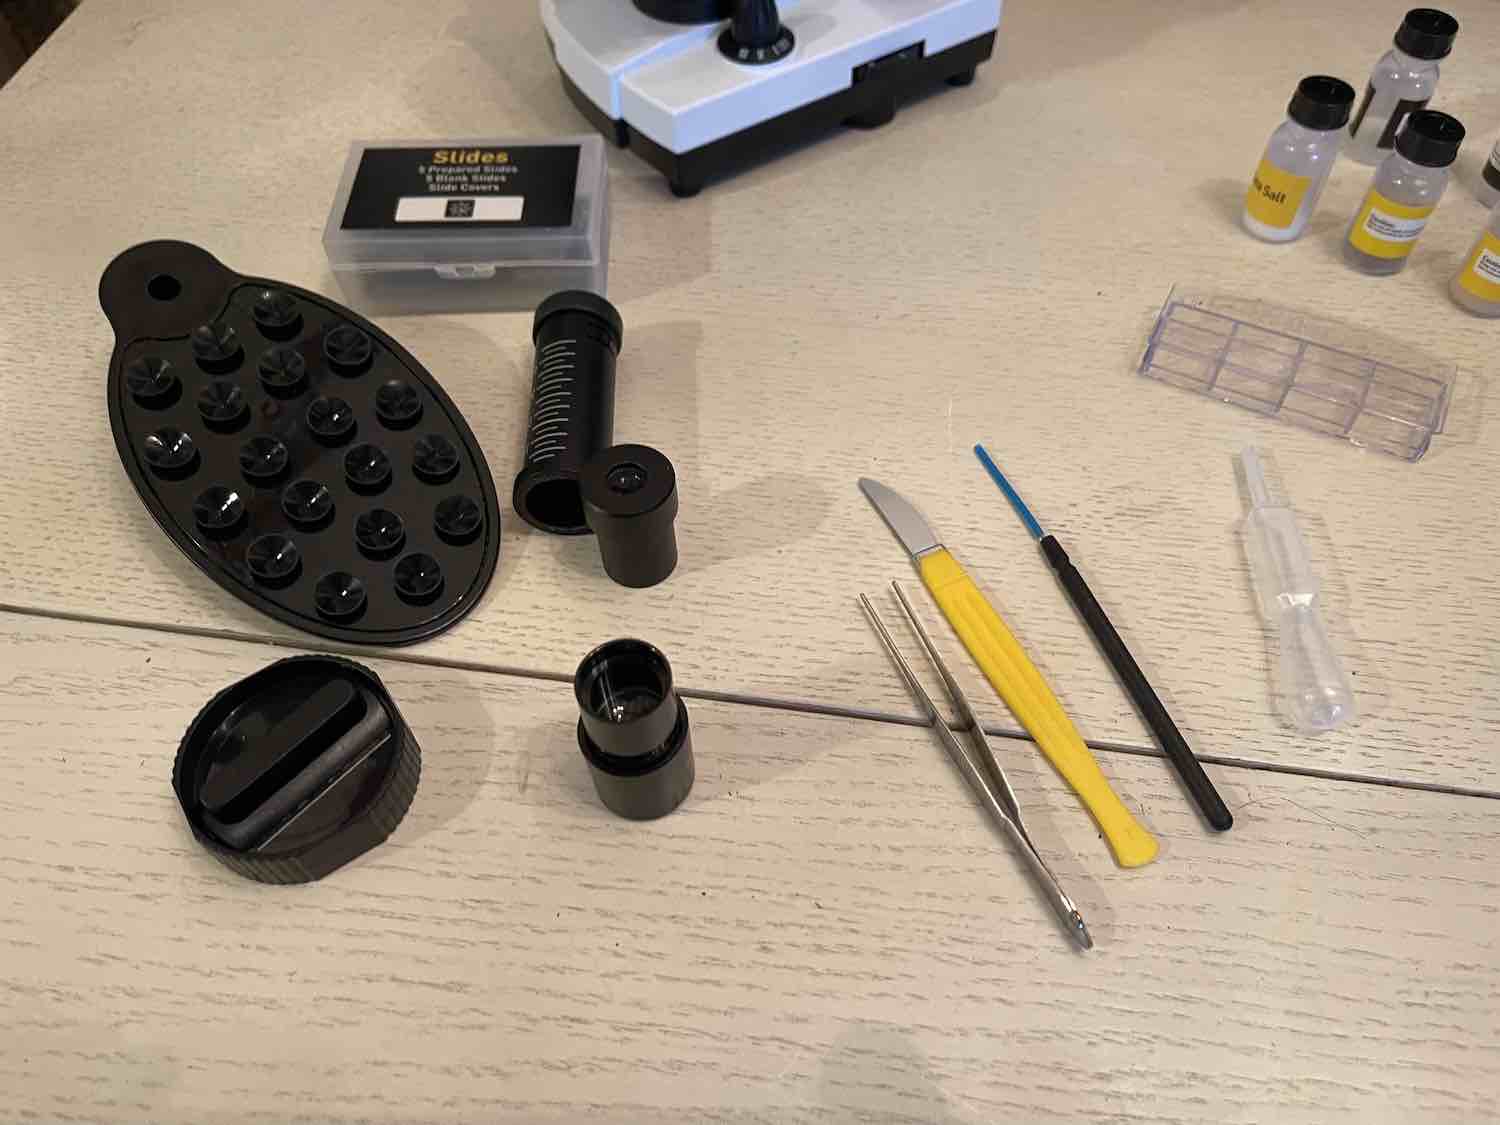
- Includes several prepared slides of different items including tree samples or fly legs
- Scalpel, pipette, needle, and tweezers are included to help you create your own samples
- Several vials of different items including yeast, sea salt, and brine shrimp eggs are included. There is also a brine shrimp hatchery compartment you can use to hatch your shrimp eggs
- Takes 3 AA batteries
Setting up National Geographic microscope
The National Geographic microscope uses 3 AA batteries. You’ll have to use a screwdriver to access the battery compartment to install the batteries. Once you do the microscope will be fully operational.
Everything you need to start viewing samples and making your own samples is included with the National Geographic microscope. It all packs up in the included carrying case. The case makes it very easy to take the microscope with you when you’d like to go somewhere to check out samples, and they give you all of the tools you need to create slides.
You can turn the National Geographic microscope off and on by turning the small dial at the base of the microscope. That dial will also change the way the light hits your slides.
Testing out National Geographic microscope
I live on a farm with a variety of animals, plants, and insects. When I first set up the microscope I used the included slides, and it was interesting to see the fly leg at 1600X magnification. We tested out the dirt in my yard and the water in my pond, and then it suddenly hit me that I could use it to look at some of our dead bees that died due to the cold this winter. From there I was off to the races, and now I can’t imagine not having a microscope. It’s actually so fun you’ll probably forget you’re learning.
Tools included with the National Geographic microscope kit
Some of the tools included were obvious including the dropper, tweezers, needle, and microtome, a device used to slice up samples. I had never used one before so I was excited to try it out.
For me, the most interesting addition to the National Geographic microscope kit is the brine shrimp eggs. Otherwise known to many of us as sea monkeys, you can buy these eggs in almost any toy store or online. If you like to read old comics you’ll have seen the advertisements for sea monkeys on the back, and it was always one of my goals as a child to hatch some friendly little sea monkeys.
Not only do they include brine shrimp eggs in this microscope kit, but there is also a hatchery case you can use to hatch them. I felt like a kid at Christmas, and I immediately put some eggs in the hatchery and have been waiting patiently for any signs of life. It should take around 36 hours, but if this batch doesn’t hatch I’ll try again.
Basic controls on National Geographic microscope
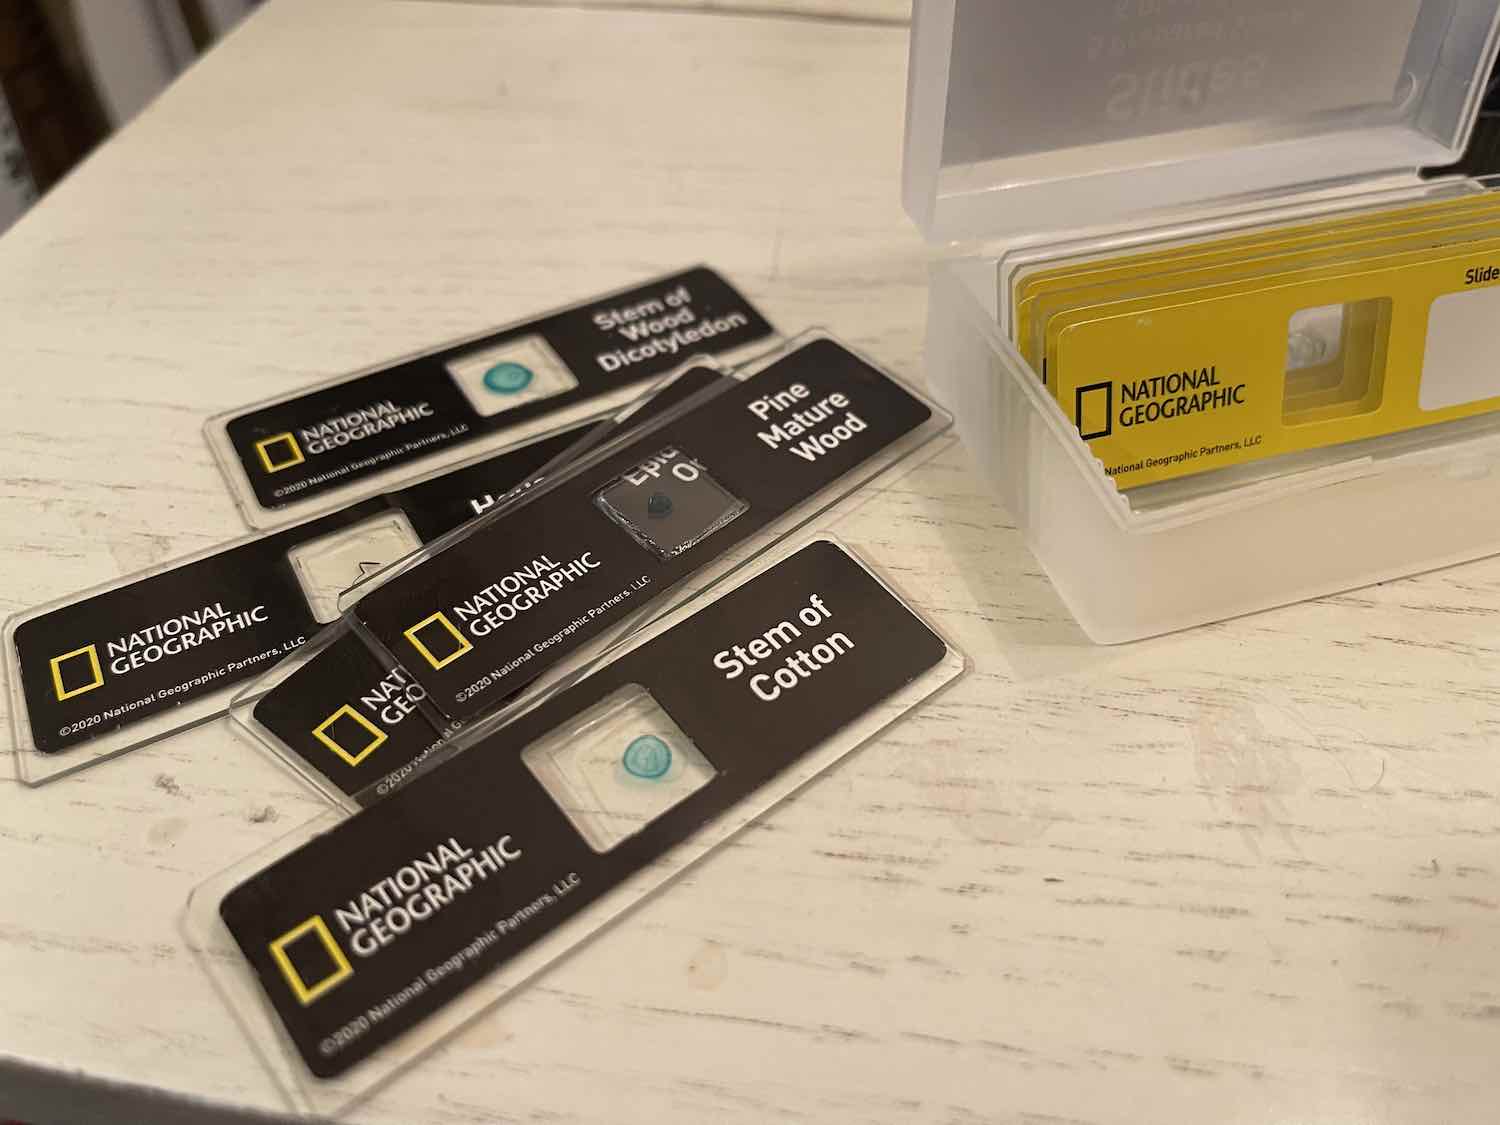
I wanted to take a few minutes to familiarize myself with how the microscope works before I started making my own sample slides. It’s nice there are a few interesting samples to take a look at while you get used to the microscope. My son and I enjoyed looking at the fly leg at max magnification, and the slice of the tree was really interested too.
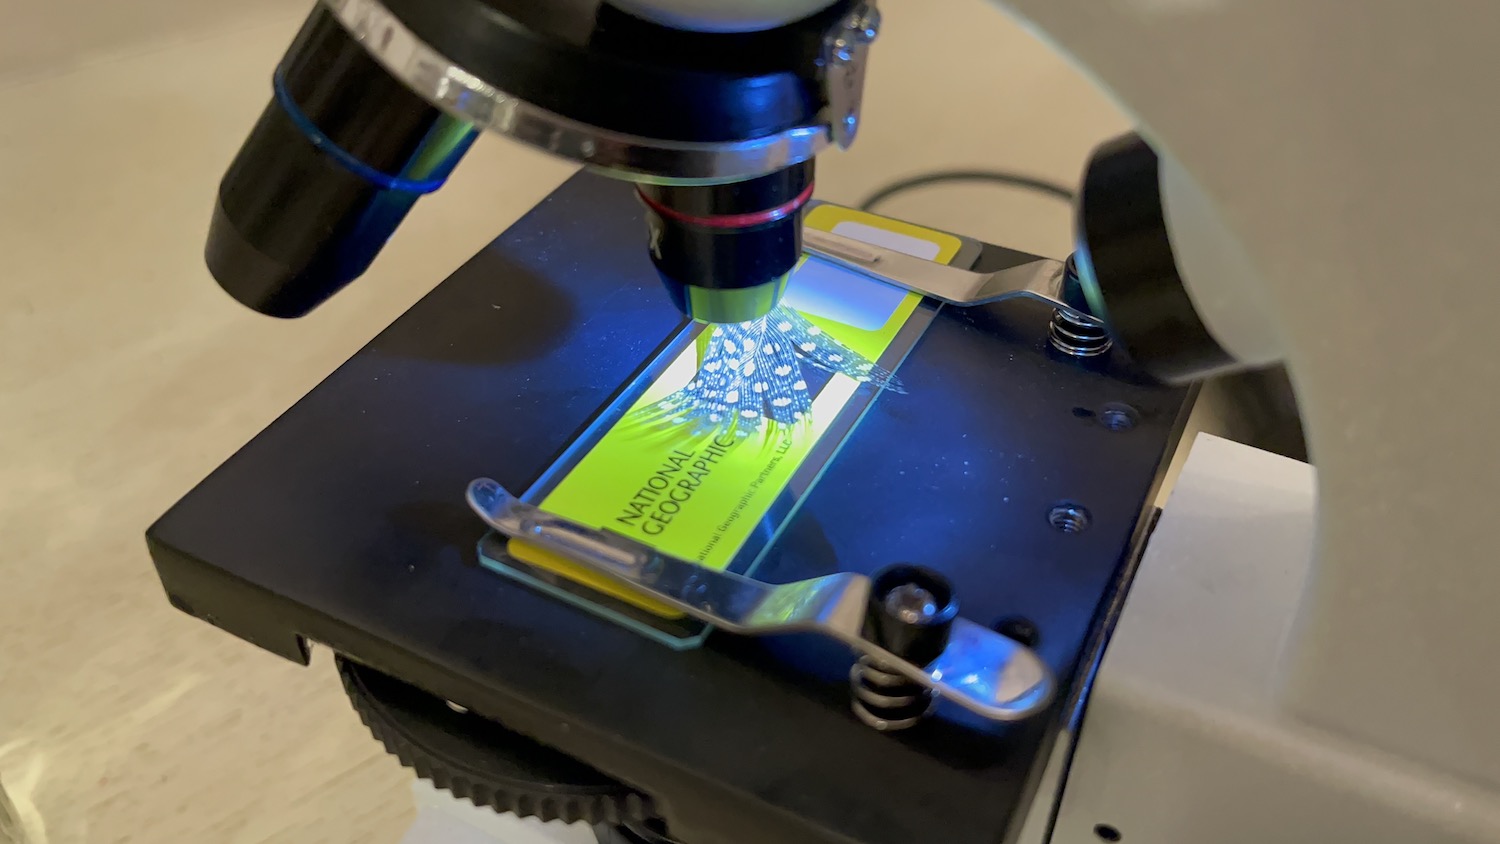
There are three lenses you can turn to amplify your magnification. You can also raise and lower the bed of the microscope with a dial on the side. There is a colour dial under the microscope bed too. It’s useful if you’re looking at clear slides and you want to see them more clearly.
The slides clip in securely so they stay put when you’re viewing them. Everything is very easy to use, and when you’re done it all has a dedicated spot in the carrying case.
Creating your own slides with the National Geographic microscope
The fun really starts when you’re creating your own slides. There’s just something about digging things up in your own yard that widens your perspective. My son and I spent a while wandering around, digging in the dirt for a deeper sample, and coming up with ideas of what would be cool to test.
Checking a honey bee for mites using a microscope
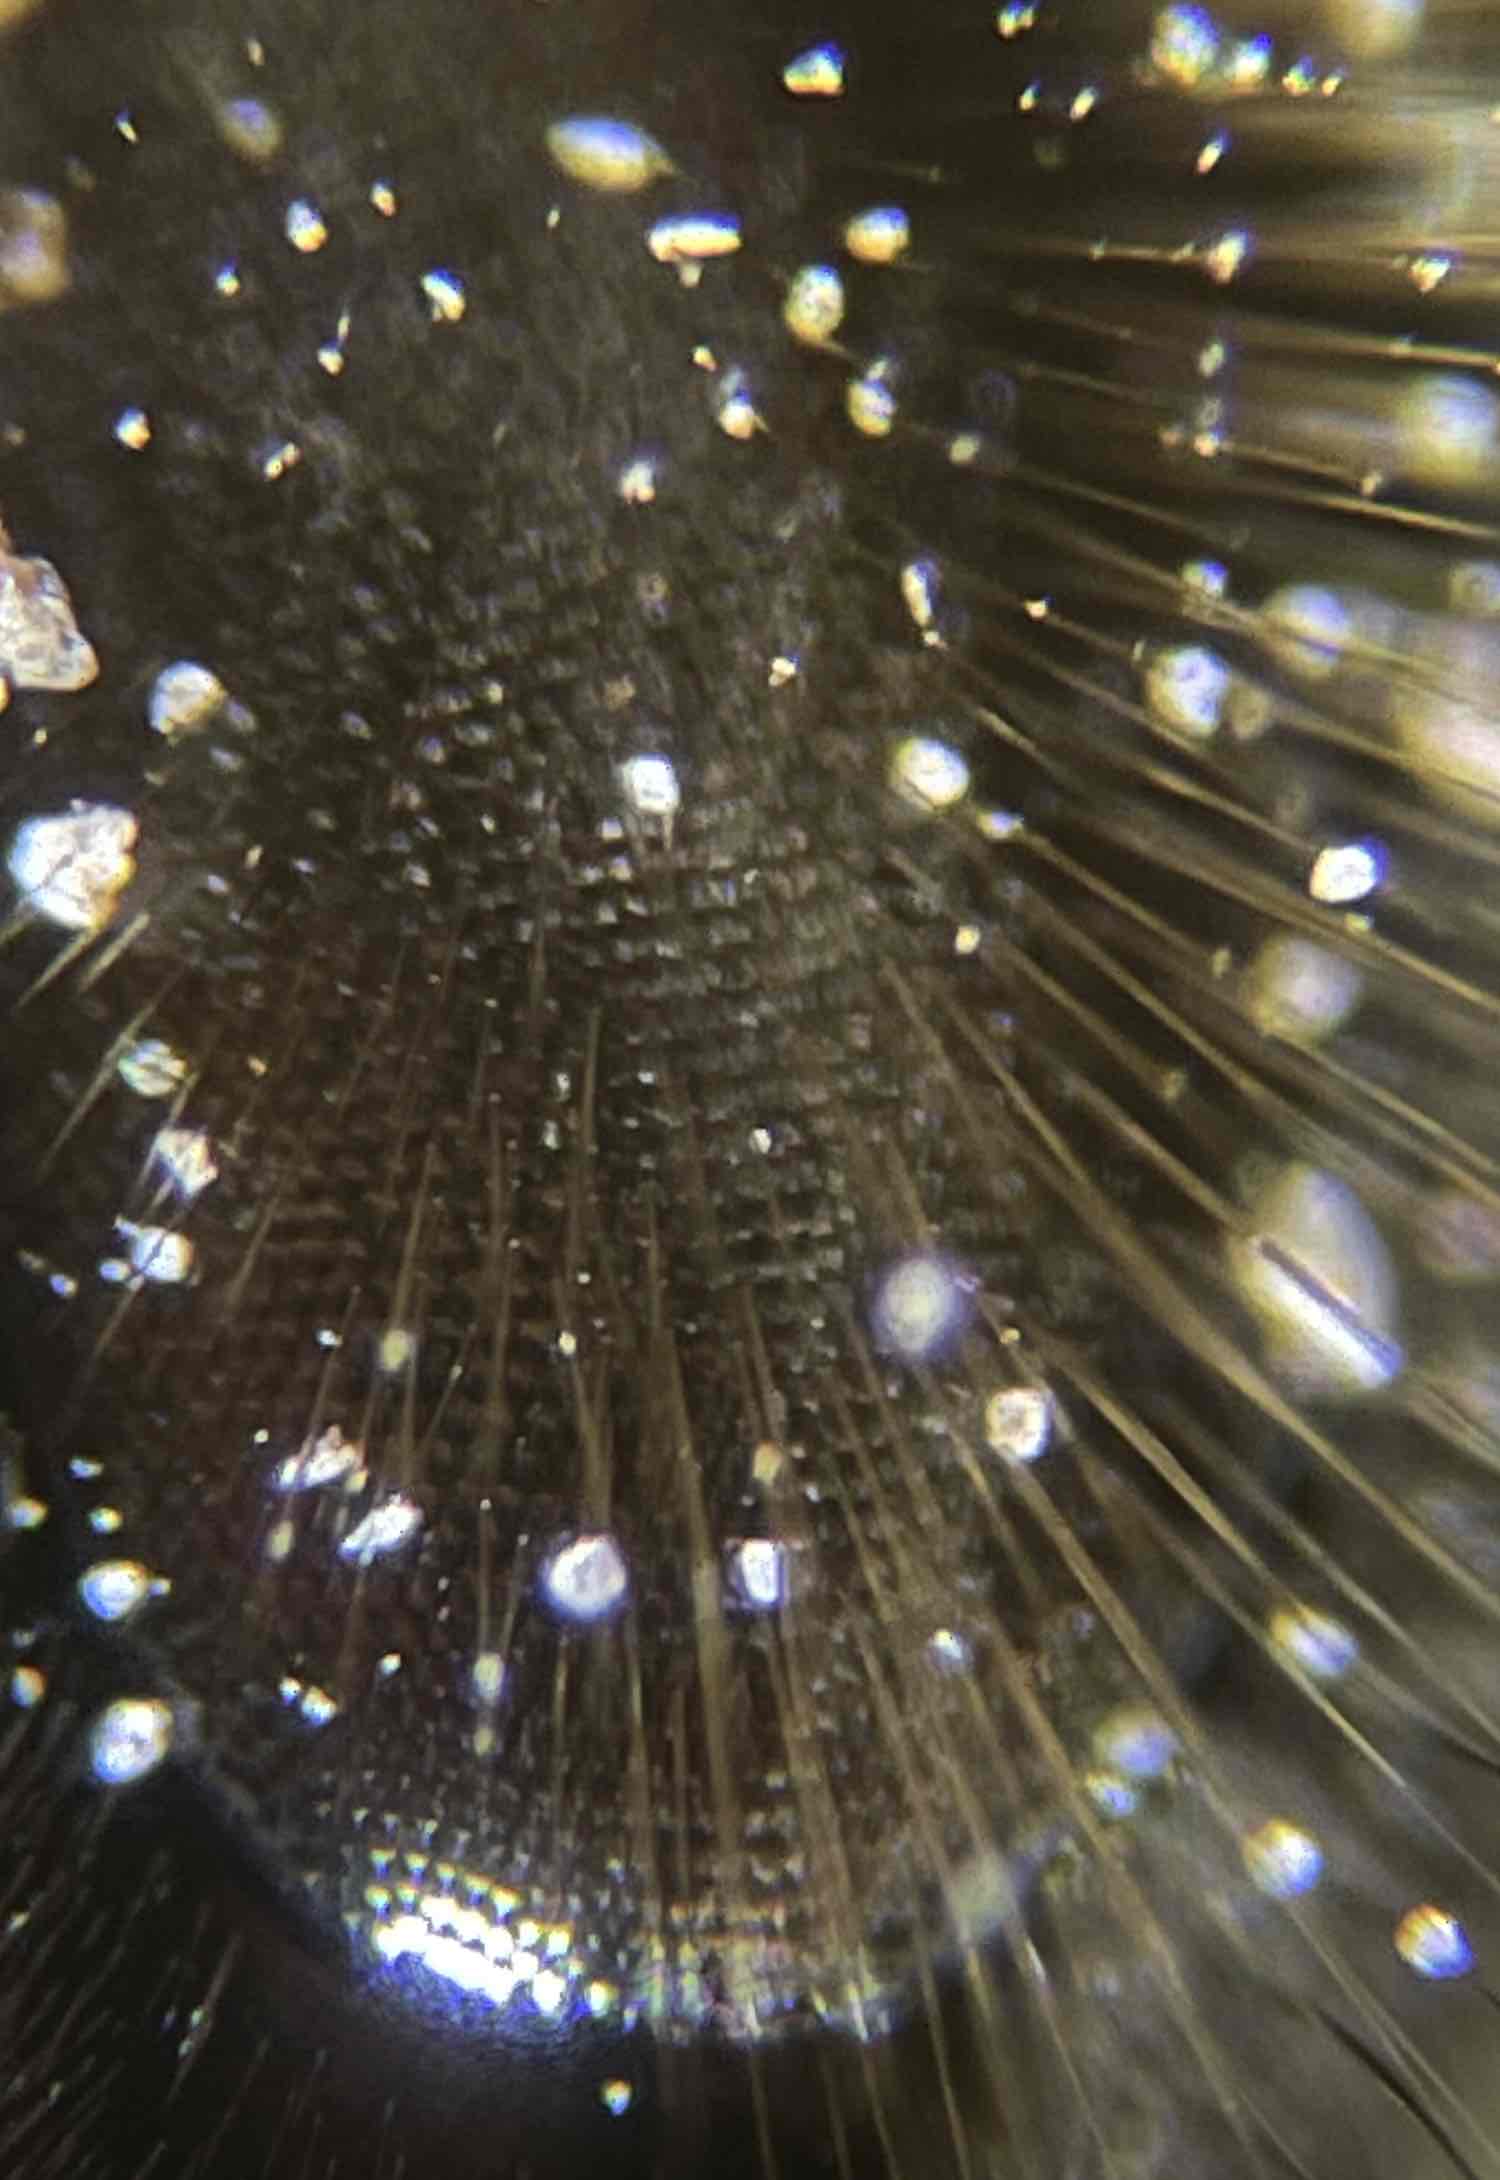
We have a very deep lake on our property, and there are frogs and lizards that use it as an incubator in the spring. We always find an interesting mix of eggs or baby tadpoles in the pond, so we took a scoop of water to see what else was in there. We also found a dead bee that had died due to the cold this winter and a guinea fowl feather one of our birds dropped.
It’s easy to make your own slides, and it’s nice that they included a few blanks to get you started. Traditionally you would slice up the sample and place it between two slides, but I didn’t do that with my own. Because the bed raises and lowers so well we were able to look at our samples without slicing or pressing.
One of the most interesting things I saw on the bee was tiny little bits of pollen. There were also microscopic specs of dirt on the bee’s wings and legs. The most interesting discovery for me was that the bee didn’t have a mite attached to it, and after finding a few other dead bees in the hive, I was able to confirm that the hive didn’t die out because of varroa mites. This is a common issue for beekeepers that we have to treat every year, and it’s also one reason for colony loss. It’s nice to know that wasn’t the case here.
I didn’t find much in my pond water, but it’s still early spring so that’s not a surprise. The feather was interesting to look at, as was the dirt. I could easily spend hours every week checking out samples from my yard.
When you’re done making and viewing your own samples you can wipe the slides with rubbing alcohol to clean them.
Using the smartphone adapter on the microscope
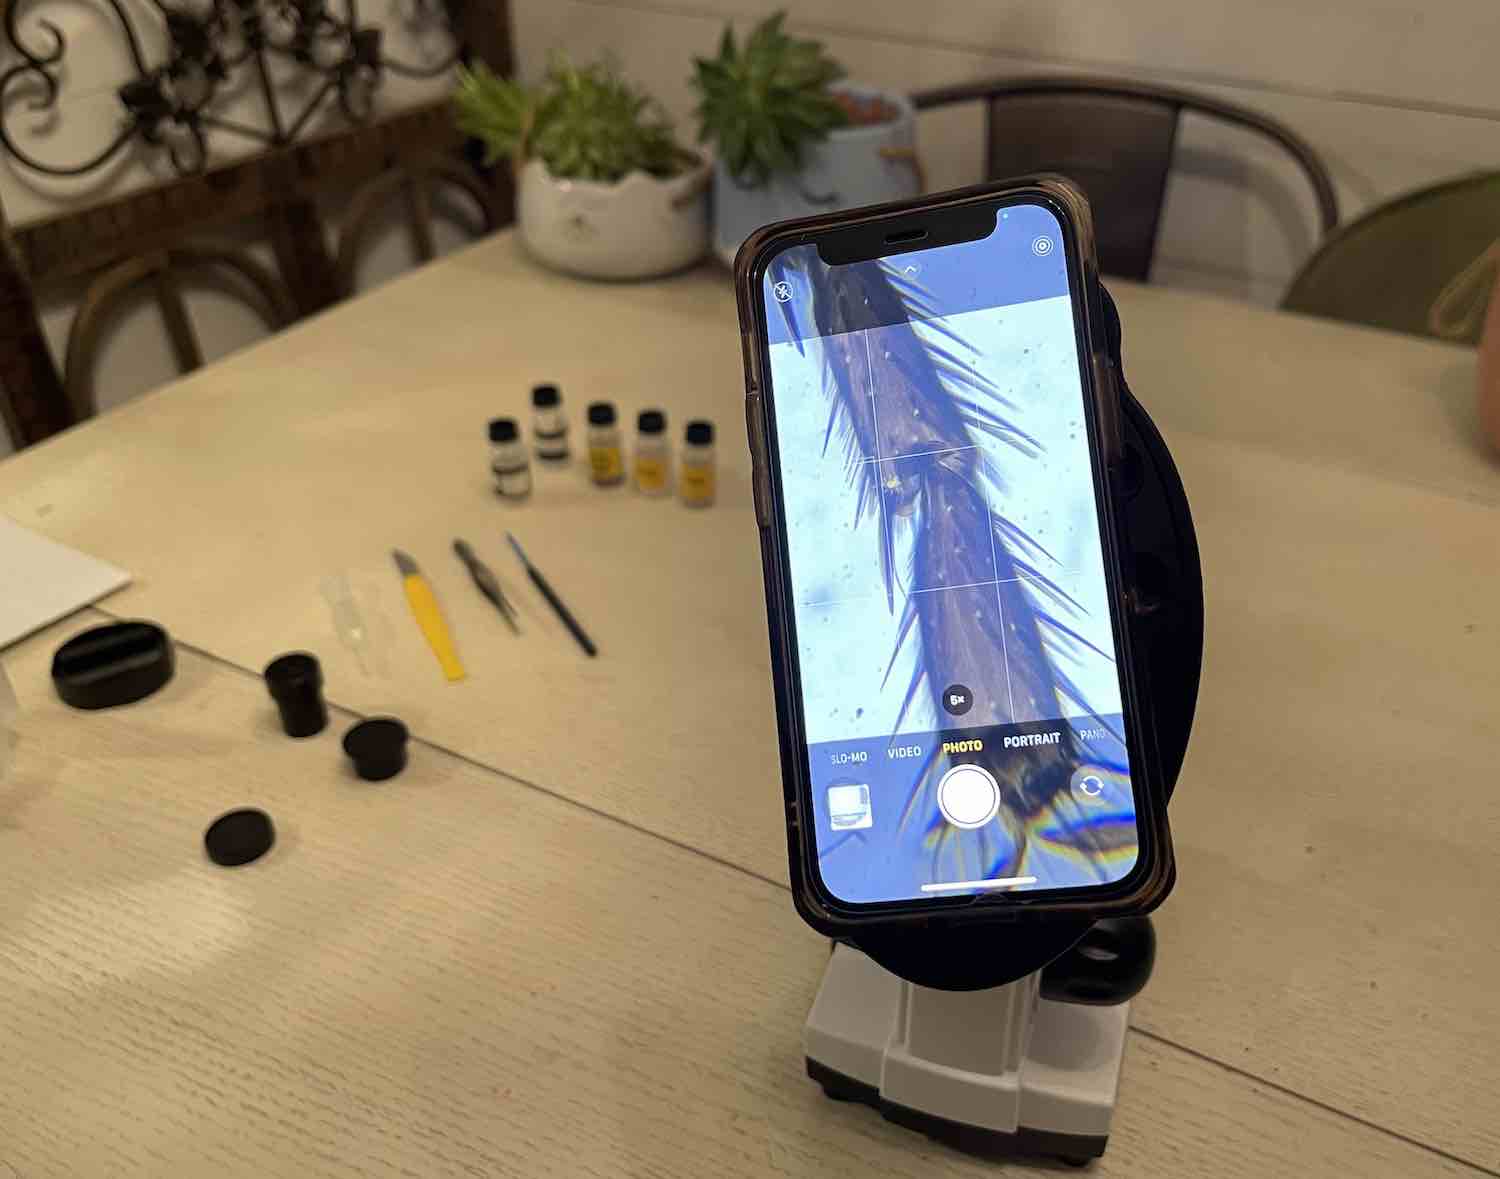
The smartphone adapter and the USB adapter are by far the best tools included with the National Geographic microscope. You can either view the samples on your phone, share it with others or record what you saw, or you can connect to your PC and use National Geographic’s software to view your slides on your computer.
I didn’t have a PC to test out the USB viewer. The software doesn’t work with Apple computers, but I did love using the smartphone adapter. It holds your phone fairly securely, and I spent quite a while zooming in on the phone and taking photos and videos of my bee. At one point four of us were gathered around the microscope staring at the eye of the bee. It’s pretty surreal to see the bee’s face up close like that.
Should you choose the National Geographic microscope?
I’ve never thought of owning a microscope before, but now that I’ve tested out the National Geographic microscope I can’t imagine not having one. I may live on a farm with a wider variety of samples, but anyone with access to nature would enjoy using this with their kids.
I really like how the bed of the microscope makes it very easy to view anything, even if it’s not packaged perfectly as a sample. I found the microscope is sturdy enough, although a little added weight wouldn’t hurt it. I found it would vibrate a bit if someone walked by.
I read the instruction booklet when setting up the microscope, but there weren’t a lot of details or instructions included. There is a QR code in the book you can scan that will open up further instructions.
There are more than enough tools and slides included to help you view anything you’d like. The different lenses offer you a different view as well, and my favourite feature was the smartphone viewer. It’s nice to share the view with everyone at one time, and I loved recording videos of what we were seeing.
I’m sure you can tell I really enjoyed using the National Geographic Microscope. It might not be as full-featured as an actual scientific microscope, but it’s a great beginner microscope with enough features to keep you and your kids entertained. Unfortunately, my sea monkeys have not hatched yet, but it’s been fun waiting.
You can find your own National Geographic microscope on Best Buy.


What is the item number? There are so many national geographic microscopes.
Comments are closed.