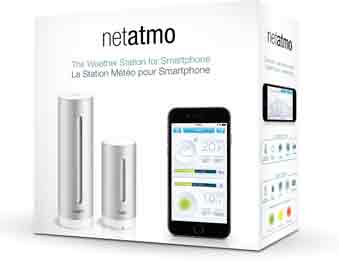
 Whether good or bad, the weather is the one thing we all have in common. Probably why we talk about it so often. The Netatmo Weather Station bills itself as the “the first personal weather station.” It lets you monitor temperature, humidity, carbon dioxide, air quality and even noise from your phone, tablet or computer.
Three components
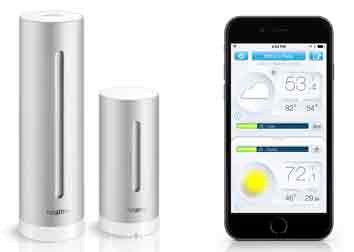
The Netatmo Weather Station consists of two modules and the app. Each module is aluminum cylinder packed with sensors inside put with no dials, buttons or screens on the outside. You control the device using the app installed on your smartphone. The indoor cylinder module is 15 cm (6 inches) and the outdoor module is 10 cm (4 inches). The main indoor cylinder plugs into the power outlet via a Micro-USB port at the back.
 Location, location, location
Next step was installing the four AAA batteries that came with the outdoor unit. (Netatmo says the batteries will power the cylinder for an entire year.) The trickiest part of the set-up was getting the outdoor module in a location where it can connect to the WiFi and the indoor module. Finding the right spot proved to be challenging. The company says it can be up to 100 metres but we found that the closer to the house the better the signal. The signal didn’t seem to go around obstructions in the garden.
Since it’s pre-paired with the indoor module the only way to know everything is synched is to see the green LED light on glow on the indoor model. The green sync light shows up every time you unplug or move the indoor module. We did a trial and error for both modules and got the best results with the indoor module in the family room and the outdoor module on the deck. We used the Velcro strap to attach it to one of the posts but may look at a more permanent mounting on the side of the house. Initially I was worried about this unit being outside and getting moisture inside but the design protects it from the elements and it kept working even through our first large snowstorm followed by freezing rain.
 Easy app
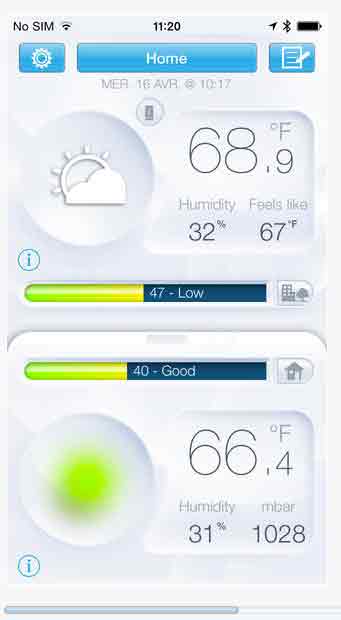
Once that was working, I downloaded the Weather station app using the Bluetooth connection. This is one smart gadget to set-up. After downloading the app, I was walked through the set-up process with step-by-step instructions. There was no need for me to enter any passwords since the system asked if it could copy my Wi-Fi settings and other info from my smartphone and transfer it to the station.
By communicating with my smartphone, the Netatmo Weather Station got my geographic location and using it’s built in barometric pressure sensors starting calculating the weather just outside my door. The indoor module monitor CO2 levels as well as ambient noise, although with a houseful of mostly tweens and teens, I already knew there was noise.
This weather station gets useful after you’ve collected some weather data. We were particularly interested in monitoring the indoor air quality since I have a child with asthma. Indoor air can actually be more polluted than outdoor air since we have made our homes more airtight. The Netatmo gave us warnings when the CO2 indoor levels were high and we could air the house out without needing to keep windows open all the time. The humidity index was going to show us if we needed to start the humidifiers. The comfort index gave us a number rating of the overall room. Hit the comfort icon gives you some suggestions for making a room for comfortable (turn the heat up, start the humidifier etc.…)
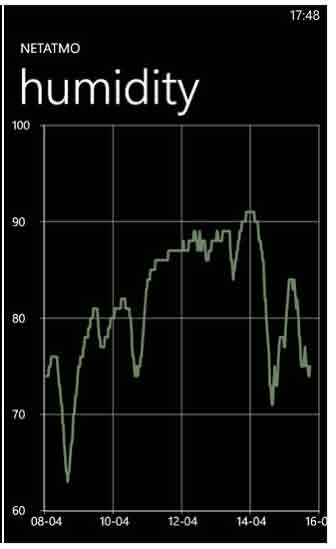
To read the current data, I launched the app and started looking at the graphs. The Netatmo Weather Station takes readings about every five minutes. For instant readings you press the top of the indoor module to force an instant readings but you still have to use the smartphone app to read the findings. I found the graphs too much information at time but my partner really enjoyed comparing the temperature during the days and nights to see if our new thermostat was doing it’s job and turning the heat down at night. The stats got more accurate after the Weather Station had been running for a few days and gathered enough stats for comparisons.
 Flexible graphs
I appreciated the well-designed Netatmo Weather Station app. I did find it a bit confusing trying to convert to Celsius but the app did switch to French once it realized I was in Quebec. I needed to rotate my smartphone to the landscape view to bring up graphs. I could pinch and zoom for the detailed reports five minutes apart. That was just too much information for me so I condensed it into a chart showing the highs and lows over a few weeks. Dragging the horizontal bar in the middle of the screen, all the latest information is displayed. Dragging the bar downwards shows weather forecasts for the next three days. Swiping to the left shows three additional days. It’s the same readings from the Internet just more convenient to read. The barometric readings on the outdoor module can also predict storms coming. The app also gave us the option of viewing weather information for other local weather stations or directly from our account at the Netatmo website. The company is also gathering all its info from clients to create a worldwide weather map. We are looking forward to adding our stats to the map and seeing how our local weather compares to other places. (This may be a dangerous activity during February and March when we are sick of winter.)
We are going to use the Netatmo cloud-based service to monitor the temperature and humidity of the house while we are away for the holidays. The low-temperature alert will let us know if the heat is turned off completely or there is a malfunction. We had one vacation where we came home to a burst pipe that had frozen and was despite hiring a house sitter. The Netatmo is going to give us piece of mind. I can see this being handy during summer months as well. We don’t have automatic sprinklers at our place but we do have some absent-minded teens who forget to water the garden. Monitoring the rain gauge will show us exactly how long it’s been since rainfall and when the teen needs to get on the end of the hose. Nothing stops a discussion with a teen that showing actual chart with stats. End of discussion.
Are you into monitoring the weather? Check out all the other cool gadgets Best Buy carries for weather watching.

