
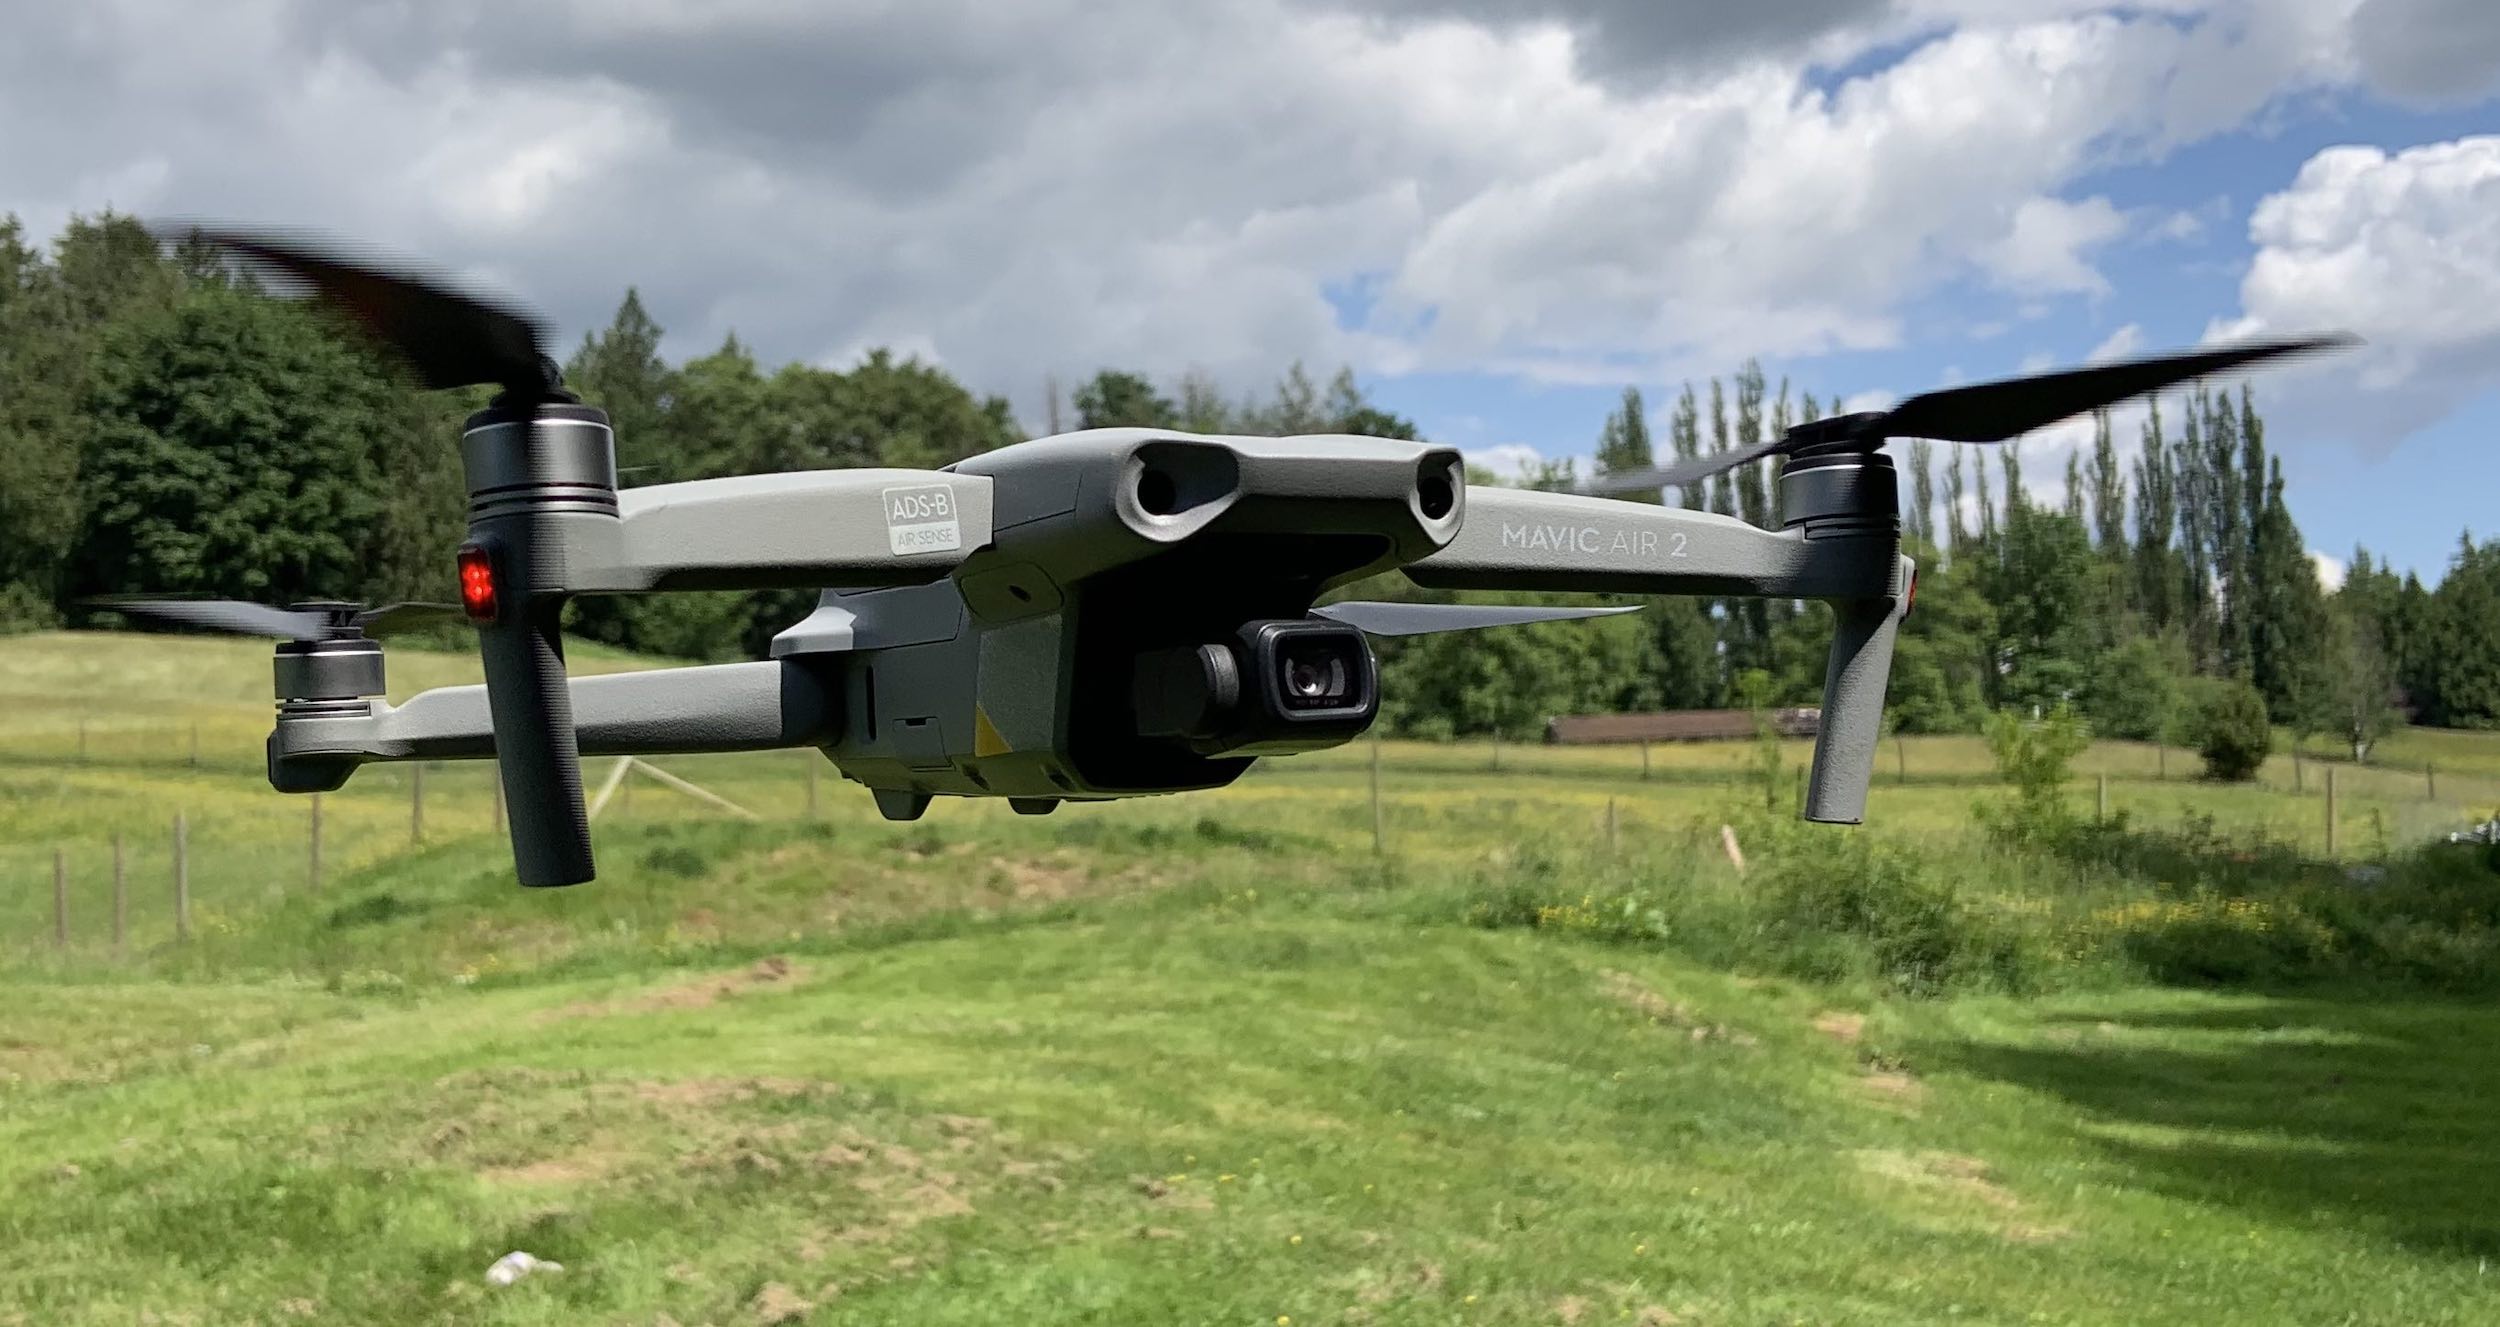
The DJI Mavic Air 2 Quadcopter is a foldable drone with a comprehensive controller, 34 minute max flight time, and a sensor that shoots jaw-dropping photos and videos in 4K, 2K, 1080p, or 8K Hyperlapse. That’s just scratching the surface of what this drone can do. I’ve been flying the DJI Mavic Air 2 drone steadily for almost two weeks and I’m absolutely blown away by it.
Make no mistake, this drone is not just for drone hobbyists; the DJI Mavic Air 2 is a drone for everyone. Even if you’ve never even watched someone fly a drone, you can easily fly and take advantage of all of the amazing features on the DJI Mavic Air 2. From one-touch take-off to multiple photo and video options, the app and remote control make everything so simple.
Design and features of DJI Mavic Air 2
The DJI Mavic Air 2 quadcopter drone is compact enough to pop into your backpack or bag for easy transport. The drone itself only weighs 1.25 lbs (0.57 kg).
The remote control is larger than some I’ve seen with other drones, but it’s easy to handle and carry too. I love the design that stores the controllers and the plugs for your phone.
- Easy to set up and fly
- Includes remote control, 2 control sticks, and 3 pairs of propellers
- 500-metre max elevation, depending on area
- 10 km (6.21 mile) max distance
- 64kph max speed
- Rechargeable 3500mAh lithium-ion battery gives you 34 minutes run time
- Three-axis gimbal with stabilization keeps your video and photos smooth
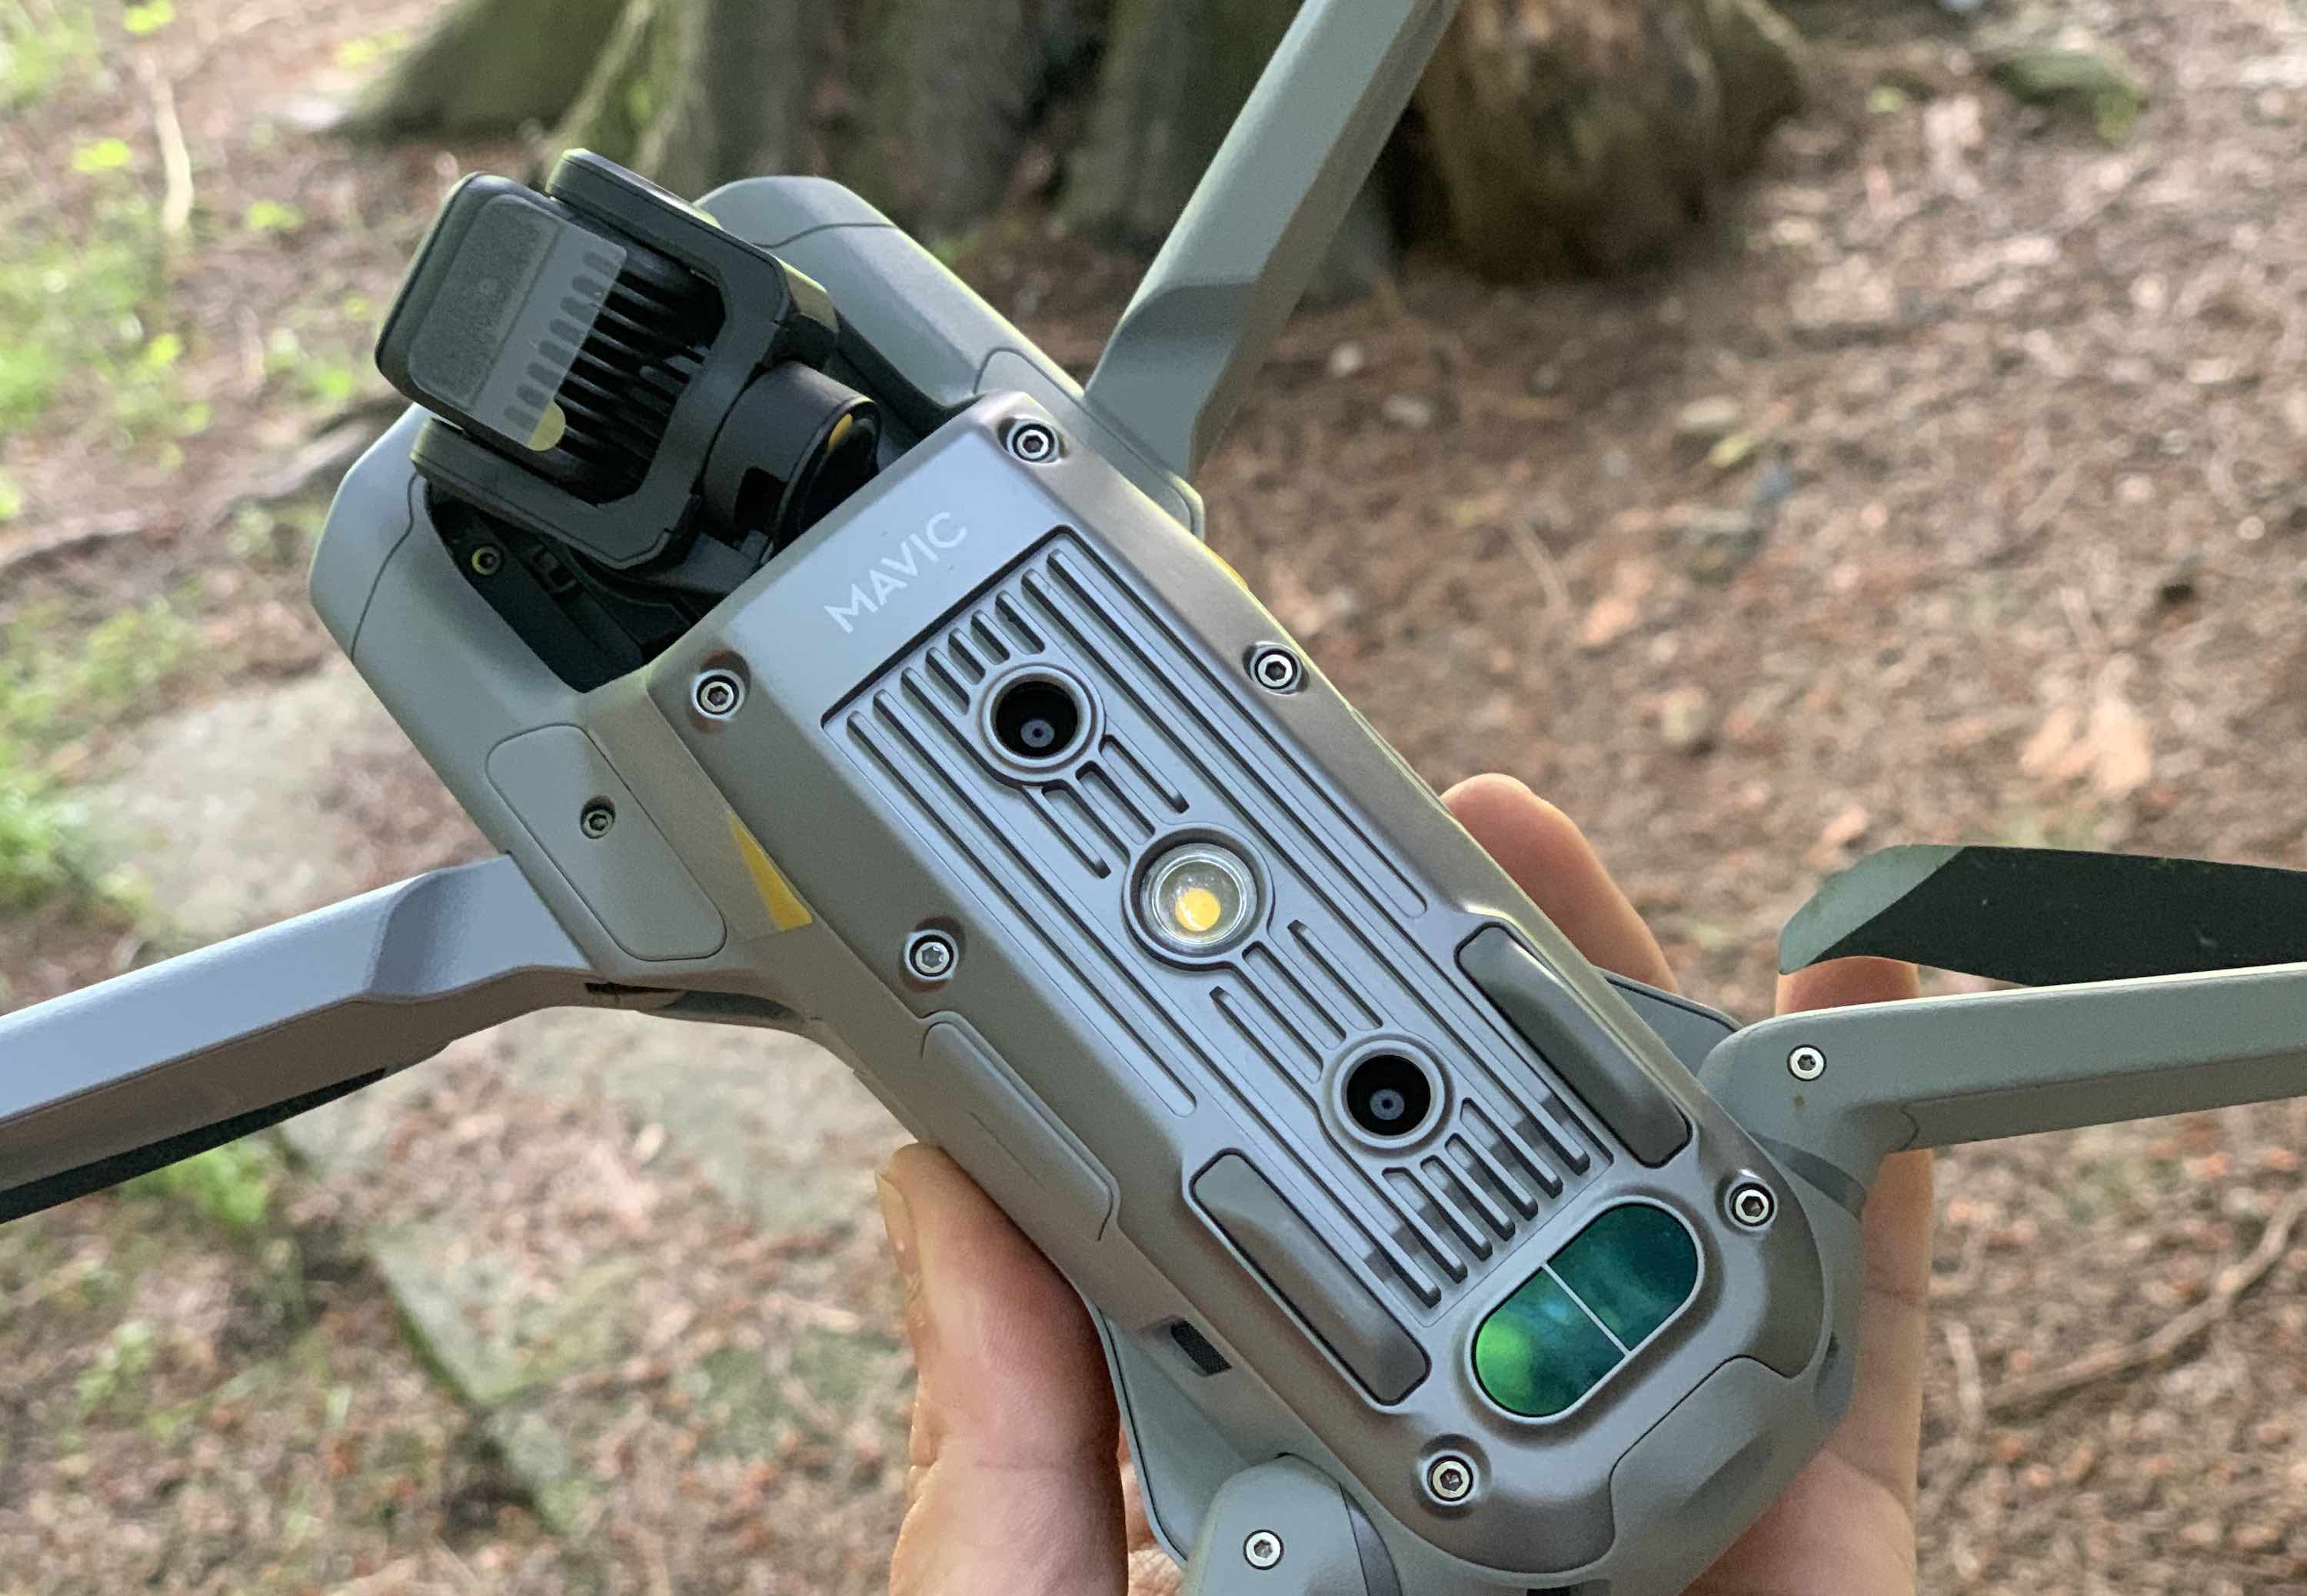
- 1/2″ CMOS sensor captures brilliant images and video including 48MP pictures, 8K hyperlapse, 4K Ultra HD/60fps, and 1080p/240fps videos
- Normal, Tripod, and Sport modes make flying easy or let you take over the the controls completely
- Several photo features including SmartPhoto, Hyperlight, Panorama, and HDR
- Auto-follow lets you lock onto a subject and follow them
- Auto-take off, auto-land, and automatic return to home point on low battery
- Voice prompts let you know what the drone is doing without looking at the screen
- Micro SD card slot holds cards up to 256GB as well as internal drone memory of 8GB
Unboxing and setting up DJI Mavic Air 2
There isn’t a lot of a set up required for this drone. The arms fold in and out easily, and all you’ll need to do is attach the propellers and control sticks. Everything is marked right on the drone with stickers, so you’ll know you’ve set it up correctly.
Once you’ve set it up you’ll need to charge it. It takes about an hour and a half to charge the battery on the drone from 0%. There are four lights on the top of the battery that show how much battery you have left to charge, and I was usually between 1 and 2 when I plugged it in.
I really liked how you could charge the remote and the drone battery with the same charger. Some drones I’ve used have disposable batteries in the remote and you only charge the drone, but with the DJI Mavic Air 2, you charge them both at the same time.
Flying DJI Mavic Air 2 drone
This drone is so easy to fly, anyone with any skill level at all can get it up in the air, fly it around, and get great footage. It also has enough tech on board to keep mid to expert level drone enthusiasts happy, and there are a few upgrades you can add to get even more out of your drone.
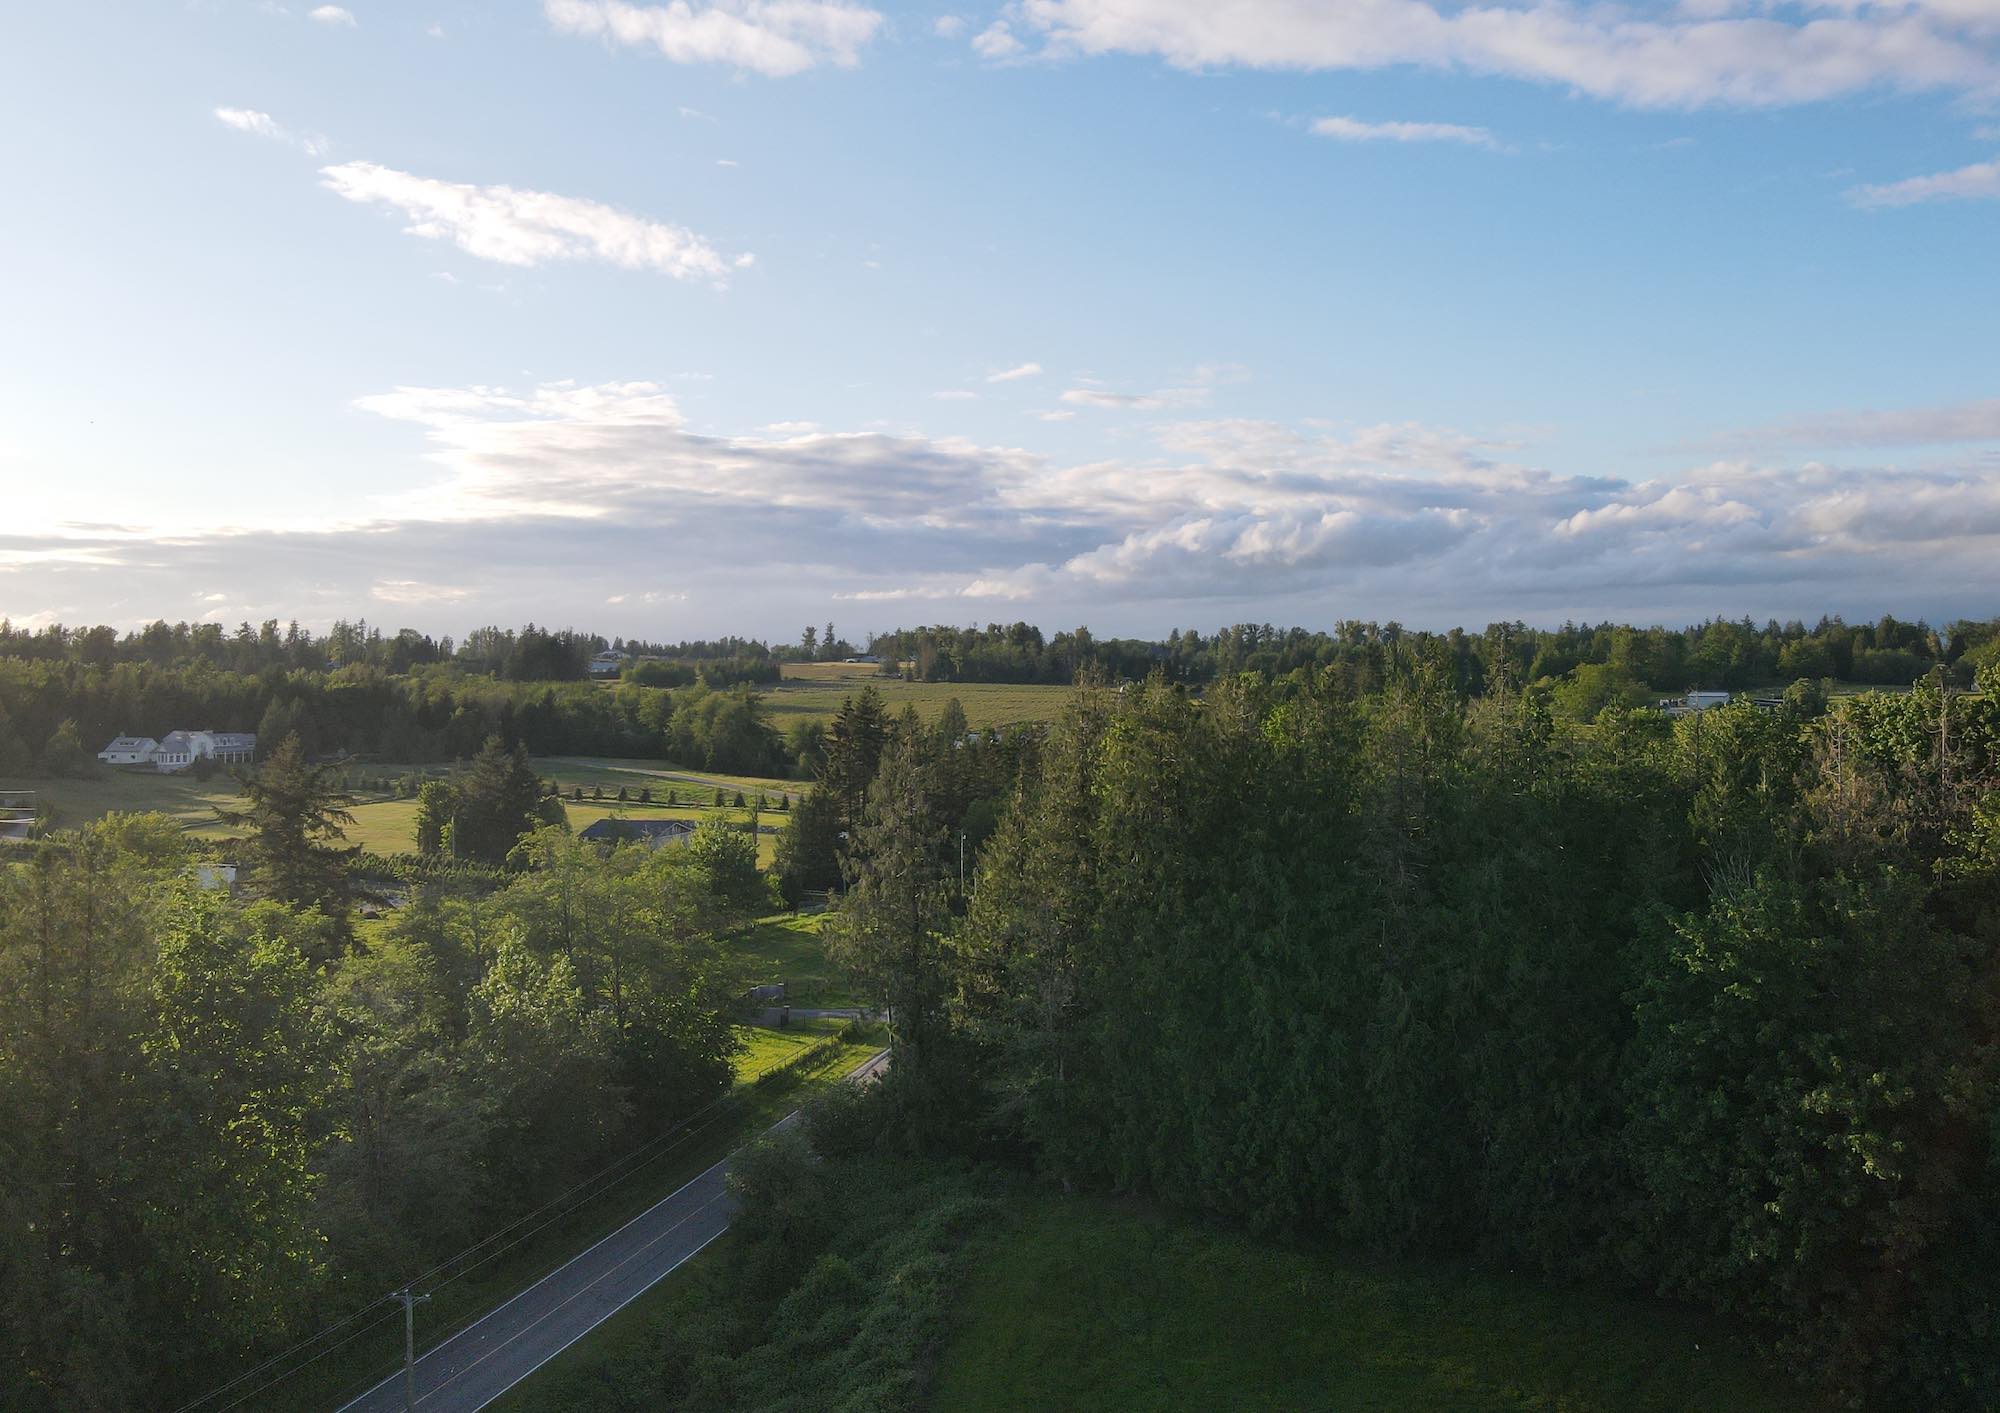
The first thing you’ll need to do before flying is to become familiar with Canadian drone rules. DJI makes it easy to see fly zones by adding a screen right on the app. You touch it and it will show you spots you can fly near you. In my case, I have a 12-acre property to fly on, so I stuck to my home quarter and we had more than enough room to test it out.
One-tap remote control

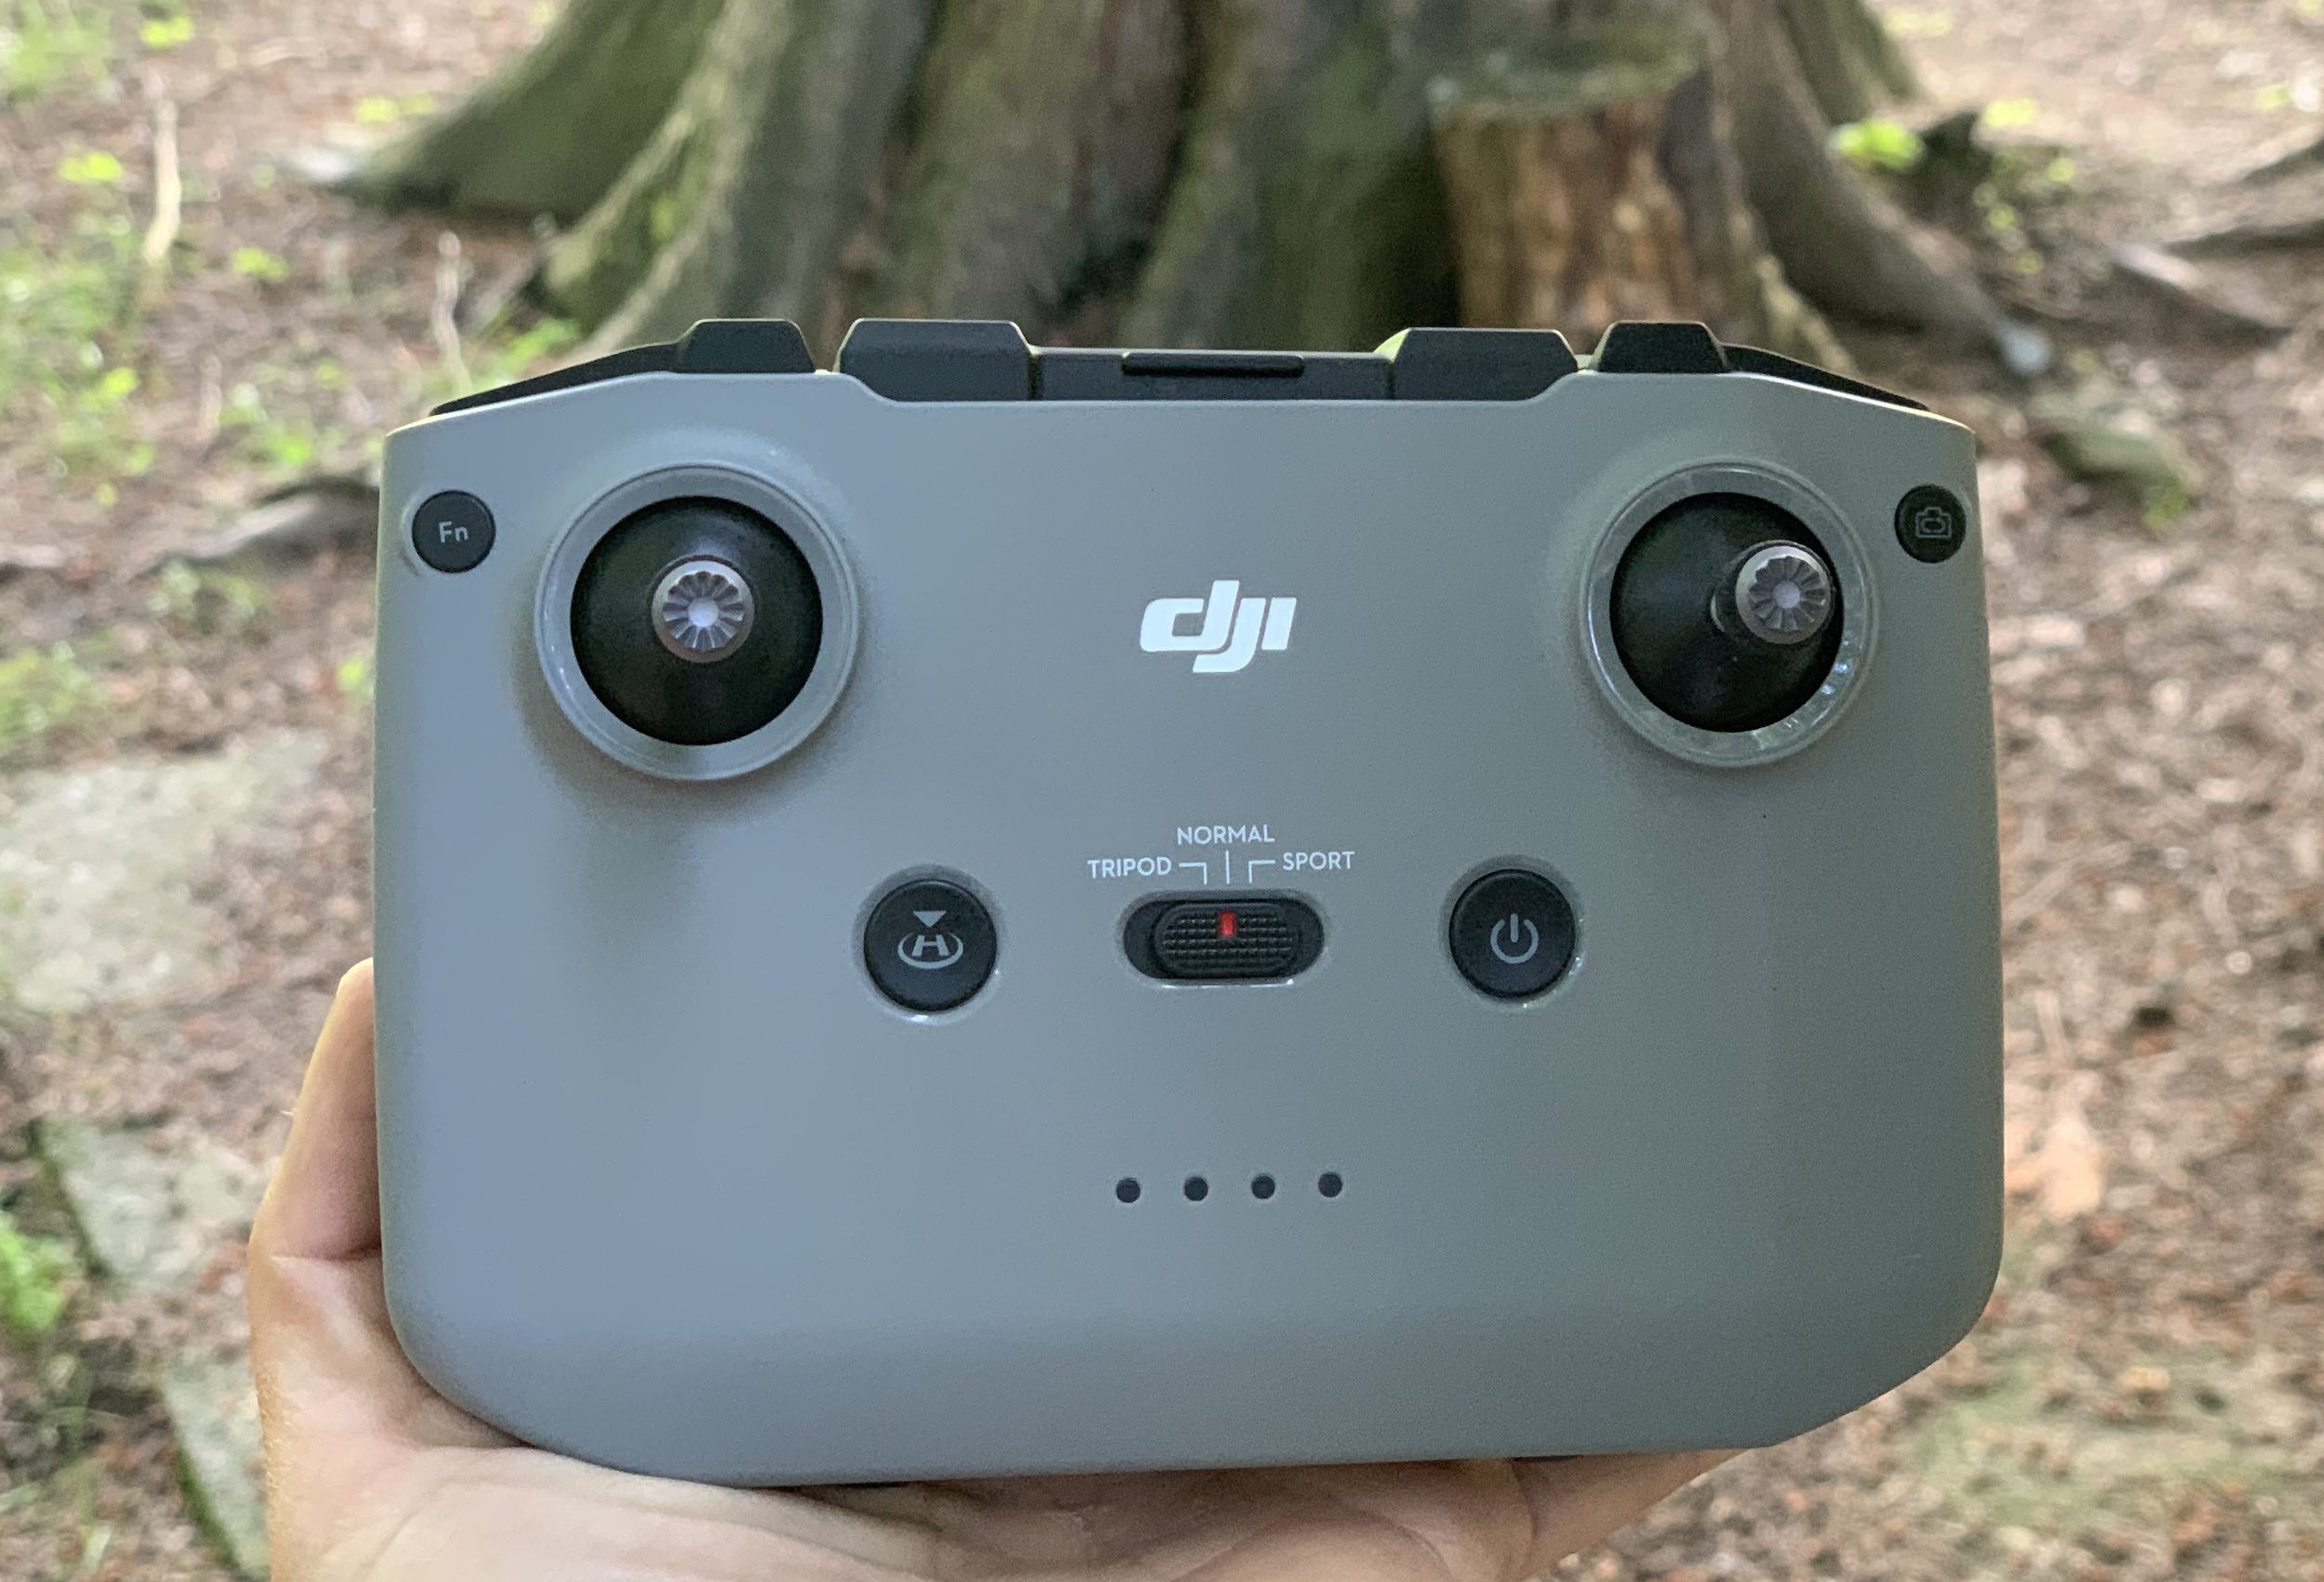
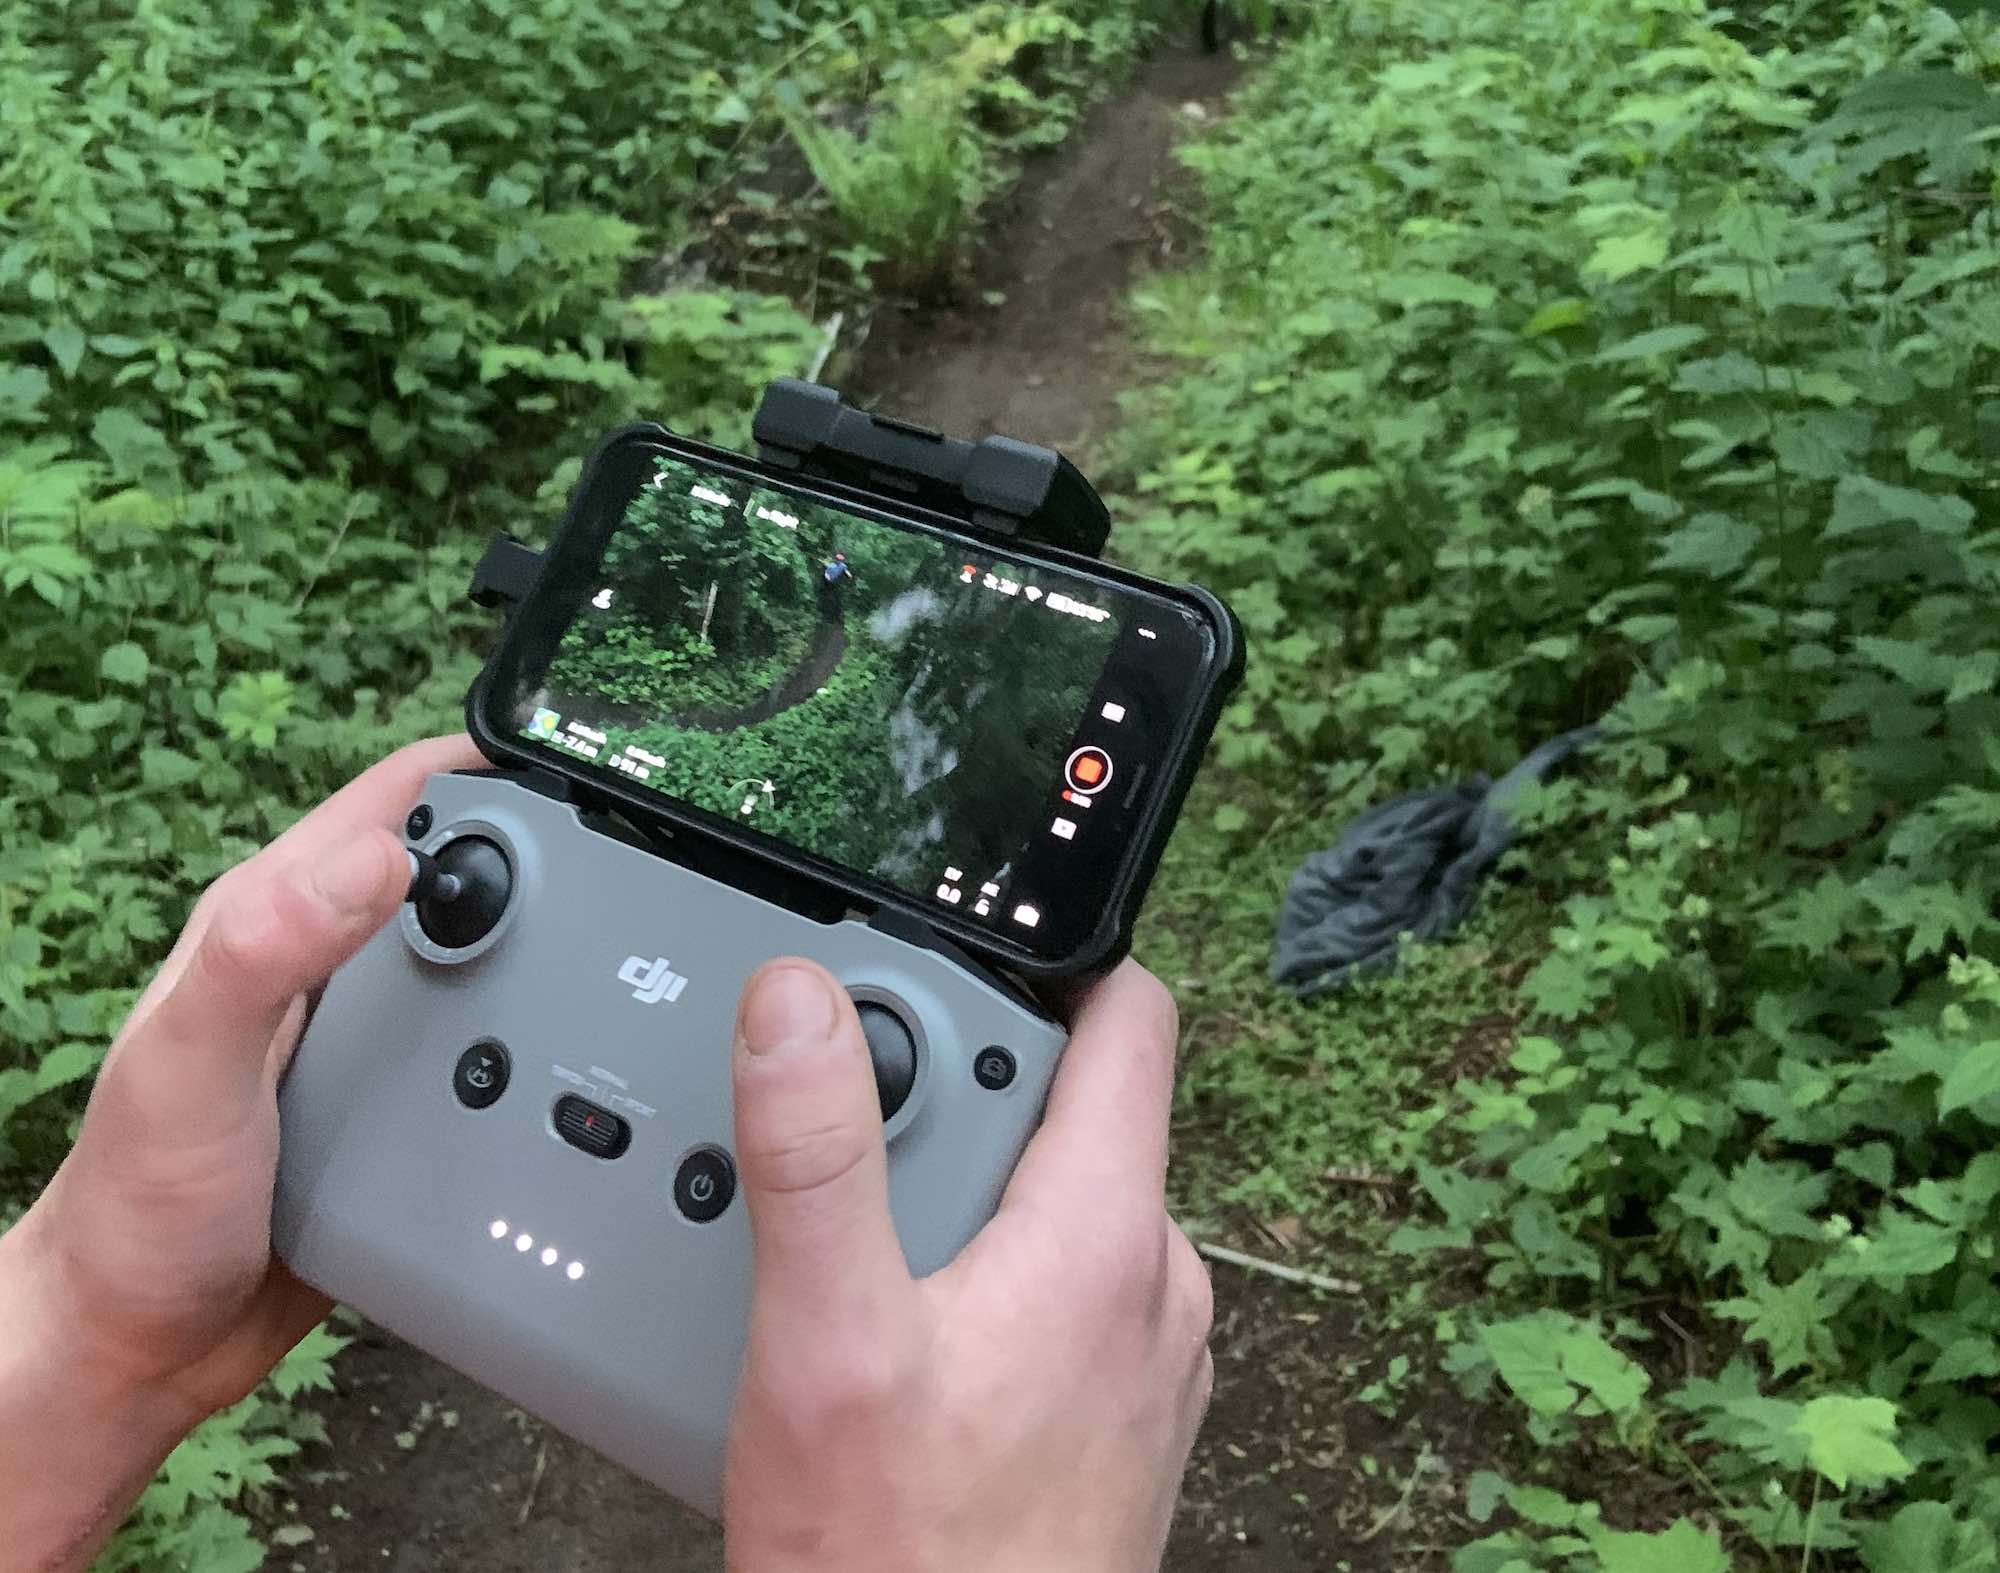
The remote control that comes with the DJI Mavic Air 2 drone has a slot for your phone. You’ll plug the phone into the remote, and there are plugs for Apple and Android. Once your phone is plugged, you’ll power on the drone, open up the app, and connect.
There are several buttons right on the remote. You can choose between Normal, Tripod, and Sport modes, and you can switch flight modes mid-flight if you’d like to. There’s a photo button so you can just tap to take a photo or start recording video, and behind the controller, there is a dial that lets you adjust the gimbal up and down.
Auto-take off and landing
On the app screen, you’ll see a “Take Off” button. All you have to do is tap and hold to take off. When you want to land you can tap and hold to land. The drone will automatically register its home point, so if the battery becomes low it will automatically fly itself back to you. If you’re new to drones, that’s a great feature. It helps you avoid crashing.
Obstacle avoidance
In both Normal and Tripod modes, you’ll be able to avoid obstacles automatically. The DJI Mavic Air 2 has an Advanced Pilot Assistance System 3.0 (APAS) that lets the drone create a new path around, over, or under obstacles. The forward vision sensor will work up to 22 meters, the backward vision sensor will work up to 23.6 meters away, and the downward vision sensor has an infrared sensor and light that kicks in for safe landings.
You can use Sport mode if you want to turn off obstacle detection and take your chances, but APAS gives you the freedom to fly and shoot photos without worry.
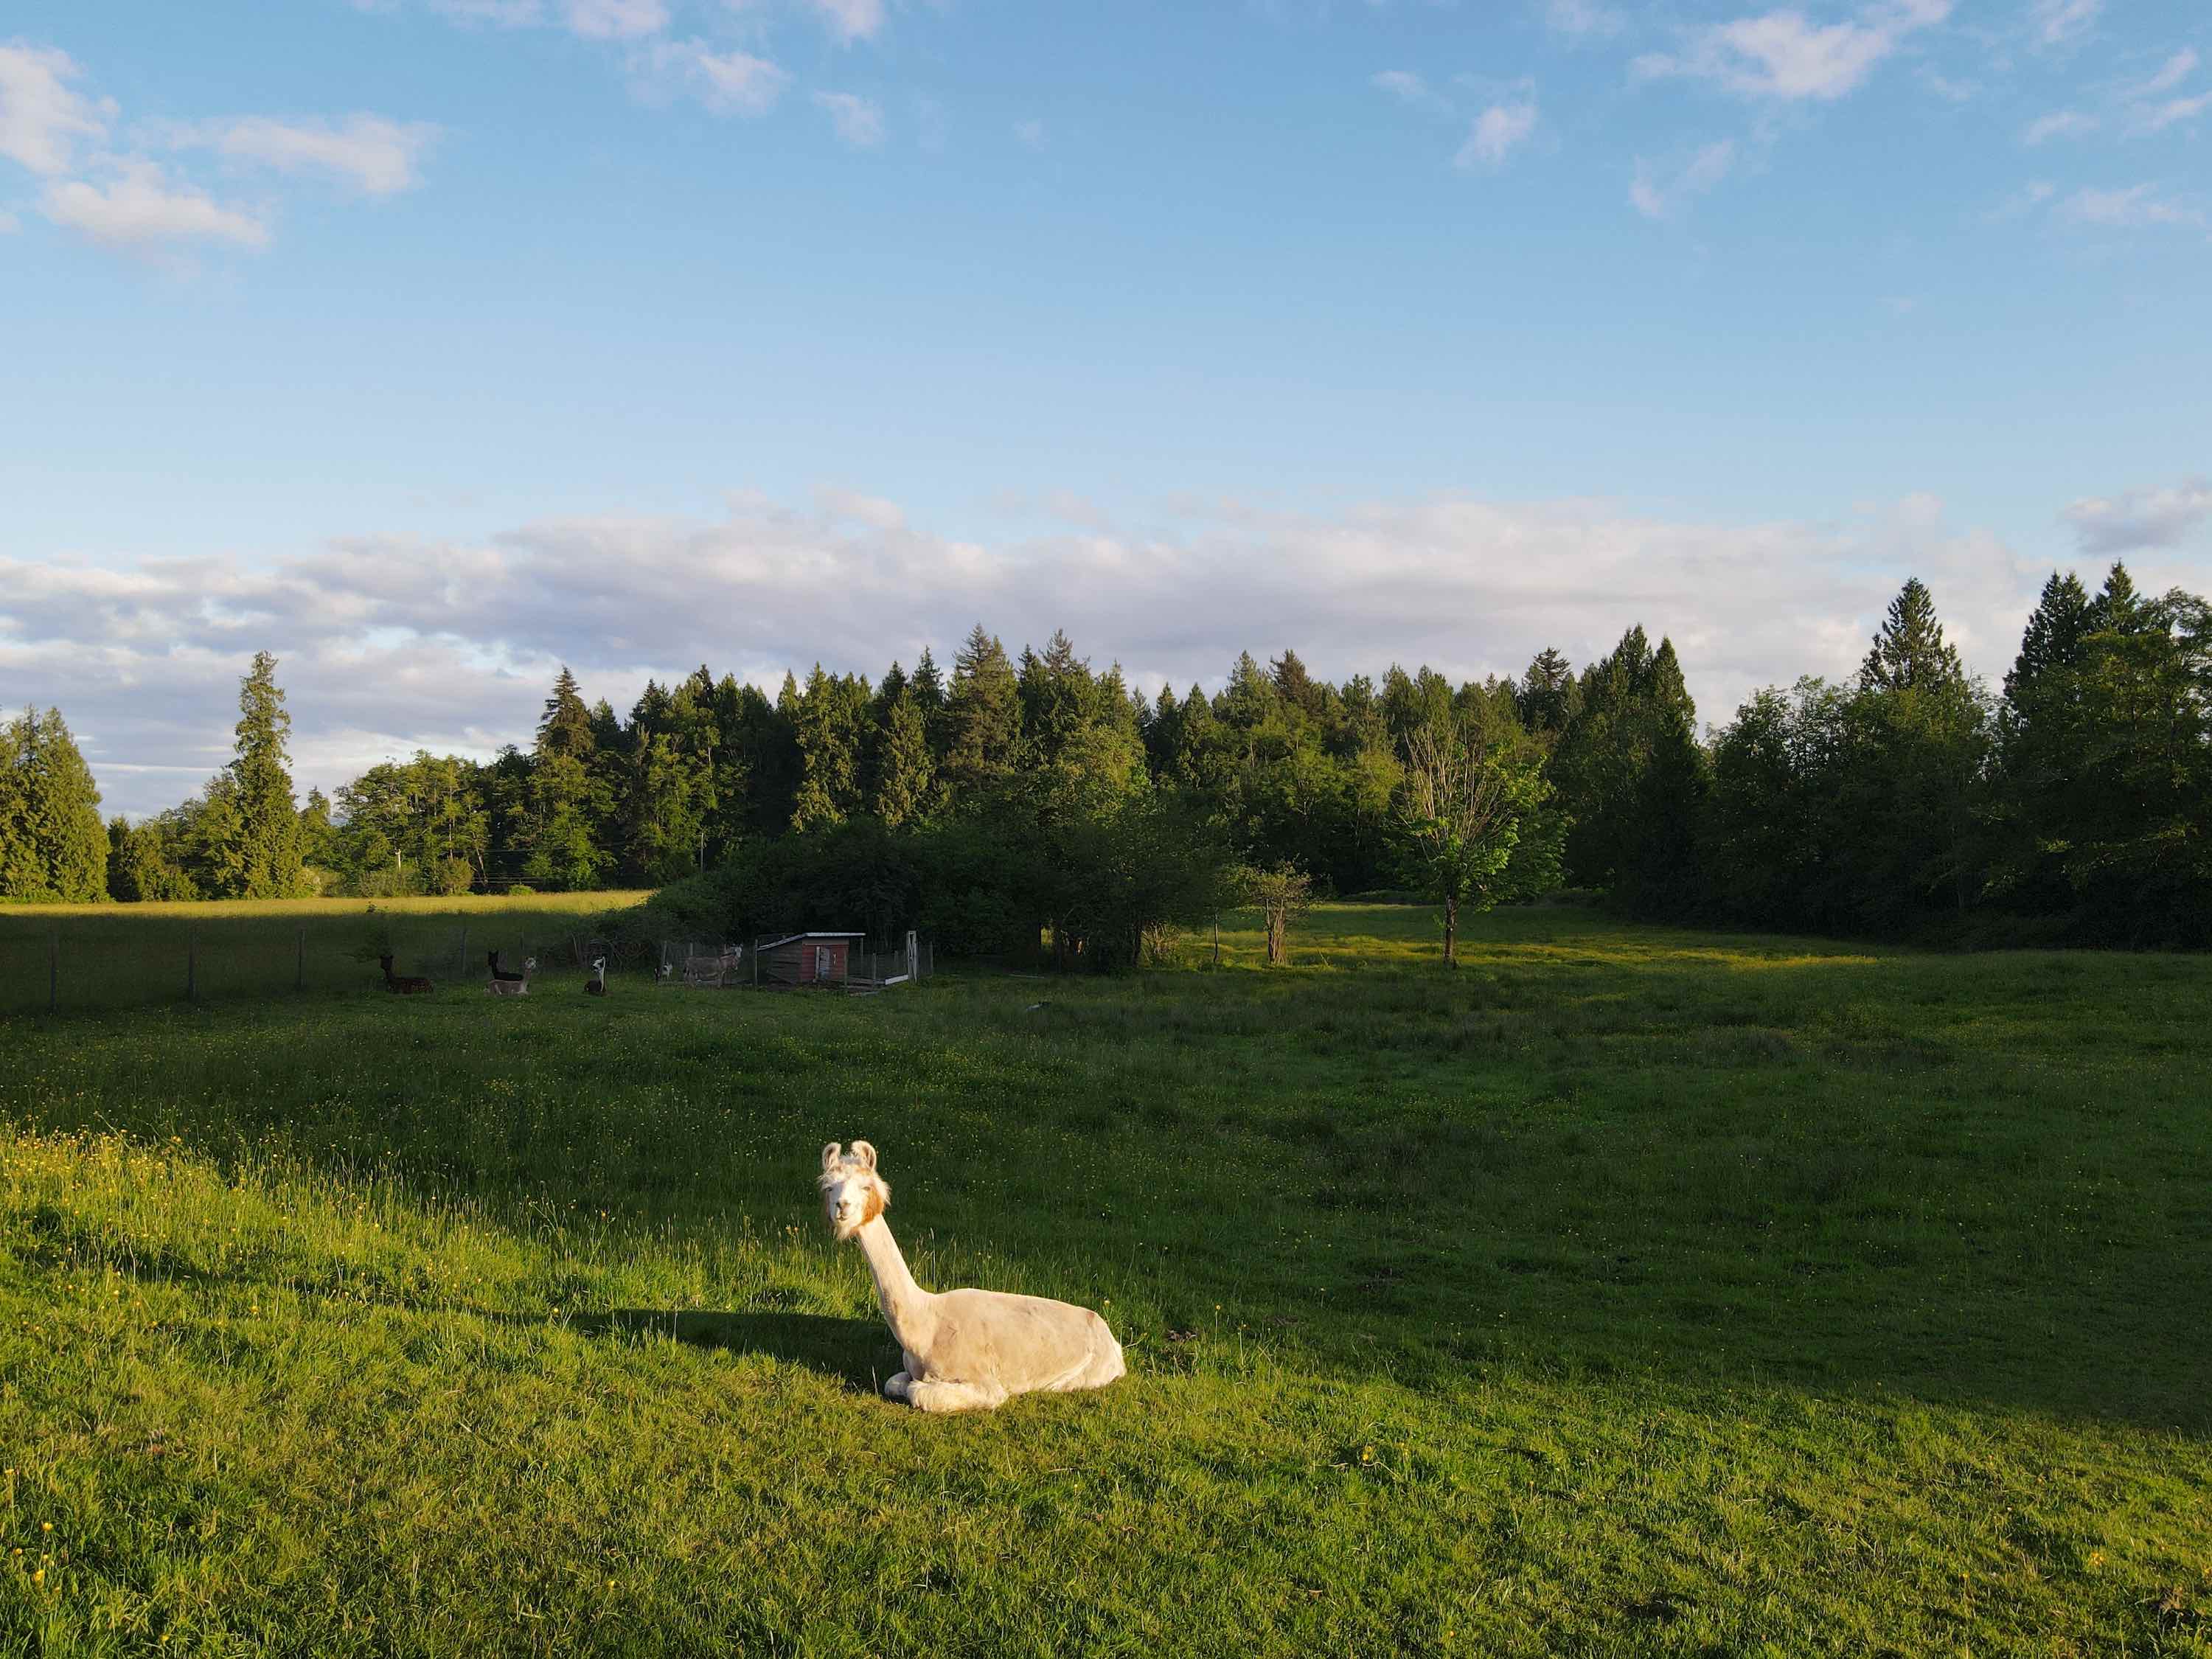
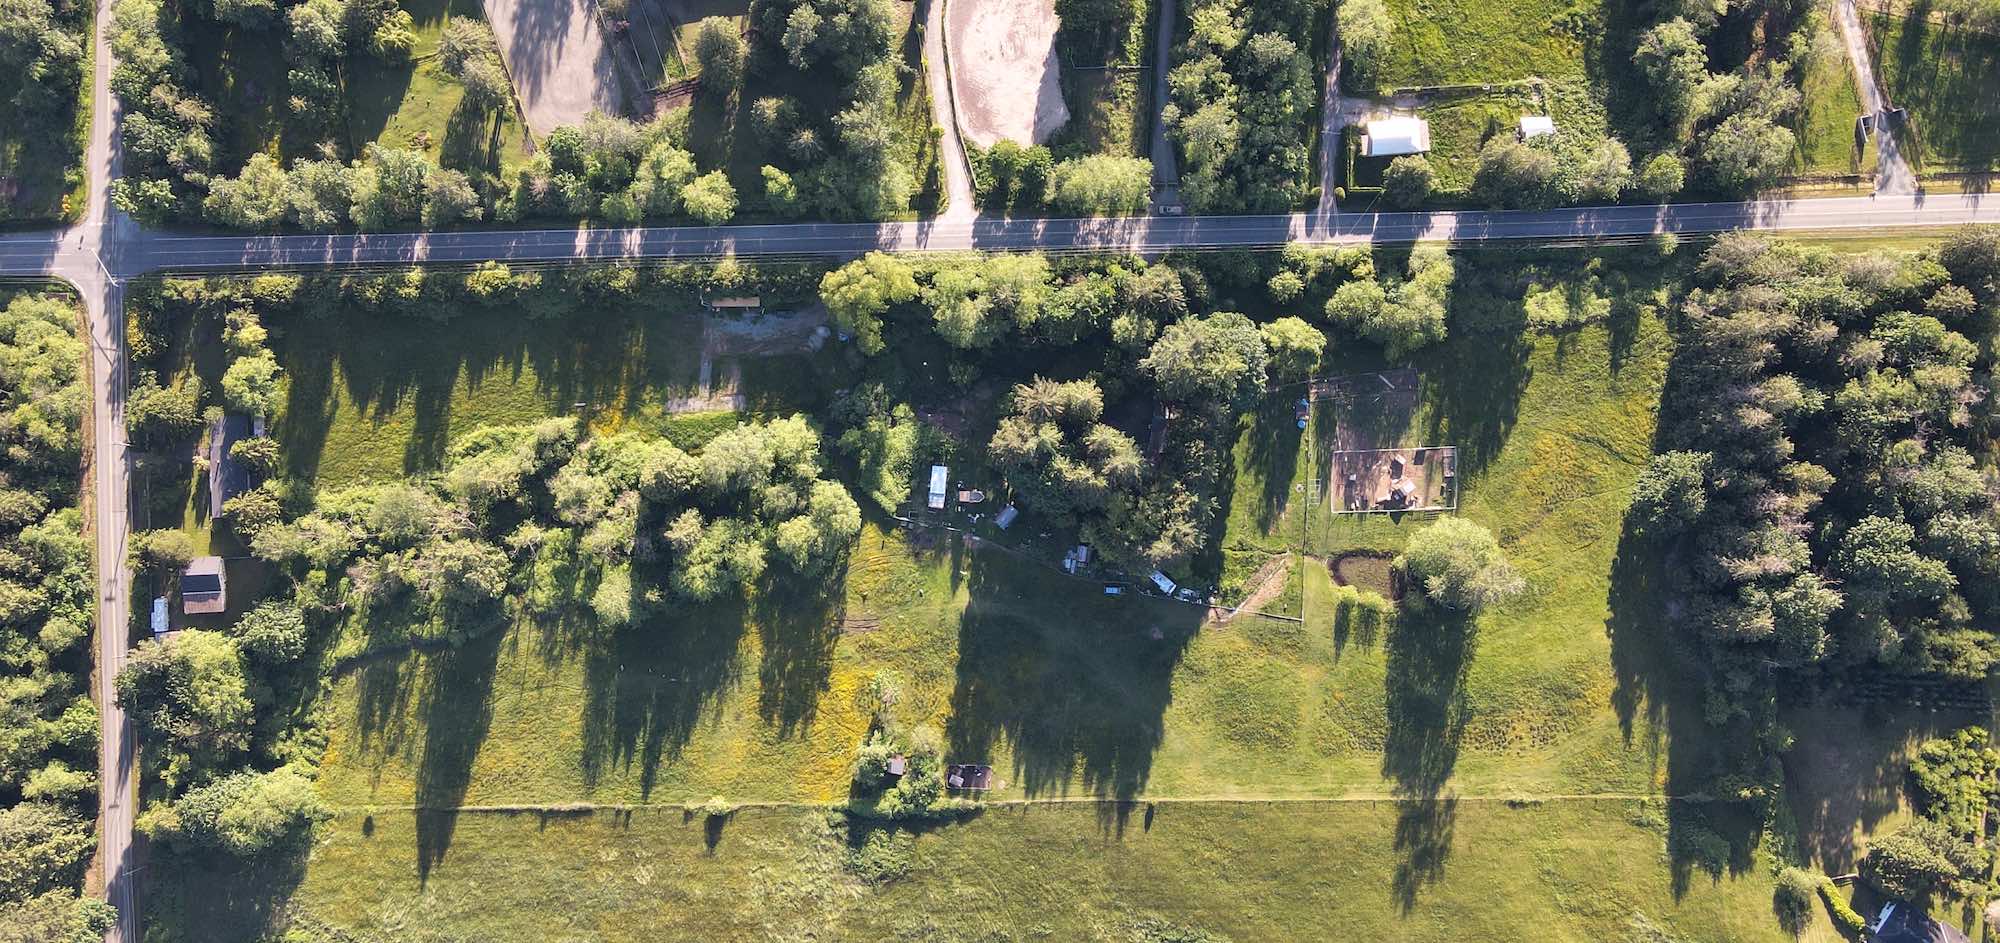
We took the drone down a mountain bike trail that was covered with trees, and we used both Normal and Tripod modes. While the drone didn’t get a lot of speed, it managed to navigate easily around the trees and follow my husband down the trail. We also tested out the APAS out in the yard when the drone was flying low and around buildings, and it rarely hesitated when cruising under hanging lights or around my little barn.
Flying in low light
In situations with low light, there is an auxiliary light under the drone that will improve your visibility. It kicks in automatically so you can clearly see what’s under the drone in low flying situations, and you can turn it off manually. As the drone flies higher in low light and it gets darker, you can adjust the ISO to lighten up the view. That will make any footage you capture grainier, but you’ll still be able to fly if you need to.
Max altitude
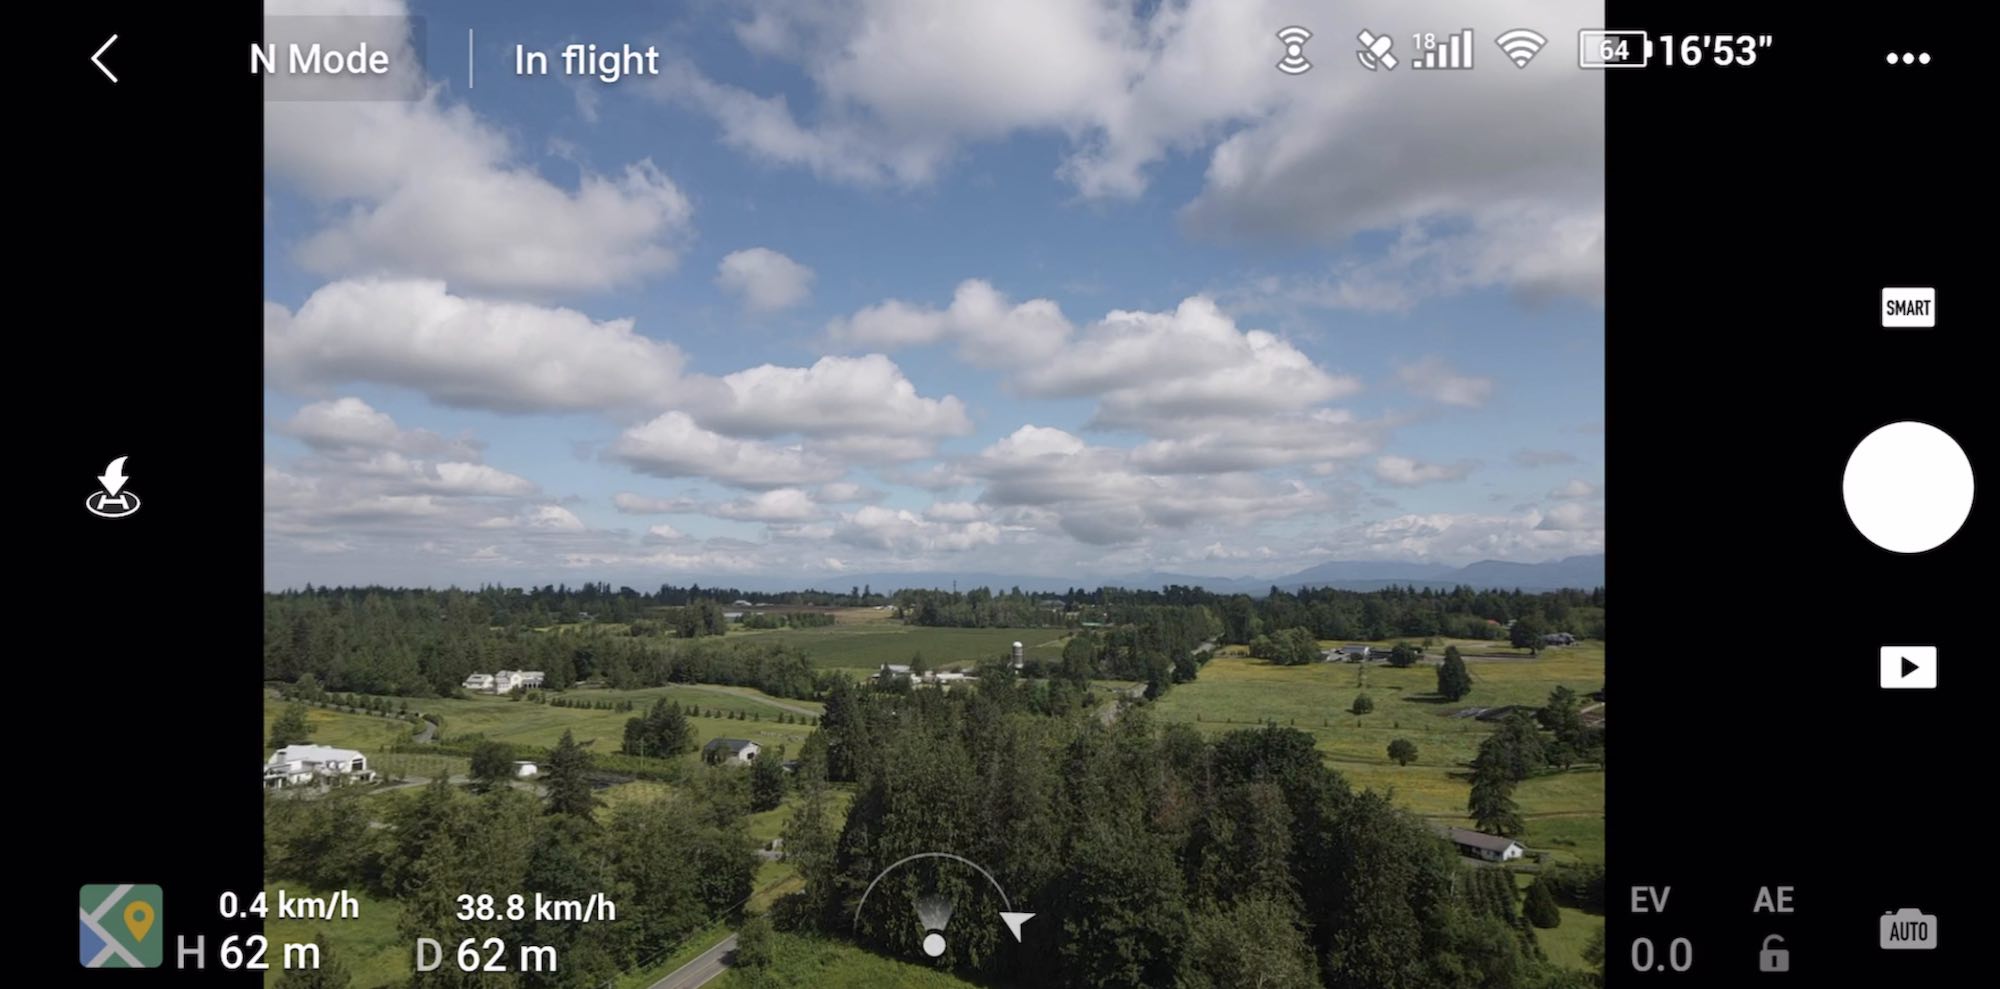
Testing out the max altitude was a bit of a hair raising experience, not because anything happened to the drone, but because we literally couldn’t see it or hear it anymore. When you reach the maximum altitude of 500 meters, the drone will stop ascending on its own.
While the video footage doesn’t timestamp the data from the drone, we managed to hit 460 meters and we captured video and images at that height. Even at that distance, there was no lag in connection. The video seemed a bit shaky but we could comfortably navigate it, tilting the gimbal down for a full view of our property.
Just a note: while I have a max elevation of 500 meters in my area, your own max elevation may be different due to legal airspace restrictions. The serviceable ceiling of this drone is 5000 meters above sea level.
Max speed and distance
The max distance you can fly this drone away from the remote is 10 km. We didn’t want to venture off our property so we only sent it 2 to 3 km in one direction and the other. It handled well at that distance for us, maintaining a full connection to the controller, and it’s nice to have obstacle avoidance on when you’re flying long distances with nothing more than your phone screen to guide you.
The max speed on the DJI Mavic Air 2 is 68kph. We managed to hit 61 on a stretch from one side of our property to the other. If you’ve never seen a drone fly that fast, I recommend trying it out. It’s pretty amazing.
Connection to drone
The DJI Mavic Air 2 uses DJI’s proprietary OcuSync 2.0 transmission technology. It gives you a very stable HD video feed at distances up to 10 km away, supports both 2.4GHz and 5.8GHz frequency bands, and will auto-switch between the two depending on signal strength. It also features anti-interference technology so it will block other signals to keep your connection strong.
No matter how far or how high we flew, we never dropped a connection to this drone. The only case where it paused was when we tested auto-follow and the subject we were following took off too quickly. The drone paused and the app told me it lost connection, and we had to reframe the subject to start tracking again.
Image and video capture
|
Video |
Photos |
Photo modes |
|
You can shoot video and photos in Auto or Manual mode. The max resolution is 48 MP 8000×6000 pixels. For both, the ISO values are: Video Photo (12 MP) |
Single: 12 MP and 48 MP Burst: 12 MP, 3/5/7 frames Automatic Exposure Bracketing (AEB): 12MP, 3/5 Frames at 0.7EV Bias Timed: 12 MP 2/3/5/7/10/15/20/30/60 seconds SmartPhoto: Scene Recognition, HyperLight, and HDR HDR Panorama: Vertical (3×1): 3328×8000 pixels (Width×Height) Wide (3×3): 8000×6144 pixels (Width×Height) 180° Panorama (3×7): 8192×3500 pixels (Width×Height) Sphere (3×8+1): 8192×4096 pixels (Width×Height) |
The app makes it easy to switch between 4K, 2K, 1080p and adjust your frames per second. I spent most of my time shooting 4K 60fps, and you can tap to turn on HDR. I loved using Tripod mode to capture landscapes from high in the air, and I found the gimbal adjust on the back of the remote made it very easy to capture a beautiful sunset. The gimbal is three-axis and will tilt, roll, and pan.
Because there are so many different ways you can take photos and videos with the DJI Mavic Air 2, it will take you quite a while to work your way through all of them. I spent most of my time using SmartPhoto because it always captured the best photos. It records 12-megapixel images after choosing one of three options: HDR, Hyperlight for low-light, and Scene Recognition. With Scene Recognition, the drone will automatically recognize what you’re trying to capture, choosing between blue skies, sunsets, snow, trees, and grass.
There are other image modes you can use including Quick Shots. Quick Shots let you capture the drone in various modes including Rocket, Circle, Boomerang, or Asteroid. Each will perform a set action for you, so you don’t have to do anything but tap and you can create some amazing content.
The app lets you easily switch between image capture and video. You just tap the screen and scroll through your choices or tap the button on the remote. You can save all of your video and image files on a MicroSD card or right to the drone. I recommend MicroSD if you’re shooting in 4K because the drone storage will fill up fast. The great thing with the DJI Mavic Air 2 is that, if your MicroSD is full, it will automatically switch you to drone storage. That way you don’t miss the shot you’re trying to capture.
Battery life on DJI Mavic Air 2

I found the estimated battery life to be very accurate. When flying around the yard, we definitely managed to last for a half-hour before the drone signaled low battery and requested a return to its home location. That happens when you have about 20% left, so you can opt to cancel the auto-return and keep flying if you’re confident you can land the drone before the battery is empty.
I highly recommend picking up an extra battery or two. It’s amazing how fast a half-hour can go by when you’re flying this drone, and extra batteries keep the fun going.
App-based video editing
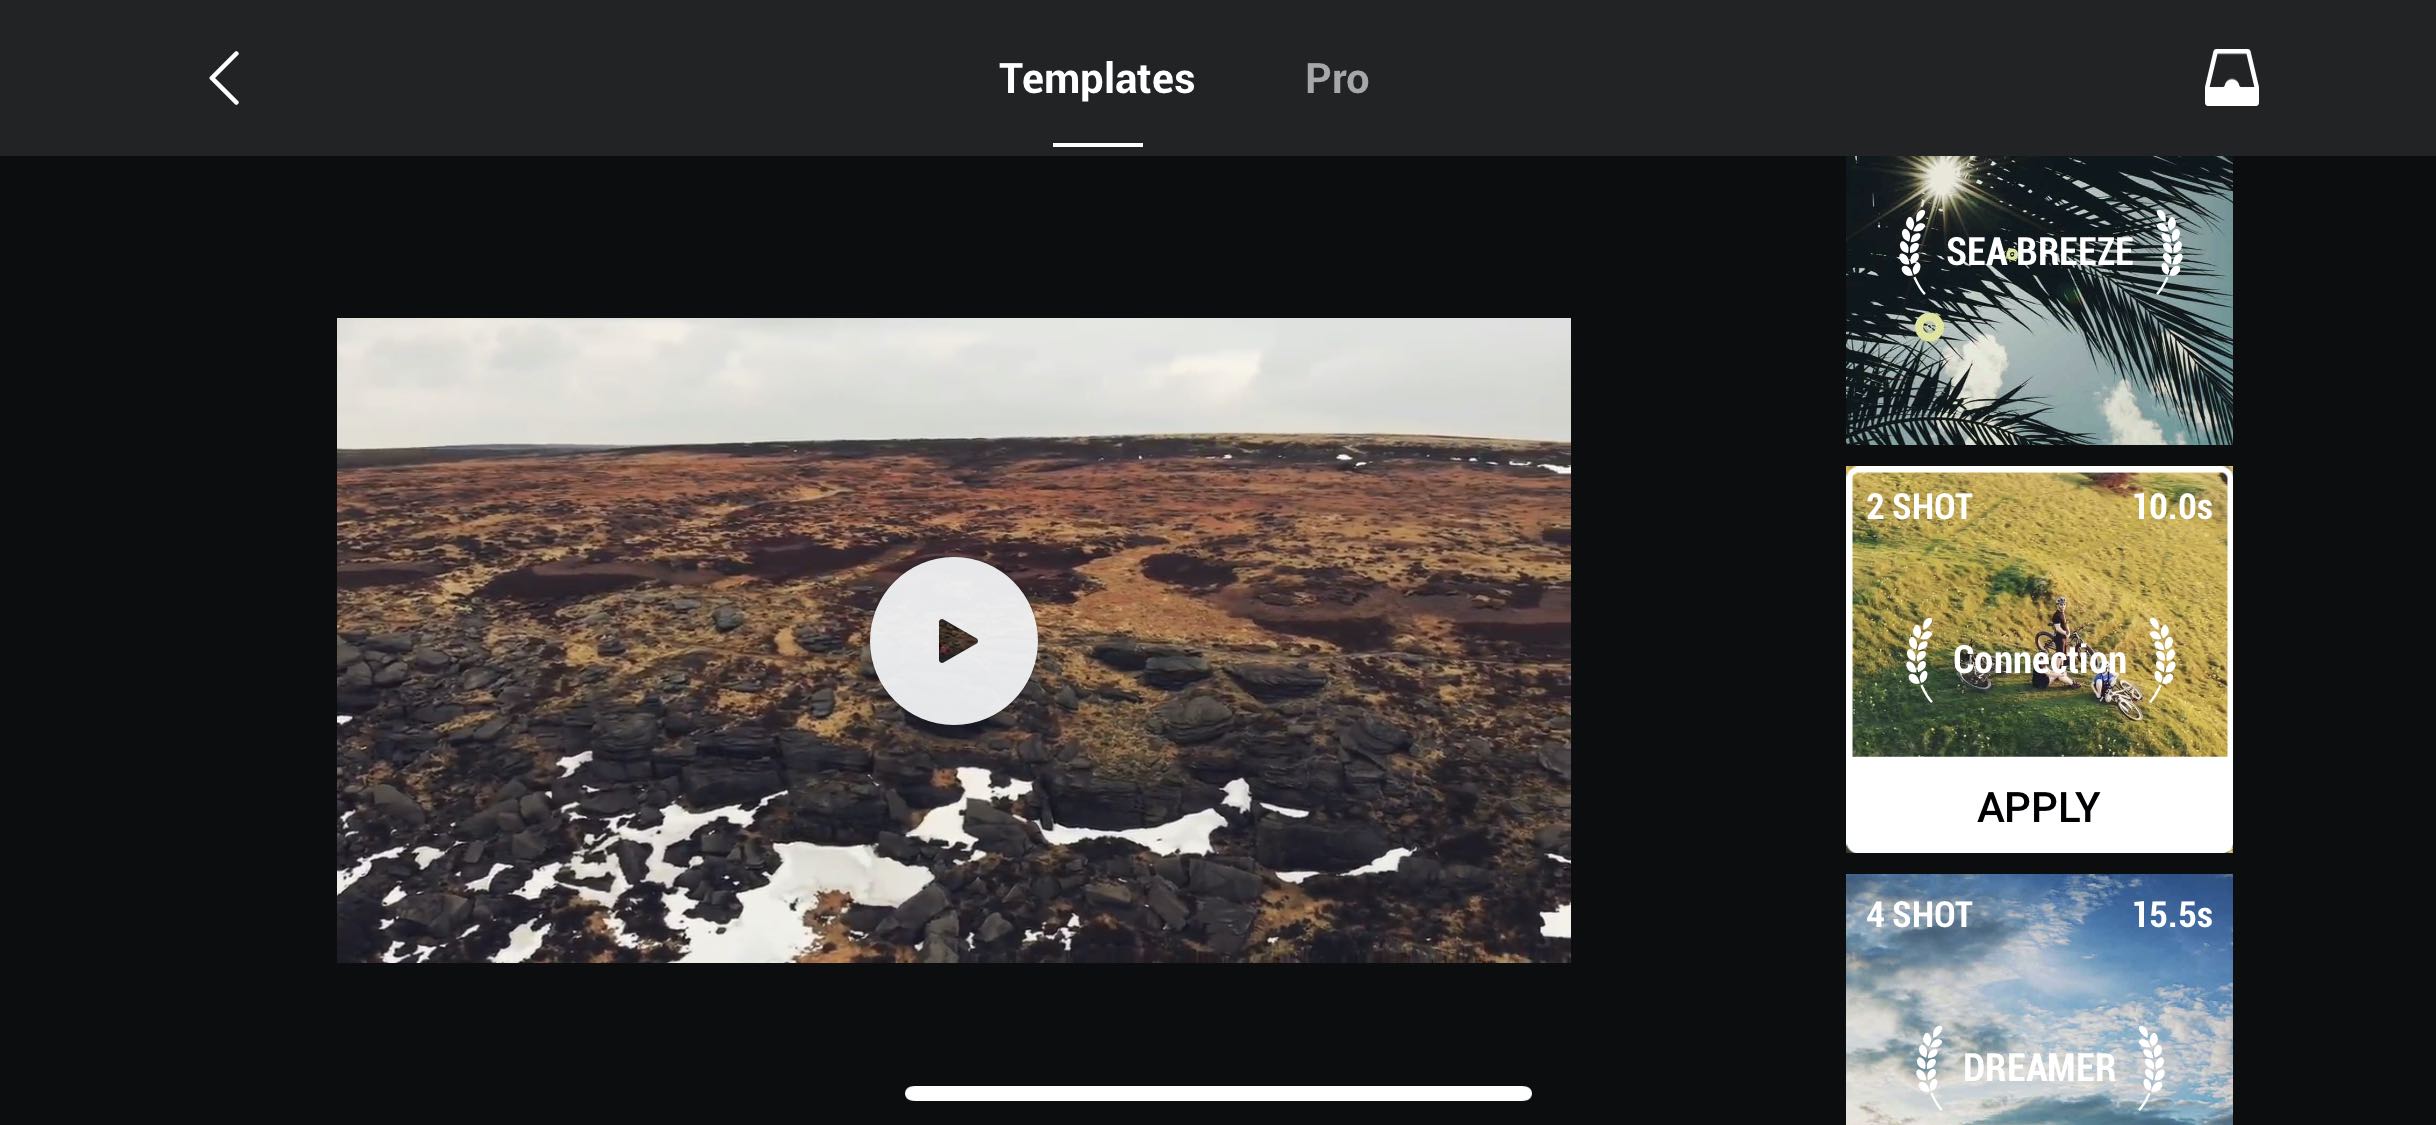
There is a video editor right in the DJI Fly app. It reminds me a little of iMovie, and you can create trailers or short videos with whatever you capture. There are quite a few set templates, and it’s a great way to create something to share on Instagram or Facebook. Just keep in mind that the file might be too large for the platform you’re trying to share it on.
Should you choose the DJI Mavic Air 2 drone?
Make no mistake, this drone is so fun to fly. If you’ve never had a drone before and you’ve been waiting for the perfect model, this is it. Even if you’ve had a drone and you’re considering an upgrade, you will love this drone. Over the original DJI Mavic Air 2 it has an improved battery life, larger CMOS sensor, and will shoot absolutely stunning photos and videos with almost no learning curve at all.
The obstacle avoidance built into this drone means it’s easy for everyone to handle and you don’t have to worry about taking a dive into the trees. If you want complete control, Sport mode gives you that flexibility. Spotlight, Active Track, and Point of Interest also make it easy to shoot unique video in every situation. If you’re a photographer or videographer, there are also filters you can purchase that will take your drone photos and videos to the next level.
My main recommendation when purchasing this drone is to buy the additional batteries. You don’t want to have to stop when your battery runs out. I also recommend you have the 256GB MicroSD card installed. You’ll be amazed at how quickly it fills up.
You can find the DJI Mavic Air 2 Quadcopter drone and the DJI Fly more combo with the additional batteries on Best Buy right now.


The only reason why I don’t own a drone by now is due to the fact that I’m scared of crashing my expensive piece of tech. I can only imagine how it would feel seeing ~$2000 falling down from the sky after crashing into a tree!
That’s the reason I’m really eager to test the Obstacle Avoidance feature. The Advanced Pilot Assistance System 3.0 (APAS) looks really nice on paper and I can’t wait to test on one of my hikes!
Great review Shelly!
Wow this unit so kool
I’m definitely the most eager to try the different hyperlapse modes, it seems like the best way to get interesting and exciting drone shots for sure!
I am super excited to try out the follow me mode. Well I’m excited try out everything. I’m just getting into drone flight. I. Ought a ryze tello to get started and I can’t wait to get a bigger drone so I can get some sweet videos of my nephew and niece dirt biking.
Love the idea of stable HD video feed from distances up to 10 km away.
Flying around using the 4K camera at higher framerates near the ocean or close to a steam is something I’ve always wanted to do. I love that you can use the collision avoidance system mode in a forested area like your video demonstrates and still maneuver around without all the stress of crashing. And I can’t believe this small device can do so much with video and stills in low light! Those options would come in very handy for me.
Thank you for the great demo on your property Shelly! Has me excited to get my hands on one! Even if it means taking the drone course to be able to “freely” and safely use it around the BC Interior and Vancouver Island! Cheers.
Obstacle avoidance
The fact that it folds, is small enough to put in my backpack and weighs just over a pound is a great feature…especially when carrying already heaving film equipment bags onto location.
Obstacle avoidance is definitely one of the features that I’m looking forward for.
Je ne connais pas mais je serais contente afin de l avoir. J aime tout de ce drone . Merci pour votre jeu.
I would be using the DJI Mavic air 2 on my next trip to Vietnam, the features like circle me or follow me would be fun to use on the beautiful landscape of Halong bay.
I’m eager to learn a safe fly zone near me then use the tap and hold to take off and land. I’m amazed that this drone will automatically register its home point so if the battery becomes low it will automatically fly itself back to me.
I’d like to check out the pictures/video from 500m max altitude!
Auto take-off and auto-land might be most helpful for me.
I really like that you can take different photo features like, SmartPhoto, Hyperlight, Panorama, and HDR too.
this is amazing looking!
Could have used it last winter while searching for a patient in the bush, could be a neat tool for paramedics 🙂
The best feature is the Auto-take off, auto-land, and automatic return to home point on low battery!!!!!!
The design and the battery life of the drone is cool. The controller is also very sick.
This would make the best travel companion! Having it auto follow you while walking down the beach, having it navigate home safely and that resolution! The obstacle avoidance is spot on and I love having your smartphone on top of the controller rather than below
I would like to film from 500 meters up like a hawk tracking his prey
I love the up to 10 km distance the drone can get from the operator. This would enable me to capture video of animals who tend to shy away from humans even at a distance.
Helix quick shot function Sounds epic
I like that it’s rechargeable!Great review 🙂
The auto takeoff and landing feature and the auto follow look like cool features.
Nice detailed review. The small improvements to the design are very nice. The light under the drone is a nice feature.
Honestly for me I like how easy it seems to use. I’m not really up to speed on drones but my son would love one.
I like the Obstacle Avoidance feature!
I am eager to try the 4K 1080 pix video. I was watching the review and can’t believe how far this drone can go 10km away. I’d love to use this in northern BC. Sasquatch won’t be able to outrun my drone. I’d love to use it to watch wildlife. Thanks for the chance.
Love the flight time and range and can’t wait to get a chance to test out the Collision avoidance and see just how much improved it has gotten.
Having the auto-follow ability on the drone would be really cool and interesting to experience. As well as the 10 km distance flight ability, which is rather very impressive. Would definitely love to jump start aerial videography as a new found passion with this drone.
I am eager to try the built in obstacle avoidance feature.
I’d like to try out the auto-follow feature!
It can help you find safe flying areas near your home.
I’m totally looking forward to testing out the Accident Avoidance functionality!
Controls are easy to use. Can be controlled through a device or through the remote controller.
Multiple photo/video option.
I’d be eager to try the Auto-follow feature.
I’m excited to try the Helix Quickshot function!
great that it take jaw dropping photos in 4k and 2k. I like can change the remote and drone batteries with the same
charger.
10 km max distance! That is incredible for a drone. Honestly there are so many features packed into this mighty drone. It is amazing.
The fact that you say that is, in fact, easy to fly is the best feature of all.
I am eager to try the SmartPhoto feature with scene recognition.
I’m super excited to test out the video and still images using the camera on the 3-axis gimbal!
Wow, this unit looks so cool
Comments are closed.