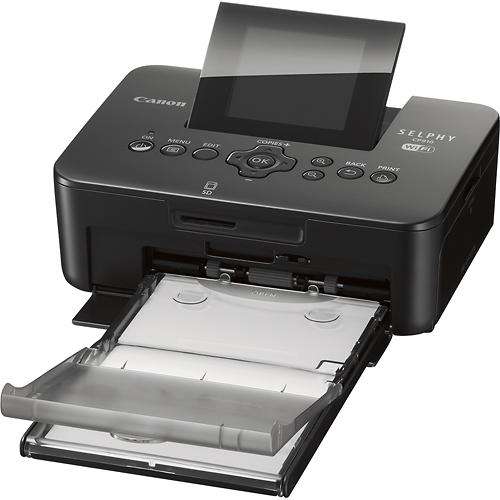
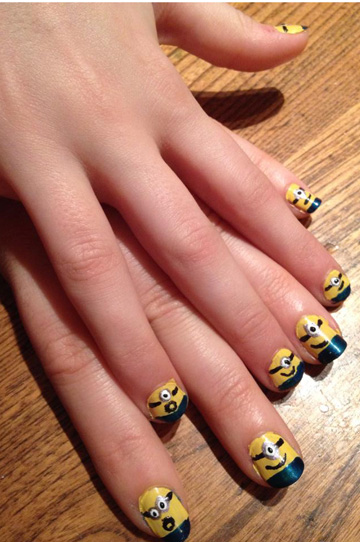
 Let your tween share all her fun moments with the SELPHY CP910 printer from Canon. This compact and portable printer is designed to print out all those selfies, instagram and smartphone photos using a wireless connection.
Get all those cherished photos out of the phone and into your photo albums or scrapbook . It’s the perfect gift for the tween girl in your life. Hand this over and you’ll be the cool adult in her life.
Good things in small packages
The most appealing feature about the SELPHY CP910 Wireless Compact Photo Printer is size. Measuring 17 cm (7″) wide, 5 cm (2″) high, 12.7 cm (5″) deep, and weighing less than a kilogram (1.8 pounds), this printer is super portable slipping easily into a purse or backpack. (Guaranteed to be a popular item at sleepover parties.)
Limited adult supervision needed
Set up of the SELPHY CP910 is relatively easy but does require some adult supervision. It’s designed to be a WiFi printer so there are no extra cables, no drivers to download or any software to load. Great! However, there are several steps to set up the phone and then get the printer to talk to your WiFi connection. If your tween is tech-savvy then it will be quick since the installation is relatively streamlined. Otherwise, Dad or Mom should be able to complete the setup without too much hassle.
Step one is getting your device or smartphone ready for SELPHY.
For our Android phones we had to download the free Canon Easy-PhotoPrint app. It can be used with all the compatible Canon PIXMA or compact photo printers, so it’s a handy app to have in your arsenal. For all our iOS devices, we just used the fast and easy AirPrint feature. You can also use this printer with Windows RT devices that have the Mobile Device Printing option or connect directly using a SD card, USB memory or USB cords to connect directly to the computer and cameras that support PictBridge.
 Talk to me WiFi
Step two was getting the printer to talk to our network. This took a little more effort. There are two options for connection: Via WiFi network or Direct Connection where you connect via an access point to your wireless camera, tablet or other smart device. The 6.5 cm (2.7”) tilt-up LCD screen was very handy during the set-up since it made viewing easier.
It’s not totally clear which WiFi option to pick. I was surprised a WPS Connection since everyone recommends not using it on your router due to security issues. I opted for the simple route and asked the printer to search for my WiFi network. It easily found both our server and other wireless printer.
Once the network was chosen, we had to enter our router password and were momentarily stumped until we figured out that pressing Menu brought up an onscreen keyboard. It’s rudimentary and not a particularly sophisticated but it gets the job done. You use the arrow keys to scroll down to each letter and then press the OK button to enter that particular letter or number. It took two attempts to get the password entered correctly but may be to do with user error and clumsy fingers. Fortunately, SELPHY remembers the password so this is a one-time set up. You do need to do this at every location so if your tween is bringing it over to a friend’s place, their parents may need to help with the set-up as well. When the WiFi connection is completed, the screen displays which network is being used in the upper left land corner.
 To border or not to border
The bulkiest part of the printer is the paper tray, which sticks out about 19 cm (7.5”) from the front after it’s been attached. To connect it to the printer, you open the small drop down drawer at the front of the printer, pull back the cover of the paper tray and click it into the printer. Simple.
Although you won’t notice it, the paper is a few centimetres smaller that the regular 10 cm (4”) by 15 cm (6”) paper. Initially, it looks longer until you tear off the perforated borders. Adding a border reduces the photo even more due to the 12mm (0.5 “) white border. There is a whole range of optional papers to try with this printer for stickers and card-sized photos. Definitely a lot of flexibility to get creative.
This size difference means there can be no substitutes; you must buy the paper created for the SELPHY since nothing else fits. Stock up on paper because you’ll burn through the beginner’s pack of 18 pieces really, really fast. The kit with the dye roll and 108 sheets of paper is reasonably priced and works out to be about 33 cents per photo. You can print about 55 photos before the print cartridge needs to be changed.
The SELPHY CP910 screen displays shows which device it’s pairing with and your corresponding device will also show print status. It uses Canon’s special dye-sublimation process that reproduces 16.8 million vibrant colours with a protective overcoating. Photos are splash proof and last up to 100 years.
Tweens are going to love watching the photo being printed. It cycles through four times, printing all the yellow pigments first, then red, then blue and a final pass for the protective overcoating. You can tell which colour is printing by the circles appearing on the SELPHY screen. It reminded me of Polaroid where the fun was watching the image appear like magic in front of you. The whole printing from start to finish takes about a minute per photo.
 Playing with selfies
Colours can be hit and miss with this printer. Like any printer, it depends on the photo and the SELPHY can’t improve the selfie – there just aren’t a lot of Photoshop features with this printer. Often what looked great on the smartphone screen, printed with a blurry washed out background. We found the glossy finish made better brighter photos as opposed to the two matte finishes available. We turned on the Image Optimizer, Brightness and Smooth Skin option for darker pictures where there wasn’t a lot of background light (down in the family playroom) and the improved their quality. Changing My Colours to Vivid also boosted the photos pop a bit more. The Sepia and B/W options produced some of the most interesting shots and oddly enough, were the most popular with my tweens for their “old-school” feel.
Not all the options are available on the Android application as they were on the iOS devices. We could turn off the borders and choose how many copies but all the other settings had to be done through the printer itself. If
we picked several pics to print at once, there was a glitch that turned off the copy feature on the phone so we could only do one set of prints at a time. We also had trouble getting the different formats to kick it so we could do the wallet size prints. It eventually worked on the iOS devices but we couldn’t figure it out on the Android phone.
The other disappointment was no battery included. You can buy an optional battery and charger but the price tag almost doubles the cost of the printer. It means wherever you go, there will need to be a power outlet which limits the locations for this portable printer. Obviously it’s not as functional outdoors without a battery.
I wouldn’t use this printer for professional quality photos but for fun tween photos the SELPHY CP910 is perfect. It’s ideal for crafting or scrapbooking projects, decorating a locker or schoolbooks, printing out pics of your BFF or making postcards to send to friends. Your tween will have a lot of fun with the SELPHY CP910 printer.


