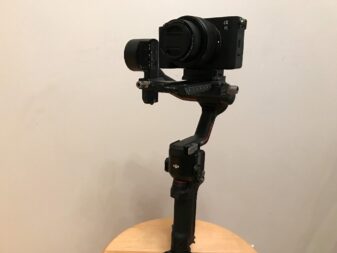
 A gimbal is a really interesting tool to own for a variety of moving shots. The added smoothness and control produce great results, resembling something you’d see in a Hollywood movie. These tools were once very expensive and available only to a select few productions. Nowadays, they are relatively affordable and many people can enhance their shots with added stability. DJI has been at the forefront of this democratization. A couple of years ago, my colleague Justin reviewed the RSC2. Today, I’m here to share my thoughts on the new and improved RS3 gimbal stabilizer.
First of all, make sure you check out this video. It features my impressions of the product, as well as a few different shots I took with the help of my friend and filmmaker Charlie Sporns.
Improved stabilization and workflow
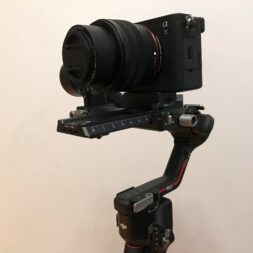 On the outside, the RS3 looks very similar to the RSC2. It has three distinct parts: the arms, the main handle, and extended handle/stand. On the newer model, the arms have automated axis locks, which helps getting the show on the road. When you power the gimbal on, the arms will unlock and expand automatically. Conversely, when you shut it off, they will go into sleep mode, locking in the stow position.
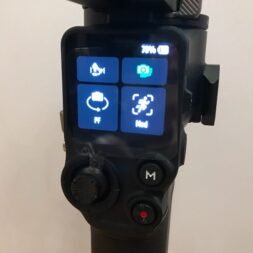
The main handle houses the battery, which is removable now. This means that you won’t have to stop shooting if you run out of batteries, if you have a spare. The OLED touch screen is now in colour and is larger than the previous iteration going from 1” to 1.8” inches. This makes it easier to navigate the menus and gets you filming faster. There is also a three-position switch to toggle between the modes.
 One of the biggest differences with the RSC2 is the stabilization algorithm. The third generation improves on the previous technology and offers a very smooth result. The super smooth mode is back, which activates more torque in the different motors for extra-stable results when you know you’ll move the camera a lot. This mode drains the battery faster, so makes sure to have spares on hand. DJI promises up to 12 hours of continuous usage, as well as 2.5 hours of charging time.
The gimbal accepts a payload of up to 3 kg (6.6 lbs) and a wide variety of very popular body and lens combinations. You can find a detailed list of recommended cameras on DJI’s website.
Easy balancing and calibration
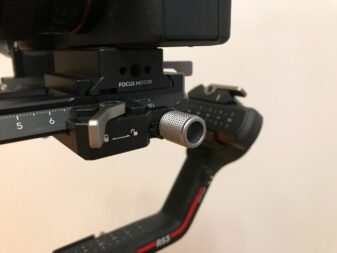 Before you start shooting, you’ll need to balance the camera on every axis of the RS3. This isn’t a particularly hard procedure, but it might take several minutes the first few times. You’ll have to adjust the position of the camera one axis at a time, keeping the unbalanced ones locked until you get to them.
On this new model, there is an extra fine-tuning knob to adjust the plate that holds the body to the gimbal. This is an excellent feature because you won’t need to physically move the plates. I remember them sticking and being hard to move on the RSC2.
Intuitive controls
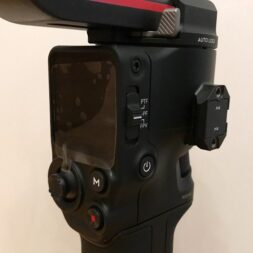 One of the great things about the RS family is how easy it is to use. The main handle has a comfortable design and different controls to help you get the shot you need. First of all, holding the trigger will lock the camera in place so you can easily follow a subject while changing positions. You can then press the joystick for fine adjustments in any direction. Once you’re ready for another shot, you can reset the camera’s position by double pressing the trigger. The camera will magically move back to place. Also, a triple press will turn the camera around for selfie mode, which is great for vloggers. The mode switch buttons are also pretty useful to quickly change the gimbal’s functionality.
You can edit many parameters in the companion app. Although you don’t need it at all times, more advanced and perhaps demanding users will be able to fine-tune the various options that will fit gestures. You can even save these adjustments to several user profiles for different needs or camera operators.
The inclusion of a toggle switch for the different modes greatly accelerates the workflow. In short, these modes affect how the gimbal is going to react to your grip movements. You’ll be able to set which axes follow your movement. You can select pan, pan and tilt, or all three (pan, tilt, and roll). You can also customize the last selector to a few different options via the accompanying app. It’s possible to activate portrait orientation, 3D Roll 360 (which is a fun effect that rolls the camera 360 degrees on the lens axis) or a custom mode you can edit in the app.
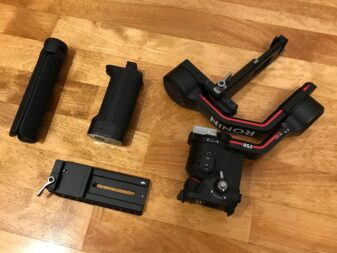 Even though it’s easy to use, there is still a slight learning curve in regards to balancing and using the gimbal. I suggest you practice the initial setup, so you waste less time during an actual shoot. Also, if you can film a friend or family member for some practice, it would be a great idea. Playing around with the RS3 before an important shoot will minimize errors and save you a lot of precious time on set.
Final thoughts
It would be extremely hard, even impossible; to achieve the types of results you get with the RS3 with handheld filming. The results are silky smooth; it’s beautiful to look at. If you want that kind of effect, you’ll want to investigate the RS3. Vloggers will also be interested in this model. Thanks to the selfie mode, it’s really easy to film yourself with a very stable image.
If you are looking to improve the smoothness of your moving shots, it’s hard not to recommend the RS3. It’s relatively affordable, will fit the most common cameras on the market and is very user-friendly. Just make sure you practice once or twice with it before a big shoot.
DJI also released a pro version that accommodates larger camera bodies and lenses, which I also reviewed for the blog.
Check out the DJI RS3 camera gimbal stabilizer on Best Buy’s website.


