
If you’ve never cleaned your headphones, now’s the time to start. This applies to whether you wear over-ear headphones at your desk or pop in earbuds for the gym, as they attract sweat, oil, earwax, lint, and germs. Dirt build-up on these devices can affect audio performance, comfort, and even longevity. Take the right steps to keep your headphones clean, like those we’ll show you below—so they should look (and sound) good as new.
Looking for the right gear to keep your headphones in top shape? From replacement cushions to cases and new set of ear tip, shop headphone accessories at Best Buy Canada.

What you’ll need before you start
Find the right tools to help you clean your headphones easily. Here’s a quick checklist:
- 70% isopropyl alcohol (see note below) or cleaning wipes with no bleach or harsh chemicals
- Microfibre cloth that is soft and lint-free
- Soft-bristle brush (a clean toothbrush works too)
- Cotton swabs for detailed cleaning
- Cleaning tool dedicated for earbud mesh
- Compressed air (optional yet use very carefully to avoid pushing debris deeper)
Use isopropyl alcohol with caution:
70% isopropyl alcohol is widely recommended for cleaning headphones and earbuds because it evaporates quickly, kills germs, and usually won’t harm plastics or metals. However, some manufacturers caution against using alcohol on certain surfaces—especially leather, fabric, or foam—because it can dry out or weaken the material over time. If you want to play it safe, use alternatives such as alcohol-free electronic cleaning sprays, alcohol-free wipes, or simply a soft cloth lightly dampened with mild soap and water. Avoid bleach or harsh chemicals.
For more safety tips, be sure to read the section on headphone cleaning mistakes to avoid before you start cleaning.
How to clean over-ear and on-ear headphones
Big and cushy headphones like over-ear and on-ear models are comfy to wear but they also tend to trap sweat and oil over time. Here’s how to clean them properly without damaging the pads or speaker drivers.
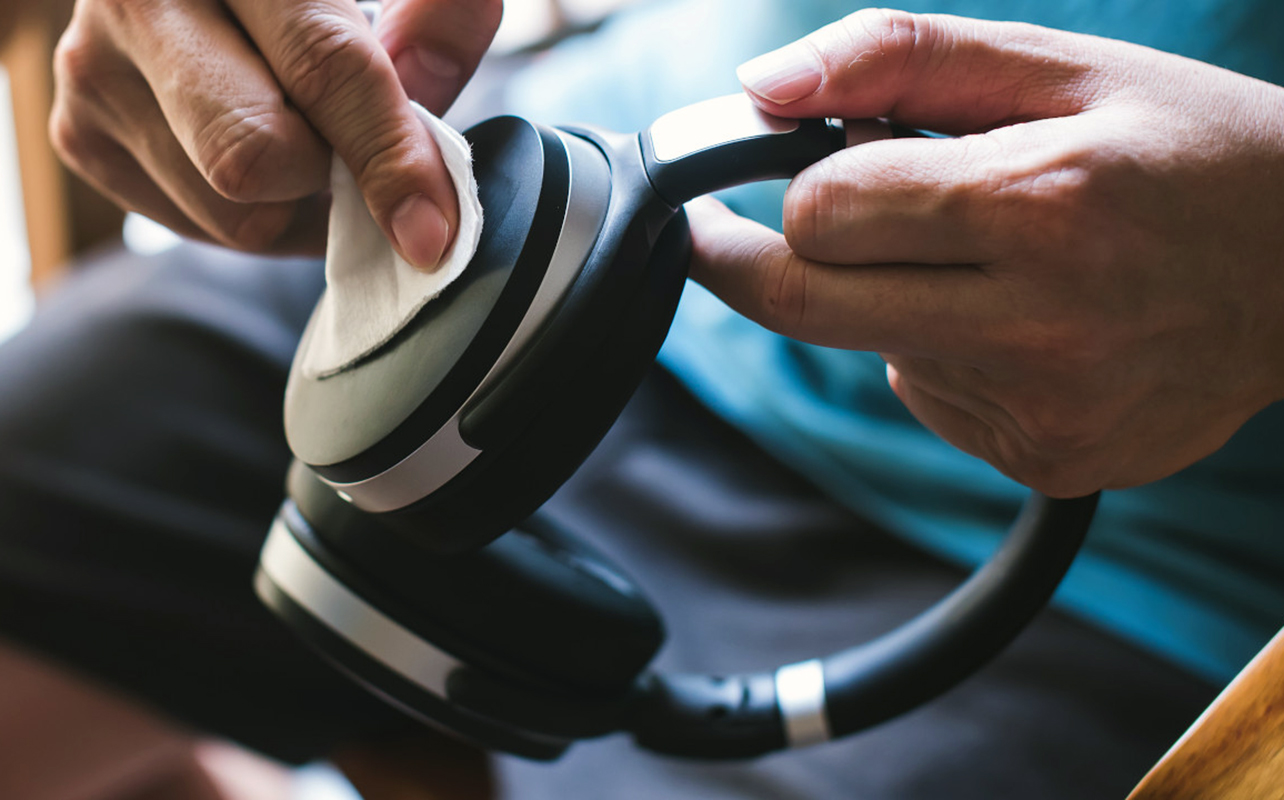
1. Wipe the headband and ear cups (exterior)
Start with the obvious: the outside. Use a soft microfibre cloth lightly dampened with 70% isopropyl alcohol. Alternatively, you can use an alcohol-free cleaning solution, or a mix mild soap and water to dampen your cloth. Gently wipe the headband, hinges, and ear cup surfaces. If your headphones fold, don’t forget to clean in the creases. If you’re using mild soap, make sure to wipe your headphones again with damp cloth to remove soap residue. As you wipe, avoid ports, mesh areas, and charging contacts—anywhere moisture could sneak in.
2. Remove and clean or replace ear pads
If your ear pads detach, remove them gently. Clean them with a cloth lightly dampened with either 70% isopropyl alcohol (if safe for the material) or an alcohol-free cleaner. Real and faux leather are especially prone to build-up from dried sweat and skin oils. For tougher staining, rub gently to remove it—too much pressure could deform memory foam or damage faux leather.
Some older pads may be beyond saving—especially if they’re flaking or squishy to the point where they’ve lost their cushioning. In that case, consider the option to upgrade with replacement headphone pads and cushions.
3. Gently clean headphone mesh and drivers
Remember, this part is delicate. Avoid pressing anything into the mesh covering your speaker drivers. Instead, hold the headphones so the speaker side faces down. Use a soft, dry brush to dislodge dust, letting gravity help. You can also use a short burst of compressed air at a distance—aimed sideways rather than directly into the driver—to clear out stubborn particles.

Looking for the perfect pair of headphones?
Our headphone buying guide breaks down the different types of headphones and the key features that meet your needs and style.
How to clean in-ear headphones and earbuds
If you’re using AirPods, Galaxy Buds, Beats Studio Buds, or other true wireless earbuds from all other brands, cleaning them regularly is key to hygiene and sound quality.
1. Remove and wash silicone or foam tips
Start by removing the ear tips. If they’re silicone or foam, rinse them in warm water with a small amount of gentle soap. Avoid scrubbing too hard, and never use hot water or alcohol. Particularly with silicone, isopropyl alcohol can work against you because it can break down the material. Also, avoid using laundry detergent or unusual cleaning agents. Regular soap you’d shower with works just fine. Dry completely with a clean towel, then let them air dry a bit longer before reattaching.
If the tips don’t stay on properly or you just want a better fit, you can shop earbud tips at Best Buy.
2. Clean the speaker grille and sensor vents
Here’s where most of the gunk builds up. If you’re wondering how to remove earwax from earbuds, the secret is patience and gentle tools. Use a dry soft-bristle brush or a cleaning tool made especially for cleaning earbuds to lightly sweep along the speaker grille and sensor area. Avoid poking through the mesh, which can damage the delicate driver beneath. You can gently run a dry cotton swab along tight spaces. This helps pick up any debris along the way. Just don’t press too hard.
Explore cleaning tools made for tech, from compressed air dusters to microfibre cloths and cleaning pen for your earbuds.
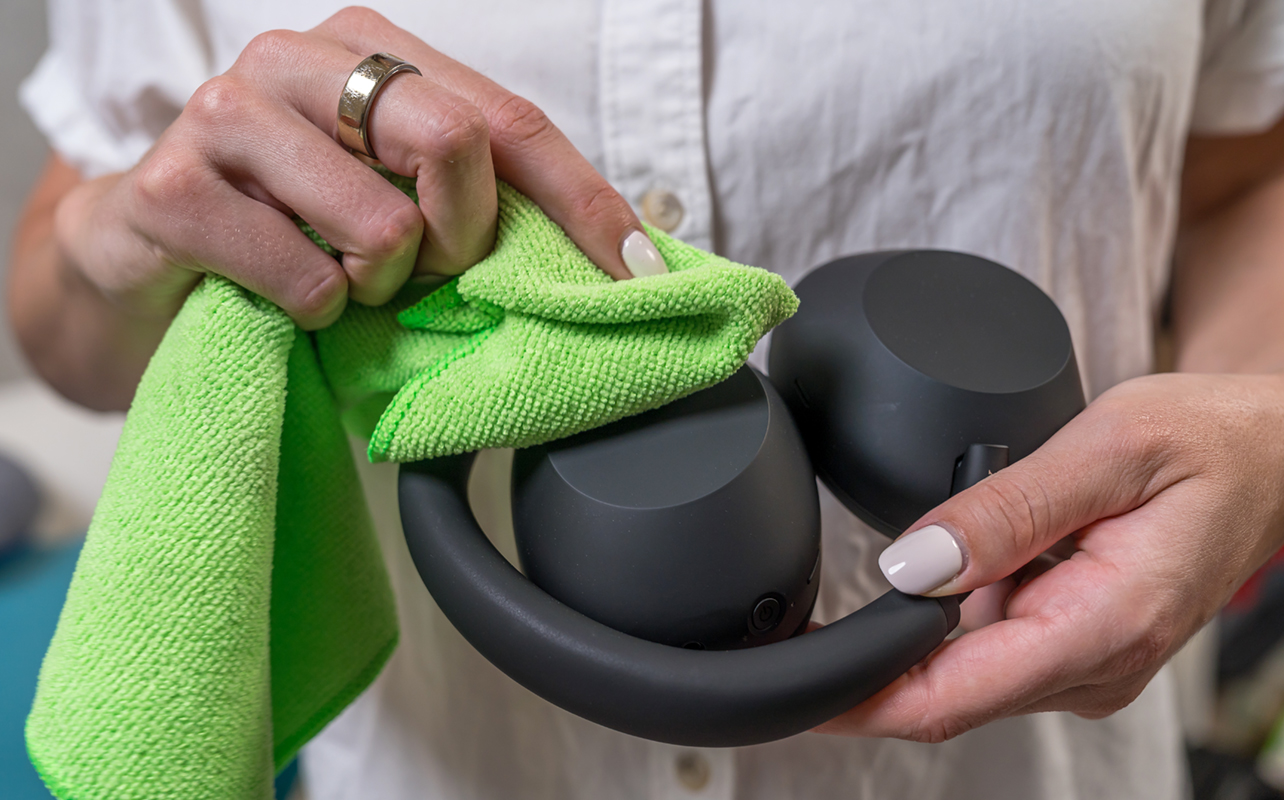
3. Sanitize without soaking
To sanitize headphones without destroying them, use a microfibre cloth lightly dampened with 70% isopropyl alcohol (safe for hard plastic surfaces) or an alcohol-free cleaning solution. Don’t soak or spray the earbuds directly, and never use hydrogen peroxide or bleach. Also, avoid higher alcohol concentrations (above 70%), as these can degrade plastic and rubber.
For earbuds with sensitive touch sensors and vents (like AirPods), always use low moisture and low pressure. A lightly damp cloth followed by a dry wipe is all you need.
Headphone cleaning mistakes to avoid
Let’s keep your headphones safe from accidental damage. Here are the most common headphone cleaning mistakes to steer clear of:
- Don’t soak or submerge any part of your headphones or earbuds, not even the tips if they’re foam. Electronics and water are not friends. Soaking can lead to internal damage, mould growth in foam tips, or even a total short-circuit.
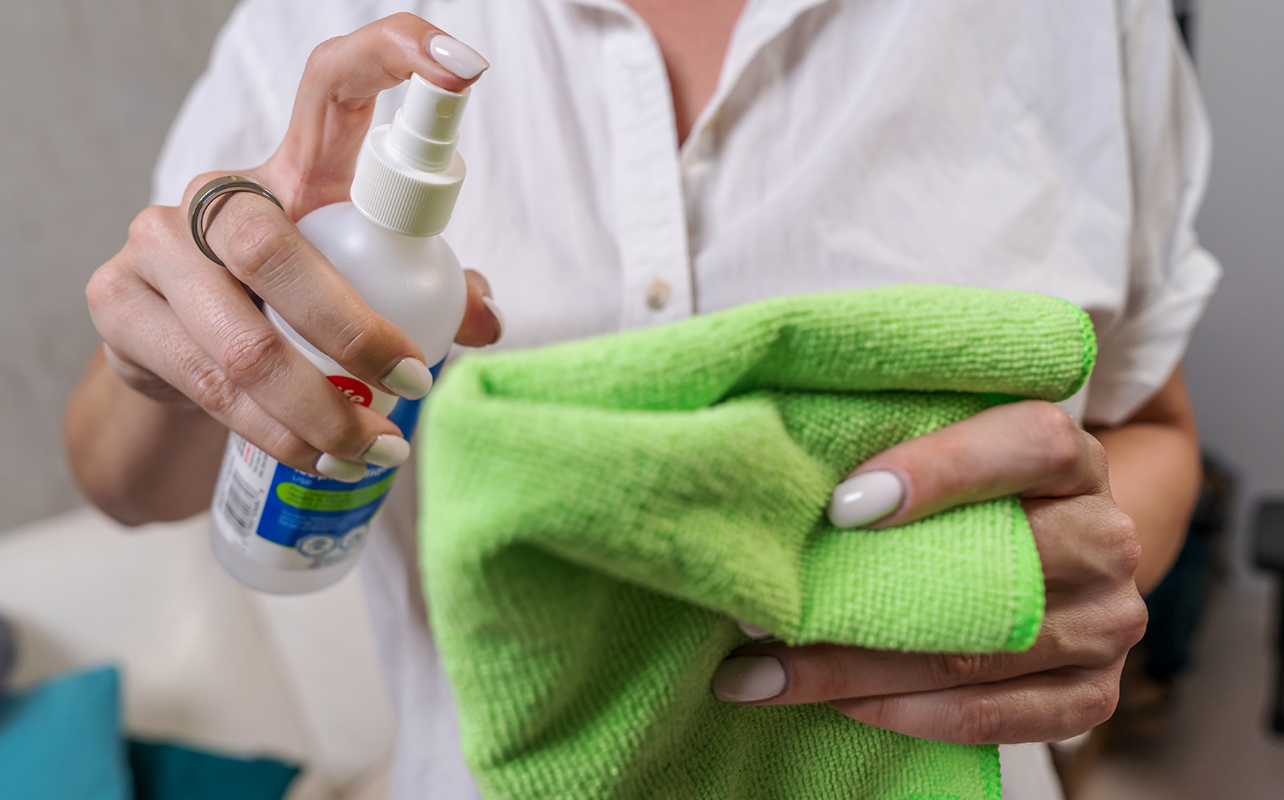
- Don’t spray cleaner directly onto your headphones—spray the cloth instead. Liquids can seep into small openings like buttons, mesh, or charging ports, potentially damaging internal components. A single speck of liquid landing in the wrong place could lead to big problems. Spraying the cloth gives you more control over moisture.
- Don’t use rough cloths or sharp metal tools that can scratch surfaces or puncture mesh. Delicate surfaces—like earbud mesh or headphone pads—can be easily damaged. Once the mesh is torn or scratched, sound quality and protection are both compromised.
- Don’t forget the mic or charging ports—just clean them gently with a dry swab or brush. Moisture can corrode them over time. These small but essential components are easy to overlook. But if they corrode, you might lose charging ability, mic clarity, or connectivity entirely.
How often should you clean headphones?
Wondering how often to do this little spa day for your headphones? Here’s a rough guide:
- In-ear headphones: Clean once a week—maybe more if you’re wearing them during regular workouts or commutes.
- Over-ear/on-ear headphones: Clean every 2–3 weeks, depending on how often you use them.
- Shared use (family headphones, airplane buds, or borrowed pairs): Sanitize after every use.
The more often you clean, the easier it is—less build-up means less elbow grease required.
Frequently asked questions (FAQs)
1. Can I use rubbing alcohol on my earbuds?
Yes, 70% isopropyl alcohol is safe for most earbuds and headphones if used correctly. Avoid higher concentrations and make sure you apply it to a cloth, not directly onto the device.
However, some manufacturers warn against using alcohol on materials like leather, fabric, silicone, or foam tips, as it can dry or weaken them over time. If you want a gentler option, use alcohol-free electronic cleaning sprays, alcohol-free wipes, or a soft cloth with mild soap and water instead.
2. How do I clean mesh without damaging it?
Use a soft-bristle brush and angle the buds so particles fall away from the speaker. Avoid poking or pressing—this can damage the driver beneath.
3. Can I clean my earbuds charging case the same way?
Mostly, yes. Earbuds’ charging cases are a mix of plastic, which could be smoother surfaces or rubberized veneers. The odd time, you might have a glossy finish. Use a microfibre cloth with a bit of isopropyl alcohol to wipe the outside. For the inside, use a dry brush or swab. Avoid letting liquid drip into the charging ports.
4. What happens if water gets into the speaker?
If water or cleaning solution gets into the speaker, stop using the headphones immediately. Let them dry out thoroughly in a warm, dry spot. Using them wet can cause short circuits or permanent damage.
Clean your headphones regularly
Giving your headphones a regular cleaning doesn’t just make them look and smell better—it improves your listening experience and helps them last longer. Whether you’re dealing with gym gunk in your earbuds or just want to clean headphone pads without wrecking the material, the right tools and techniques make all the difference.
From cleaning earbud tips to learning how to sanitize headphones safely, you’ve got everything you need to keep your gear fresh and functional. Shop headphone accessories at Best Buy.

This article was drafted using AI technology and then reviewed, fact-checked, and revised by a member of our editorial team.


