If you own a modern DSLR or a mirrorless camera, then you’ve got a really powerful piece of photographic equipment at your disposal. But in order to unlock it’s potential, you need to step outside of the comfort zone of automatic mode and learn about the manual settings. I gave a primer on these in a previous post, here, which you should read before proceeding with today’s post.
Once you’ve spent a little time working in manual mode and balancing your shutter speed, aperture and ISO in order to get the exposure meter to sit nicely in the middle, you’ll soon realise that doing so doesn’t always mean you get the results that you want.
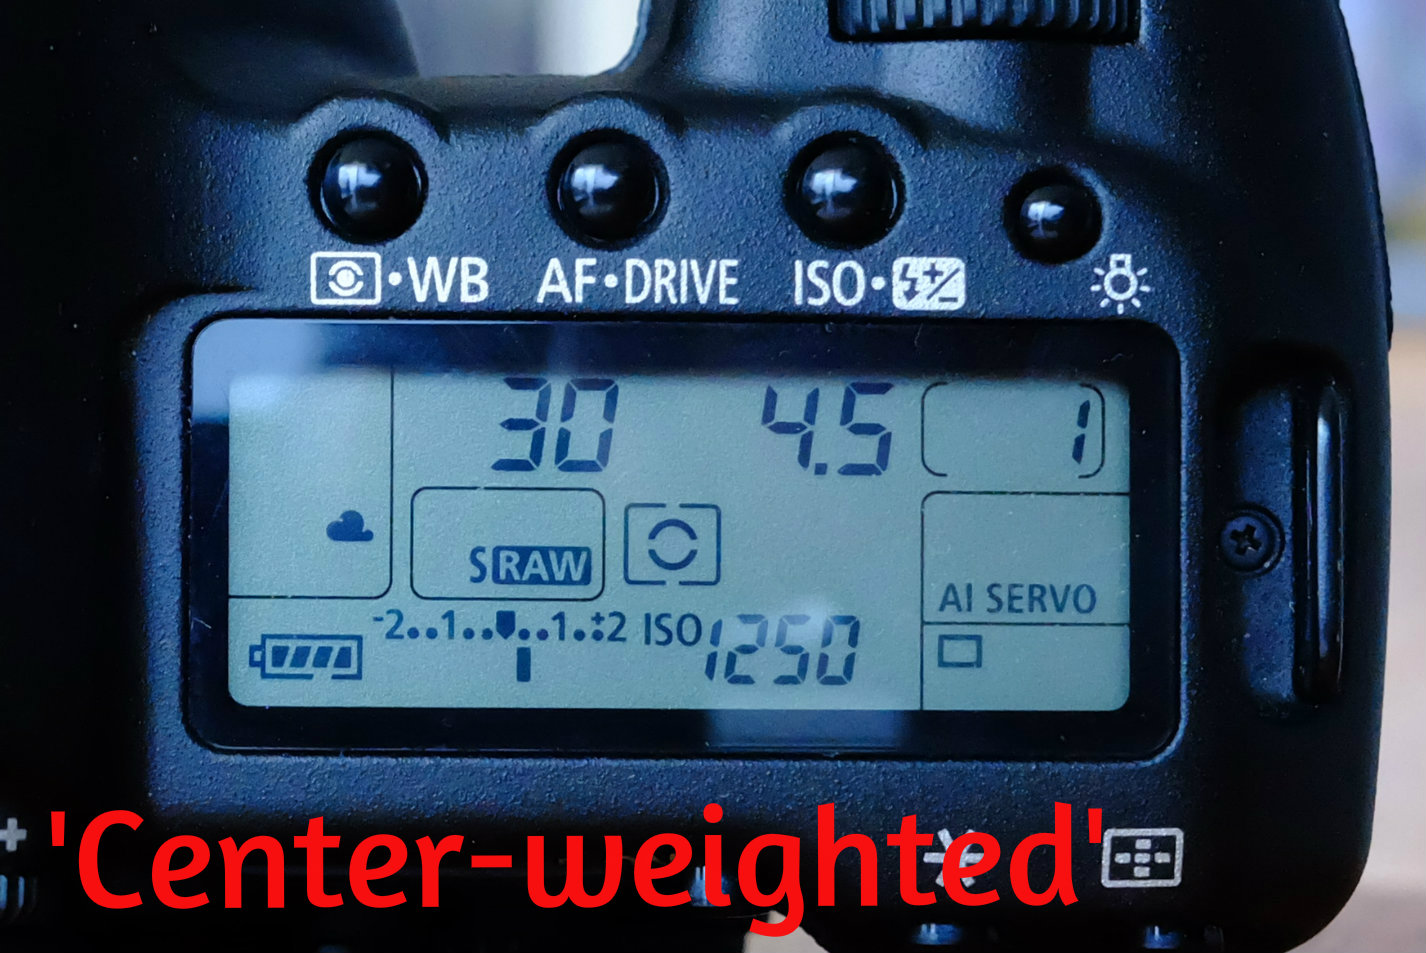
Before we look at specific examples of where the exposure meter can let you down, let’s talk about metering modes. Every DSLR and mirrorless camera carries at least three different metering modes; ‘average’, ‘spot’, and ‘center-weighted’ (different manufacturers may use different terms however). Below you’ll see some images that show how the modes are represented on my Canon 5D.
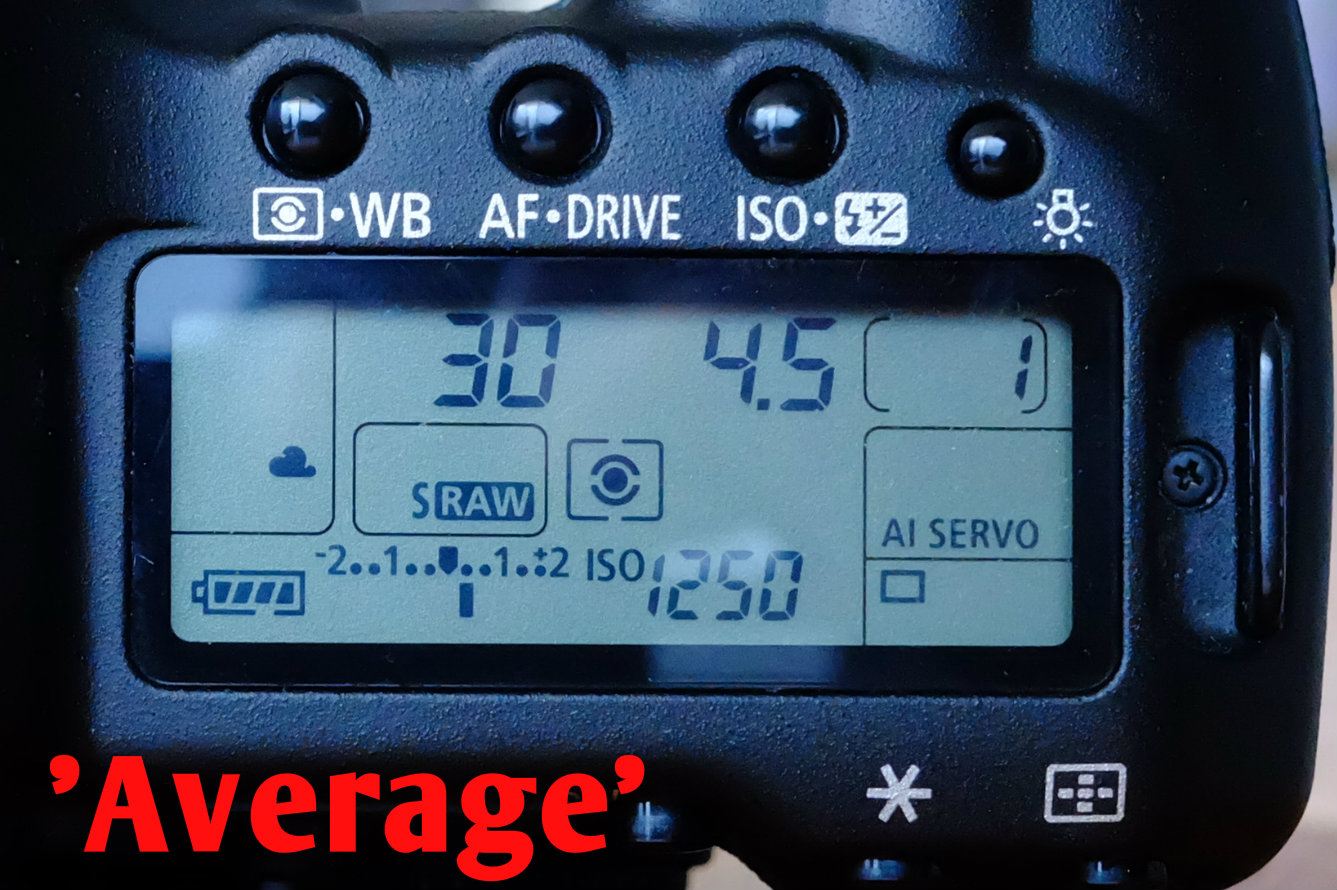 The default setting is ‘average’, whereby the camera looks at the amount of reflected light coming from the scene as a whole and suggests settings that will yield an exposure that equates to something called ‘18% grey’. What this means is that if you point your camera at an all-black wall and take a photo, it won’t turn out black, it will turn out grey. Similarly, if you take a photo of an all-white wall, the resultant photo won’t turn out white, it will turn out grey. In fact, the two grey images will look the same; and the grey you see will be 18% grey.
‘Spot’ metering mode uses a small area at the center of your frame and the camera bases it’s meter reading on just this small area. ‘Center-weighted’ metering is similar to spot but uses a larger area, usually ignoring just the edges of the image.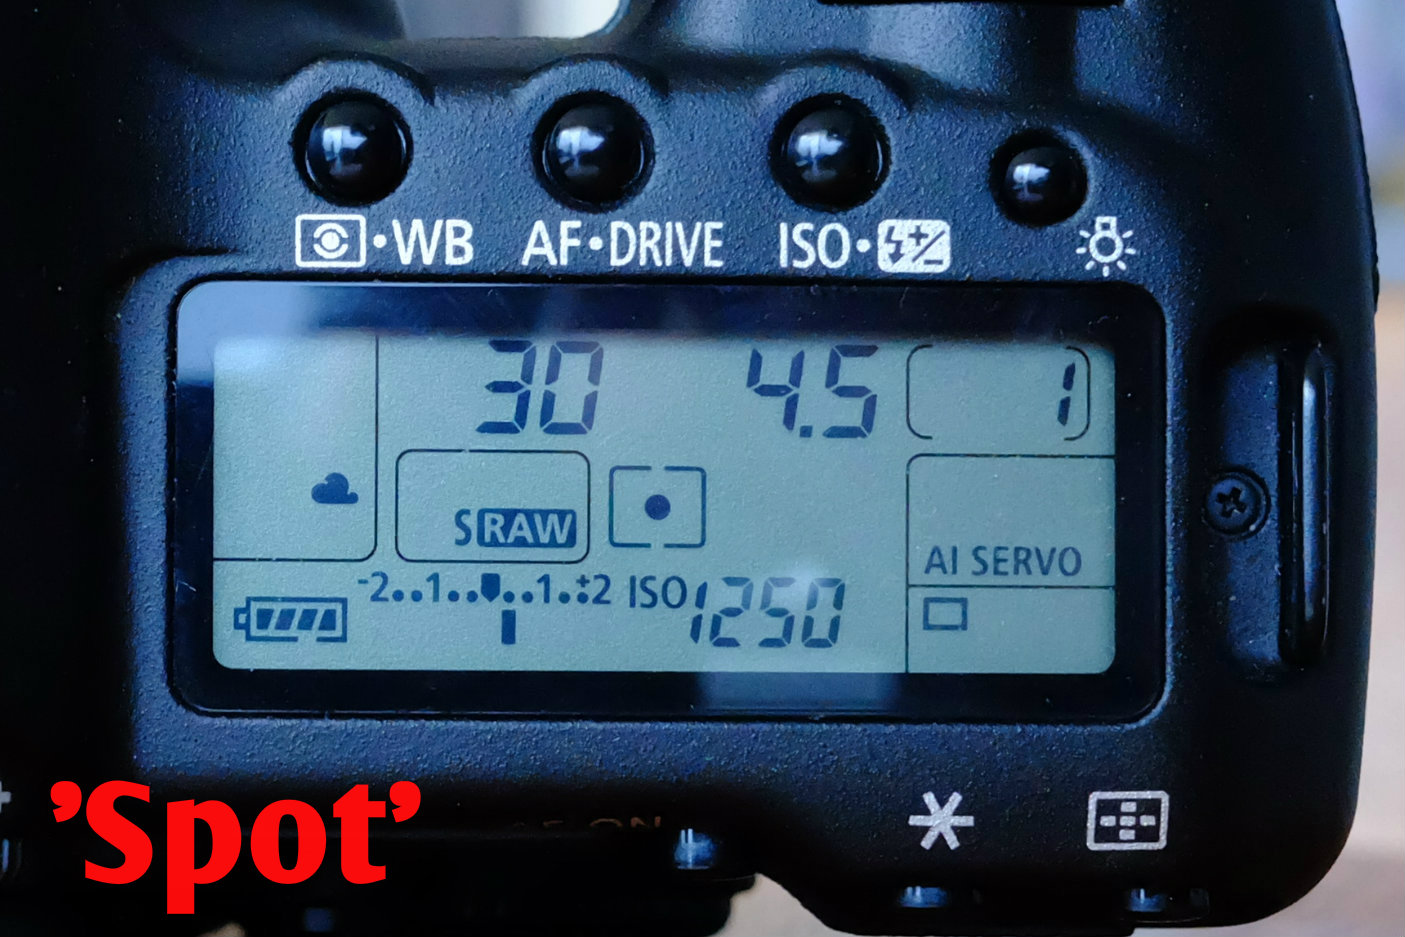
So let’s start with average metering. As an example, let’s imagine you’re on the beach in the Bahamas with your super-photogenic partner around sunset and the sky over the ocean looks glorious. The perfect scenario for a great holiday photo. And so you ask your partner to stroll through the surf and look at the camera. Click! You take the shot.The chances are the sky will look great but your partner will be all shadow. You followed the rules, kept your shutter speed fast and your aperture narrow, the meter was bang in the middle, but your subject is totally underexposed. What’s the deal?!
 Well you’ve just found the limitations of average metering. Your camera has no idea what you’re trying to photograph, what your intention was when you put that viewfinder to your eye. In fact, the camera is not that smart, and it’s a pretty rare situation where it’ll get the exposure exactly right.
Exposure is an important concept here so before I go ahead let me just clarify the term. Photographers (particularly the more, em, ‘experienced’) sometimes say “I took an exposure”. The term literally refers to the moment when you show your light sensitive medium (be it film or sensor) the scene in front of you. By and large, a good exposure means that you captured detail in all areas ranging from the shadow areas to the highlight areas. A bad exposure means that you either under-exposed, and lost detail in the shadows, or over exposed, and lost detail in the highlights.
Going back to our Bahamian beach scenario: In order to create an image where your partner is correctly exposed and shows good detail, we would have to over-expose the image, according to the meter in average mode, and thereby lose detail in the sky. Instead of seeing the nice gradation of yellow to orange to blue, we would see a lot more white. Unfortunately there’s a tradeoff that has to be made, it’s just one of the limitations of photography. We expect to be able to take a photo of exactly what we see with our eyes, but our eyes are actually vastly superior to our cameras when it comes to dealing with big differences in light intensity. We can simultaneously see detail in dark shadowy areas and brightly lit areas, where our cameras will struggle to do so.
So what are our options for overcoming the limitations of average metering? Well, there are actually two. The first is to use one of the other metering modes.
If you change to spot metering and center the frame on your subject’s face, you’ll get an image that is well exposed for the face. Now in terms of composition, it is unlikely that we would want to place our subject’s face dead center. Which leads us to the exposure lock function. In most cameras, if you half press the shutter button, two things will happen; the camera will focus, and it will take a meter reading. If you keep the button half pressed and recompose the image as required, the focus and the exposure reading will stay the same, they are, as we say, ‘locked’. The disadvantage of working like this is that you need to keep recomposing your image on the fly. And if you are shooting at a very wide aperture where you have a narrow depth of field, recomposing the image can actually put your subject out of focus.
Spot metering works well when you have a particular situation, like the sunset scene outlined above, where you have a subject set against a strongly contrasting background, which will usually be a very bright background but it could also be a dark background. Center-weighted metering is probably a more generally useful metering mode, particularly for portraits where the subject is likely to be near the center of the frame. For most landscape situations I recommend using average metering.
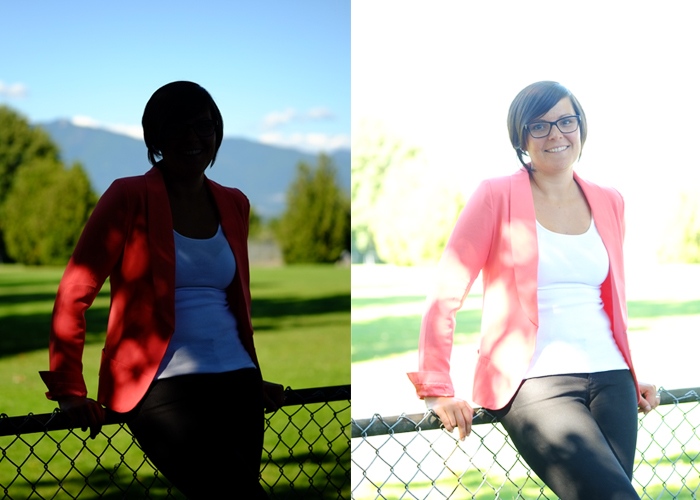 The other option open to us to overcome an average metering fail, and one that I use quite a lot in my wedding photography, is exposure compensation.
Exposure compensation is where you tell the camera to over-expose or under-expose the image. Generally you do so in increments of 1/3 of a stop. In the images to the left, I actually had to over-expose by two full stops in order to get good exposure on the face.
Good exposure compensation takes practice and experience to understand but for me it’s a vital tool. I want to spend as little time as possible working on my images, so if I can get the exposure right in the camera, that’s great. Also, brightening an underexposed image by post-processing can lead to an increase in the visible noise, particularly in the shadow areas, something we should always strive to avoid.
Effective metering is one of the fundamental skills of a good photographer, and although it takes a little time to master, you’ll be forever glad you did. So grab your manual, figure out what the options are on your camera, and get out there and practice!

