
Your smartphone is capable of taking stunning photos without the need for expensive gear or years of training. All you need are your eyes and hands to capture them, by they vacation memories, portraits of your pet, or your daily latte art. Learning how to take better photos with your phone can make a big difference in how you unlock your own creativity.
This guide will walk you through practical, easy-to-follow tips to help you sharpen and boost your skills—from understanding your camera’s features to editing like a pro. Let’s turn those average shots into scroll-stopping photos.

Understand your phone’s camera features
Before you dive into snapping away, take a moment to really get to know your phone’s camera. You might be surprised by how many powerful tools are built right in—and understanding what they do can make a big difference in how your photos turn out. Some of these are designed to work in an automated way, like how software computation helps render or process an image after taking it. Others are elective, letting you decide what you want to use to produce the photo you want.
Let’s start with the basics:
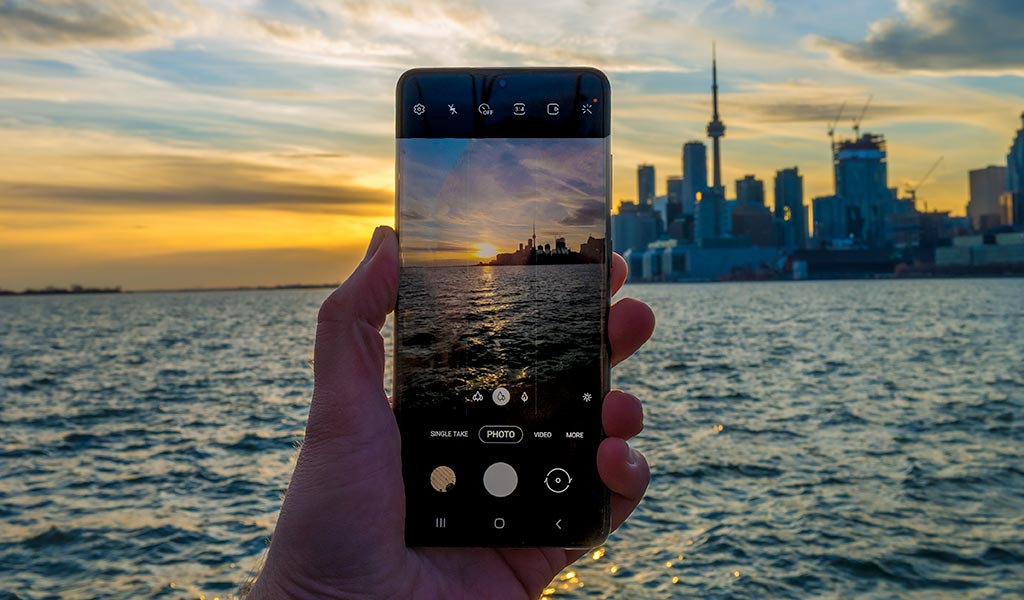
- HDR (High Dynamic Range) helps balance out the bright and dark parts of a photo. It’s especially useful when you’re shooting scenes with intense contrast, like sunsets, skylines, or photos with a mix of indoor and outdoor lighting. HDR will augment darker shadows and dampen brighter highlights to achieve that balance.
- Portrait mode is designed to keep your subject in sharp focus while blurring the background (a technique known as “bokeh”). This makes people, pets, and even objects like flowers or food really pop. It’s a go-to for achieving that professional look. Image sensors on phones are small, meaning they would normally struggle to produce shallow depth of field for that creamy bokeh effect. That’s why software tends to bridge the gap.
- Night mode is your best friend in low-light conditions. It uses longer exposure and software magic to brighten up dim scenes while reducing the grainy “noise” that usually ruins nighttime photos. It tends to work best in static scenes, so think of a cityscape or posed subjects because it takes a little longer for image capture.
If your phone has more than one lens—say, ultra-wide, standard, or telephoto—each one serves a specific purpose:
- Wide-angle lenses are ideal for capturing sprawling landscapes, city streets, or large group shots. If we were to compare that to a DSLR or mirrorless camera, they are equivalent to about 23mm or 24mm lenses.
- Telephoto lenses let you zoom in without losing sharpness. They’re great for getting closer to your subject without physically moving, perfect for events, wildlife, or candid shots. Some phones will use unique optics, like periscope lenses, to create a longer zoom, though hybrid zooms are also common (combining optical and digital zoom together).
- Ultra-wide lenses have a very wide field of view that allow you to capture a lot into one frame. The only catch is the closer you get to a subject the more distorted they will appear. These lenses can offer interesting perspectives, especially when you use them from lower or higher angles.
- Macro lenses are designed for extreme close-ups. Want to show the texture of a leaf or the detail in a tiny object? A macro lens will bring that into focus beautifully. Dedicated macro lenses are rare on phones nowadays as the feature is more often part of a telephoto or ultra-wide lens where it kicks in once you get close enough to a subject.
Remember: your phone’s camera app often has extra features like slow motion, time-lapse, panorama, and even manual settings like ISO and shutter speed. Spend some time exploring those options and see what works best for your shooting style.
And finally, keep your phone updated. New camera features, bug fixes, and performance improvements are frequently included in software updates—making a noticeable difference in how your camera performs.
Use natural light to your advantage
Lighting is the ultimate key that can make or break a photo. Your phone’s flash is not particularly effective, partly because it’s weak and doesn’t travel very far, but also because it can’t mimic natural light. Natural light tends to produce the most flattering and realistic images. Great lighting can highlight your subject, create depth, and even set the mood of your photo. This applies to both sunlight and overcast conditions, though the time of day also plays a role.
What is golden hour and why does it matter?
One of the best times to shoot photos outdoors is during golden hour, which occurs shortly after sunrise and just before sunset. When the sun is low in the sky, it casts a warm, diffused light that flatters skin tones and adds a soft, golden glow to landscapes. Shadows are longer and gentler, making it easier to get evenly lit shots without the harshness of midday sun. There’s a cinematic and dreamy quality to these photos, and they present great opportunities for various types of photos. Scenic shots and portraits certainly stand out, but architecture and street photography also benefit from these conditions. It’s worth setting your alarm or planning an evening stroll just to catch this magical light.
Avoiding harsh midday lighting
In contrast, shooting in the middle of the day can result in harsh lighting with strong shadows and washed-out colours. When the sun is directly overhead, look for shaded areas or use a tool to diffuse the light—this could be something as simple as a sheer curtain, your own body, or even a hat. Diffused light softens bright highlights and harsh shadows to help maintain the natural tones of your subject. HDR computation can mitigate these harsh effects but only to a certain degree. In some cases, they may overdo it and make the photo look a little too unrealistic.
Making the most of indoor lighting
If you’re shooting indoors, take advantage of window light. Position your subject near a window where natural light can spill in from the side. This creates pleasing highlights and soft shadows that add depth and texture to your photo. Avoid overhead lighting whenever possible, as it can create unflattering shadows on faces (under the eyes and nose, especially) or dull the atmosphere of your shot.
Shooting at night
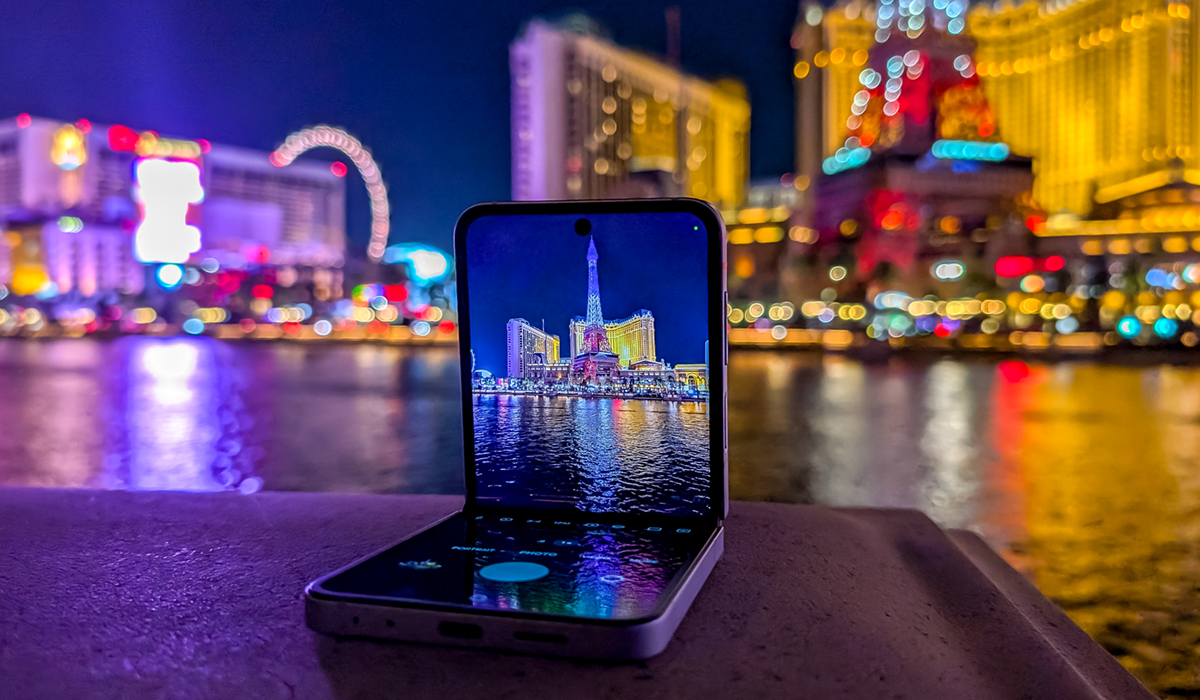
For night photography, don’t just rely on night mode. Seek out ambient light sources like street lamps, neon signs, or even a well-lit storefront. Lighting like that can create interesting visual effects while helping your phone’s camera focus better in the dark. The combination of ambient light and night mode can work wonders for capturing scenes that are atmospheric but still sharp. If the ambient light is strong enough, you may not even need to use night mode to get a good shot.
Even though today’s smartphones have increasingly powerful software to adjust lighting on the fly, starting with good natural light will always result in cleaner, sharper, and more visually appealing photos. Certain phones may offer astrophotography modes to capture the stars, which works best in darker locations with less light pollution. Pro and manual modes are also useful for long exposure photos where you need more time to gather light, though these work best when utilizing a tripod or flat surface to prop up the phone.
What about blue hour?
Much like golden hour can help cast wonderful light and shadows, blue hour is that short twilight period in the morning or evening when the sun is still below the horizon. That gives the sky a blue tone contrasting nicely with other lit subjects. Think of a skyline lit up in different colors in front of a blue canvas. Architecture particularly stands out this way, be it a landmark or something interesting in an urban setting. Even a natural scene like a lake, mountains or the stars can lead to great results at this time. Much like night photography, blue hour is sensitive to movement, so you may want to use a tripod or something else to maintain the utmost stability.
Pay attention to composition
Even with great lighting and a sharp camera, a photo can still fall flat if the composition doesn’t hold up. The way elements are arranged in your frame can have a major impact on how engaging your photo feels. That’s why just aimlessly pointing and shooting often leads to bland results. Fortunately, you don’t need to be a professional photographer to start using better composition techniques. A few simple tricks can go a long way.
Use the rule of thirds
One of the easiest ways to improve your composition is by following the rule of thirds. Most phone cameras have a grid setting you can turn on in the camera app. This overlay divides your screen into nine equal parts using two horizontal and two vertical lines. Placing your subject along these lines—or even better, at one of the four intersection points—can make your photo look more dynamic and naturally balanced. It helps avoid that stiff, centred look that’s often less visually appealing. Try tilting the angle sideways so that the subject appears further away from the background for some depth. As a guiding principle, the rule of thirds is a key one to follow in how you take photos.
Look for leading lines
Leading lines are lines within the scene—like fences, sidewalks, roads, hallways, or even shadows—that draw the viewer’s eyes toward your subject or further into the broader view. They help guide attention and create a sense of depth, making your photo more immersive. When composing your shot, see if you can use the natural lines in your environment to your advantage. It’s a subtle trick, but it adds visual direction that makes your images stand out. A good example of this might be a street that leads to structure or building, much like Dumbo in Brooklyn, New York that has a cobblestone street leading to the Brooklyn Bridge in the background.
Embrace symmetry and framing
Some shots benefit from symmetry—where both sides of the image mirror each other. Think of reflections on water, architectural elements, or faces framed by a centred background. On the flip side, framing your subject within a doorway, window, or even tree branches can focus attention exactly where you want it. This approach adds a sense of structure and storytelling to your images.
Experiment with different perspectives
The perspective you shoot from has a huge effect on how your subject is perceived. Instead of always holding your phone at eye level, try crouching down low or shooting from above. A low angle can make a subject seem more powerful or dramatic, while an overhead view is great for flat lays, food shots, or capturing symmetry in everyday objects. Play around with your positioning to find a fresh take on ordinary scenes.
By being just a little more intentional with how you compose your shots, you can turn an average photo into something eye-catching and creative—without needing any extra gear.
Clean your lens and hold steady
It might sound obvious, but a dirty lens is one of the most common reasons for blurry photos. A quick wipe with a microfibre cloth can make a huge difference.
Blurry images also happen when your camera shakes. Use both hands and tuck your elbows in for stability. If you need even more control, you can lean against a wall or rest your phone on a steady surface. Or, consider using a tripod or smartphone gimbal for sharper images and smooth video. Best Buy Canada has a wide range of mobile accessories to help stabilize your shots.
Avoid using the flash
Most smartphone flashes, which are basically just LED lights, can be more detrimental than helpful in everyday photography. They often bounce directly back from reflective surfaces—mirrors, windows, shiny metals—resulting in glare, halos, or unwanted reflections. Additionally, these flashes lack sufficient power beyond about 10 feet, making them virtually ineffective for dimly lit large scenes like buildings or concerts. Instead of relying on harsh, artificial light, it’s better to use your phone’s night mode or HDR for softer, more natural results.
There is one exception. You can use the LED as a flashlight to light a source off-camera. This works best with two extra phones positioned to the left and right of the subject to softly illuminate them at night or in low-light environments. This dual-light setup creates a more balanced, professional look, reduces harsh shadows, and avoids the on-axis glare of a single camera flash. Even one additional phone is better than none if you’re with a friend or family member willing to help.
Edit thoughtfully, not excessively
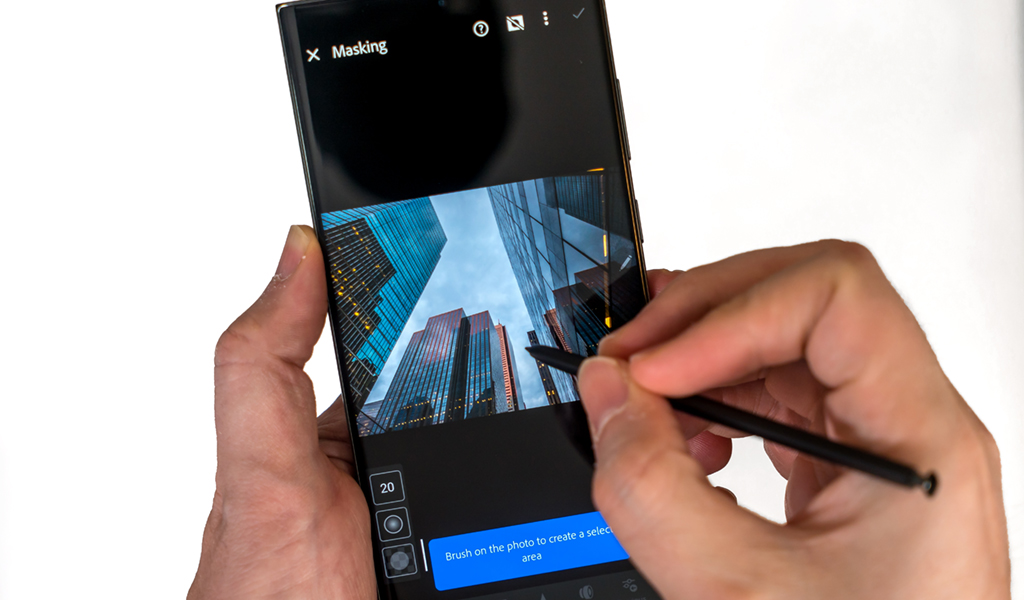
Editing is a great way to enhance your photos, but less is often more. Focus on making small adjustments that refine rather than distort.
Start with basic edits:
- Brightness and contrast to enhance overall light and shadow.
- Cropping to improve framing, remove distractions, or straighten perspective.
- Sharpening for extra clarity.
Avoid using heavy filters that overly saturate or blur your photos. Instead, try apps like Snapseed, Lightroom Mobile, or your phone’s built-in editing tools for a more natural look. Sometimes, taking a fresh look at your edits after a first round may entice you to take a different approach afterward.
Consider accessories to enhance your shots
Accessories can take your phone photography to the next level, especially for creative or challenging shots.
Here are some popular options:
| Accessory | What it does | Why it helps |
|---|---|---|
| Clip-on lenses | Adds macro, wide-angle, or fisheye views | Expands your creative options with unique perspectives |
| Portable lights | Provides consistent lighting | Great for portraits and low-light shooting |
| Tripods and gimbals | Stabilizes your camera for photos and video | Helps eliminate blur and improve framing |
Explore Best Buy’s mobile photography accessories to find gear that suits your needs and budget.
Start capturing your best shots yet from your pocket
Learning how to take better photos with your phone isn’t about buying the most expensive gear. It’s about understanding how your camera works, practicing good composition, using natural light effectively, and knowing how to enhance your shots with thoughtful edits and accessories.
Whether you want to share better travel photos, take stunning portraits, or simply make your everyday snapshots more memorable, these tips will help you level up your mobile photography game.
Looking to boost your skills even further? Check out mobile accessories and tripods at Best Buy Canada to take your creativity to the next level.

This article was drafted using AI technology and then reviewed, fact-checked, and revised by a member of our editorial team.


