
 First we had fire, then electricity. Tesla, Faraday, and Franklin pioneered the technology behind electricity, and then Thomas Edison invented the lightbulb. The way we light our homes really hasn’t changed much since that auspicious day in 1879. The lightbulb is round, it screws into a fixture, which requires a tradesman to install; electricity is dangerous for the uneducated.
Forget the bulb, Nanoleaf has a whole new way
But now, a Canadian company has really, actually, reinvented the way we light our homes. Nanoleaf, based in Toronto, has invented lightweight, flat plastic panels that fully illuminate, change colour, morph and swirl. They’re bright, responsive and fully configurable, both in terms of how you place the lights, and how you operate them. This lighting system is called Nanoleaf Aurora, and yes, it’s deliberately named after the Northern Lights phenomenon known as Aurora Borealis.
The story of how this technology came to be is charming; flying from Toronto to Vancouver, Nanoleaf’s CEO & Co-Founder Gimmy Chu, glimpsed the Aurora Borealis while looking out the window of the plane. He was so inspired by the colour and movement of the lights, he started a three year project that has since become the Nanoleaf Aurora.
Nanoleaf Aurora: what’s in the box?
Nanoleaf supplied me with a test kit called the Smarter Kit (a cleverly named starter kit). Inside are 9 flat, lightweight plastic light panels, and the various cords and cables to connect it to power. There are also some flat microchip-like wafers called ‘linkers’ that connect each panel to its neighbour. Helpfully a packet of 3M command strips removable adhesives are also included for getting it on and off the walls.
Aurora Smarter Kit Starter kit comes with:
• 9 panels
• Power supply pack
• Controller
• 28 linkers that connect the panels
• 28 double sided mounting tape strips
• 9 stencil papers to help with setup
How Nanoleaf Aurora works
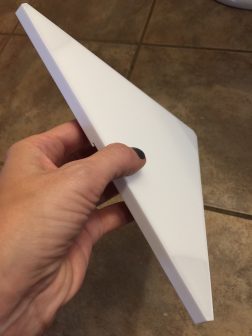
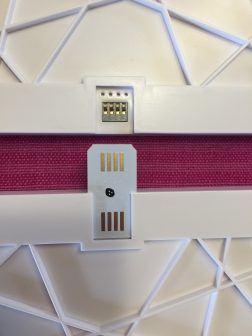
Each triangular Aurora panel has the ability to fully light up from edge to edge; while it looks thin, it’s a virtual layer cake of technology. It’s made up of printed circuit boards, LED chips and a diffuser panel as the icing across the top.
The first panel you stick up connects with a snap to the “controller”, which in turn connects to an AC power supply. To add more lights, just slip a linker into the side of the panel, then slid on another panel . Build shapes or lines of light as you wish. You can create flower-like patterns, lines, triangles, animals and more.
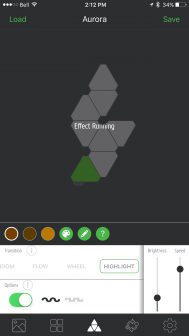
The lights will work independently, and can display different colours, or all the same colour. Everything is controlled via the free Nanoleaf app which lets you adjust brightness, the way the lights flow, the different colours and palettes used, as well as timing functions.
These lights are smart… really smart
Amazingly, there’s also a feature called ‘Layout Detection’. Essentially the Aurora kit is always aware of its set up, shape and design, so when you look at your app, the kits’s shape and design match what’s on the wall exactly. This technology enables the Aurora’s intricate color flow animations, and allows users to fully customize their own designs and shapes.
Setting Up Nanoleaf Aurora
When you plug it in, the light panels that you have connected will power on right away. Getting the kit working with the app (and to work with Apple HomeKit) is another story.
 I was able to get easily through part of the set up process, but I had difficulty when it came time to configure the Aurora. The app asks you to assign the Aurora to a ‘room’, but it wouldn’t let me complete this step. The error message I got was that that there was already a room with that name, despite the fact I was, through trial and error, choosing odd names for the room like ‘outhouse’, and ‘Batcave’. I finally closed the app and restarted it, and that seem to do the trick, as my personal Aurora kit was finally visible inside the app now.
From there, operation was largely easy and seamless.
Once your app is running, you can start assembling the lights on your wall. It’s worth giving some thought to where you want to place it, and the design you’ll use, in part to save yourself some wasted adhesive strips, and in part because the triangular shape of the panels poses some odd angles once you start placing it on the wall. Mine actually angled kind of to the side instead of straight up as I wanted it. It’s easily fixable by pulling off the adhesives and repositioning, but you might want to save yourself some trouble.
Attaching Aurora to the wall
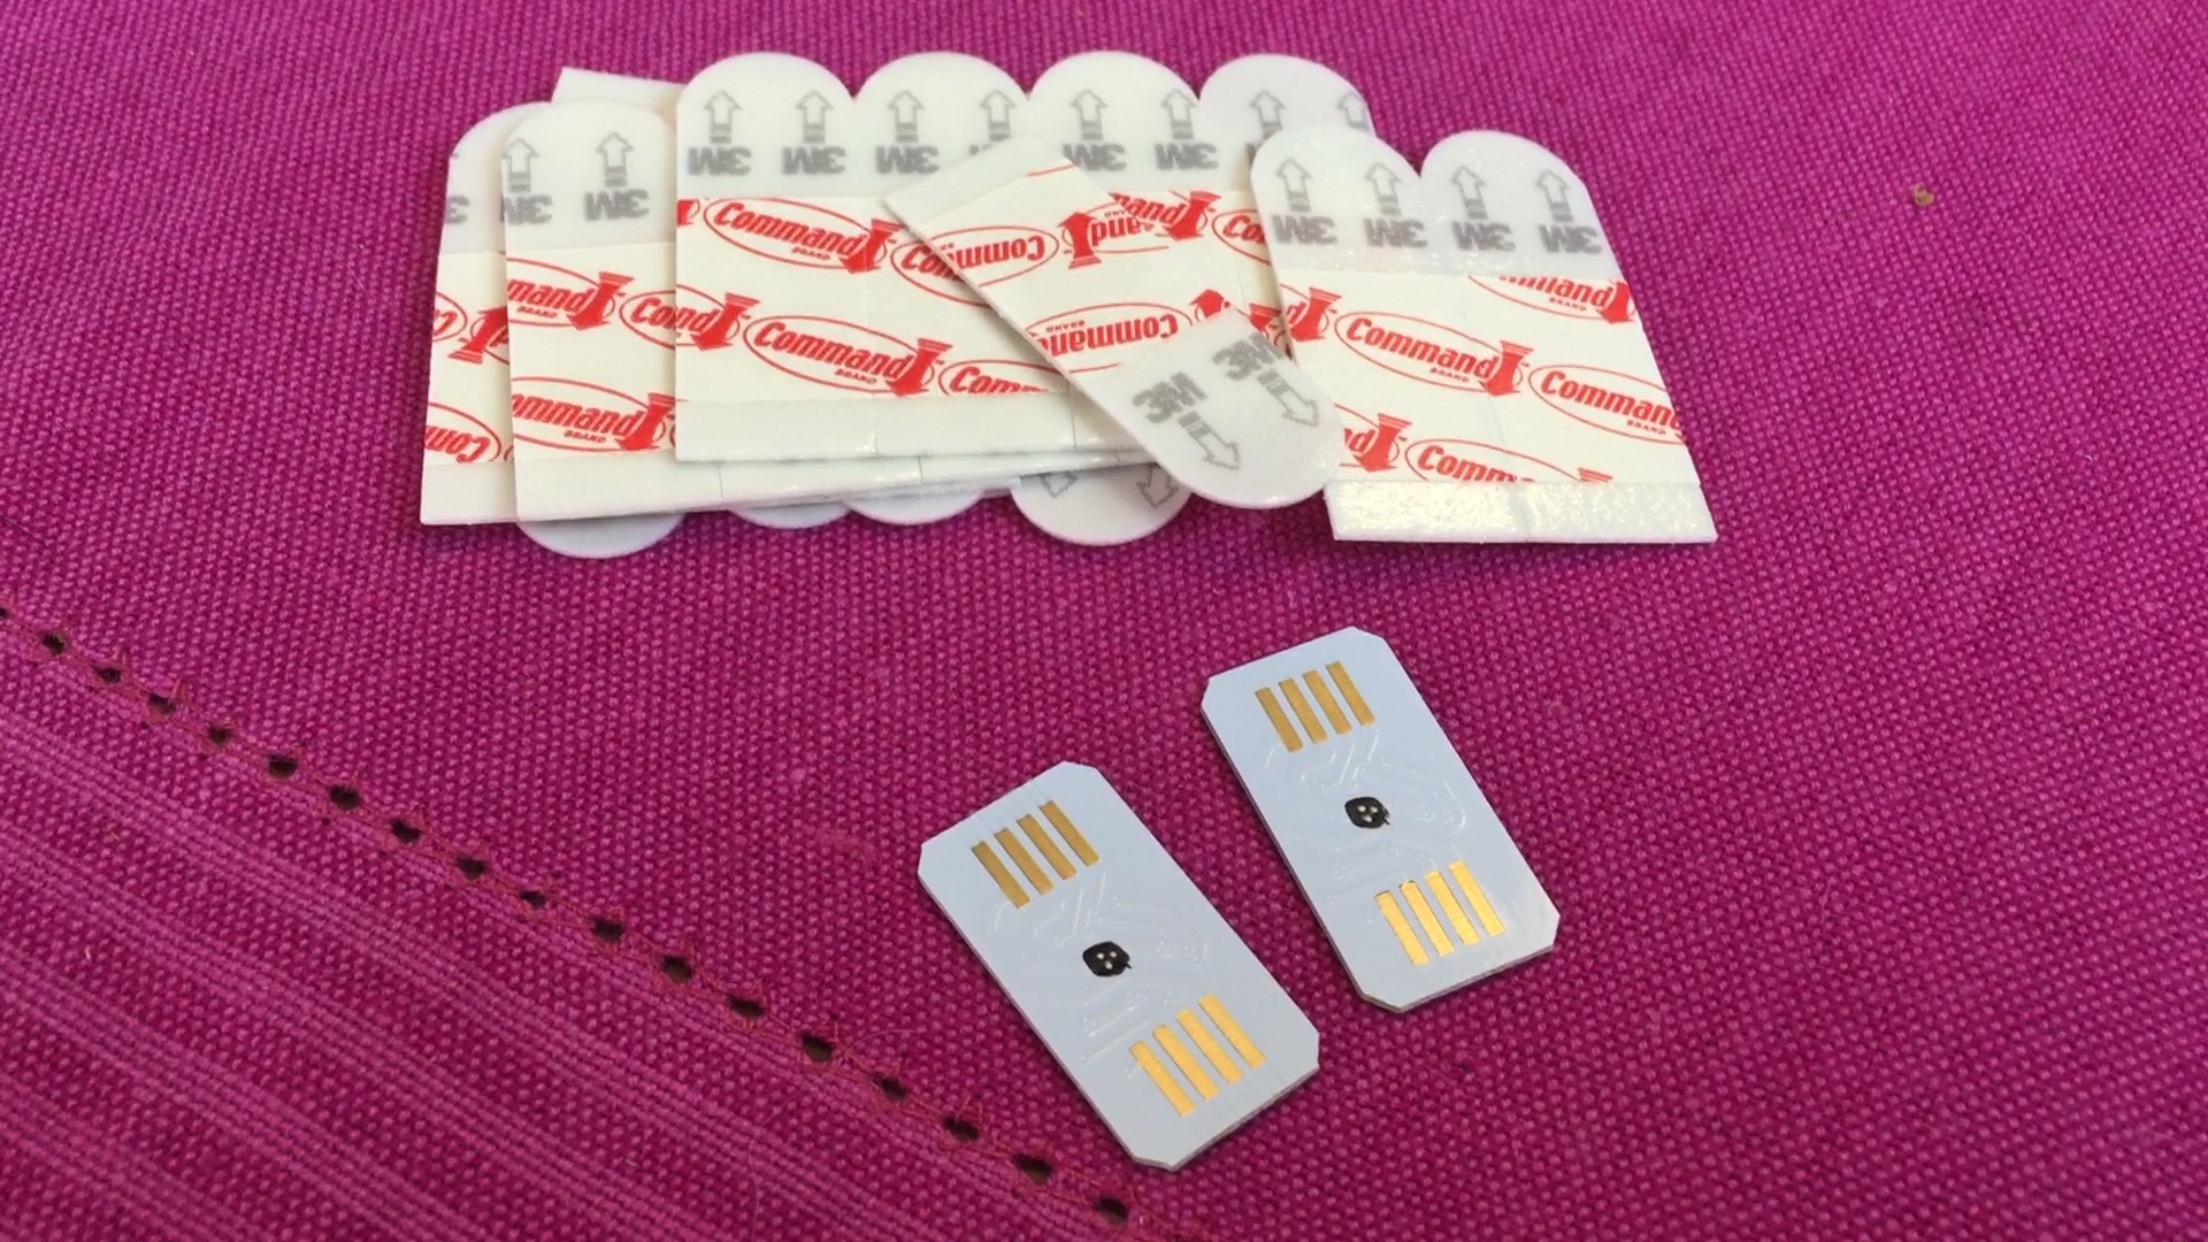
Initially I couldn’t even guess as to how the panels get hung on the wall; there are no hooks or dents for nails. It wasn’t until I opened the envelope that contains the tiny computer chip linkers that I saw there are the 3M command adhesive strips inside. They make it quick, easy and fast to install, and mean no repairs afterwards; great for rentals!
During the setup process you will also need a ‘home code number’ which is printed on the back of the controller.The same information is also helpfully printed on the instruction manual.
One other pro tip I didn’t consider until after I got the first panel onto the wall, was that you have to place the command adhesive strips with the tab sticking out from behind the light panel, or you won’t be able to unstick them again easily. Oops.
 Controlling lights & using the app
The Nanoleaf Aurora app can be confusing. There are several different screens and buttons and configurations, and within some of the controls are a dazzling array of bells and whistles. It requires some time and experimentation to learn what all the controls, sliders, buttons and symbols that make up the app mean, and do.
A smarter and more intuitive timer function would be nice in the app also. The existing ‘schedule’ screen is very confusing. While it allows you to add a date and time, there’s no selection for whether you want the lights to turn on or off. You’re essentially just selecting a time for something to happen. I’m not sure how you’ll know what that is. I set the lights to do.. something at my wake up time. While they came on, there was no way I could find to schedule them to turn them off automatically in the app. I had to turn them off manually.
Nanoleaf tells me there is an update coming to the app, so hopefully that will resolve this issue. The update will also allow for something called ‘Sunrise’ where users will be able to schedule their Aurora to come on over a 15 minute period to gently and gradually wake you up; great for bedrooms or gentle kids’ wake ups.
You can also do some basic controlling of the lights without the app. You can toggle between your preset scenes and turn the light on and off using the controller panel at the base of the light. Control here is ultra basic, but helpful if you’re phone’s not handy.
Creating your own effects and palettes with Nanoleaf Aurora: HOW TO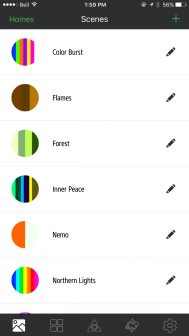
The app has several preset lighting palettes; from ‘Colour Burst’; a dazzling array of colours, to ‘Forest’; a suite of greens, and ‘Flames’; a soothing melange of oranges and yellows that flickers like a fire. There are only about eight preset lighting patterns in the app, but fortunately it’s easy to create your own. Here’s how:
Load up the panel control screen (the icon with the triangles in the app). Select the little artist’s palate circle in the middle of the screen. Select ‘make your own’ from the list of options.
Tap the ‘plus’ sign, then select a color. Tap the plus sign again to add another color. Add as many colours as you like. When you’re choosing a colour to add, you also have the option of adjusting the brightness. Save your selection and then it will take you back to the previous screen. Hit ‘save’ again and you’ll have the option of naming or renaming this effect.
Once it saves, the effect you created will now be available in the main screen (the little mountain icon).
There were a couple of times the lights became disconnected somehow from the app and I wasn’t able to control it. Shutting the light off at the source seemed to fix that problem.
Using the Aurora
The Aurora was easy to use and I must admit, really fun. Playing with the colours and the animations, using it to change up the colour in a room or the feel in my home was really enjoyable. There’s a nearly endless list of colours you can get it to display, and even when it comes to whites, you can provide a warmer white light, or a cooler one, depending on your needs and preferences.
Voice Control with Siri
Aurora works with Apple’s Home app, and when configured you can ask Siri to turn your lights on for you. I’m still learning the best ways to control Home, but suffice to say I was able to get Siri to turn my Aurora panels on or off just by asking. I wasn’t able to get Siri to change the colours or palettes; something to work on I suppose.
Overall thoughts on Nanoleaf Aurora
I really, really liked my experience with the Aurora. It works well and the effect is just stunning. The light looks like nothing else I’ve tested before, and people visiting our home were absolutely bowled over by it.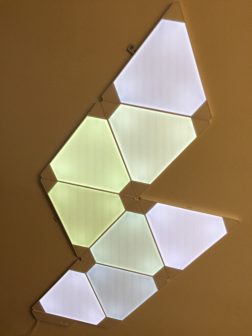
The lights are bright enough for task work, but can be dimmed for a more relaxing feel too. If you want more there’s also an expansion kit of three panels you can add. Nanoleaf tells me you can run up to 30 panels off one controller.
I felt like the panels were durable, if lightweight, but Nanoleaf points out the triangle is among the worlds strongest shapes. The panels felt like they attached very securely to the wall, and I wasn’t worried they’d unstick and fall off.
While some might think sticking these lights up with tape feels cheap or ineffective, I feel like it allows me much more versatility; I don’t need to put holes in the wall if I mess up my design, and I can move it on a whim.
I’m very happy with the design, construction and user experience with the Nanoleaf Aurora, and would definitely get one for my home, or to give as a gift.


