
Now that we’re all conducting so much more of our work, study and social lives online, it only makes sense that we should start exploring ways to make that experience as engaging and immersive as possible. Here on the Best Buy blog we recently discussed the ways you can use a regular camera for video conferencing.
Today I’m going to look specifically at Sony cameras, as Sony has recently released the Imaging Edge Webcam software which allows you to connect most Sony digital cameras to your computer in order to use them as webcams. The advantage of doing so is really significant in terms of the image quality you can get, and you can be sure your friends and colleagues will notice.
Let me point out right off the bat that Imaging Edge Webcam only works on machines running Windows 10 64bit. Sony has stated that a Mac version will be available this fall, so we’re hoping that will drop any day now.
Which Sony models are supported?
As I mentioned, Imaging Edge Webcam works on most Sony cameras, but not all. Check out this screenshot from the Sony website for a full rundown of all the compatible cameras.
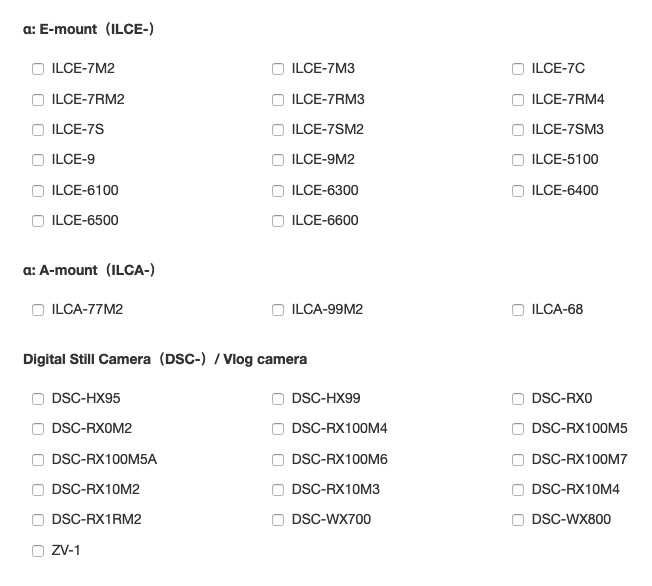
Good to see that the ZV-1 vlogging camera that I reviewed recently is listed, as well as the RX100 VII that I also reviewed recently.
Setting up Imaging Edge Webcam
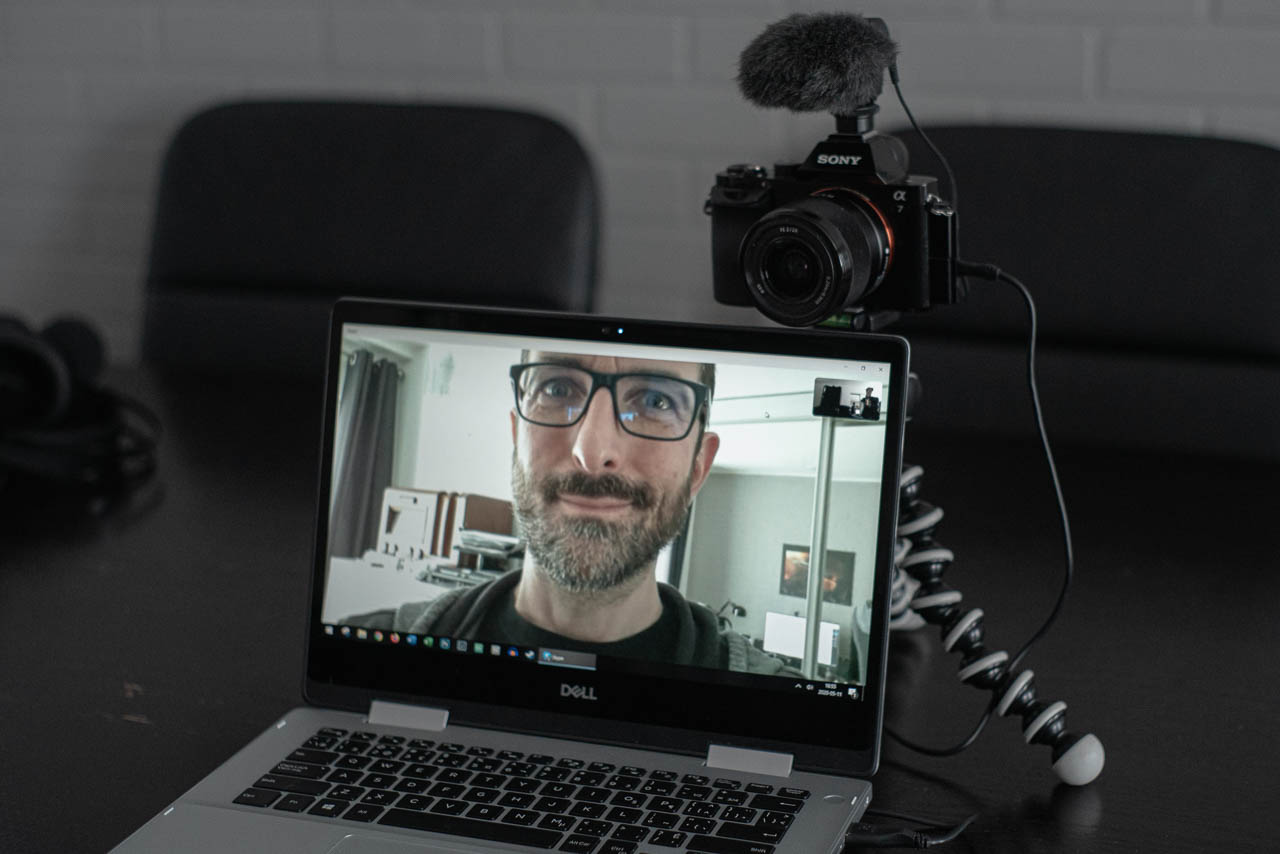
Once you have downloaded and installed the software, you will need to change some settings on your camera to enable the connection to your computer. Below is a screenshot of the steps I was able to perform on my A7 III, which were really straightforward.

These steps will work for most cameras, but if you have a A7C, an A7R IV, an A9 II, or an A7S III [lucky you!], be sure to visit this page to find your specific instructions.
The next step is to connect your camera to the computer with a USB cable, and set the camera to movie mode, or auto mode if it’s one of the following models: A7 II, A7S, A7S II, A7R II, A5100, A6300, A68, A77 II, RX1R II, RX10 II, RX10 III, RX100 IV, or RX100 V.
After you’ve attached your camera, it’s time to launch your preferred video conferencing program. Within this program you will then need to change the setting for your video input to your Sony camera. Audio, however, will not be captured by your camera but by the computer’s default audio input.
Powered by USB
One of the big advantages of using a Sony camera is that many are chargeable by USB, which means that power can be supplied to your camera while it is plugged in to your computer, so you don’t have to worry about running out of battery mid-conversation. Check your camera settings and look for the ‘USB Power Supply’ setting (or equivalent) and make sure it is set to ‘On’.
Sony recommends using auto mode if your call is going to be a long one, as this can help to mitigate any overheating issues. Also you might be able to find an ‘Auto Pwr OFF Temp.’ setting which you can set to ‘High’.
I think the new Imaging Edge Webcam software is a fantastic development for Sony users, and I hope the Mac version gets released soon.
Check out the full range of Sony digital cameras available at BestBuy.ca


