
If you want to get the most out of your PlayStation VR2, here are some tips and tricks to enhance your experience. I conducted a full review of the PS VR2 when it launched and have been playing it ever since. Along the way, I picked up plenty of helpful tips that improved my experience with the virtual reality platform. In this guide, I’ll share my top recommendations for optimizing your setup, ensuring comfort during extended gaming sessions, and sharing lesser-known features to help you get the most out of your PlayStation VR2. Let’s dive into the basics of set-up and move up to more advanced tips to get the most out of the hardware.

Setting up the PS VR2 correctly is essential for peak performance
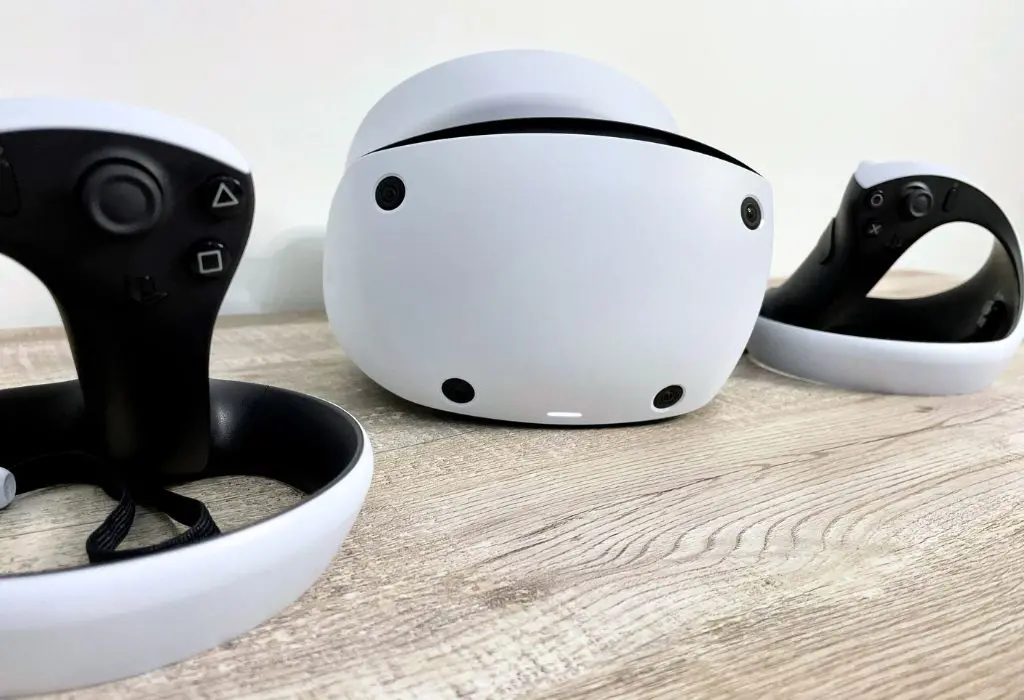
Setting up your PlayStation VR2 correctly is crucial for the best gaming experience. This is especially important because the lenses have a more defined “sweet spot” when it comes to displaying the proper “3D effect”. The visuals from the PlayStation VR2 look stunning, so you want to be sure everything is set up correctly to get the full effect. Along with adjusting the headset, playing in a well-lit room is important. This helps the camera track your movements more accurately.
Steps to get up and running with the PS VR2
Sony details some of these steps with their set-up documents included with the device. As always be sure to review the manufacturer’s instructions and safety warnings first before use. When it comes to getting up and running you first want to update your PlayStation 5 to the latest firmware. This will ensure compatibility with the PS VR2 and make sure it is properly recognized by your console.
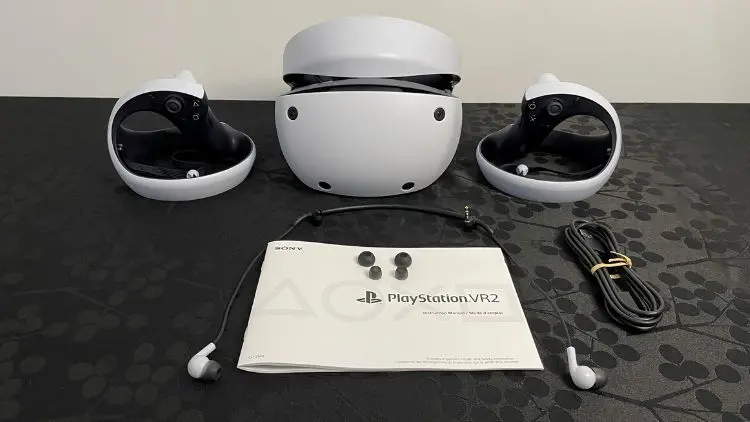
Unpacking and connecting the PlayStation VR2 headset
Plug the PS VR2 headset’s USB-C cable into the front of the PS5 console. Make sure the connections are secure and that the cable has enough slack for you to move comfortably during game play. Turn on the PS5 first, and then the PS VR2 in that order. After your console is on, press the power button on the PS VR2 headset. You can find this on the underside of the view-finder module. Follow the prompts on your TV first, before putting on the headset. Otherwise, you’ll miss important steps.
Adjusting the PS VR2 to your head and sight lines
When prompted in the set-up process, put on the headset and adjust the headband and visor until it fits comfortably and securely. There are 3 main points of adjustment. The first is the headband, which is used to tighten the headset and keep it secure:
The second is the “eye-to-eye” distance adjustment. The PS VR2 allows users to adjust the distance between the lenses to match their interpupillary distance (IPD). IPD is the measurement between the centers of the pupils of both eyes. Adjusting the IPD ensures your eyes are aligned with the lenses, offering the sharpest image possible and reducing eye strain.
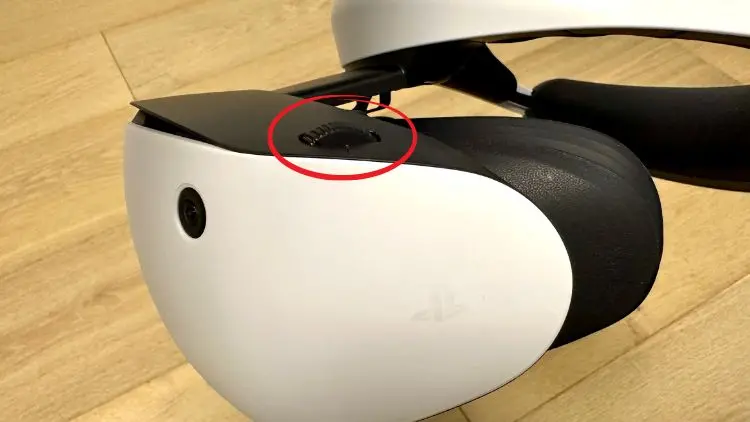
This adjustment can be made using the dial mechanism on the top of the headset’s viewfinder area (pictured above).
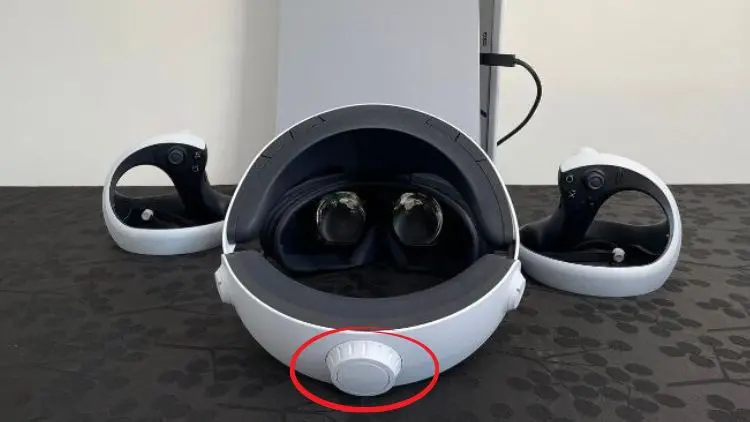
The third is a front-to-back slider adjustment.
This helps to customize the distance between the headset’s display and your face. This adjustment is important for accommodating different face shapes and ensuring that your eyes are at a comfortable distance from the display.
Calibrating the PS VR2
Follow the on-screen prompts to calibrate the PS VR2, which includes adjusting the visor and headband, setting your eye-to-eye distance, and defining your play area.
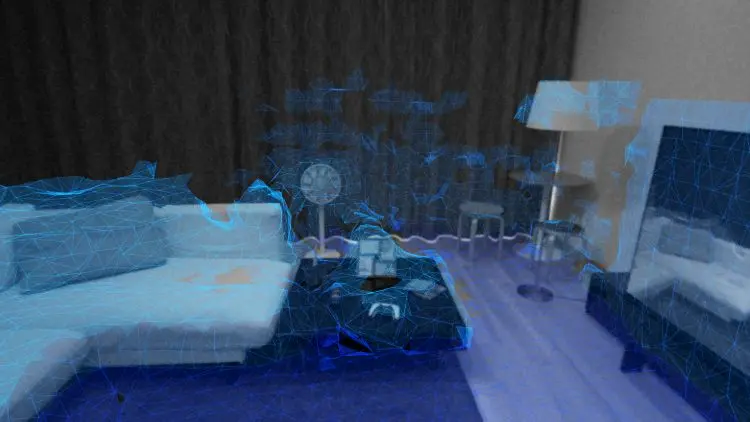
The process to define your play area is very cool as it scans your entire room and maps out a “safe area.”
Play in a well-lit room
In the past with the PS VR1 darkness was good, now with the PS VR2 the tracking system needs proper lighting to perform at its best. You can play in dimmer settings, but the hardware isn’t as responsive to your movements. This is especially true with smaller hand-based movements. While you are in a well-lit space turn on and pair the Sense controllers with the console. Once your PlayStation VR2 is set up correctly, you’re ready to dive into some virtual reality gaming.
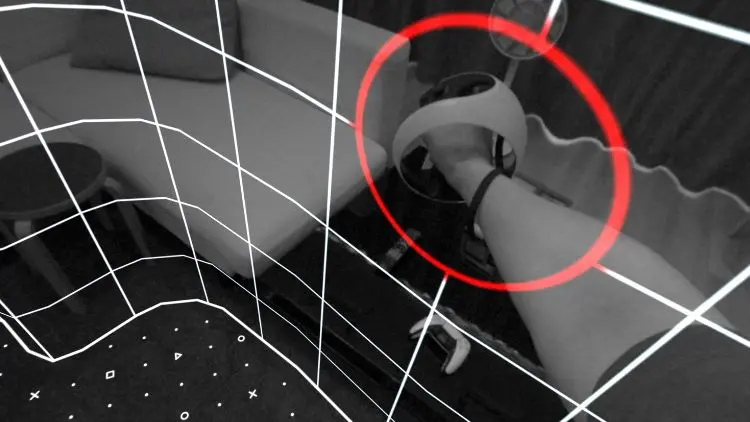
Play in a spacious, safe area
Remember to give yourself enough space to move around safely. If you are using the PS VR2 near other people be sure they are over 7 feet away. You’ll need an open area of roughly 3.5′ by 3.5′ to play safely and take breaks to avoid motion sickness or discomfort.
Other PS VR2 tips and tricks
Outside of set-up and initial use tips, here are some other features that your PS VR2 has to offer that are great for levelling up your gaming experience.
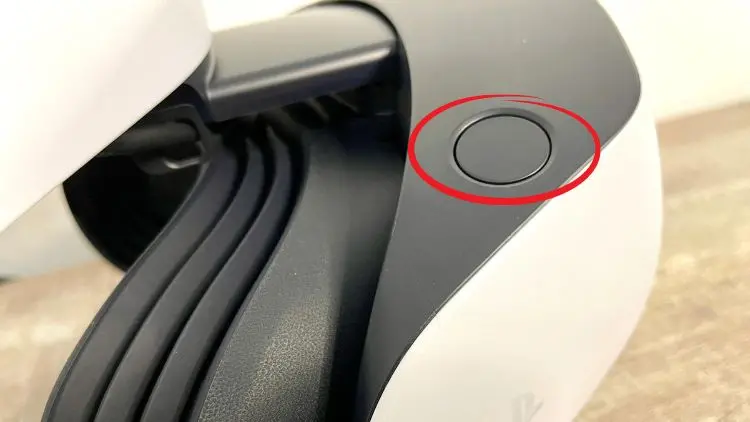
Use PS VR2’s pass through view to see your surroundings
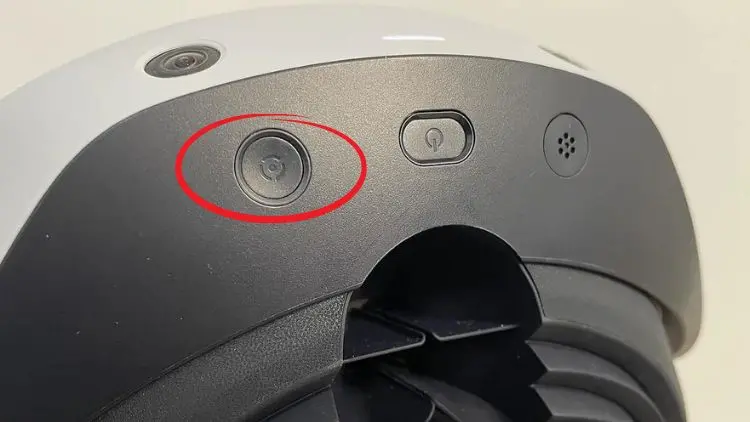
One of the smartest additions to the PS VR2 is the ability to use pass through mode. This allows you to press a button and see your real-world surrounding without removing the headset. It saves so much time and can help you avoid trips and falls if used correctly. To access this, you’ll want to use the button on the bottom of PS VR2’s viewfinder. Pressing it gives you one-click access to the headset’s pass through view.
Re-calibrate your PS VR2 lenses after a few uses
To calibrate the lens on PS VR2, follow these steps: double-tap the PlayStation button on the controller and select “Adjust Visibility” from the quick settings menu.
You can play the PS VR2 without a TV connected
The PS VR2 projects, or “mirrors” what you see onto your connected television, but doesn’t require a TV to function. The hardware can function with the TV turned off, or even disconnected completely. This is a bonus, especially if someone else in your household wants to use the TV for something else. You will need your television for the initial set-up of the PS VR2 but after that, you can enjoy your VR adventures without needing the TV.
Use the PS VR2 as a 120Hz big-screen HDR display
The PS VR2 can also double as a new way to play “standard” PS5 games with “Cinematic Mode.” This simulates a massive screen within your field of view that is 120Hz HDR compatible. The image quality is fantastic, and it’s an excellent way to play games like Astro Bot, Horizon Forbidden West, God of War Ragnarok, or The Last of Us: Part I.
To access this feature, simply launch a “non-VR” game or app on your PS5 and use a PlayStation 5 DualSense controller for game play/navigation. The PS VR2 offers a high refresh rate (120Hz) with HDR, enabling it to display games with stunning fidelity. Standard PS5 games that support a 120Hz performance mode with HDR will display like a giant high-end TV. The PS VR2 defaults to 120Hz with HDR for VR games, but when it comes to displaying standard “flat” PlayStation 5 games, you’ll need to activate 120Hz and HDR settings.
To access the feature through the PS5’s menu, navigate to Settings > Accessories > PlayStation VR2 > Cinematic Mode. Select “Video Output for Cinematic Mode”.
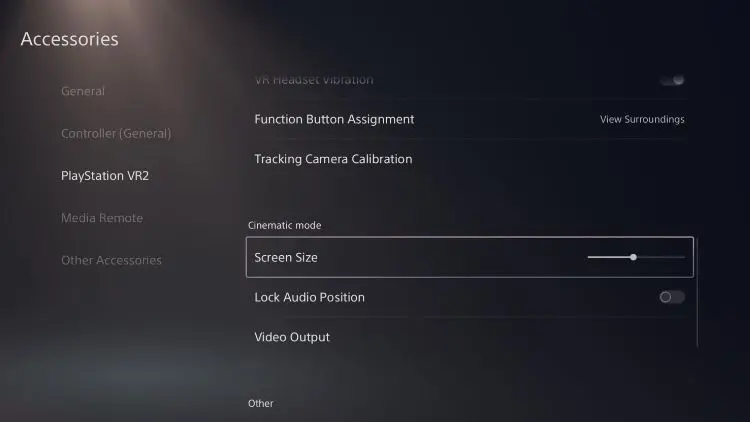
Adjust the PS VR2’s “Cinematic Mode” screen size and position
Now that you know how to simulate a 120Hz HDR display within your PS VR2’s field of view, here’s how you can customize it. To make the most of this feature, you can easily adjust the screen size and position to suit your preferences. To access and customize the “Cinematic Mode” settings, follow these steps on your PS5: Double tap the PlayStation Logo > Use “quick settings” > use the slider to shrink or enlarge the screen. You can also select Settings > Accessories > Screen Size (and use the slider).
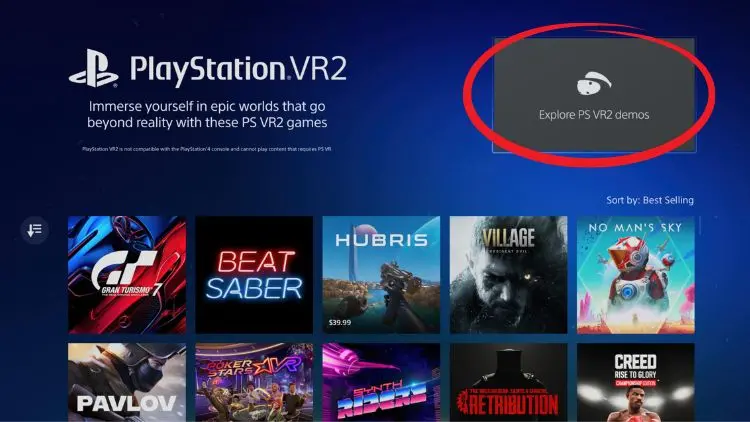
Upgrade your game library to VR
Some PlayStation 5 games can be upgraded to be compatible with the PS VR2. Titles like Gran Turismo 7 and Resident Evil 4 can be upgraded for free. Other titles might require a fee to upgrade either online or in-game, this varies per title. Check out the PlayStation Store for details, or look for the “VR Upgrades” tab when viewing game pages.
To do this on your PS5 you can also go to Games > Game Library > Your Collection and see if there is a VR upgrade available.
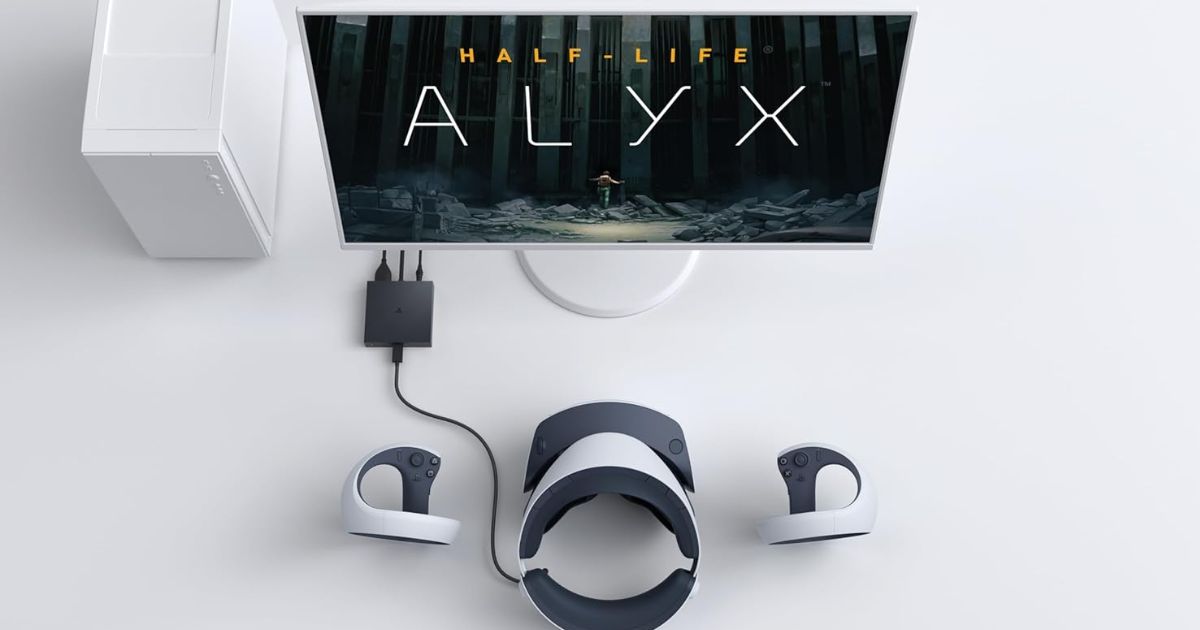
Expand your PS VR2 library with PC games
Sony recently released the PlayStation VR2 PC adapter, which connects the PS VR2 headset to your PC. With this adaptor, you can purchase and play a vast array of SteamVR titles, significantly expanding your options. The adapter supports the PS VR2’s 4K OLED display, 110-degree field of view, and 3D audio, offering a high-fidelity experience. It’s important to note that some advanced features like eye-tracking, HDR, and adaptive triggers are not supported when using the adapter. If you are considering getting the adapter, ensure your PC meets the minimum requirements outlined by Sony. If you’ve got the proper PC hardware and a PS VR2 headset, you’re all set to dive into a broader and more diverse world of VR gaming.
Get the most out of your PS VR 2
The PlayStation VR2 delivers a fun and immersive virtual reality experience, and you can enhance it even further with my tips and tricks. Following the steps above for system set-up, safety, and optimizing your play conditions, you’ll get the most out of the hardware. Lesser-known features like using the PS VR2 as a 120Hz big-screen HDR display can open up new ways to enjoy both VR and standard PS5 games. And, with the new PlayStation VR2 PC adapter, you can unlock even more games!
With these recommendations, you’re ready to get the most out of your PlayStation VR2. Enjoy your VR adventures and be sure to comment below with any tips of your own in the comments.
Click here to see the full line of video game software available at Bestbuy.ca
Click here to see digital video game downloads offered at BestBuy.ca


I think the most helpful tip is that VR can be played without a TV connected
Most helpful tip is that VR can be played without a TV connected.
Play in a spacious, safe area
update your PlayStation 5 to the latest firmware first
adjusting the IPD is useful, reminds me of getting new glasses when they measure your eyes
This article gave a really thorough rundown. But just knowing the basics is really helpful 1. Well lit room! 2. Breaking down where the buttons where I found to be a great tip
I found the article “Play it in a well lit room” the most helpful. I did not know the PS VR2’s tracking system needed proper lighting, unlike the VR1.
play in a well lit room a basic but important tip for your eyesight especially
Thank you for telling us in your article to re-calibrate your PS VR2 lenses after a few uses. We forget to do that but it is important.
Play in a spacious, safe area
The most helpful tip was that you can play the PS VR2 without a TV connected.
So many useful tips.. essential to know for vr2 users..
The passthrough view, calibrations and settings are important to know. The Cinematic Mode is very useful to learn about as well.
Had no idea you could play VR without a TV. Good tip! An interesting value proposition for my loved ones who would love to be less annoyed by loud gaming 🙂
For me, it is my eyes straining — so your tips on eye to eye distance adjustment is helpful here.
I love that you can use the PS VR 2 without a TV! This allows people to share TV viewing time, but also helps people who live alone to save electricity. I feel like a lot of people wouldn’t guess that you could play without a TV without being told, so this is a fantastic tip!
Knowing that you need to use a well lit room is the most helpful tip
Play in a spacious, safe area.” so you don’t smash into things while fighting aliens.
Adjusting the IPD ensures your eyes are aligned with the lenses, offering the sharpest image possible and reducing eye strain.
The eye distance adjustment and the tip that this adjustment can be made using the dial mechanism on the top of the headset’s viewfinder area
Eye strain is a concern to me so I appreciated the tip about “eye-to-eye” distance adjustment.
I found very helpful was adjusting the IPD ensures your eyes are aligned with the lenses, offering the sharpest image possible and reducing eye strain.
I found very helpful was adjusting the IPD ensures your eyes are aligned with the lenses, offering the sharpest image possible
Using the passthrough view to see your surroundings was the most helpful tip.
Very useful article and “Play in a spacious, safe area” is such an important tip! Don’t want to end up accidentally hurting anyone or breaking anything 🙂
Thanks for the extremely useful article! I’m not one for reading the instructions in the box, so I’m especially appreciative of the photos with the “turn this”, “adjust this”. And I love the new passthru mode of this headset, groundbreaking tech like you see in the movies
The three main points of adjustment is very useful to know. Not a one size fits all
Adjusting the PS VR2 to your head and sight lines is the best tips for our family as we all have different preferences.
Explaining the three main points of adjustment definetly helped to clear up which steps to take to get the perfect fit!
Adjusting the IPD ensures your eyes are aligned with the lenses, offering the sharpest image possible and reducing eye strain.
There is an eye to eye distance adjustment and the tip that this adjustment can be made using the dial mechanism on the top of the headset’s viewfinder area
The tips to adjust it correctly are the most useful
I found very helpful was adjusting the IPD ensures your eyes are aligned with the lenses, offering the sharpest image possible and reducing eye strain.
There is an eye to eye distance adjustment and the tip that this adjustment can be made using the dial mechanism on the top of the headset’s viewfinder area would be very helpful as it is always the little adjustments that I miss which make all the difference to a good view.
How to calibrate the headset to your chosen room is very interesting.
I think that the “Use PS VR2’s passthrough view to see your surroundings” tip would be most helpful for someone setting up a PS VR2 for the first time because I would imagine they would have to switch back and forth from game view to real life during things like calibration and lining up the sight so it would save a lot of time.
Turn on the PS5 first, and then the PS VR2 in that order.
Most important because if you dont get the initial steps correct you cannot move forward to the complete setup.
The step by step instructions on adjusting the IPD is definitely useful.
I had no idea that the PS VR2 doesn’t require a TV to function. This is great to for anyone like me with only one household TV! This would allow one person to play and another to use the TV as they like.
Adjusting the IPD ensures your eyes are aligned with the lenses, offering the sharpest image possible and reducing eye strain.
The most helpful tip for me was ensuring when you are setting up your VR2 and calibrating it, being in a well lit room or space like Matthew said but not in an area with so much light.
Oh useful to know you can adjust the visibility from the quick settings menu. Very helpful!
Adjusting the PS VR2 to your head and sight lines is the best tips for our family as we all have different preferences.
Best tips, have enough space for a safe area to play and the calibration set up. I was very excited to read about the IPD pupil measuring for even smoother playing. And the passthrough option to see your real life surroundings is pure genius
The setting up your play area is the most important tip in my opinion. When playing VR, you can really lose your bearings so the play area is key to keep safe from crashing into things.
The “Play in a spacious, safe area” is legitimate. You have to make sure it’s clear because you won’t see anything. The article doesn’t mention it, but beware of pets as well.
Explaining the three main points of adjustment definetly helped to clear up which steps to take to get the perfect fit! Thanks!
The well-lit room tip was really useful! Our living space is usually pretty dim to keep it cozy.
The fact that you don’t need the TV to be connected after initial setup is very useful.
Play in a spacious, safe area.” so you don’t smash your TV while fighting aliens.
The well lit room tip was helpful to know especially since our family room doesn’t have much natural light
Comments are closed.