
Setting up a wireless printer doesn’t have to be complicated, but it can feel overwhelming if you’re not sure where to start. The good news is you can set up most printers with a Wi-Fi connection in a few simple steps and be ready to go without the hassle of running cables across your workspace.
Wireless printing gives you the freedom to print from laptops, desktops, smartphones, and tablets without physically plugging into the printer. That’s really convenient in a home office, shared workspace, or small business, and that’s how this guide will walk you through everything you need to get it done. From preparation to troubleshooting, you can get to printing faster and with fewer headaches.
If you’re still in the market for a printer, compare models and features in our how to choose a printer guide or browse the latest printers at Best Buy.

What you need before you start
Before jumping into the setup process, it’s worth taking a few minutes to make sure you have everything ready. Skipping this step often leads to unnecessary delays and connection errors.
Here’s what you’ll need:
- Wi-Fi network name (SSID) and password – Your printer will need these to connect to your wireless network. If you’re unsure, check the back of your router, your internet provider’s app, or your saved network settings on a device that’s already connected.
- Printer powered on and within range of the router – Most wireless printers have a range of about 30 feet from the router. Walls, large furniture, and electronics can weaken the signal, so place the printer in an open area if possible.
- A ready device for setup – Whether it’s a laptop, desktop, smartphone, or tablet, make sure the device is turned on and connected to the same network you want the printer to use.
- Any included accessories – Keep the printer’s USB cable handy in case your setup method requires a temporary wired connection.
Connecting your wireless printer to Wi-Fi
Most wireless printers give you several options to connect to your Wi-Fi network. Which one you choose will depend on your printer model, your router, and your comfort level.
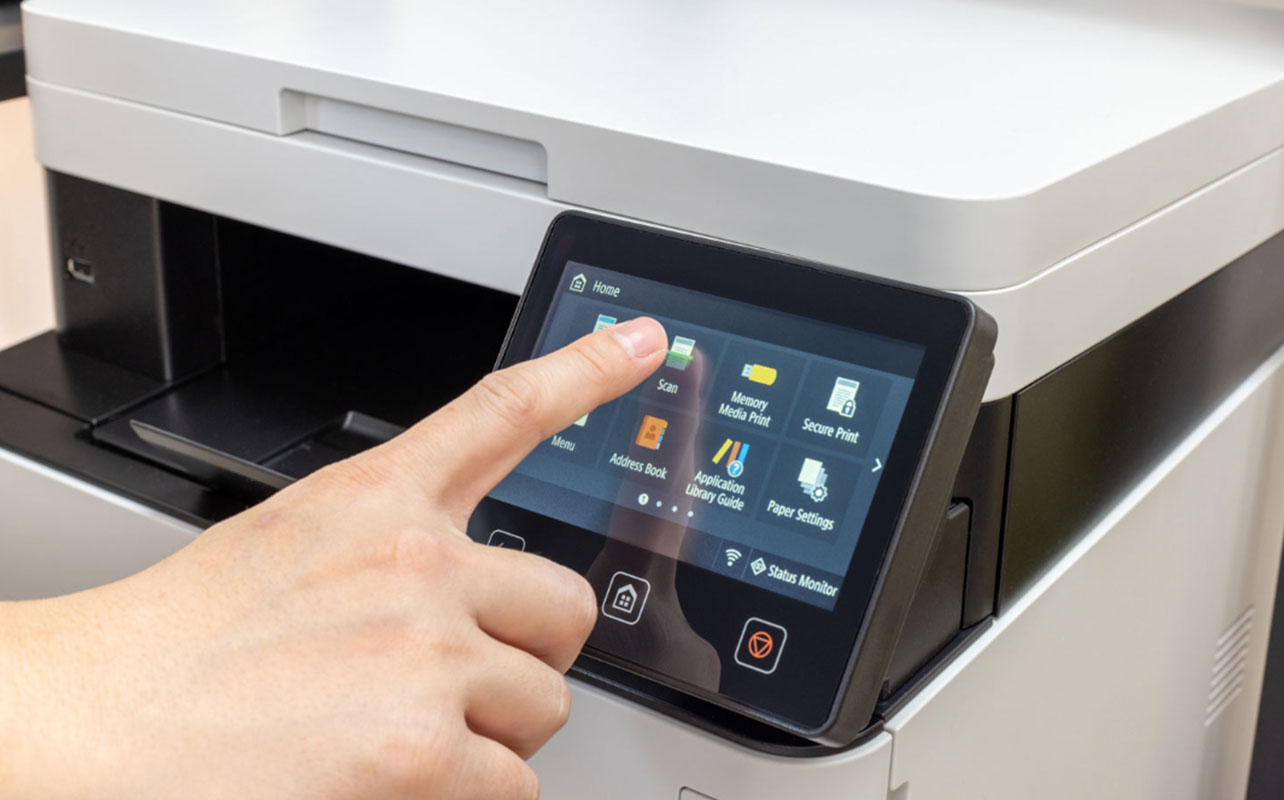
Using the printer’s control panel menu
Almost all modern printers have a built-in display panel or touchscreen. From the main menu, look for “Network,” “Wireless Settings,” or “Wi-Fi Setup Wizard.” This will display a list of available Wi-Fi networks. Select yours, then enter the password using the on-screen keyboard. Once the printer confirms it’s connected, it should be discoverable by your devices.
Tip: If your printer doesn’t display your network, make sure your router is broadcasting on a compatible frequency (some printers only work with 2.4 GHz).
WPS button method (fast and cable-free)
If both your router and your printer have a WPS (Wi-Fi Protected Setup) button, you can connect without entering a password.
- Locate the WPS button on your router (often on the back or side).
- Press it once.
- Within 2 minutes, press the WPS button on your printer.
- Wait for the printer’s display to confirm a successful connection.
When to use this method: This is great for quick setup but may not be available on all devices, especially newer routers that prioritize app-based management. If you try it once or twice and it doesn’t work, use one of the other methods.
USB temporary connection method
If your printer is older or has trouble detecting the network, you can use a USB cable for initial setup. If your printer has wireless capability, you can still set that up if you initially set up the printer via USB first. Just consider that option as a last resort.
- Connect the printer to your computer via USB.
- Install the printer’s software from the manufacturer’s site or included CD.
- During installation, select “Wireless Setup” when prompted.
- The software will configure your printer’s wireless settings and save them so it connects automatically in the future.
Setting up on Windows
Once your printer is connected to Wi-Fi, it’s time to pair it with your Windows computer.
- Open Settings – Go to Start > Settings > Devices > Printers & Scanners.
- Select ‘Add a printer or scanner’ – Windows will search your network for available printers.
- Choose your printer from the list – If your printer doesn’t appear, click “The printer that I want isn’t listed” and follow the on-screen prompts for manual setup.
- Install the drivers – Windows will often install drivers automatically, but for best performance and access to all features, download the latest version from the manufacturer’s website.
- Set as default printer (optional) – If you print from this device regularly, right-click the printer in your settings and select “Set as default printer.”
- Test print – Print a sample document to confirm everything is working.
Troubleshooting tip: If the printer doesn’t appear, make sure both your printer and computer are on the same Wi-Fi network and that no firewall settings are blocking the connection.
Setting up on Mac
Mac setup is just as simple, but the menus are a little different.
- Go to System Settings – Click the Apple menu, then System Settings (or System Preferences on older macOS versions).
- Select Printers & Scanners – You’ll see a list of currently installed printers.
- Add a printer – Click the + icon, then choose your wireless printer from the list. If it’s not listed, select “Add Printer, Scanner, or Fax” and look under “Default” or “IP.”
- Install the drivers – macOS often installs printer software automatically, but some features may require downloading brand-specific drivers or utilities.
- Test print – Use the “Print Test Page” option to make sure the printer responds correctly.
Tip: If your printer uses AirPrint, macOS should connect instantly without extra software.
Connecting to smartphones and tablets
Printing from mobile devices is one of the biggest advantages of a wireless printer. Here’s how to set it up on both Apple and Android devices.
Apple AirPrint setup
AirPrint is built into iOS, so no extra downloads are required:
- Ensure your iPhone or iPad is connected to the same Wi-Fi network as your printer.
- Open the app or file you want to print (e.g., Photos, Safari, Mail).
- Tap the Share icon, then select Print.
- Choose your printer from the list and tap Print.
Note: If your printer doesn’t appear, check if it supports AirPrint or download the manufacturer’s companion app.
Android printing setup
- Open Settings > Connected devices > Connection preferences > Printing.
- Enable the default printing service or install your printer brand’s app (e.g., HP Smart, Canon PRINT, Epson iPrint).
- Connect your phone or tablet to the same Wi-Fi network as your printer.
- Open the document or photo, tap Print, choose your printer, and confirm.
Tip: Since Google Cloud Print was discontinued, most Android printing now happens through brand-specific apps or built-in print services.
Troubleshooting common wireless printer problems
Even with the right steps, printers can be temperamental. Here’s how to solve some of the most common issues:
Printer not showing on network
- Restart your printer, router, and computer. A printer that’s been in sleep mode for extended periods can sometimes lose the ability to reconnect. A reboot usually solves that.
- Check that your printer’s wireless feature is turned on.
- Make sure your devices are all connected to the same network (avoid mixing 2.4 GHz and 5 GHz networks if your printer doesn’t support both).
Weak Wi-Fi signal or dropouts
- Move your printer closer to your router or use a Wi-Fi mesh network or range extender.
- Reduce interference by placing the printer away from microwaves, cordless phones, and thick walls.
Driver or software issues
- Download and install the latest drivers from the printer manufacturer’s support page.
- Run your printer’s built-in self-test or diagnostic tool.
Tips for reliable wireless printing
To avoid repeated setup issues and ensure smooth performance:
- Update firmware regularly – Printer manufacturers release updates to improve stability and security. Check your printer’s settings or the brand’s website periodically.
- Use a strong, stable Wi-Fi connection – If your home has Wi-Fi dead zones, consider upgrading to a mesh network system.
- Avoid interference – Keep your printer away from devices that use the same frequency as your Wi-Fi, such as baby monitors and Bluetooth speakers.
- Restart occasionally – Power cycling your printer and router every few weeks can prevent glitches.
Final checklist
Before calling your setup complete, confirm that:
- The printer is connected to your Wi-Fi network and shows as “Online.”
- You’ve printed a successful test page from at least one device.
- All your devices—Windows, Mac, smartphones, and tablets—can send print jobs wirelessly.
With these steps, your wireless printer should be ready for everyday use, whether you’re printing work documents, family photos, or school projects. For the latest printer models, accessories, and ink refills, explore wireless printers at Best Buy.

This article was drafted using AI technology and then reviewed, fact-checked, and revised by a member of our editorial team.


