
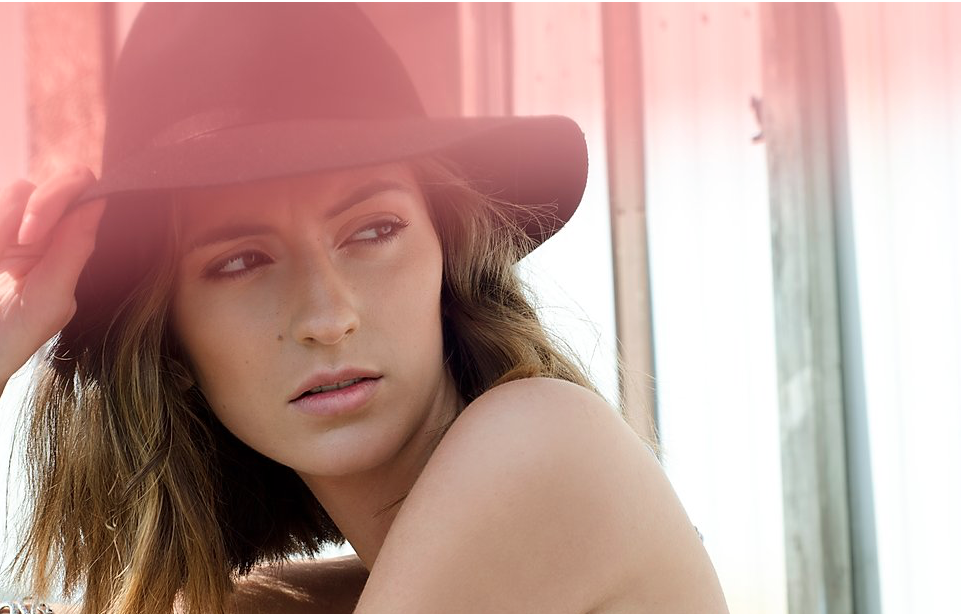
Social media, bus stops, book covers; portraits are everywhere. Whether you are taking a self-portrait for Instagram, want a great shot of your child, or are looking to shoot something a little bit more professional looking, there are certain things that you will need to keep in mind to get the best results possible. There are many different types of portraits but in this article, I will be focusing more on a traditional portrait. Here, your subject is fully aware that you are taking their photo, they are posing and looking into the camera.
Here are 7 tips to get you set up for taking a great portrait
Tip #1 Making your subject feel comfortable
This is the most important part of a portrait shoot. Making your subject comfortable before you take a photo, will get you a great portrait regardless of other factors. There are many ways that you can do this but it will be a bit more challenging if you do not know your subject well. Playing music and setting the vibe is a great way to start. If you can find out ahead of time what kind of music they like and create a relaxing atmosphere by dimming the lights a bit, your subject will often feel more comfortable than in a quiet room with bright lights on.
You can also chat with them, ask them about their day, maybe even attempt to crack a joke. Once you have snapped a few shots you can look at them together on your screen and reassure your subject that they are creating great shots.
Tip #2 Attention to detail
The details are the small things that you tend to notice after your shoot has wrapped. There are certain details that you can fix in post-production like a stray hair or a small wrinkle on a shirt, but there are certain things that you will just have to live with if you don’t take the time to seek them out before you take your shot. Hand placement is a very important one. Make sure that hands don’t look awkward or are placed in a way that makes them look large or disproportionate. In addition, pay attention to their wardrobe and jewelry that they are wearing (clasps in the correct position etc).

Tip #3 Posing
Many people think that a portrait needs to be straight on with even lighting on your subjects face. I encourage you to experiment with different angles, take many shots of different poses and find which one suits your subject’s face and body the best. Another common assumption is that a portrait must be a tight head and torso shot, but it can show partial body as well as full body. Shooting at these different distances will give you way more variation in your posing as well which is key.
Tip #4 Lighting and environment
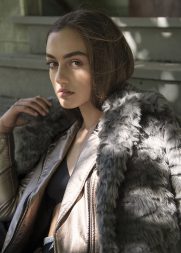
We just talked about portraits showing the subjects full body; however, if you are shooting outside of a controlled environment, such as a studio, you can exercise some creative freedom! The backdrop you choose for your portrait can change the mood of the final product completely. Shooting in a minimal apartment vs. outdoors in the forest will give off a different vibe even if the subject is posed and dressed the same. You can choose an environment that means something to your subject, find a location that you think represents their personality, or take control of your shoot and just choose something that you think looks great!
Attention to detail also comes into play when you are selecting your environment. You do not want to choose a location that is too busy that takes away from your subject. Lighting is another way to create a mood for your portrait. Even if you aren’t in a studio where you have control over the lighting, it is still important to take note of lighting conditions. In the studio you can easily play around with lights to create either a clean or dramatic look. When you are outdoors, you do not have that kind of control, so you must place your subject in a way that the light is creating the desired feel and is still flattering. Be aware of bright sunny days casting harsh shadows on faces; when possible try to have the sun behind them.
Tip #5 Choosing the right lens
There are many different lenses that you can choose from to take a great portrait. Photographers typically use anywhere from 70mm-200mm lenses and this is because the further you are away from the subject, the more natural their features will look. For example, if you are shooting with a 20mm lens, their features might start to look distorted, their nose larger etc. Long focal lengths also create bokeh easier. This is a great way to make your subject stand out from the background if you don’t necessarily want to show the background off. You can also achieve this look by choosing a lens that as an aperture of at least f/2.8.
Tip #6 Camera settings
Mentioned above, to create a bokeh look, you want to set your aperture to at least f/2.8 if you would like that effect. This however is not a rule. If your background is important to you, then you can shoot at a higher aperture. A simple way to remember is the smaller the number(f/2.8), the smaller depth of field, the larger the number (f/22) the larger the depth of field. This means that when you are shooting at f/22 everything will likely be in focus in the background. If you would like to create an artistic motion blur effect when the subject is moving, you can try slowing down your shutter speed. This will keep your lens open for longer, but when you do this you will also need to compensate with your aperture because more light is coming in affecting your exposure. If you would like a no movement, you should shoot at 1/125 minimum.
Tip #7 Focus
No matter how you have decided you want your portrait to look, there is one thing that you must make sure of. This is focus. Not only do you want your portrait to be in focus, but you always want to make sure that your subjects eyes are in focus. For example, if you are shooting at a super shallow aperture like f/1.2 the distance between a subjects eyes and the tip of their nose might be great. You do not want to accidentally focus on their nose and have their eyes blurry, however it is okay to have it the other way around. The eyes create impact, they draw the viewer in and create an emotional connection.
Hopefully these tips come in handy when you are shooting your next portrait. Even if you are taking a snapshot in the moment, take the time to think about a few of these points to create even the best cell phone photos! If you liked this article, check out “How to create stunning still life photographs“, by Noah Asanias.

