

A dirty projector lens can ruin your viewing experience. If dust, fingerprints, or smudges build up on your lens, you’ll notice your once-crisp images turning blurry, hazy, or dim. Not only does dirt affect image quality, it can also cause your projector to overheat if dust starts to clog vents. The good news? With the right care and some simple steps, you can keep your projector looking sharp and running smoothly.
In this guide, you’ll learn why cleaning matters, what tools you’ll need, and exactly how to clean a projector lens inside and out without risking damage. We’ll also cover common mistakes to avoid and answer some of the most frequently asked questions about projector maintenance.

Why cleaning your projector lens matters
The lens is the heart of your projector. Even the slightest layer of dust or smudges can reduce brightness and make images appear soft or distorted. Think of it like wearing glasses with fingerprints: everything looks just a little off. Here’s why cleaning is so important:
- Image clarity: Dust scatters light, making images look less sharp.
- Brightness: Smudges and dirt reduce how much light passes through the lens, dimming your projection.
- Colour accuracy: A dirty lens can mute colours or make them look uneven.
- Heat management: Dust doesn’t just stick to the lens, it can also gather around vents. This buildup traps heat, forcing your projector to work harder and potentially shortening its lifespan.
A clean lens ensures you get the vivid, bright images your projector was designed to deliver.
Tools and supplies you’ll need
Before jumping into how to clean projector lens properly, it’s important to have the right tools on hand. Using the wrong products can do more harm than good. Here’s what you’ll need:
- Manual air blower (bulb blower): Safely blows away loose dust without forcing particles deeper into the lens.
- Soft brush: Helps lift dust from edges and hard-to-reach spots.
- Microfibre cloth: Essential for streak-free cleaning without scratching.
- Lens cleaning solution: Specifically designed for optics (avoid harsh household cleaners).
Avoid these items:
- Alcohol or ammonia-based cleaners: These can strip coatings from the lens and cause permanent damage.
- Paper towels or tissues: They may feel soft, but they can scratch delicate glass surfaces.
- Compressed air cans: The pressure can push dust deeper inside or even damage internal parts.
Here’s a step-by-step guide to cleaning your projector

Let’s walk through how to clean a projector lens safely.
1. Power down & cool off
Always turn off your projector and unplug it before cleaning. Lenses and internal parts can get hot during use, so give it 20–30 minutes to cool. Cleaning while warm can smear oils or risk burns.
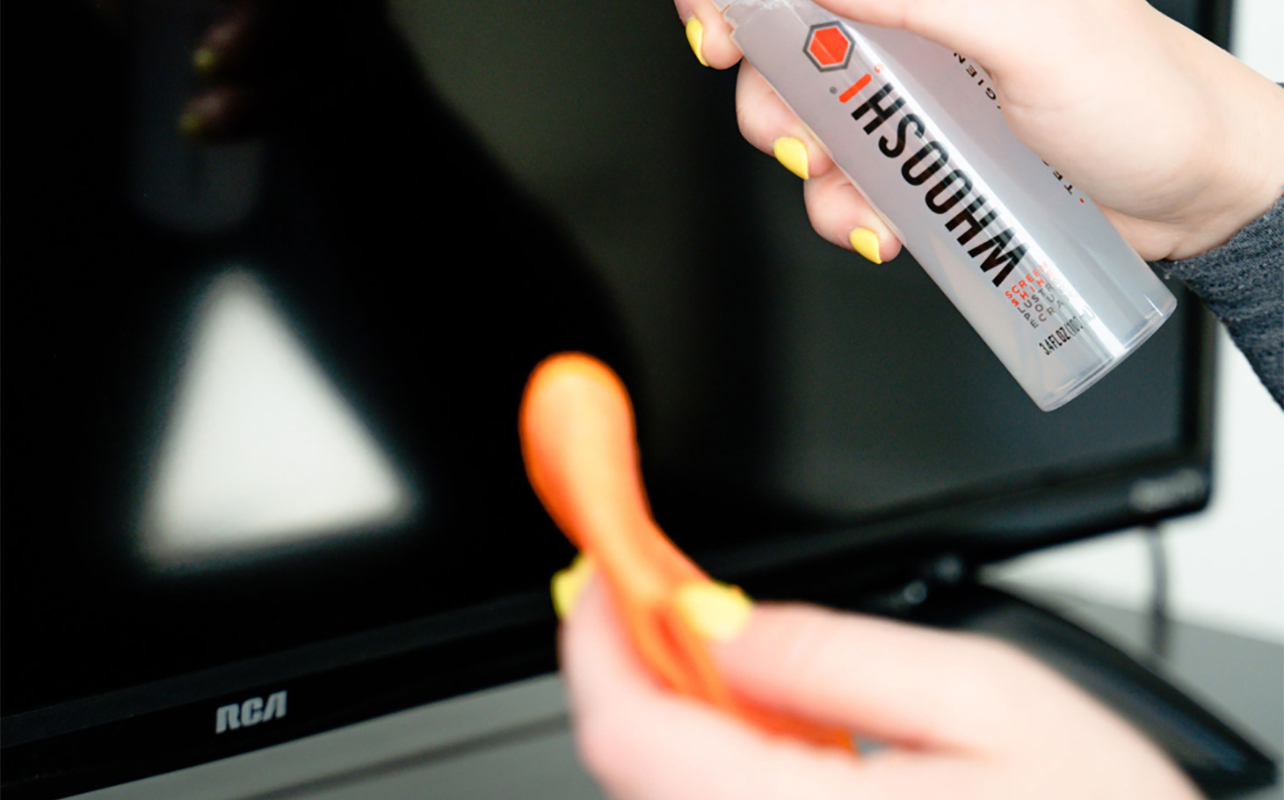
2. Remove loose dust
Start with the manual blower. Gently squeeze it toward the lens surface to blow away loose dust. If needed, use a soft brush around the edges to lift any stubborn particles. Never touch the lens directly with your fingers.
3. Wipe with solution
Lightly dampen (don’t soak) your microfibre cloth with a lens-cleaning solution. Using gentle circular motions, wipe from the centre of the lens outward. This helps prevent streaks and avoids dragging dirt across the surface.
4. Clean inside the lens (if applicable)
Some projectors allow the lens housing to be detached, while others are sealed and should not be opened at home. If your projector supports removable lenses, follow the manufacturer’s instructions to detach it. Use the blower and cloth as above, keeping pressure very light. Remember to handle it very carefully.
If your projector is sealed and dust has made its way inside, it’s safer to take it to a professional service centre. Attempting to open the housing without experience can void warranties or cause damage.
5. Inspect and test
Once cleaned, inspect the lens under a soft light. If you see streaks, gently polish with a dry section of the cloth. Then, power the projector back on and test it with an image. You should notice sharper details and brighter projection immediately.
If you’re looking for projector for your home, check out our projector buying guide to help you make the right choice.
How often should you clean your projector?
How often you should clean your projector really depends on how and where you use it. If you only use your projector occasionally in a clean room, a quick dusting every few months is usually enough. On the other hand, if you use your projector often in a dusty or humid environment, it’s a good idea to check and clean it monthly.
Of course, one of the clearest signs that it’s time to clean is when the image quality drops. If you notice haziness, muted colours, or a dimmer picture, that’s your cue.
A key tip to remember is to avoid overcleaning. Every time you wipe the lens, there’s a small risk of micro-scratches. So only clean when you notice dust or image issues.
Mistakes to avoid when cleaning your projector lens
It’s just as important to know what not to do when figuring out how to clean dust out of a projector lens safely.
Don’t use household cleaners
Household glass cleaners, especially those with alcohol, ammonia, or vinegar, may seem convenient. But they can actually harm your projector. These chemicals can strip away the delicate coatings on the lens that are designed to improve clarity and protect against glare. Once that coating is gone, there’s no way to restore it, and your images will never look as sharp again. Always stick with cleaning solutions made specifically for optical lenses.
Don’t wipe with tissues or paper towels
It’s tempting to grab a tissue or paper towel when you see dust on your projector lens, but these materials are rougher than they look. They can scratch the glass surface and leave tiny fibres behind, which only makes the problem worse. A proper microfibre cloth is much safer and designed to lift particles without damaging the lens.
Don’t touch with bare fingers
Even if your hands are clean, natural oils from your skin will transfer onto the lens the moment you touch it. These oils are surprisingly stubborn and don’t come off easily. It often requires extra cleaning that risks scratching the lens. To avoid the issue altogether, never touch the lens directly with your fingers. Always use the right tools instead.
Don’t use canned compressed air
While canned air may seem like a quick way to blast dust away, it can actually cause more harm than good. The high pressure can push particles deeper into the projector, and in some cases, the can may spray liquid propellant onto the lens. This not only leaves streaks but can damage sensitive components. A manual air blower is a safer and more controlled alternative.
Don’t rush the process
Projector lenses are delicate, and cleaning them is not something to rush. If you hurry, you risk applying too much pressure, dragging dust across the surface, or even scratching the lens. Take your time, use gentle motions, and give yourself a few minutes to do it properly. A careful approach will always pay off with a clearer image and a longer-lasting projector.
Frequently asked questions about the cleaning process

1. How often should I clean my projector lens?
For most home users, every couple of months, or whenever the image looks dull, is plenty. Remember, over-cleaning does more harm than good.
2. Can I clean the lens with an alcohol-based solution or glass cleaner?
No. Alcohol and regular glass cleaners can damage protective coatings. Stick to solutions specifically designed for camera or projector lenses.
3. How do I clean the inside of the projector lens?
If your projector has a removable lens, follow the steps above. For sealed models, leave internal cleaning to a professional. Attempting to disassemble the unit at home can cause more damage.
4. How do I remove moisture from the lens?
If condensation forms (common when moving from a cold to a warm room), let the projector sit unplugged at room temperature. The moisture should evaporate naturally within an hour or two. Never try to wipe condensation inside the lens.
5. Is a microfibre cloth enough or do I need lens-specific products?
A microfibre cloth handles light dust and smudges well. For tougher spots, pair it with a proper lens-cleaning solution.
Remember to clean your projectors properly

Learning how to clean projector lens properly is one of the simplest ways to keep your projector in top shape. Remember: be gentle, use the right tools, and clean only when necessary. Whether you’re watching a blockbuster in your basement theatre or giving a work presentation, a clear lens makes all the difference.
Check out our wide selection of projectors at Best Buy Canada as well as lens cleaning kits to keep them in tip-top shape.

This article was drafted using AI technology and then reviewed, fact-checked, and revised by a member of our editorial team.


