Chances are, your smartphone is your go-to point-and-shoot camera. Whether it’s a slice of life or a slice of food, the compunction to capture those moments means that more people are taking more photos than ever before. The level of sharing on social media only drives things further. Not all smartphone cameras are created equal, yet there are some basics to snapping better images that will not only improve image quality, but also make you a better mobile photographer.
There’s a reason why smartphone camera apps, especially the primary ones developed by the various smartphone manufacturers, default to an automatic setting. It’s the easiest way to ensure that users can shoot without tinkering and thinking too much. Like learning anything, it will take a little time and effort, but the results will be worth it.
Taking control
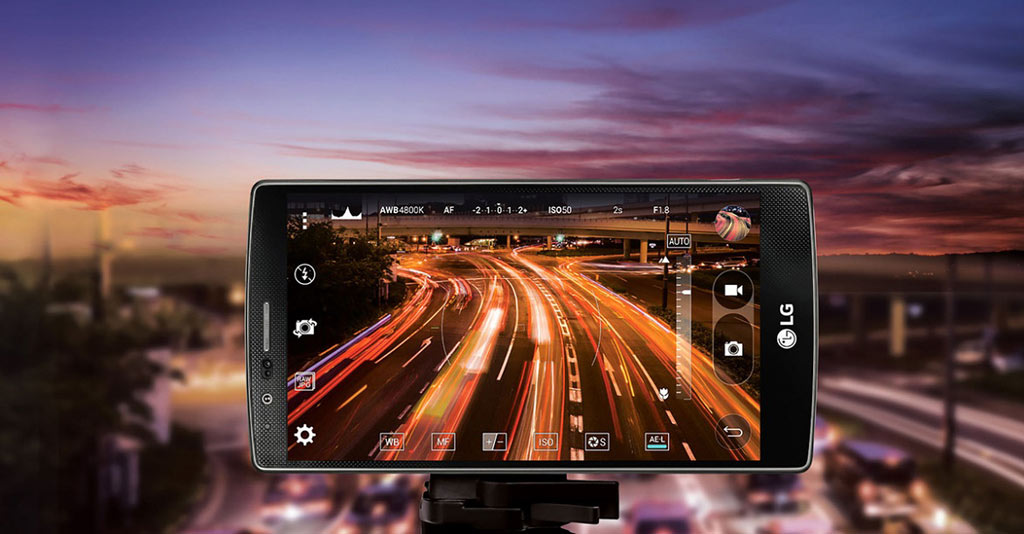
As smartphone cameras have improved with better image sensors and lenses, the level of sophistication on the software end has been keeping up, too. It is more common now to find that focus and exposure can be controlled with a tap or swipe.
Going deeper, manual controls will seem daunting to those who have no idea what shutter speed, aperture or ISO mean. The aperture of the lens is already fixed on smartphones, so you need to play with the other features to make adjustments. Adjusting those settings can dramatically change how well a photo turns out, especially when you’re able to see those changes reflected on the screen in real-time. Several phones now have that as part of their manual features, taking away any of the guesswork.
For example, shooting a sunset in auto mode may present a decent shot, but also one that is likely a little overexposed. Raising the shutter speed means the lens allows less light for a shorter time, leading to an image that captures more of the contrast and colour variations that make them so spectacular. Tinkering with the white balance can also yield interesting results in those scenarios. Shooting something in dimmer light usually requires a lower shutter speed and higher ISO.
Note that shooting at slower shutter speeds also makes the image susceptible to jitter in your hands, leading to blurry images. If you’re shooting a cityscape at night, for instance, try to lean the phone on a flat surface and use the timer, if possible. If not, press the lower edge down on a flat surface and use the timer while holding it, so you’re not contorting to tap the shutter button.
Experimenting with manual controls can be a liberating feeling, and it only takes a few good shots to gain some self-confidence.
Lighting and flash
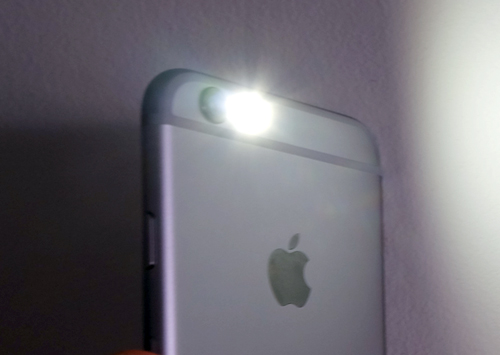 Too often, I see people misusing the flash on their phones. I’ve seen instances where they will shoot at a window or mirror, or indoors when there is perfectly suitable light to not use it at all. Not surprisingly, the light just bounces right back into the lens. The thing about LED flashes on smartphones is that they are linear, meaning they can’t be aimed up or to the side to bounce the light off another surface. There’s no really good way to diffuse the light, either.
Out of every 10 shots I shoot with any phone I have, I may use the flash once, or not at all. Why? Because it takes away the natural light and ambiance of the scene. Using a flash to shoot a nice meal makes it look strange, in my opinion, like a flashlight was being aimed at it the entire time. Since restaurants can have dimmer lighting, you can always use the manual settings to capture something much better. Or you can turn HDR (High Dynamic Range) on.
Another option is to borrow a friend’s phone at the table and use the flashlight from a different angle and from further away to illuminate it more. You can also do this with people, too. Of course, if you’re in a dark nightclub and you want a group photo, you will likely opt to shoot with a flash, which is fine. In that case, it would be too dark to capture a crisp image, otherwise.
Use HDR
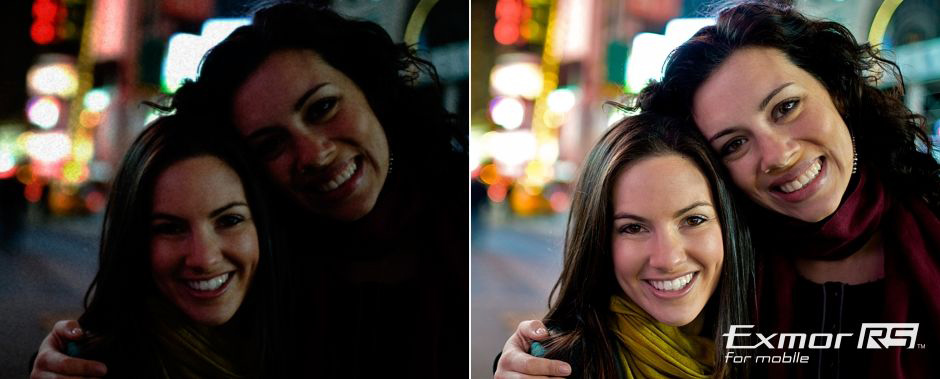
HDR is a neat feature that can salvage a good shot from a tough situation. What it does is takes three images—one overexposed, one underexposed, and one at regular exposure—and fuses them together to create an ideal shot. The reason this comes in handy is to handle settings that may have too much shadow or highlights, backlit shots where the sun is behind the subject and various other instances where a little help may be required.
Since pretty much all of this is automatic, turning the feature on is the extent of the setup. The camera and software do the rest. Bear in mind that HDR isn’t always going to offer the best results, and is not a full substitute for manual controls. It’s simply a convenient way to get a better shot than normal auto.
Don’t zoom
 I’ve seen a number of photos from friends ruined by zooming in on their phone. The problem with zooming is that the lens isn’t doing the work, it’s software interpolation that’s tricking you. This is what’s called digital zoom.
In essence, digital zoom enlarges the centre of the image, stripping away the edges. The result is that the pixels in the middle are also bigger, lowering the overall resolution and degrading image quality. Important or memorable photos don’t deserve that kind of treatment, so even if a subject is far away, don’t worry about zooming in. Image sizes are large enough now where you can always crop the photo later without sacrificing resolution and quality.
If you can get closer to the subject, then do it. Good photographers are never shy about moving around to get a better shot, so keep that in mind.
Don’t be shy to edit
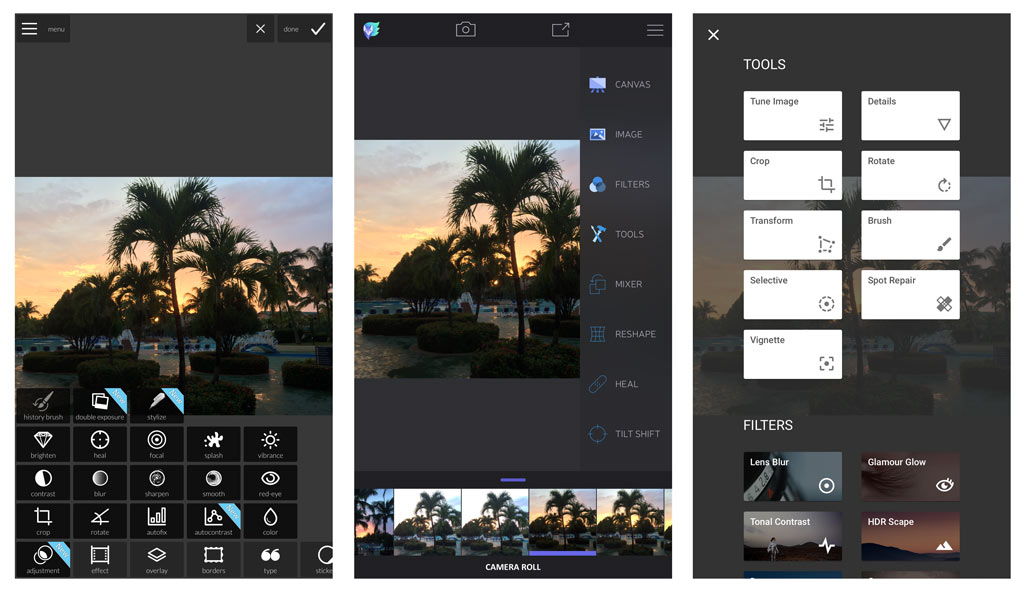
This is probably a no-brainer, given how popular filters and effects have become, but particularly as it relates to improving composition, I see nothing wrong with editing a photo to make it look better. There are plenty of great apps that help do that, like Photoshop Express, Snapseed, Enlight, Pixelmator, Autodesk Pixlr, Afterlight, Over and Photo Studio Pro.
These may not have enough to rescue a photo that is blurry, noisy or out of focus, but they can truly enhance anything you shoot.
A few more pointers
Shooting photos is inherently creative, except there’s a difference between snapping a quick selfie in front of something and capturing the mood of a scene with some clever positioning. The subject doesn’t always have to be in the centre of every shot. And shooting an object close-up on an angle with the background out of focus can also lead to interesting results that evoke something.
If you can, always try to shoot with two hands. A steady hand makes a huge difference in keeping subjects in focus. Also, shoot video in landscape rather than portrait. You may have captured something amazing, and it would be a shame if it was in portrait mode, where it doesn’t look good on a computer, tablet or TV.
If something inspires you, shoot it multiple times and from different angles. You never know what your eye will catch.
And lastly, consider upping your game with mobile photography accessories that can help you take better images.

By Ted Kritsonis, Editor Smartphones
I’m a fortunate man in being able to do the fun job of following and reporting on one of the most exciting industries in the world today. In my time covering consumer tech, I’ve written for a number of publications, including the Globe and Mail, Yahoo! Canada, CBC.ca, Canoe, Digital Trends, MobileSyrup, G4 Tech, PC World, Faze and AppStorm. I’ve also appeared on TV as a tech expert for Global, CTV and the Shopping Channel.


