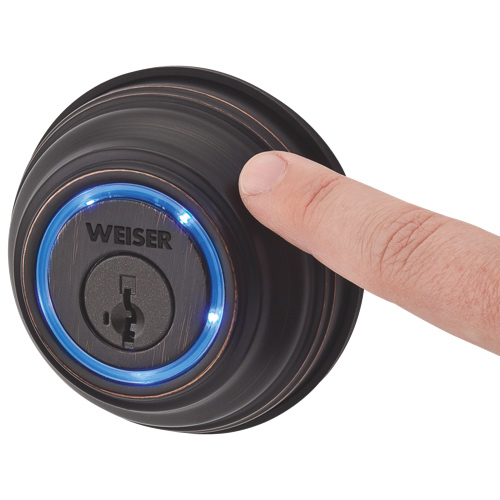
 A few months ago, we visited the Weiser Kevo – A lock powered by your smartphone or through a Fob to allow you entry into your home with the touch of your finger. With my increased interest in home automation and trying to bring certain features of my home into the 21st century, I was more than happy to welcome Kevo into my home and review whether it’s the device everybody needs for their home. Something caught my eye at install, however – The fact that there were only iOS devices listed on the box. No problem, as I’ve encountered devices with outdated packaging, where Android devices were added later, but the app didn’t exist at the time the hardware first came out. I assumed this was more of the same. Let’s get started!
The whole installation process started with my watching the online installation video and proclaiming that I could easily conquer the novice task of replacing a deadbolt. The locking mechanism of the original deadbolt came off easily enough but the drive-in cylinder itself was problematic. Never having done this before (the online installation video also shows the ends with screw plates only,) I started to wonder if I was in over my head until I made the basic realization that it just pushed in before, so all I had to do was apply force from the opposite end to push it out. Sure enough, it popped out in about 3 seconds. After absorbing this embarrassing lesson in basic physics, the installation process was a snap.
Before you get started, I would really recommend watching the online installation video from Weiser. This is essentially all you need to get going from start to finish. The whole Kevo system DOES come with an installation manual, but the video is so well laid out from start to finish that you likely will not need it. Be sure to download the Kevo app from the iOS App Store as well and register an account online. You don’t have to do this first, but you may as well do it before you get your hands dirty, since chances are your deadbolt may be pretty greasy and dirty on the inside.
The tools you will definitely need for this are a Phillips Head Screwdriver and a ruler or tape measure. Optional tools are a hammer (only if you have the drive-in style cylinder,) a wet cloth or paper towel, and something that can be lightly hammered upon. Everything else is included inside the box.
Once the deadbolt is off, wipe your door down and then get started. First, install the latch and strike (the middle piece.) Weiser provides you with both styles – the style with the screw plate and the drive-in cylinder. Take a measurement from the center of the door’s bore hole (the hole you’ll be attaching the deadbolt in) to the nearest edge of the door. If your measurement is 70mm (2 ¾ inch,) you’ll have to twist the metal end of the applicable cylinder to expand it. If you don’t have a ruler or tape measure, you could also go the lazy handyman’s route and compare the size of the previous deadbolt’s latch and strike. Be sure to stick the side that says “UP” upward, otherwise, you will have trouble installing the rest.
Note: Don’t worry if when you drive (or screw) the latch and strike in, the latch is sitting crooked inside the strike. The motorized unit will calibrate it properly for you automatically if installed correctly.

Once that’s in, attach the exterior deadbolt mechanism to the exterior of the door. You’ll notice a little gold cylinder inside it. This is only necessary if you have a larger style bore hole in your door, which is fairly common with a lot of newer style exterior ones. You’ll know right away whether or not you need it when you attempt to affix the exterior piece to your door. The exterior deadbolt also has a soft, almost suction-like piece of plastic which MAY stick to your door, making the next step easier. If not, you’ll need a friend to hold the exterior deadbolt in place, or hold it in place yourself via the wiring (which you pass underneath the latch and strike in the bore hole.) Next, rotate the inner D ring to extend the latch all the way. You MUST do this, or else your unit will fail the calibration step.
Next, grab the mount plate. This plate is tucked inside of the electric housing Tuck the wiring through the middle of the plate and rest them in the little bay on the bottom left of the middle. Screw the plate to the center of the latch and strike, and make sure it’s on straight. There are two sets of screws that you can mount with. If you have a larger width door, use the gold mounting bolts. If you have a smaller width, use the silver ones. Again, modern exterior doors will probably have the larger widths, so chances are you’ll be using the gold screws.
Then, you can install the electric housing, or the interior assembly piece. First, make sure to take the cover off and slide the battery pack out. You also have to make sure the deadbolt lock on the housing is facing upward, and not in any other direction in the slightest. All you have to do here are connect the wires into the two open connectors (it should be pretty straight forward, as there’s a mini diagram inside the housing of what goes where) tuck the wiring as recommended and then slide the housing in place. Take the two small screws to finalize affixing the unit to the door. Be careful how far you screw them in place, however, as they will keep going until the housing bulges out of the door. Just keep an eye out for the unit staying level and flush to the door, and make adjustments if you’ve gone too far. Physical installation is now complete. If you know what you’re doing, this should really only take you about 10 minutes tops. As this was the first time I was doing anything of this fashion, it took me around 25 minutes to install, including the shots I was filming for the video.
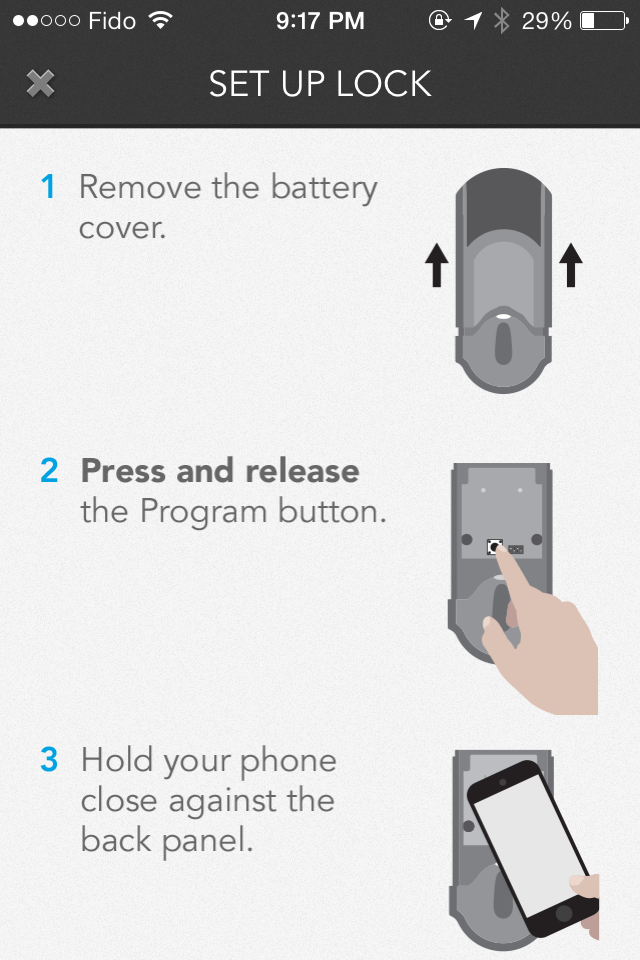
 Now the real fun (for me as a gadgets guy anyway) begins. First you want to electronically calibrate the deadbolt so that it works to begin with. First, put 4 AA batteries (included) in the battery pack. While holding the “program” button down, insert and then press “program again” and watch the fun ensue. The door should automatically program itself and calibrate the latch bolt. Neat!
Note: The battery life of the 4 AA batteries in the Weiser Kevo unit is approximately one year. You will receive mobile notifications when the battery is low and needs to be replaced. If that doesn’t apply to you, there is an LED light above the interior housing’s deadbolt that flashes its battery status and will warn you when its low.
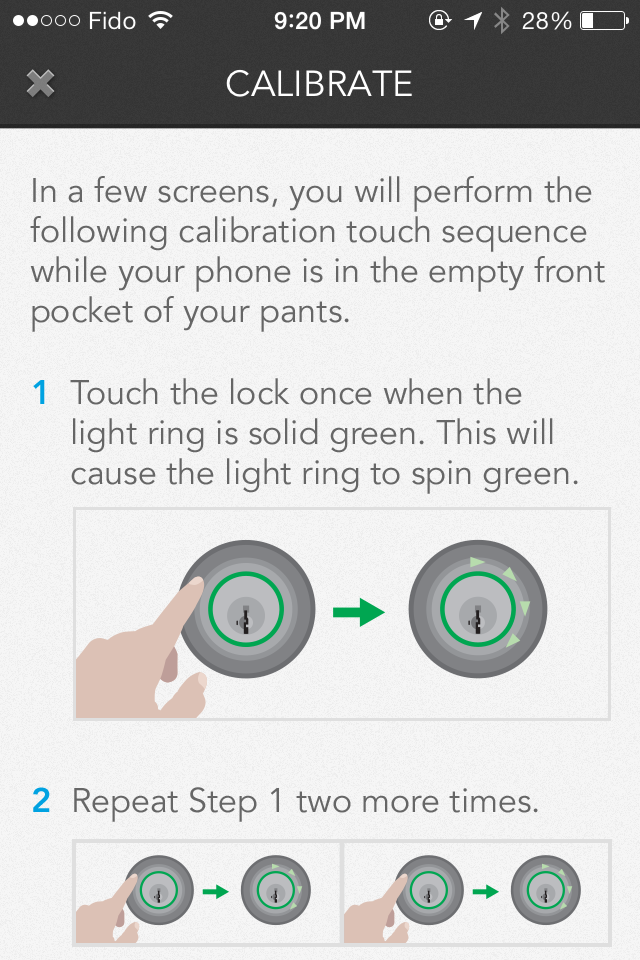
Next you’ll want to get your iOS devices connected. This is a pretty simple process. Once you log into the Kevo software, you’ll be prompted to enter a new device. Make sure you’ve enabled your location, and you’ve enabled Bluetooth. Select to add the new device, and follow the steps. Press the “Calibrate” button on the door when prompted and hold the phone up to it. The app needs to communicate with the lock, and once done, you go outside to complete the calibration process from the exterior (take the manual keys with you just in case.) If you have your phone or mp3 player, slip it in your pocket. If you’re using a tablet, slip it in wherever you’ll be keeping it (purse or backpack.) Then, stand nearly at arm’s length and tap the door (the Kevo light should be lit green) 3 times.
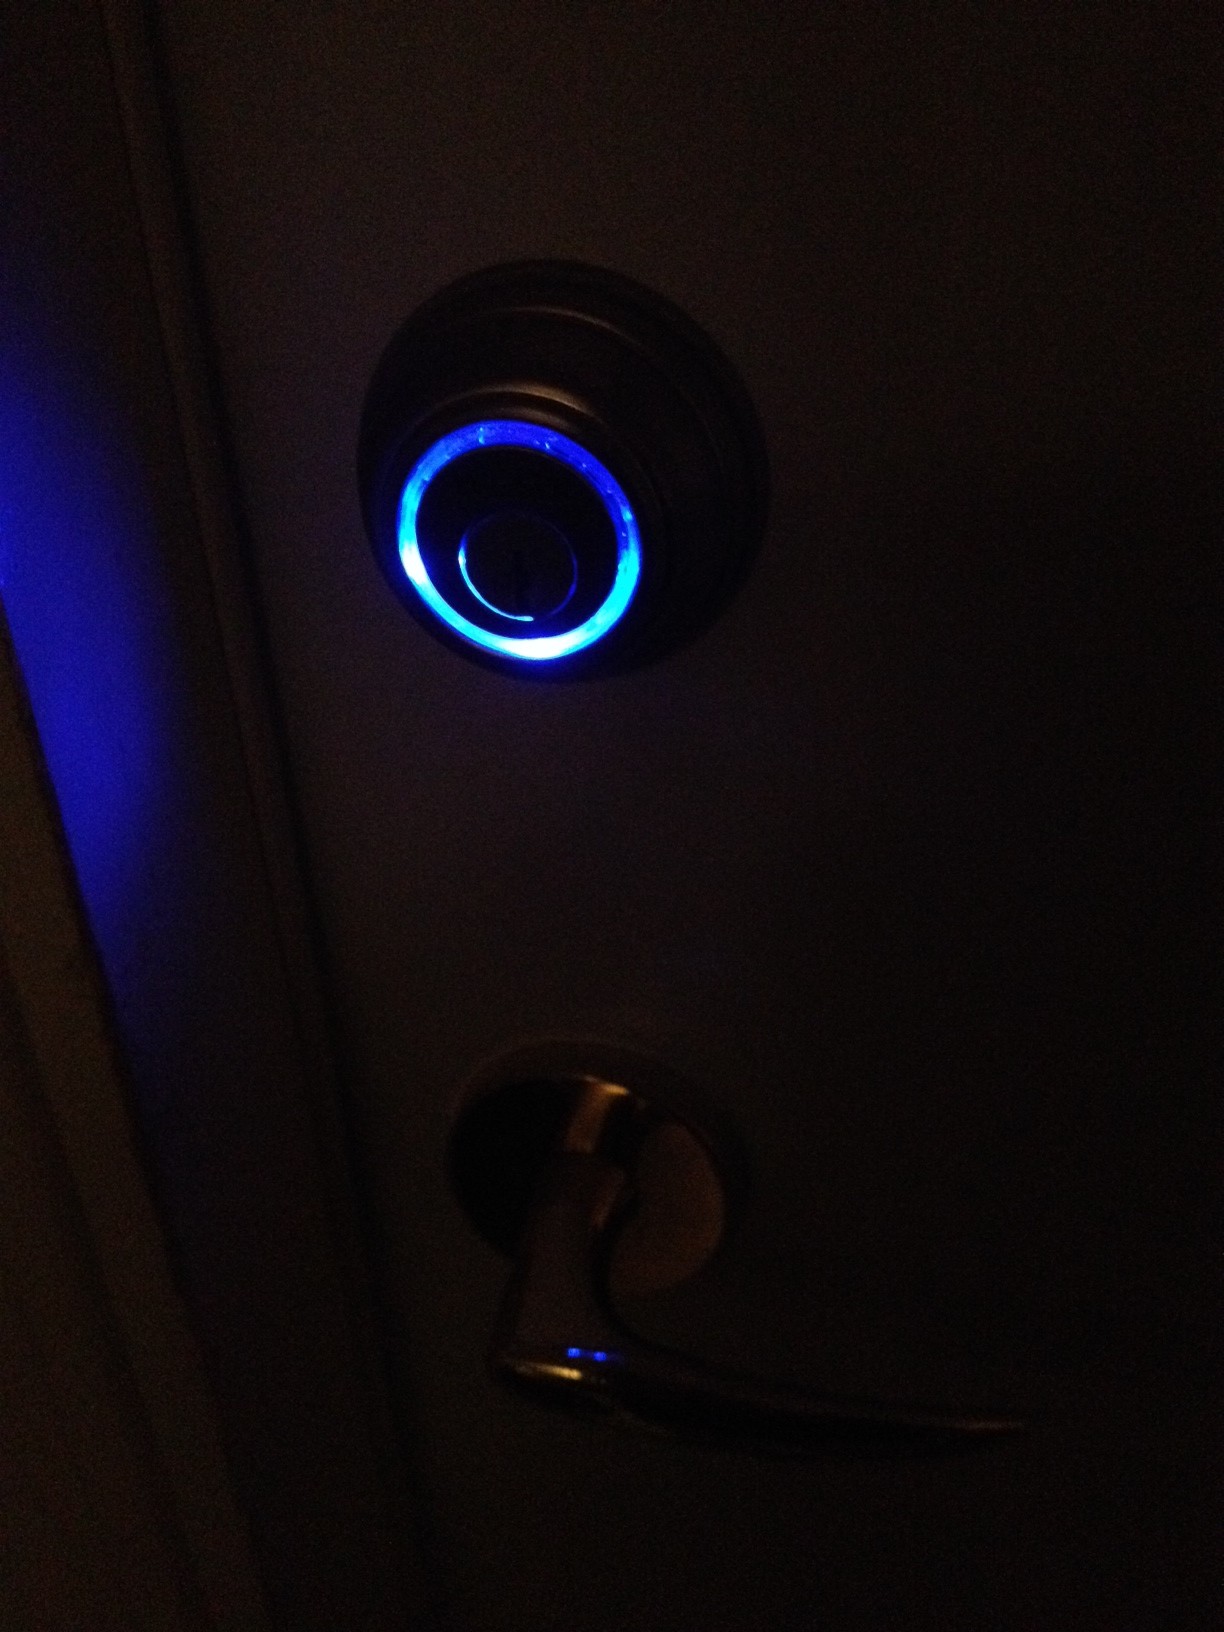
Calibration is successful if the Kevo light flashes green acknowledgement (if it flashes red, try again. It may be  calibrated with a weak connection, but chances are more often than not, you have to try again.) The iOS devices are a snap, and so far, everything has been pretty smooth. I can even send my friend an e-key if he downloads the app so that when he comes to check in on our pets while we’re on vacation, I don’t have to drop off and pick up a physical key! Kevo is also smart enough to query where the access points are, so if you’re worried that you’ve left your phone by the door and somebody could touch their way inside, it’s not possible. Kevo’s intelligently going to determine the phone is inside the house and will flash purple, denoting that entry was unsuccessful. You’ll also receive a notification on your phone. Everything’s almost a go at this point.
That’s where this took a bit of a turn for the worse. You see, functionality-wise, the Weiser Kevo is a slam dunk if you own the supported Apple devices. The trouble is, I have an iPhone and my wife has a Samsung Galaxy S4. Android and Blackberry devices are not currently supported. There are two ways around this: The Fob or just old fashioned keys, which with this device coming out seemed like such a thing of the past!
The Weiser Kevo comes with one Fob already ready to go – Sort of. Calibration is supposed to be as simple as the iOS devices. After you wake up the Fob (by pressing the button in the middle,) you’re supposed to take it to the housing, press the “calibrate” button, and after the Fob flashes amber, go outside and follow the same calibration steps. Then you’re done, right? Not quite. No matter how many different times and different methods I used (different lengths away from the door, Fob in my pocket, in my hand and at one point practically touching the lock, door wide open, etc,) I couldn’t get the Fob to calibrate. After 20 different occasions, including one where I accidentally locked myself out of the house (that’s why I said to take the regular keys with you!) I gave up until I’m home to speak to Weiser customer support, and now I get to enjoy the benefits of touch entrance into my home, while my wife is no better than before. Worse yet, the internal housing’s lid is so tight fitting that I’ve scratched the inside a few times trying to pull it off and put it back on in frustration of having to try to calibrate the fob so many times (since Weiser recommends you replace the housing lid each time you go outside to calibrate a device as devices don’t calibrate as well with it off.) I thought the housing was all metallic for some reason (though it’s not necessary, really) but it’s mostly a rigid brushed plastic. That was a bit frustrating too.
At the end of the day, Weiser gets a huge thumbs up from me for a few things. First of all, when something is so easy to  install properly that I can do it without breaking it into pieces, or catching something on fire, you know it’s easy. The app itself was a breeze to figure out, and getting the Kevo working with my phone was just as easy as installing the unit itself.
The Kevo falters in a few places, however, First and foremost is the lack of mobile support. I can perhaps overlook the lack of support on Blackberry devices, but it seems almost academic nowadays that you want to have some form of Android support, even if it’s no more than a secondary outlet to let you in and out of the house. The fact that there are probably just as many, if not more Android devices out there than iOS devices makes me hope that there’s a model coming out one day that has functionality, or perhaps some sort of update in the future to interact with them.
I can overlook the damage I caused to the housing, but can’t overlook the difficulty of Fob calibration. This isn’t just my problem either, as other reports and reviews I read online had the same problem. I was following the directions Weiser provided step by step in all the literature and video I could find, but it was to no avail. I’ll be in touch with Weiser Customer Service and provide you an update once I have it, so keep checking back.
Otherwise, I have nothing bad to say about this unit. I consider the two flaws fairly large ones, so I’d give the Weiser Kevo a 3.75 / 5 with a point off for the lack of mobile functionality, and just a quarter point for Fob issues since I would give Weiser the benefit of the doubt and assume I’m in the minority here. Given what the Kevo does, it’s a good bargain. The app sends me alerts every time somebody opens the door, or attempts to open the door. I also like that the device is smart enough to query access devices to see where they are in comparison to the door to determine if it’s a legitimate entry request. It’s a really good device that just needs a little bit more to make it great. If your home is chock full of just Apple devices, and you want to experience how neat the Kevo truly is, it’s worth your time of day. If you’re in a multi-phone type household like mine, or everybody would need fobs or regular keys, perhaps it’s worth waiting it out a bit until the next generation of Kevos come out to see if your phone will be supported in the future.
The Weiser Kevo is now available at Best Buy and online at BestBuy.ca. Colour coordinate so that your Kevo matches the rest of your decor.
Weiser Kevo in Satin Nickel
Weiser Kevo in Venetian Bronze
Weiser Kevo in Polished Brass
Additional Fobs can be purchased as well
Here’s a brief introduction to the installation of the Kevo as well as calibrating it to your iPhone.


