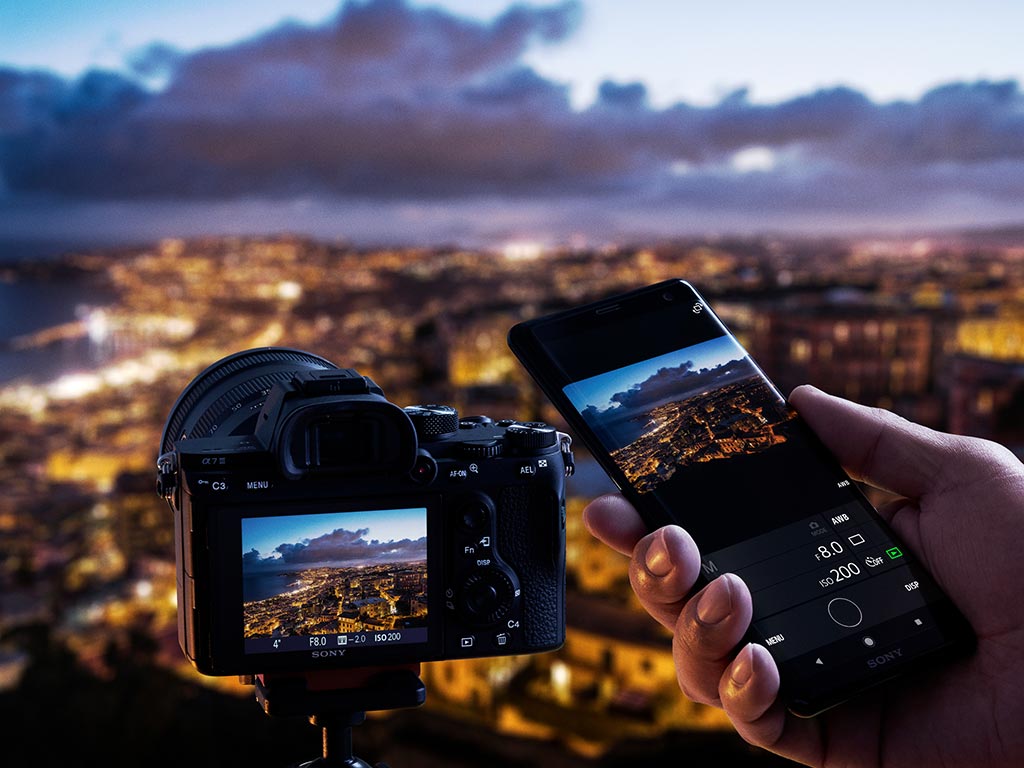
Smartphones are already compact cameras unto themselves, but they can also play assistive roles when shooting with a DSLR or mirrorless camera.
Camera manufacturers recognized the potential for smartphones to help capture and collect photos and video from these cameras. Most of that is facilitated via Wi-Fi or Bluetooth, where the phone and camera are tethered together wirelessly. All major camera manufacturers, including GoPro, have dedicated apps for iOS and Android dedicated for such a purpose. I’ll go over some of the benefits and nuances you need to know to get them working.
Remote shooting
There are times when holding a camera makes the photo worse. Low-light and night photography are good examples because you often have to shoot at a slower shutter speed and higher ISO to capture as much light as possible.
One thing I often do is to place the camera on a tripod or flat surface, and set a timer for the shutter to release. That way, I’m not touching the camera at all, negating any shake to blur the final shot. But what if I wanted to change focus or adjust a setting without having to move or touch the camera?
This is where an app comes in handy. Running on a phone, the app can be the camera’s viewfinder and shortcut to the menu. You can see what the camera sees, focus on what you want, and alter settings on the fly. You don’t get the full gamut of menu options to select, but you do get important ones. You may be able to change shutter speed, ISO, aperture or white balance, among other things.
The menu options won’t be extensive, but the simplified interface may make it easier to learn them. For example, it’s easy to select a burst rather than single shot—great for shooting action from a tripod. It’s often called “continuous shooting” in menu lingo. Whether you know your settings or not, this is one way to get to important ones quickly.
Photo transfers
Every shot you take stores onto the memory card you have in the camera, but you can preview shots as they come in, too. These dedicated camera apps have preview functionality, allowing you to see whatever you captured on the phone.
Not only that, but you can set it so that images also save to the phone directly. If you’re doing a workflow that involves posting on social media or editing on your handset, it’s a great way to cut out a computer from the process.
I like to use this option as a backup if my memory card surprises me by filling up fast. Saving to the phone means I can keep shooting and utilize the extra storage I have there. One caveat, however, is that it may not apply to every shooting mode the camera has. For instance, anything in full manual mode may not save, or a custom preset. There is variation here, so it depends on which camera make and app you’re using.
Alternatively, you can also transfer images over manually by selecting the ones you want to move them over. That’s a standard feature with any dedicated app, and well worth using if you want to work on specific images.
Taking selfies
Taking a selfie with a DSLR or mirrorless camera isn’t as easy as it is with a phone. If you want the quality of your camera without resorting to using your phone instead, try this out.
Granted, you will need to have somewhere to place your camera, like a tripod, selfie stick, gimbal, flat surface or wherever it’s safe, sturdy and ready to shoot. Connect the camera to your phone and use the app to focus on you (and whomever else is with you), positioning yourself however you like. Pressing the shutter on the app snaps the photo, so you don’t have to touch the camera itself.
One of the cool things about this is how you can get creative. Since you’re holding the phone, you can angle the camera to shoot you from pretty much any angle. Tilt it facing up for a majestic shot, or down for a slight overhead. You also get the benefit of creating more distance, getting more of the background (or a group) in the shot. It makes it easier to see more without having to go at arm’s length, like you do with a phone.
Turning face detection on ensures you will be in focus when doing this, so you don’t have to worry about the camera losing you in the photo or video.
Light source
Put your phone’s flashlight to good use when you need to illuminate a subject for a photo. While small, and somewhat harsh, phone LEDs have decent light distribution when held a little further back. The weaker light may negate the ability to light a large surface, and is otherwise useless for faraway vista photos, but closer objects could benefit, nonetheless.
I don’t use this tactic often, but I will when I need to. Light up the subject from a different angle using one hand and fire away with the other. The flash on the camera itself points forward, and will almost always create a drop shadow behind whatever or whomever you’re shooting. With the right combination of shutter, ISO, exposure and focal length, you can make a phone’s LED help create something a little more natural.
There’s plenty of room to experiment here. For a softer flood light, put a piece of paper over the LED and it will lessen the effect. You can manage with one hand by wrapping the paper around the phone. If you have a friend’s phone handy, hit the subject from opposite sides to reduce shadows.
Camera brands and their apps
To help with seeking out which apps work with which brands, I’ve listed them for you below. These are available for both iOS and Android, unless otherwise specified.
Canon — Canon Camera Connect
Nikon — Wireless Mobile Utility
Sony — Imagine Edge Mobile
Fujifilm — Fujifilm Camera Remote
Panasonic — Panasonic Image App
Olympus — Olympus Image Share
Leica — Leica FOTOS
GoPro — GoPro and Quik
Check out the latest DSLR and mirrorless cameras currently available.


