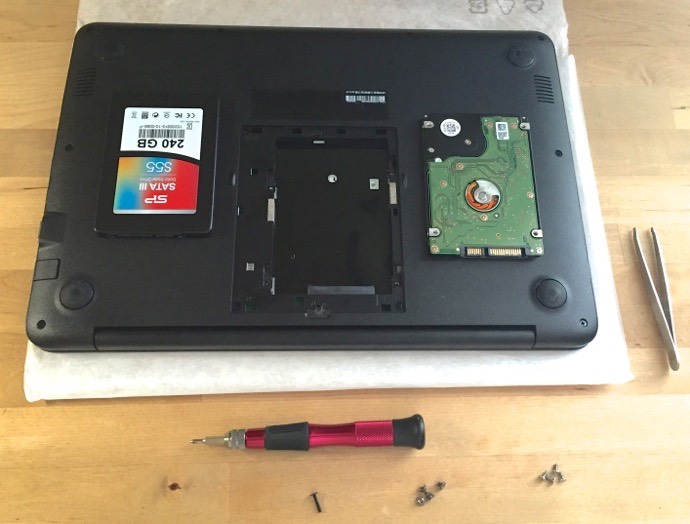
Replacement solid state drive (left) and the laptop’s original 5400 rpm hard drive (Right)
Why Upgrade to SSD?
Up until a few years ago, almost every laptop shipped with a hard drive for storage. That’s a traditional, spinning platter, mechanical drive. Most laptops also used 5400 RPM drives, which are even slower than the hard drives usually used in desktop PCs. The reason for using a hard drive was cost, but SSDs have come down dramatically in price and they now make a very cost effective hard drive replacement. But why would you want to replace the hard drive if you already have it there?
SSD is an acronym for solid state drive. That means there are no moving parts. Reading and writing data is significantly faster with an SSD because there’s no read/write head moving back and forth across the spinning platter of a hard drive. It’s not only faster, but that lack of moving parts means an SSD operates silently and it’s not a susceptible to being damaged or causing errors if the laptop is accidentally jarred. Switching to an SSD also uses less power, so you should see a little more battery life.
But really, the big payoff is speed. Your laptop will boot faster, loading and writing files is faster and performance will seem snappier.
Here’s how you swap out your old hard drive for a SSD.
Clone the Hard Drive
Swapping out a drive the hard way can take a long time. What makes the process infinitely easier and faster is a cloning kit. Many SSDs actually come with the cloning kit but otherwise you can pick one up separately. Using the SATA to USB cable, I connected the replacement SSD to the laptop as an external drive. Then I ran the drive cloning software to turn that SSD into an exact duplicate of the laptop’s hard drive.
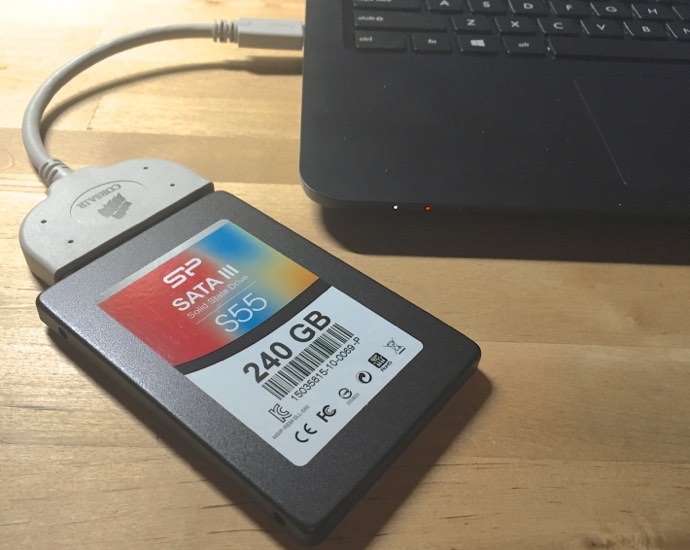
New SSD connected to the laptop’s USB port for cloning
With a cloned drive, I don’t need to make a backup (I now have two identical copies of the hard drive) and there’s no configuration or software installation when the SSD is installed—just boot the laptop and go. This is the longest part of the process because you’re copying the entire contents of your hard drive, and the more data you have the longer it takes. The good news is you can just walk away and leave the software to do its thing.
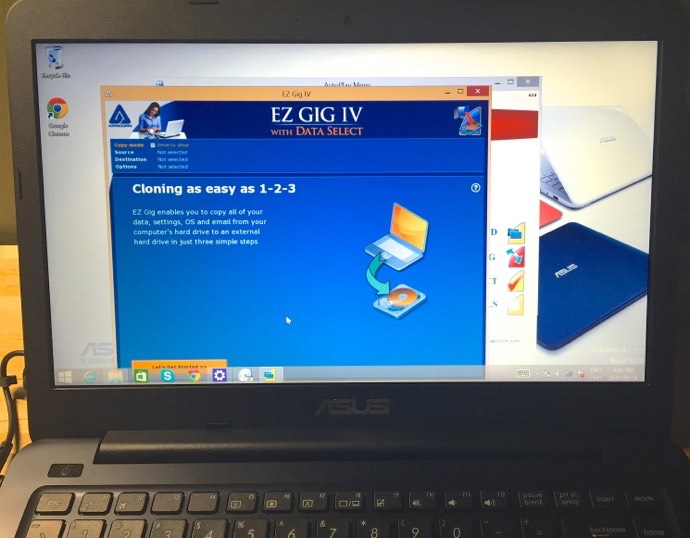
Drive cloning software is the easy way — it creates a backup (your original drive) and there are no software installs needed once the SSD is installed
Prep the Laptop
You don’t need specialized tools or training to replace your laptop’s hard drive. Before you open it up, make sure doing so doesn’t void your warranty. If you’re looking at replacing a hard drive, chances are the warranty has expired anyway … You typically need a small Phillips screwdriver and tweezers. That’s it for tools. If you’re not sure you have what’s needed, an inexpensive PC tool kit includes everything you’ll ever want.
Start by unplugging the power cable and if your laptop has a removable battery, take it out. Put down a soft cloth so the lid doesn’t get scuffed and flip the laptop over. Touch a metal object to make sure any static electricity is discharged and you’re ready to begin.
Open Up the Laptop
Many PC manufacturers offer an easy access door to replace the hard drive. The ASUS I used in this video has one of these, so I only had a single screw to remove. Some laptops will require you to remove the entire bottom case to access the hard drive. My MacBook Pro is a good example of the harder approach, but all it really means is removing a few more screws. Make sure you set any screws aside and that you know what order they go in (some may be different lengths).
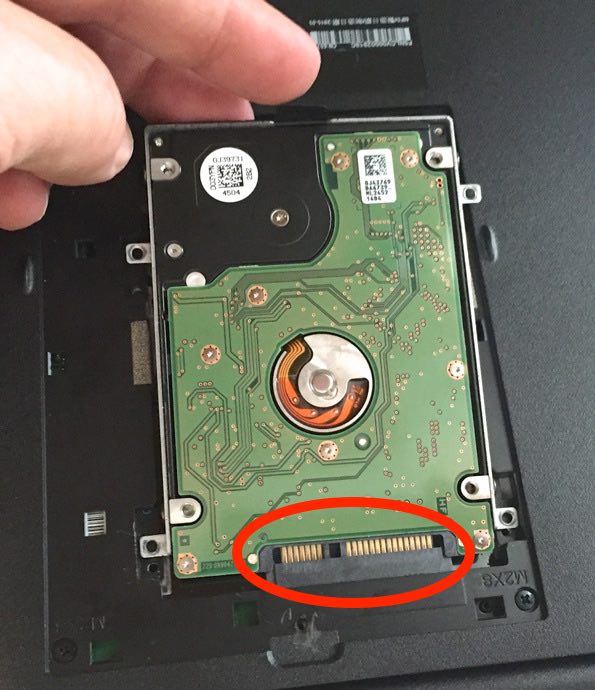
This is the key connection to be aware of
Remove the Hard Drive
Once you have access to the hard drive, it needs to be removed. There will be screws that physically connect its bracket to the laptop. carefully remove those screws and set them aside. Next, the hard drive needs to be disconnected. There is usually a tab to pull, otherwise you should be able to slide it free of the socket it’s connected to.
Once the drive is free, there will be several screws (usually four) attaching the hard drive to a mounting bracket. Remove those and set the hard drive aside.
Install the SSD
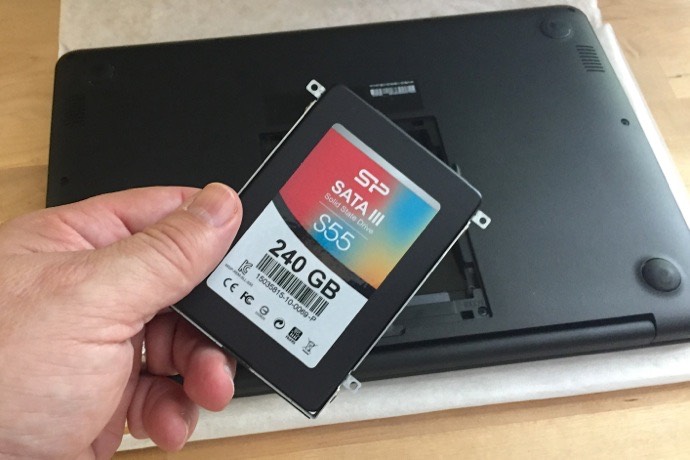
Mount the SSD in the drive bracket that originally held the hard drive
Installing the SSD is a matter of reversing the operation you did to remove the hard drive. First, attach the mounting bracket to the SSD. You’ll notice the data connector has two “tabs” one wider than the other; these correspond to two plugs on the socket and you’ll need to make sure you line them up so they match. Then push the SSD firmly but gently until it’s connected to the socket. Replace the screws that hold the drive bracket in place and put the access panel—or laptop case bottom—back in place.
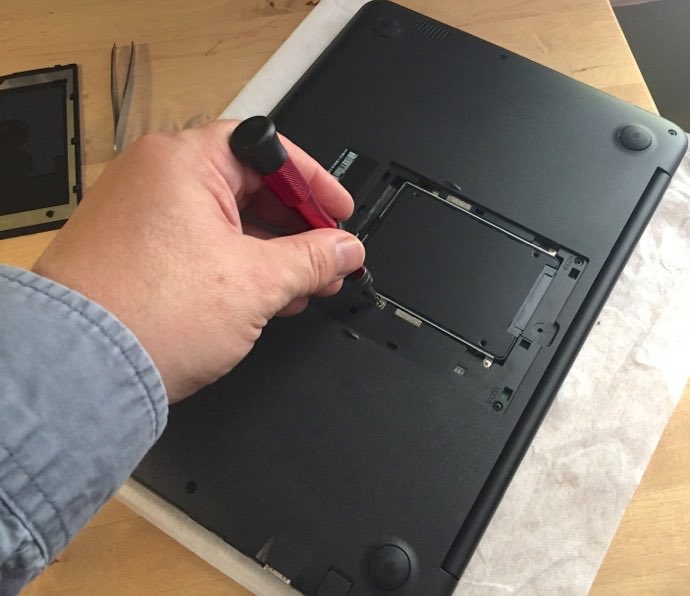
SSD in drive bracket is connected to the socket, time to replace the screws and reassmble the laptop case
That’s it. The actual hardware swap should take all of five minutes.
Start Up Your Laptop and Enjoy the Speed
The final step is to restart your computer. Because the drive was cloned, there’s no additional fuss required, just hit the power button and Windows (or OS X if you’re in the Mac camp) will launch and everything will look exactly as it did before the procedure. You’ll notice that startup is considerably faster—in the example laptop I used for the accompanying video, it dropped from 20 seconds to under 10 seconds. Your entire user experience should be snappier, especially any process that involves saving or reading large files. Applications also launch significantly faster.
Once you’re satisfied everything is running properly, that hard drive you removed can be mounted in an external exclosure and used as a backup drive. Faster, quieter and more durable laptop, plus an external backup drive—win, win!
The process of installing an SSD is one that doesn’t require specialized tools or training but not everyone is comfortable in cracking open a laptop that could be worth thousands of dollars. That’s okay. If you’d rather have a professional handle the installation from start to finish, that’s one of GeekSquad’s specialties—they take care of it for you.
Whether you do it yourself, or have an expert handle the installation for you, take advantage of the performance boost your laptop will get from ditching the hard drive and upgrading to solid state storage.


Thank you. I did not know about the cloning. That would make it so much easier, almost a no brainer for the switch.
Comments are closed.