Overview
Setting up a router was once a fairly intimidating task. However, things are much different today. First of all, most routers (especially those designed for home use) are wireless. That eliminates the most time-consuming and labour-intensive parts of the job, because you no longer have to worry about running Ethernet cable.
Even better, wireless router manufacturers have steadily simplified the process of setting up their devices. You don’t need a technical background to install your router or configure your Wi-Fi network. In many cases you don’t even need a computer, just a smartphone! The latest whole-home mesh networking routers even take the guesswork out of locating your router, because they distribute multiple, small access points throughout your home.
This article explains in detail how to install a wireless router.
Tutorial
Step 1 / 9
Assess your Wi-Fi needs
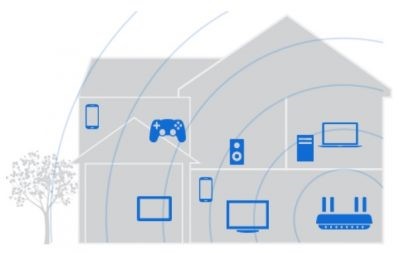 Before starting this project, it’s important to figure out exactly what your Wi-Fi needs actually are. Key factors to consider include the number of devices that will be simultaneously connecting, and the bandwidth requirements. The size of area to be covered is also important—for example, do you need coverage just in your home, or also in your yard?
If your Wi-Fi network will be used to provide internet access for your smartphone in an apartment, then your Wi-Fi needs are fairly modest. If you have a large area to cover, smart devices (like a thermostat and lights), you stream video, or play online video games, then your Wi-Fi needs are significantly higher.
Confused and don’t know where to begin? A Geek Squad Agent can assist with a site survey to assess your networking needs and recommend solutions. If you’re already a member, connect with us online and we can walk you through it.
Step 2 / 9
Choose a wireless router
 The next step is to choose a router based on your needs. 802.11ac is the current standard for Wi-Fi and that should be your starting point. The router will be backward compatible with 802.11n and older standards, but make sure it is a dual-band router, supporting both the 2.4GHz and 5GHz bands.
If your Wi-Fi needs are modest, a basic 802.11ac router like the TP-LINK Archer C7 will do the job just fine.
That being said, most homes these days would be better off going with either a high performance router or a whole home mesh system. Even if they don’t need it now, it gives them room to accommodate future network demand.
For Wi-Fi coverage in a small to medium-sized home with limited obstructions, a single high performance router is the traditional solution. Current dual band routers like the Netgear Nighthawk AC1900 offer combined data throughput of 1900 Mbps, providing plenty of bandwidth for high demand applications like 4K video streaming. Built in QoS (Quality of Service) features help prioritize streaming and gaming for a faster Wi-Fi experience. Choose a model with adjustable external antennas and the Wi-Fi signal can be optimized based on location.
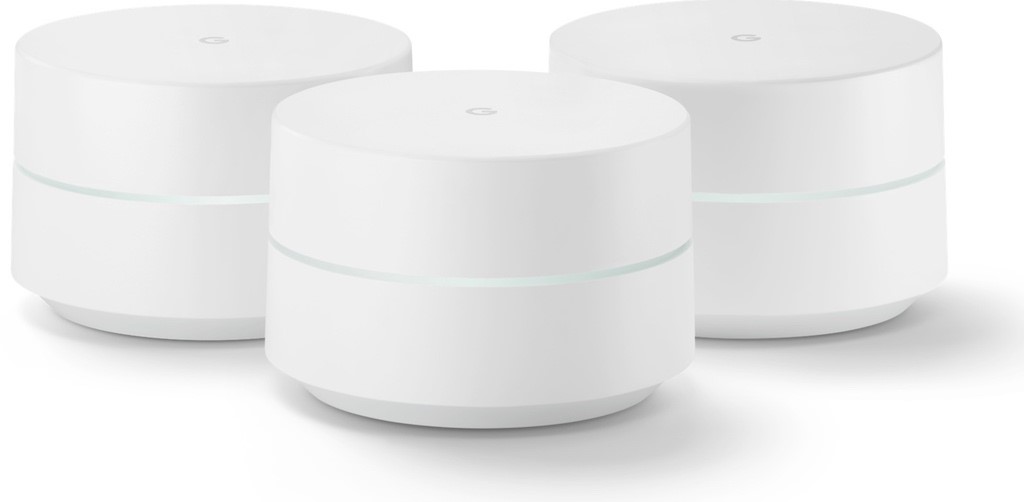
The latest option is whole home mesh Wi-Fi systems like the Google WiFi. These use multiple small access points instead of a single router. For larger homes, or areas where there are obstacles (including brick walls and glass) or interference, they provide the ideal solution for consistent, high performance Wi-Fi.
Step 3 / 9
Choose a router location
With a traditional Wi-Fi router, you need to locate it as close to the centre of the coverage area as possible. In addition, it should be unobstructed. If the router is placed in a corner, in the basement, in a cabinet, or in a closet, the home’s Wi-Fi network is likely to suffer from slow spots and dead zones.
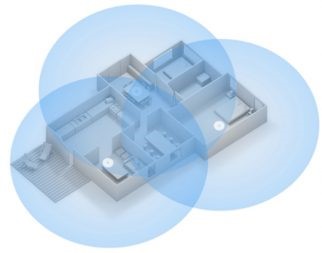
With a whole home mesh system, location is much more relaxed. The access points are small so they don’t stand out and can be placed in the open without looking out of place. You’ll need to spread them through the house (most can be bought in three-packs) to ensure full coverage.
Step 4 / 9
 Connect to your ISP’s modem
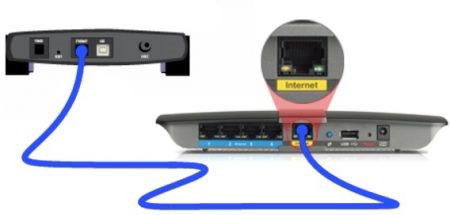
Your Internet Service Provider (ISP) provides you with a modem that connects your home to internet services. You’ll need to connect the WAN or internet port on your router to that modem using an Ethernet cable. You may also need to contact your ISP to put the modem into bridge mode (if you’re replacing an existing router connected to the modem, that has already been done).
Step 5 / 9
Set up the router
Setting up a new wireless router is easier than ever. Most routers offer the option of setting up by connecting directly to a computer using an Ethernet cable, connecting to a computer using Wi-Fi, or by using a mobile app on a device that wirelessly connects to the router.
Each router manufacturer includes instructions and most offer a wizard that walks you through the basics. During setup the key things that you’ll be doing are to name the network and setting passwords (for the network and the router itself). You’ll also have to set the security level (WPA2 is recommended) and decide if you want to separate the 5GHz and 2.4GHz bands or have them combined so devices automatically connect to the appropriate band. Most router manufacturers suggest leaving the bands as a single network.
Now is also a good time to set up a guest network. Your router’s management software will walk you through the process, but it basically involves creating a guest Wi-Fi network name and password. The advantage of a guest network is that visitors can connect to it instead of your primary Wi-Fi network, getting Wi-Fi access without having the password to your main network (you can reset the guest network password any time without disrupting your connected devices), and guest networks can’t be used to access connected devices like hard drives where sensitive information might be stored. If you need advanced routing features for your network, we recommend contacting Geek Squad.
Step 6 / 9
Check for firmware updates
The next step is increasingly important. Check to see if there are any firmware updates for your router, and if the option is available, set it to automatically install updates. The “Krack” Wi-Fi attack was the latest reminder that it’s important to keep your Wi-Fi router updated.
Step 7 / 9
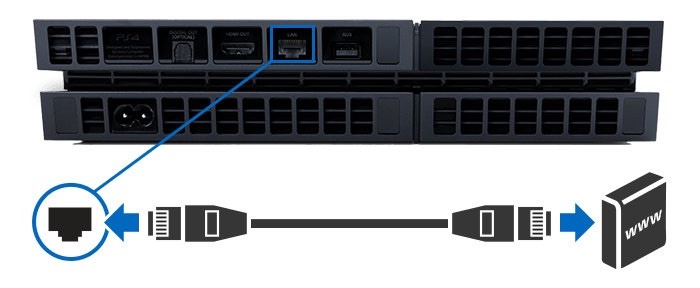 Connect any USB drives or printers
If you are going to use a USB hard drive for network attached storage (NAS), or share a printer over your network, they can be connected to your wireless router’s USB ports. You’ll need to use the router management software to name the devices and set access privileges.
Even though you are installing a wireless router, you may actually decide that a wire is needed at this point. If you have a device on your network that has high bandwidth demand and you don’t want any chance of lag (a video streamer or game console for example), you have the option of directly connecting it to your router using an Ethernet cable.
Note: whole home mesh Wi-Fi systems don’t always support Ethernet or USB connectivity.
Step 8 / 9
Fine tune your configuration
 Once your wireless router is set up and your Wi-Fi network is up and running, you can fine tune the configuration as needed.
One quick way to determine if performance is living up to potential is to run a speed test from various areas of your home. There are dedicated apps for this, but an easy option to give you a good idea of how well your network is working is to use the speed test on your ISP’s website, or use the Geek Squad Version. Your download speed should be close to the download speed your ISP advertises, no matter where you are in the house.
There are many ways you can tweak the configuration of your wireless router. For example, most offer QoS options allowing you to prioritize a device or service on your Wi-Fi network so it always gets maximum bandwidth. You can also switch channels if you suspect a neighbouring router is interfering with your signal. There are many other settings that can be adjusted based on specific needs, but most people won’t need to dive into these.
If you don’t want to be adjusting settings for the best performance, a whole home mesh system does all this automatically, in the background ….
You may also want to set up parental controls, limiting Wi-Fi access times or blocking websites for children connecting to the network.
Step 9 / 9
Connect your devices
When you install a new wireless router, the final step is to connect all your devices to the new Wi-Fi network. This is a matter of pointing each device to the new Wi-Fi network and entering the password. Computers, smartphones, video streamers, and game consoles are fairly obvious, but don’t forget devices like smart thermostats, Wi-Fi cameras and smart scales.
Enjoy your new Wi-Fi network
Once your new wireless router is in place and set up, you’ll be able to enjoy the payoff of a high-performance Wi-Fi network. Stream, game, browse and connect without thinking twice.




My service provider has promised me a network speed of 100 Mbps but delivers at 56Mbps. Does it have any correlation with the router quality that I am using?
Setting up a wireless router can be tedious and complicated sometimes mostly because of the errors one might get. Your article is very to the point and well-written people can understand it easily and can set up their router.
Hey! the 5GHz and 2.4GHz bands or have them combined so devices automatically connect to the appropriate band. Most router manufacturers suggest leaving the bands as a single network.
if you’re installing wireless security cameras yourself, you want the option to view them remotely. Not all cameras provide remote control and sneak peeks. It’s easy enough to make sure that you are buying a camera that includes remote access. However, one thing you should look into is how you’re going to actually access that camera. Looking to view real-time video from a web browser? Make sure that’s an option. Even more importantly, check to see if that camera supports your smartphone/tablet platform. Some cameras work with iOS devices, some work with Android, and some work with both. Unfortunately, not as many work with BlackBerry and the Windows Phone. Make sure to read the fine print!
Thanks.
Last year when I set up the internet in my home I was totally wrong. Now I understand what was my mistake then. Thanks for this helpful article.
WiFi covering the whole home area is just so important now a days. If friends come over they always want to be in the room where wifi is available. It’s just so important part of our lives now a days that setting it right is kind of a big deal.
Hi, great article, straight to the point. However, I would personally point out the importance of securing the wireless network during the setup process like changing the default router password, default SSID and network password. Some users skip these steps and leave everything as is, leaving their home network open. It’s always better to spend some time on securing the network, than setting it up again.
Regards!
Comments are closed.