
 In the last year, many of us started video calling family, friends, and colleagues to stay connected; and more people are using a smart display for this purpose. Prior to the pandemic, you may have done the odd video call on a smartphone, tablet, or other device. As such, the transition to the new normal of connecting to loved ones and colleagues using just a video screen may not have come as a huge challenge for you.
But your mom or dad likely didn’t have the same experience. You are likely their main source of support when it comes to technology. Providing technical support for your parents has become much more difficult during the pandemic since you are not able to meet in-person and show them how it works. This is especially true for those who had to purchase new devices for their parents during the pandemic for the purpose of staying connected and had to work together on the phone to set it up. The unfamiliarity and technical jargon may have made the setup process for your older family member even more daunting.
Smart displays can be pre-set up as a solution. In this article we are going to discuss ways various smart displays can be pre-set up, minimizing the amount of set-up that has to be done by your older family member. The goal is to allow your older family member to start using the device out of the box, without the hassle of creating accounts and setting it all up—their only task should be plugging it in to power.
Note: The setup requires a smartphone and specific online accounts that need to be connected.
Checklist: What do I need to get started with a smart display
Here are six things you need to setup a smart display:
- Confirm internet and Wi-Fi access: the smart display requires internet access for most of its functions
- Their Wi-Fi network name (SSID) and password (Ensure this is exact or it will not work)
- All smart displays require internet to function. If your older family member does not currently have internet you could look at arranging internet service or look at providing a mobile hotspot device that can supply internet using cellular data. Note that cellular internet is subject to data caps and overage charges. The selection of mobile hotspot services is beyond the scope of this article but we recommend you check with your local internet or cellular provide for options.
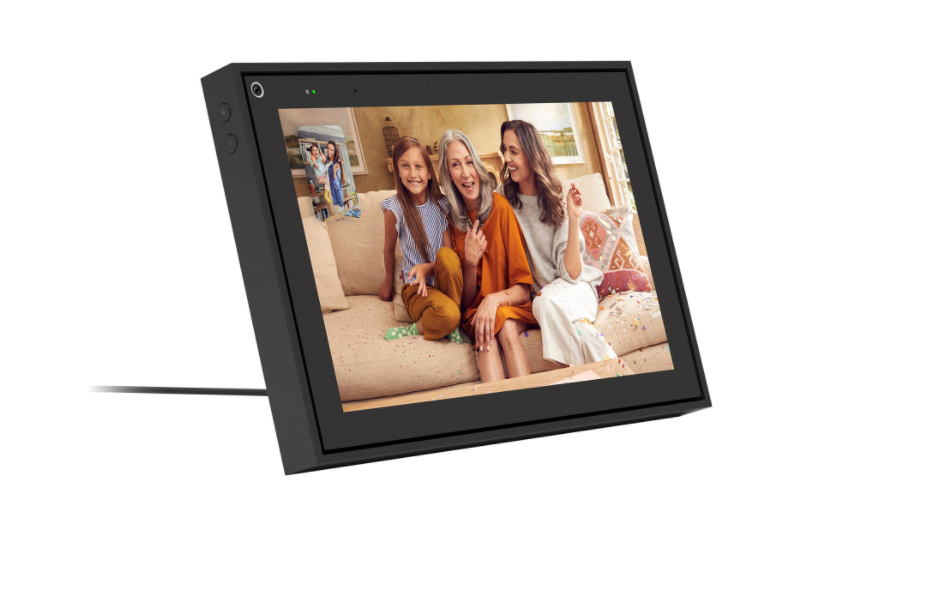
- The smart display of your choice example: Google Nest Hub Max, Facebook Portal, Amazon Echo Show
- A smart phone running the latest version of Android or iOS
- Access to the email account and password of your older family member to add their account to the smart display
- Ensure you contact your family member to explain what you are doing and obtain permission before accessing or making any accounts on their behalf. If they do not currently have an account you may create a new account for them with the respective service provider (e.g., Google, Amazon Alexa, or Facebook).
- A phone number capable of accepting text messages (This phone number is sometimes used for setting up for 2-factor authentication)
Instructions for pre-setup of a smart display for someone else:
At the end of the setup, the older family member receiving the device should be able to do the following:
- Plug and play: The device recipient only needs to plug it in to power and it should connect to internet and be ready to work. No account setups needed or registering for other services.
- Making calls should be easy: Common contacts should already be setup on the device to make it easier for them to call friends and family.
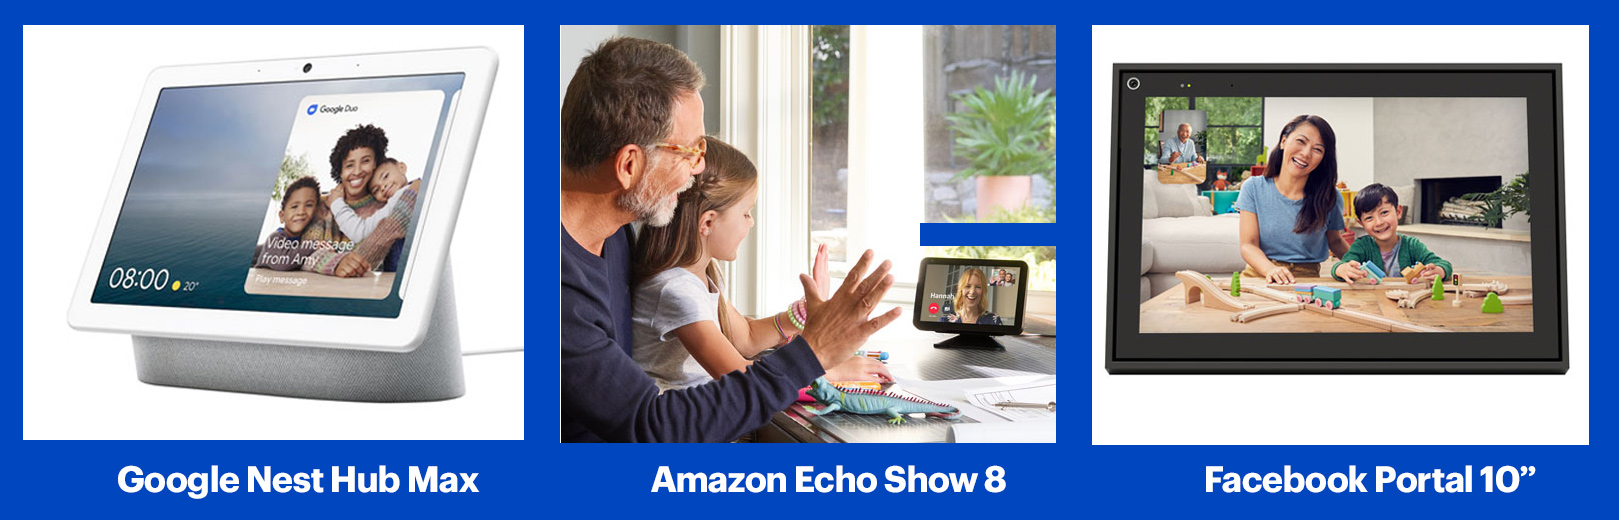
Throughout the article we will provide the general steps and provide links to each manufacturer’s support pages with the detailed step by steps on how to configure the device. We will focus on one primary smart display for each ecosystem. Most instructions and steps will be the same across models but if you have a different model than what is listed, the specific steps may differ slightly. The primary smart displays for each ecosystem we will use as a reference are:
- Google Home: Google Nest Hub Max
- Amazon Alexa: Echo Show 8
- Facebook Portal: Facebook Portal 10”
Note: Keep in mind that each major ecosystem (Google, Amazon Alexa, and Facebook Portal) have their own specific instructions, but the general ideas will be the same across each ecosystem.
Steps to pre-set up a smart display
To setup the device so it can plug and play we will need to complete the following steps:
- Create account: Ensure the device is linked to the respective online account
- Begin setup: Complete the initial setup of the device by following the device prompt
- Connect common apps and features: Connect smart display to such as music, entertainment, and video calling apps
- Add contacts to make calls easy: Add contacts on your older family member’s account to make it easy for them to make and receive calls from the people they care about
- Set up Wi-Fi: This last step is important so the device automatically connects to your older family member’s home Wi-Fi network upon powering up, but it will stop connecting to your home Wi-Fi once this is done.
After the steps are complete, your older family member only needs to plug it in to power and it should connect to internet and be ready to use their device. The smart display should be the only device needed to access video calls and other services such as music services or entertaining videos.
PLUG AND PLAY
- Create Account
If your family has an existing account you can use for the smart display setup, proceed to step 2. If they don’t have an existing account and you need to create one, see the chart below and use the support link to help in setting up an account.
| Device | Required Account | Support Link |
| Google Nest Hub Max | Google Account (Gmail) | Click here to details on how to create a Google Account |
| Amazon Echo Show 8 | Amazon account | Click here for details on how to create an Amazon account |
| Facebook Portal 10” | Facebook Account | Click here to create a new Facebook account
|
- Begin setup
To ensure the device is ready to go, complete the initial setup of the device. For this you will need a smartphone and the smart display device you are setting up. To start, plug in the smart display. It will prompt you to download an app on your phone. On the smart display and the app, follow the on-screen guide.
While you are setting up the device, the device prompts will ask about additional services such as music streaming, videos, or others to be added to the account(s) at this time. For some services, you will be able to enter the log-in credentials to connect them. Alternatively, this step can be skipped for now and revisited in the next section Connecting common services.
If you need further support to begin the setup, follow guides from Google, Amazon, and Facebook by clicking on the links below.
Setup Guides
| Device | Support Link |
| Google Nest Hub Max | Click here for Google Next/Home Setup |
| Amazon Echo Show 8 | Click here for Amazon Echo Show Setup |
| Facebook Portal 10” | Click here for Facebook Portal Setup |
- Connect common apps and features
To ensure the device recipient can make the most of their new smart display, you can pre-set up services on the device for them. Common services can be broken down into 3 categories:
- Entertainment
- Voice/Video calling
- Check-in
The list provides most common services and apps to get started, but most smart displays can also be used with additional services which may vary by ecosystem and the specific device model.
- Entertainment apps
| Ecosystem/Device | Apps | Support Link |
| Google Nest Hub Max
|
Netflix | Link TVs to your speaker or display |
| Spotify | Link your music services and set your default service | |
| Amazon Echo Show 8
|
Netflix | How to use Netflix on your Amazon Echo Show |
| Spotify | Spotify on Alexa | |
| Facebook Portal 10”
|
Facebook Watch | How does Facebook Watch work on Portal TV |
| Spotify | Spotify on Facebook Portal |
*Facebook Portal TV is the only Portal device that supports Netflix
- Voice and Video calling apps
Video calling services will allow your family member to make outgoing voice and video calls to people on their contact lists as well as receive incoming calls on the device. Some services such as Google Duo allow outgoing calls to telephone numbers, but most require the person receiving the outgoing call to have a smart device and the specific app (e.g., Zoom) to receive the call.
| Ecosystem/Device | Apps | Support Link |
| Google Nest Hub Max
|
Google Duo (Video, Voice, Phone number) | Make Duo calls with your speakers or displays |
| Zoom (Video Meetings) | Getting Started with Zoom on Google Nest Hub Max | |
| Amazon Echo Show 8
|
Amazon Alexa App (Video, Voice, Phone number) | Device Setup Video by All things Tech |
| Zoom (Video Meetings) | Getting Started with Zoom or Echo Show | |
| Facebook Portal 10”
|
Facebook Messenger (Video, Voice)
|
How does calling work on Portal? |
| WhatsApp (Video, Voice) | How do I add my WhatsApp account to my Portal? | |
| Zoom (Video Meetings) | Zoom on Facebook Portal |
- Check-in features
Some smart displays can initiate two-way video calls or used as a security camera to be able to check-in on the home without requiring the family member to accept the call. These features should only be setup with permission from the call recipient and have indicators or announcements on the recipient’s smart display to let them know that someone is accessing the camera on their device remotely.
| Ecosystem/Device | Features | Support Link |
| Google Nest Hub Max | Nest Camera: Use the Google Nest Hub Max as a Nest camera and view the video on your smartphone | Nest Cam on Google Nest Hub Max |
| Amazon Echo Show 8
|
Smart Home Camera | Set Up Your Echo Show for Home Monitoring |
| Amazon Drop-in: Start a voice or video call on Echo devices for approved users | Turn Drop In On or Off for your Device |
MAKING CALLS SHOULD BE EASY
- Add contacts to make calls easy
To make it easy for outgoing calls you will need to create contacts on the smart display. This way, it will be easy to contact the people that are most important to them with simple commands like “Call my daughter” or “Call Susan”. Depending on the apps there are a few different ways to do this. There are additional features on some devices like the Google Nest Hub Max where you can add a list of “Household Contacts” which will enable an onscreen list of people that can be called with just a tap on the screen.
Assuming that you don’t have access to your family member’s smart phone, log in to the video/calling app on your phone with your family member’s username and password. This log-in must be the same as the one you used to set up the smart display. Manually add contacts with name and phone number. Use a name your family member can use with voice prompts (e.g., daughter, Susan etc.). Do not import your contacts because the smart display will pull contacts from your phone. If you have access to your family member’s phone, this step will be easier as you can directly import their contact list from their phone.
| Ecosystem/Device | Features | Support Link |
| Google Nest Hub Max | 1. Use Google Contacts while logged in to the recipient’s Google account to add their common contacts | Add, move, or import contacts
|
| 2. Household Contacts allows access to an easy onscreen list to make outgoing calls | Allow others to make calls to your household contacts | |
| Amazon Echo Show 8 | 1. Use the Alexa app logged into the recipient’s account to add contacts. | Add Alexa Contacts |
| Facebook Portal 10” | 1. Portal uses your Facebook contacts and WhatsApp contacts as the contact list. You must add or remove contacts in the respective account associated with the recipient.
|
· How to add a contact on WhatsApp
· How do I find and add friends on Facebook?
|
| 2. Use the Portal App on your mobile device to mark contacts as favorites | How to mark contacts as favourites |
- Set up Wi-Fi
To ensure a plug and play experience for the older family member when they receive the new smart display it needs internet connectivity out of the box. During the previous steps, the device was set up using your own Wi-Fi network so you can pre-set up in the convenience of your own home. As we get the smart display ready to be handed over to your older family member, we need to ensure it will connect to their Wi-Fi connection.
As part of the check list, we asked that you obtain the Wi-Fi network name (SSID) and the password of the family member’s home internet service.
Follow the below directions to update the Wi-Fi network the smart display is looking for before packing everything up to be delivered.
| Ecosystem/Device | Notes | Support Link |
| Google Nest Hub Max | This will be a two-step process:
1. Forget current network using the Google Home App 2. Follow the Hidden Wi-Fi setup troubleshooting to add the recipients Wi-Fi information. Once the steps to add the Wi-Fi have been completed, unplug the device and prepare for delivery. |
1. Change the Wi-Fi network of your Google speaker or display |
| Amazon Echo Show 8 | Follow the directions from Amazon on how to manually setup Wi-Fi. | Help Loved Ones Set Up Their Echo Show Remotely |
| Facebook Portal 10” | Follow the directions from Facebook to manually enter your network settings. | Portal: To Enter Your Network Manually |
Now the smart display is set up to be used by your older family member, right out of the box. If you are a person caring for your older family member and is interested in how Smart displays can benefit them, read our article titled: How can a smart display be used to support my older loved one(s). If you are an older adult, curious to understand what you can do on a Smart display, read our article titles: 7 ways older adults can use a smart display to have fun.


