
Editor’s Note: this review was published on the blog a few years ago. We have updated the publication date so that it can appear at the top of the blog.
When life hands you dairy products, you make ice cream. Or at least that’s what I do, and although I know it’s really easy to walk into a grocery store and buy a bucket of ice cream anytime you’d like, I have yet to find a store bought ice cream that can even match the ice cream I make with my KitchenAid ice cream maker.

The reason why people don’t make ice cream at home is because they think it’s hard to do, but I know from trying the KitchenAid Ice Cream Maker attachment that it’s fast, easy, and you can have homemade ice cream in 25 minutes. Not only that, but when you have the KitchenAid Ice Cream Maker attachment you can make any kind of frozen dessert or sorbet at home. I’ve even tried to make frozen juice slush in it and in less time it takes to make dinner I’ve got homemade slush scooped up for the kids.
Here’s a look at the KitchenAid Ice Cream Maker attachment and what it’s like to use it.
Features on the KitchenAid Ice Cream Maker
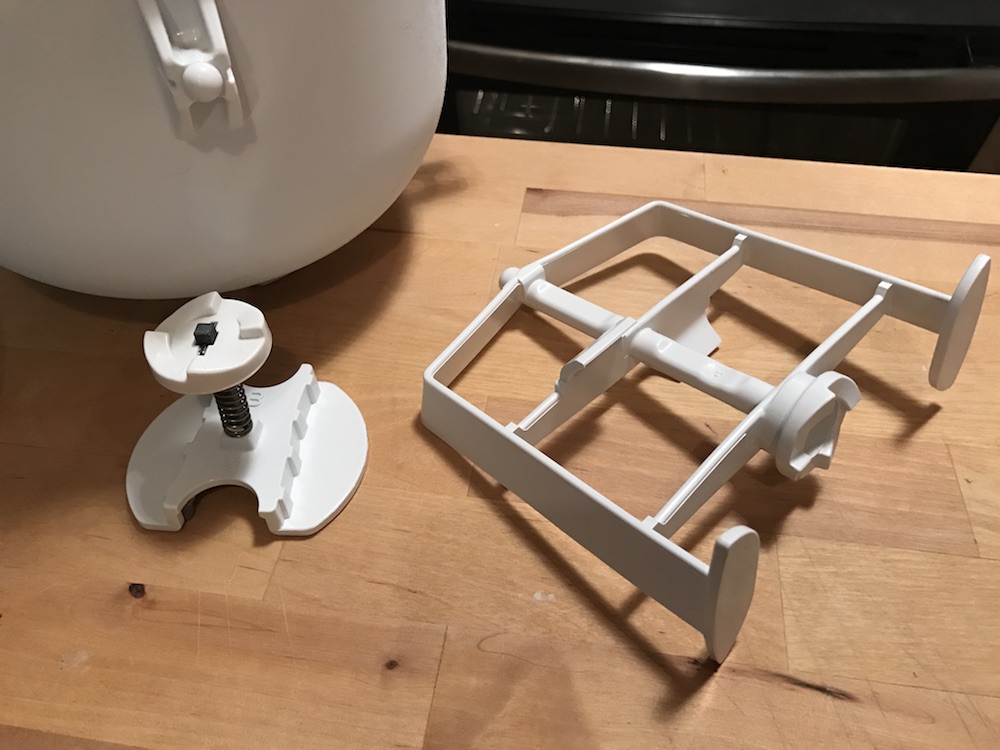
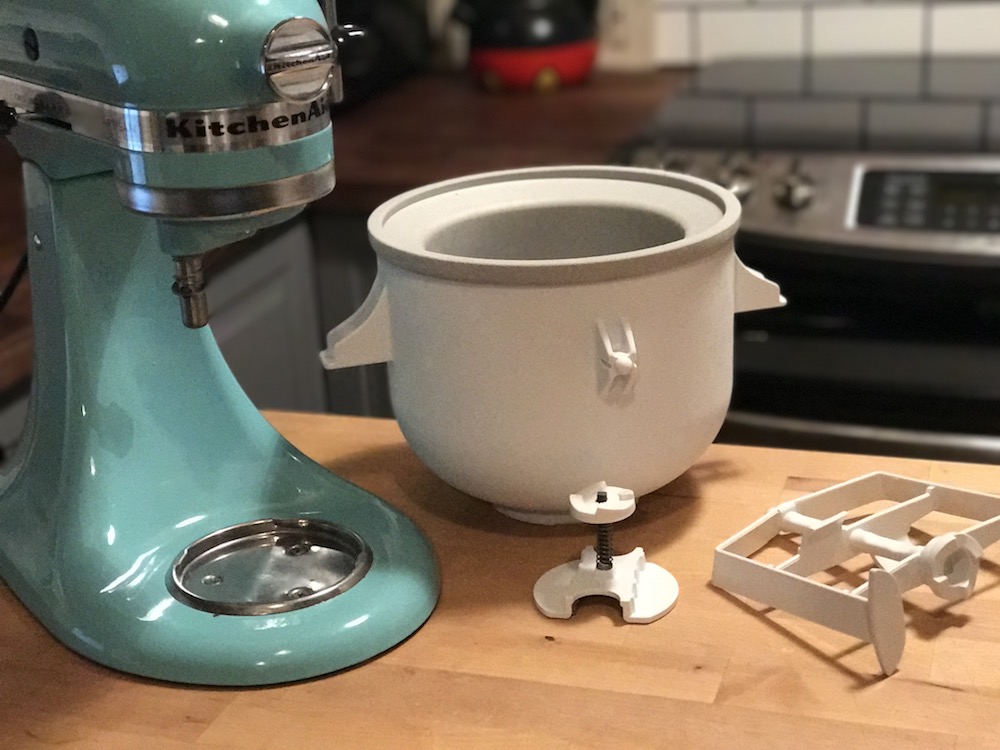
The KitchenAid Ice Cream Maker attachment consists of three parts that fit on your KitchenAid stand mixer: a paddle that’s also known as a dasher, an attachment that fits on your mixer and fits into the paddle, and the freezer bowl.
This attachment is compatible with all KitchenAid stand mixers except for the KitchenAid KSM6573C and KSM7, and makes up to 2-quarts or 1.89 litres of ice cream.
Testing the KitchenAid Ice Cream Maker
There are so many different kinds of ice cream you can make with the KitchenAid Ice Cream maker attachment, it’s hard to choose just one. I tend to like fruit based ice cream rather than chocolate or vanilla, so that’s why I choose to make a blackberry ice cream with some of the frozen blackberries I picked this past summer.
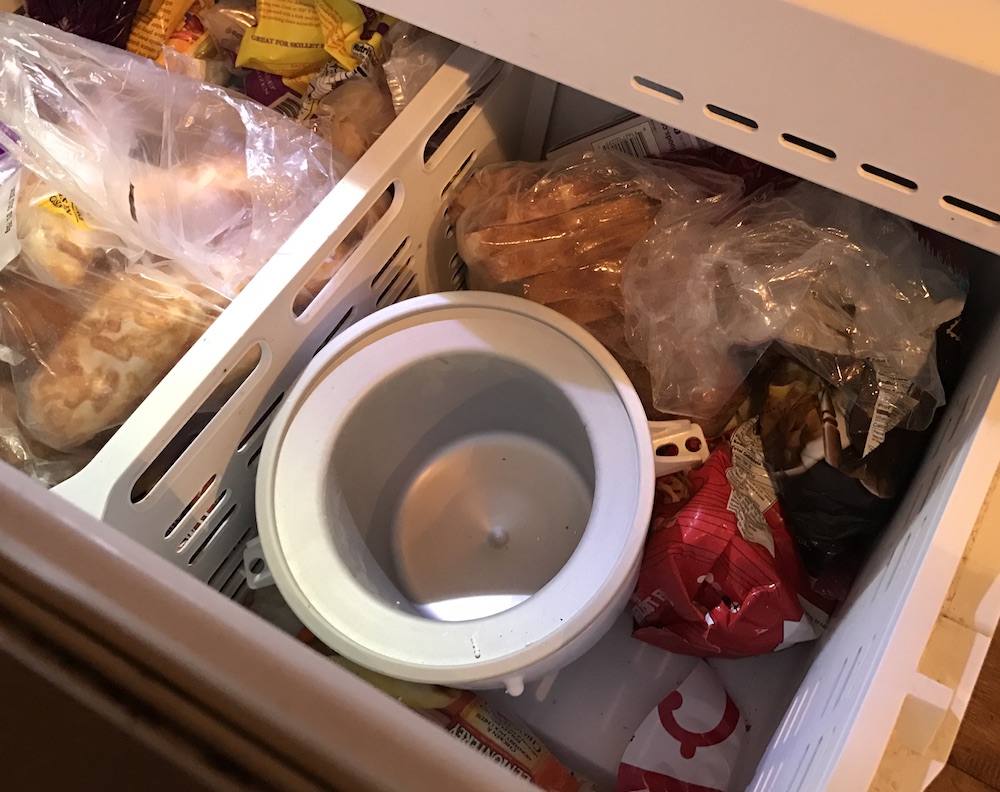
The first thing you need to do when you’re going to use your KitchenAid Ice Cream maker attachment is to put your freezer bowl in the deep freeze. It has to sit in the freezer for a minimum of 24 hours so it’s frozen solid and ready to make ice cream.
Once your KitchenAid Ice Cream Maker bowl is ready to use, you can put together your ingredients. The booklet included in your KitchenAid Ice Cream Maker has quite a few recipes you can try, and you can also go online and search for recipes designed specifically for the KitchenAid Ice Cream Maker.
The difference between egg vs eggless ice cream

You’ll notice that some ice cream recipes use eggs while others don’t. The recipe I used in my KitchenAid Ice Cream maker attachment review video doesn’t use eggs, but there’s a reason why so many ice cream recipes do.
Egg yolks are comprised of fat and protein, and when you heat up protein it becomes a gel. Egg yolks also bind fat and water together to make a creamier base for ice cream, so you’ll notice your ice cream made with eggs is more like the old fashioned, extra creamy types you’ve tried. Ice creams made without eggs are still creamy, but they can be a little on the icy side. To counter this you can find recipes that use whipping cream to add that extra texture.
Making Blackberry Ice Cream in the KitchenAid Ice Cream Maker

To make my blackberry ice cream using the KitchenAid Ice Cream maker attachment I gathered the ingredients below and poured them into the bowl of my KitchenAid stand mixer. With an eggless ice cream you’ll need to mix the whip cream, half and half, and sugar really well using the paddle.
This ice cream has a slight whip cream taste, and if you’d like it to be more icy you can just decease the amount of whip cream you’re using and increase the half and half.
Once your mixture is ready for your freezer bowl, just place the dasher in your freezer bowl with the ice cream mixture and add the attachment that connects to your dasher onto the stand mixer.
Recipe adapted from serving-ice-cream.com.

Ingredients
Blackberries
1 pint (2 cups) blackberries (fresh or frozen)
3/4 cup sugar
Ice Cream Base
3/4 cup sugar
3/4 cup milk
2 cups heavy whipping cream
Directions
Blackberries
In a food processor or blender, process berries with sugar until smooth.
Place blackberry mixture in the fridge for at least 2 hours. If you leave the blackberries in the fridge longer, it will enhance the flavour. You can strain the seeds or leave them in.
Ice Cream
Mix milk and sugar together in your stand mixer so that sugar dissolves.
Add whipping cream and combine well.
Stir in blackberry mixture.
Add your KitchenAid ice cream maker attachment freezer bowl to your stand mixer.
Place the dasher in the freezer bowl and pour your ice cream mixture into the bowl.
Add the attachment to your stand mixer by sliding the dasher attachment onto the stand mixer.
Churn about 25-30 minutes using your KitchenAid Ice Cream maker attachment.
If you’re making blackberry ice cream and you’re wondering whether or not your recipe is turning out, you can see what this ice cream looks like as it processes in the KitchenAid Ice Cream maker attachment. I found it was ready to eat by the 20 minute mark, but I let it run for another 5 minutes and then placed it in the freezer so it was slightly harder and less like soft serve.
Cleaning the KitchenAid Ice Cream maker attachment
Just like all KitchenAid attachments for the stand mixer, clean up is quick and easy. The ice cream dasher and the attachment are both dishwasher safe, but the freezer bowl requires hand washing.
Once you’ve cleaned your bowl, just pop it back in the freezer and it will be ready for the next time you want to make ice cream.
Overall thoughts on the KitchenAid Ice Cream maker attachment
Once I used it a few times, I realized that the KitchenAid Ice Cream Maker attachment is handier than I originally realized. If you have a child who has allergies or you have allergies and you’ve had a hard time finding a good brand of ice cream, you can just opt to make your own.
2 quarts is enough for a crowd too, so if you’re having a party or you just want a quick afternoon treat, your ice cream maker will make sure you’ve got something delicious to share in a hurry.
Best Buy has a wide selection of stand mixer attachments to suit your needs. Want to make your own ice cream? The KitchenAid Ice Cream Maker attachment is available right now at Best Buy.


I’ve tried several different recipes – with and without custard. Bowl in zero degree freezer for at least 24 hours or longer. Liquid in bowl still “sloshes”. I keep ending up with flavored cream which doesn’t thicken to even soft de be consistency. Followed recipes to a T, and very thing well chilled. Is Matt bowl defective?
I used my kA ice maker for the first time. I liked the consistency but the flavor was too bland for me. What can I do to get a sweeter taste without using fruit. Can I use regular sugar??
Hi, yes you can definitely use regular sugar to make your ice cream in the KA ice cream maker as long as you make sure to dissolve it in milk first before adding other ingredients to the mixture.
When using KitchenAid Ice Cream Maker Attachment: Make sure bowl is completely frozen. I freeze for 24 hours with my freezer on the coldest setting. Then attach to mixer. (see video in article for how-to.)
This was a good help I bought the ice cream mixer after reading this
I purchased the Ice Cream Attachment for a Bridal Shower gift and decided to purchase one for myself as well, since I got it on sale. I used it last night WOW. That was really easy and tasted great! The flavors are endless. I cant wait to try out many different flavors. Great product and easy to use. I do wish the book had more recipes, however I found lots online.
This was a good help I bought the ice cream mixer after reading this
kitchen aid info was very helpful
Comments are closed.