 If you’re anything like me, podcasts are a part of your daily life. They can be so interesting, inspiring, funny, or just plain fun. It’s no wonder so many people are starting new ones every day about topics they are passionate about. Audio quality being very important in this medium, it may be hard for newcomers to get started because of the steep learning curve of some recording procedures. This guide is here to give you an idea of what you’ll need and how to create the best sounding podcast possible. If you are completely unversed in recording, I suggest you take a look at the basic recording guide here.
Phone
 Your smart phone is a very powerful tool that you can use to create audio and even video podcasts. This is a particularly handy method if you are planning on doing a monologue. Sound being an important consideration, it’s wise to invest in either a mobile-compatible microphone or even an audio interface that accepts traditional mics. The omnidirectional models built into phones usually sound decent, but by nature they can pick up a lot of unwanted noises and sound reflections which diminish the focus on the speaker.
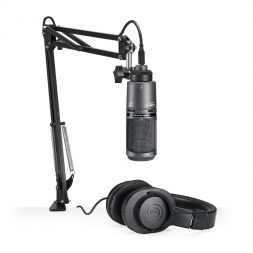
For optimal quality, you can use a simple USB mic (such as the AT2020 USB or the Blue Yeticaster) and plug it into an adapter to make it compatible with your iPhone or Android mobile device. A nice condenser microphone like that will give you a lot of detail and a pleasant airiness to your voice.
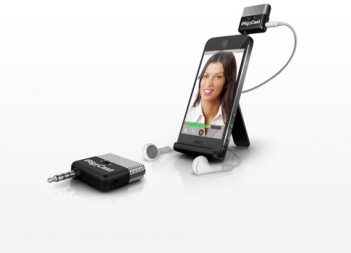
For even more flexibility, a dedicated audio interface such as an iRig Pre or an HD is a good idea to be able to use all the classic microphones with an XLR connection. You’ll have access to a legendary collection of beloved mics that will surely enhance your audience’s experience. It will also add some perks like a dedicated monitor out for your headphones so you can easily hear what you are about to record. IK Multimedia also has a handy microphone specifically designed for this usage: the iRig Mic Cast.
Camera
Although smart phones have come a long way in the video department, the big sensor in a DSLR or mirrorless camera is undeniable. The possibility of using various lenses will greatly increase your options and make the visual aspect that much better for your viewers.
 The same reality is applicable to cameras; they have omnidirectional microphones that are great multipurpose tools, but you’ll need something more specific for better results. Luckily, there are excellent options made to go directly on your camera. I’ve recently tried the Deity D3, a beautiful sounding and affordable model. Deity also offers the D4 Duo, a clever front and back microphone that splits the signal on the left and right channel for post-production convenience. That one is great for interviews.
If you want more freedom of movement and want to avoid setting up stands to get the microphones closer to your subjects, you can also check out lavaliers. These are little units that you clip on your clothing to get nice, clear audio.
Computer
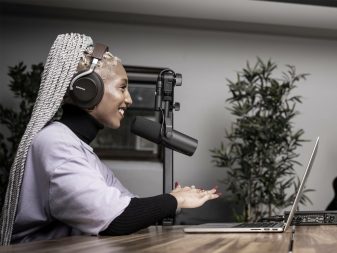
If you plan on setting up a podcast studio, it’s best to stick with your computer for recording. You’ll have the best possible quality and multiple options for the set-up and post-production. In a controlled environment, you can really make the most of time-tested microphone models. These include the Shure SM7 or RE20 by Electro-Voice. These are some of the most popular models for this application, and for good reason: they sound very good. If you plan on having guests, you’ll want a few of them so there isn’t any noticeable difference in quality.
You’ll need an appropriate audio interface too. If you plan on having multiple guests, it’s wise to invest in an interface that offers multiple preamps. For example, the Scarlett 18i8 has four separate preamps for you to use. Focusrite gets a lot of love for its clean-sounding gear, which is ideal for a podcast.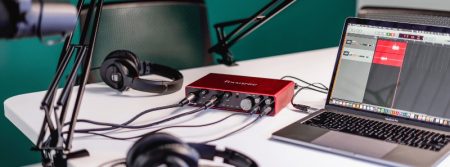
You’ll need a few accessories, such as stands and cables. A regular microphone stand is perfectly fine, but there are some great desk-mounted options that are perfect for podcasting. A suspension is a wise investment as it makes the whole thing secure, easy to move, and reduces vibration.
Additional Considerations
There are some things to consider and try out to get the best results possible.
First of all, it’s important to set the gain correctly. Your gain structure is important to avoid any sort of distortion that can be distracting and unpleasant. So, before you hit the record button, make sure that your signal level isn’t peaking the preamp. When setting it, take the time to test for the loudest sounds, such as laughs and talking up close to the microphone.
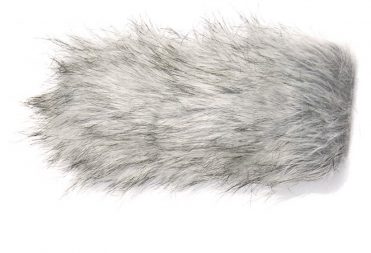 If you want to record outside, plan ahead and use some kind of furry muff to keep the wind noise to a minimum. This type of artefact is very distracting and considerably lowers the quality of your productions. The foam ones aren’t very efficient and only work for very light breezes. Muffs are available for all types of microphones, but make sure they fit yours.
If you really desire to take your podcast to the next level, I recommend you investigate post-production techniques with plugins. For example, Waves offers the Content Creator Toolkit that gives you a lot of options. You’ll be able to really enhance your sound and voice with EQ. You’ll also be able to reduce background or unwanted noises digitally (although please remember that not everything can be removed). Levels can be set properly and have a consistent volume that matches the standards of the platforms you want to use.
As you can see, creating your own podcast is pretty straightforward and doesn’t require as much equipment as you think. I recommend you take it slow and do some short practice sessions either alone or with a friend and listen back to the results. It will help you evaluate the sound quality and make any adjustments before you sit down for a real session. Some post-production can really help salvage a recording that has noises or artefacts. It will also add some polish for an expensive-sounding production.
Check out all the recording gear available at Best Buy.

