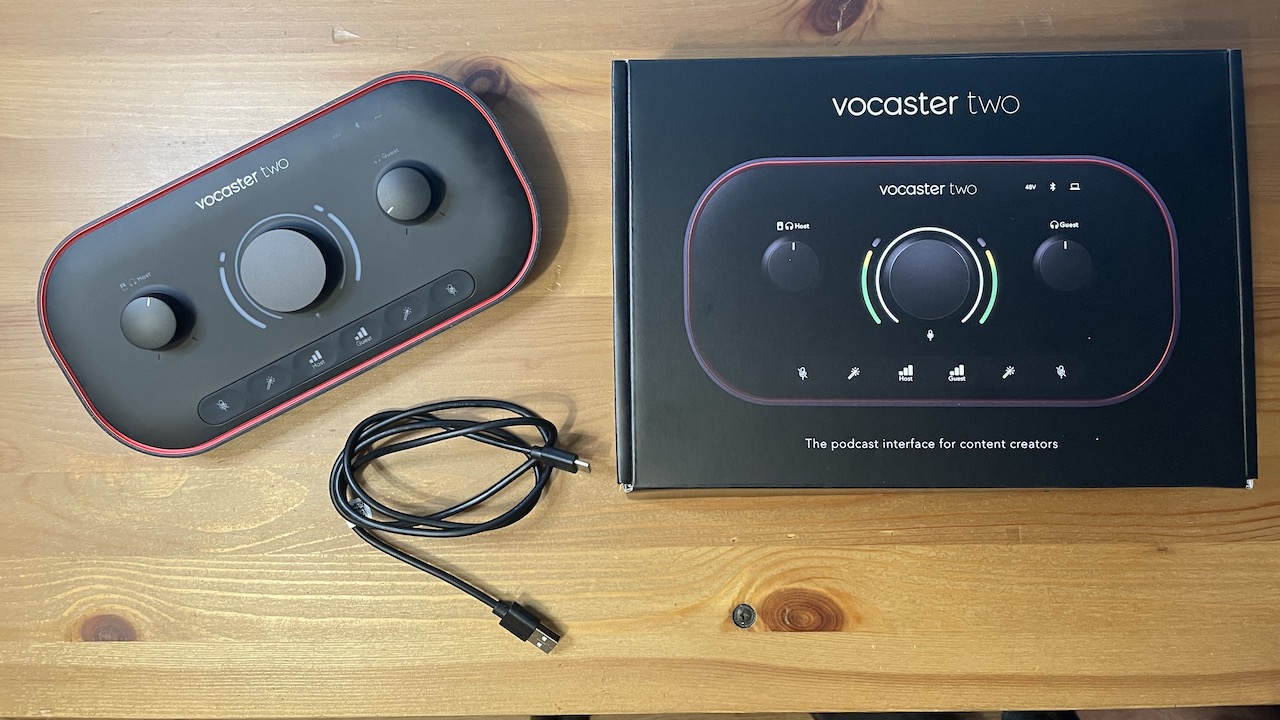
 Podcasting, video creation, and streaming have exploded in number and variety over the last number of years, especially since the COVID-19 pandemic. Producing high-quality voice media with ease is essential for these creative areas. Audio engineering companies are creating more and more products to help anyone to produce professional-quality results easily. Focusrite is prominent in this field, offering its own range of audio interfaces for podcasting and other media, with the Vocaster series being one such interface.
As a longtime Focusrite user, I am curious to try the Vocaster Two podcasting interface (coming soon). In this review, I provide an overview of the podcast interface, explore some of its features, and provide my opinion on my experience using the unit.
Vocaster Two: versatile interface for recording voice
Vocaster Two is a versatile audio interface for voice applications. Podcasting is the primary use for this interface. However, its scope is larger than this. The Vocaster Two is an asset for other types of content creation as well—vlogging, live streaming, voiceover work, and audiobook production are all viable uses.
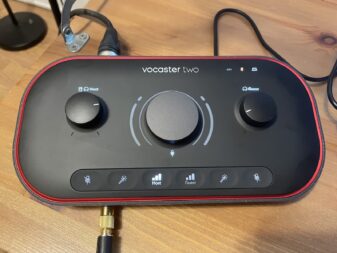
The Focusrite Vocaster Two promises to make your voice media broadcasting very easy with professional results. Key audio management features help make your episodes sound great and flow naturally, allowing you to focus more on the content of your work, and less on technical hurdles.
The USB-powered Vocaster Two features two XLR microphone channels, designed for a host and a guest. The channels are clearly labelled in this fashion. Traditionally, you would expect an audio interface to use a “Channel 1” and “Channel 2” designation. The Vocaster Two eliminates confusion, and marks the channels as “Host” and “Guest”.
70dB of gain for dynamic or condenser microphones
The audio interface also contains a 48V phantom power option, which is perfect if your microphone is a condenser type. However, if you are using a dynamic microphone, Vocaster Two features 70dB of gain on each channel. There is no need for additional equipment to boost gain for your dynamic microphone. The preamps are excellent quality, a signature of Focusrite products.
Vocaster Hub app is essential and simple to use
There are many apps included with the Vocaster Two package. I will talk about these more in the review, but it is important to note the use of Vocaster Hub at this stage.
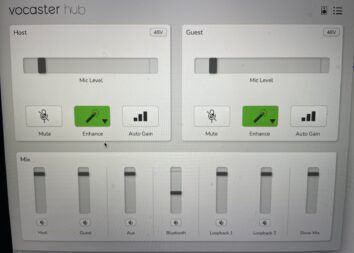
The Vocaster Hub app is a simple control station for everything in your Vocaster Two interface. It is an essential app as it is from the Hub that you will activate the Auto Gain and choose various parameters for the other features. Vocaster Hub also serves as a mixing console as you manage all of the possibilities of audio routing, microphones, and external guest interviews during your production.
Auto Gain sets your levels for you
Set levels for each channel using the Auto Gain feature. When you activate the Auto Gain, the Vocaster Two measures your speaking voice over a ten-second period and sets the gain accordingly. This ensures your podcast sounds professional from the very first technical stage, adding expediency to your workflow with great results.
Enhance presets make the host and guest voices shine
To help even more with your professional-sounding production, Vocaster Two contains an Enhance feature. Pressing the Enhance button activates an audio preset through four different presets: Clean, Warm, Bright, and Radio. The presets are a combination of audio compression, equalization (EQ), and a high pass filter (HPF) and switched using the Vocaster Hub.
The compression controls the volume levels of your voice (which you’ll have optimized via the Auto Gain function). The EQ cleans and sparkles your voice according to the setting your choose, and the HPF serves to eliminate low rumbling from your recordings. All of these technical processes are industry standard. My favourite is the Radio setting, but it is clear the others are very useful as well.
Mute unwanted pauses, sneezes, and coughs
Also on the front panel is a Mute button. The mute function is very handy for those unexpected moments during a broadcast. A cough, a sneeze, or even a burst of uncontrollable laughter are managed with the quick press of a button. It is a small but smart feature of the Vocaster, one that is standard in the radio-broadcasting industry.
Vocaster Two offers useful audio integration options
The Vocaster is equipped to integrate outside audio sources in your productions as well. For example, you can plug in your iPhone for playing music or pre-recorded interview material. Alternatively, using a TRRS cable (not included) you can connect a guest directly to your broadcast, just as if they were on a telephone call.
In this case, a Mono signal is sent to the telephone for your guest to hear the all elements of the conversation and production. I find this feature to be really valuable, as it seamlessly allows you to connect to the whole world. Your guest can be anywhere there is a phone—no need for a microphone and internet connection.
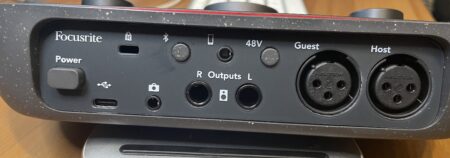
Vocaster Two is also Bluetooth-enabled, making the process even simpler for connecting audio to your production. Simply pair your device, no cable is needed! Play your music or voice memo interview live via the Bluetooth connection.
The Vocaster Two additionally features two 1/4” line outputs. Use the line outs to send sound to your powered speaker monitors. However, the Vocaster is also equipped with a 1/4” headphone output for both the Host and Guest channels. The volume of each channel is controlled individually by large, easy-to-reach knobs. This allows each participant to manage their overall volume as needed. You can also send audio to your camera using Vocaster Two. This becomes an interesting option for live streaming, as audio and video would be perfectly synced as you broadcast.
Bravo, Vocaster Two, for providing so many options for us to use!
Vocaster Hub
Focusrite includes many software apps to make the best use of your Vodacaster Two audio interface. For this review, I think the most important is the Vocaster Hub app. After you install it on your computer you will have access to additional features and controls. The layout of the Vocaster Hub is simple. Those who use traditional audio mixing apps or small mixing consoles will find Vocaster Hub extremely easy to use. Vocaster Hub helps you to manage and control mix levels with more precision, particularly as you add outside audio sources and mix music into your productions. We also know that it controls the Auto Gain and Enhance functions with great ease and detail.
In the Vocaster Hub app, you also have access to two Loopback channels. These are only accessible via the Vocaster Hub app, as there is no physical setting on the Vocaster interface. It is a little bit confusing at first to have the Loopback controlled only within the computer. However, I found it easy to adapt to this detail and discovered that I can control everything in one place via the app.
Accompanying software apps
If you register your Vocaster Two interface with Focusrite, which I highly recommend, you’ll get access to more software apps and user guides. Hindenburg, a DAW is included. Additionally, entry-level subscriptions to Acast (six month trial) and Squadcast (three month trial) platforms are a part of the Vocaster Two package. Acast helps to monetize your podcast, and Squadcast is a cloud-based DAW for recording your work.
After registering the product via the Focusrite website, you’ll have access to a super helpful and friendly setup guide. The guide includes some YouTube videos which are clear and concise that help you understand the setup, features, and usage of the Vocaster Two interface.
After I did this, a prompt asked me to decide if I would like to use my own DAW (Garageband), or if I would like to use Hindenburg, Focusrite’s DAW offering that is included with the product. For this review, I chose to use Garageband, as it is my familiar DAW. When I selected my DAW, I was redirected to a video on how to use my DAW with the Vocaster Two. I am impressed that Focusrite invests in directing its new users towards good information for using their devices.
Taking the time to watch this short video helped a lot to understand how the signals connect to Garageband. I notice there are a good number of options for recording. Individual channels can be recorded, and also a simple stereo “Show Mix” that is the final product of everything happening inside the Vocaster Two. The main takeaway for me is that the Vocaster Two can be as simple or as complex as you need it to be for your productions.
Final thoughts
Overall, having a chance to review Vocaster Two audio interface turned out to be a true pleasure. It is simple to use and the various features are supercharged with value. And, the interface sounds fantastic! The Vocaster Two has a professional sound, is easy to use, and will help you to produce your best work, without needing to invest in anything extra. I recommend it to anyone creating podcasts, live streaming, audiobook sessions, vlogging, and also for voiceover work.
Are you ready to have professional-sounding podcasts? You can find the Vodcaster Two (coming soon) as well as a large selection of recording equipment at bestbuy.ca.


