[Editor’s note: this is part of a series of articles about home recording. At the end of this article are links to other articles in this series.]
Last week, I took a quick spin through Digital Audio Workstation (DAW) software. Now we’re going to dive into yet another realm of gear – the Audio Interface.
If, like most home or project studio owners, you’ve opted to use a computer as the center of your studio, then you’ll most likely be hearing a lot about audio interfaces. Pretty well all computers come with on-board audio capabilities built in: a sound card that probably has three mini jacks for a microphone, headphones/speakers and line out.
For the typical home user, that sound card is just fine. Unfortunately, for a studio owner, you’ll very quickly find that the onboard sound system is inadequate for your needs. They’re typically noisy, they lack inputs and outputs you’ll most likely need and they can be inefficient in the way they translate analog and digital audio.
That’s where audio interfaces come into the picture. An audio interface is a piece of dedicated hardware that you connect to your computer. In the most basic sense, the interface is the audio middleman between you (the real world) and the computer.
The audio interface facilitates three main services for the computer:
- Inputs – Your pathways to get all the magic into the computer! We’ll get into all the different flavours below.
- Outputs – The reverse of Inputs – pathways to hear all the magic that you’re creating. Again, many shapes and sizes that we’ll dive into later.
- Converter – This is the unsung, behind-the scenes benefit of audio interfaces – Analog-to-Digital (A/D) and Digital-to-Analog (D/A) audio conversion. We won’t get into detailed specifications in this article, but pretty well every studio-rated audio interface you’ll come across does a head-and-shoulders better job of converting audio than your computer’s stock on-board sound system.
But, There are SO Many
Let’s back track to the broken-record portion of this series so far:
How are you going to be using your studio?
By taking stock of what you envision to use your studio for, you’ll be able to whittle down the audio interface options you have to choose from. Do you envision recording your rock-band (not the EA game!), create EDM music, score films, or just mix and master other artists recordings? Each of these types of uses will end up looking for different features in an audio interface.
Looking at the Options
The feature and technical spec pages of audio interface pages can be intimidating. There are a lot of terms and jargon that you’ll come across. Here’s a run-down of some of the input and output features you may run across. It’s not an exhaustive list, but it covers the most common items.
Analog Inputs
XLR
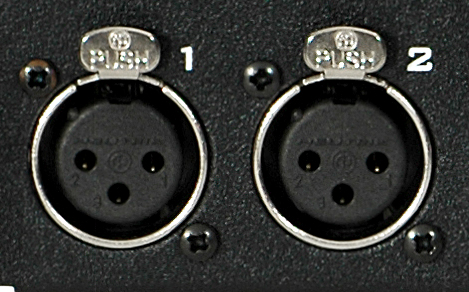 The “star” input of most interfaces is the XLR variety. It’s a three-pin jack that is used mostly for microphones. Sometimes, you’ll hear these referred to as “Balanced” inputs which just means that the cable that’s connecting your microphone to your input will cancel out any external electrical interference so that you receive clean signal.
 Microphone signals are the weakest of the three in this list and require a pre-amplifier. You’ll typically see each XLR input paired with a GAIN knob that controls the level that the pre-amp boosts the microphone signal for the audio interface. The vast majority of interfaces also have a Phantom Power switch that you need to enable if you are using condenser microphones – more on microphones next week.
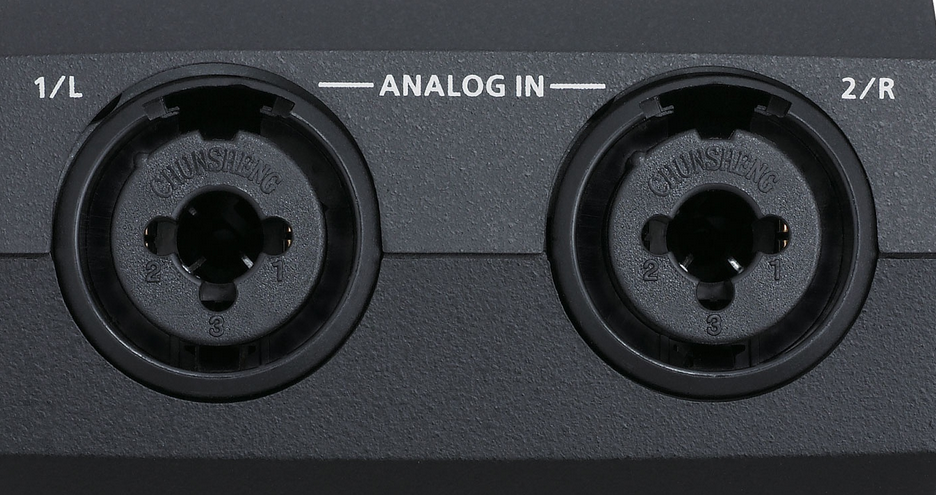
Most interfaces made within the last decade will feature a type of XLR connector called a Combi Jack. These are XLR inputs that have a ¼” jack in the middle that allows you to connect things like keyboards and guitars using the same jack.
Line-level
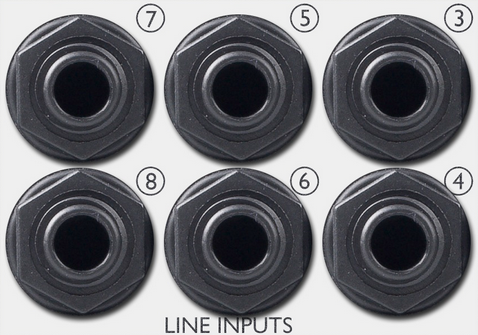 These inputs are for devices such as keyboards and other electronic instruments. These come in a few varieties. The most common is the ¼” jack. If you’ve picked up an interface with Combi Jacks, then the ¼” input in the middle is most likely a line-level input.
 ¼” jacks come in a couple of different varieties: unbalanced and balanced/stereo. An unbalanced jack is what you’ll typically see plugged into a guitar – it only has one ring and is sometimes referred to as a tip-sleeve (TS) configuration. A balanced/stereo jack has two rings and is sometimes referred to as a tip-ring-sleeve (TRS) configuration.
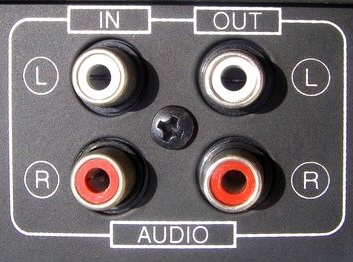
Another popular line-level input is the RCA jack. Theses are exactly like the inputs and outputs on home stereo systems.
Hi-Z
Hi-Z inputs are designed to accept high-impedance signals from instruments such as guitars and bass guitars. The “Z” is the symbol used to indicate impedance in electrical engineering. This is a ¼” input.
Again, if you’ve picked out an interface that has Combi Jacks, they’re usually designed to accept all three types of signals: XLR, Line and Hi-Z. Check the specs before plugging things in though!
Outputs
When you look at interfaces, you may come across what seems as a disproportionate amount of outputs and/or inputs. There are a couple of main reasons for this – you might want to factor these into your decision:
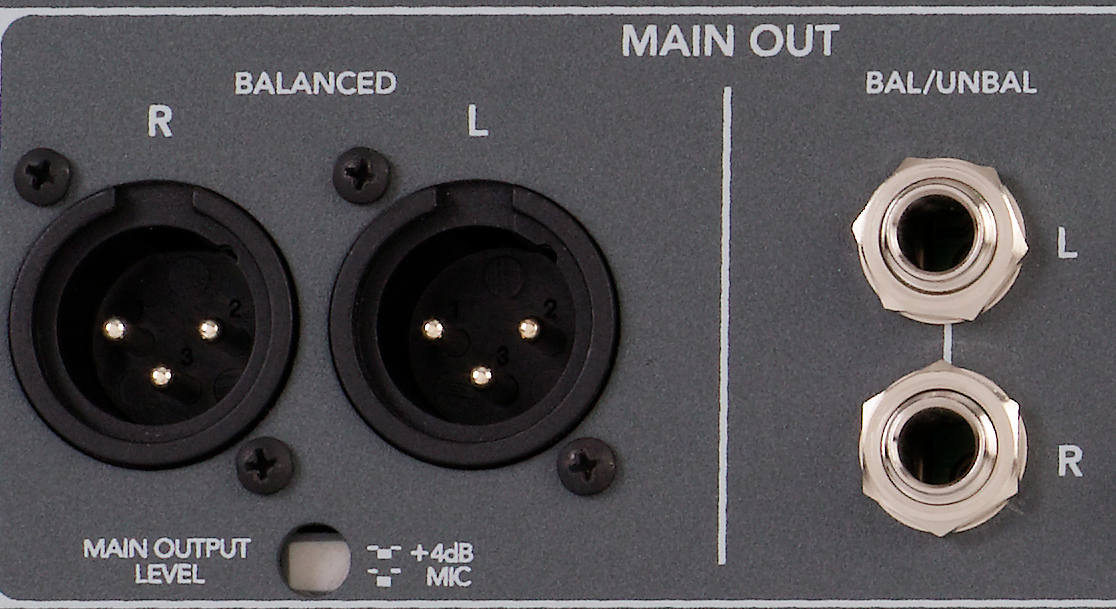 Some studios need more than two speakers. You may have a situation where you need to add a subwoofer to your speaker setup (2.1), or you intend to mix in 5.1 surround sound.
- Outboard analog processing gear is sometimes desirable. You can route audio out from your computer through the interface, have it processed and come back in to your mix. Pairs of outputs and inputs facilitate this easily.
Most analog outputs from an interface are ¼” balanced jacks (TRS), however, you may come across XLR or RCA outputs as well. XLR and TRS connectors are going to give you piece of mind that outside electromagnetic interference is going to be minimized in the signal from your interface to your speakers.
Digital Stuff
MIDI
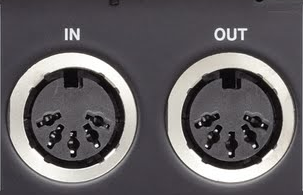 You may find a MIDI input (and output) on an interface. Many modern keyboard controllers and MIDI controllers provide a direct USB connection to computers, so you may need no MIDI ports at all, and if you have more than a couple of MIDI devices to connect, investigating a dedicated MIDI interface may be more appropriate.
The Ins and Outs of Digital Audio
There are a couple of common flavours of digital inputs and outputs. Digital inputs and outputs allow you to connect up compatible studio gear (gear that has digital ins and/or outs) without having to pass their audio through additional analogue-to-digital conversion stages and cause possible degradation. These aren’t absolutely necessary, but something to consider.
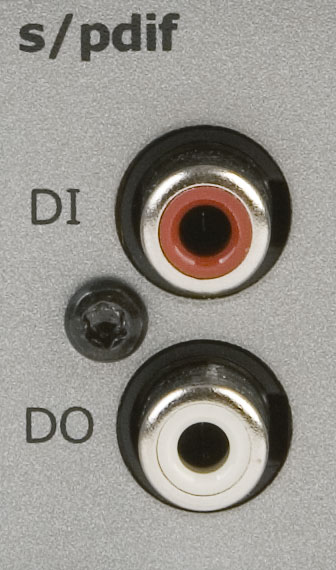 S/PDIF (Sony/Philips Digital InterFace) – This is an interface protocol that uses either RCA connectors (like what you have on your hi-fi stereo system) or TosLink optical connectors. The interface is a two-channel format – each cable can handle a single-direction stereo digital signal between the two devices.
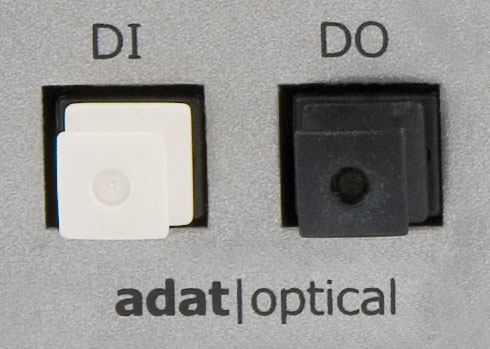 ADAT (Alesis Digital Audio Tape) uses the same TosLink connector that SPDIF uses, but supports up to eight digital audio channels. An ADAT connector gives you the option of adding up to eight more inputs to your interface via a digital connection.
You may come across other digital interface protocols such as AES-EBU (Audio Engineering Society/European Broadcasting Union), but those interface protocols are engineered for much larger format audio installations such as multi-roomed studios and broadcast networks.
Other Considerations
Connecting to the Computer
The audio interface used to be a card that slotted into your motherboard (inside your computer case), but these days it is extremely common for them to exist as an ‘outboard’ breakout box, which connects to your computer via USB or Firewire. The external boxes have a ever so slight disadvantage to the card-based interfaces in communication speeds with the motherboard, but in reality, the difference is virtually negligible.
Headphones
A lot of interfaces also have headphone amplifiers included. You can mute or turn down the send to the speaker and control the volume of the headphones separately.
Internal Effects
Some audio interfaces have on-board effects processing such as reverb, delay or compression. This is especially useful for tracking when you need a little “comfort reverb” for a singer, but your computer does not have enough oomph to do it in real-time.
So, Which One?
Budget and features are going to be the two large factors you’ll need to keep in mind when searching for an ideal audio interface.
For a small home or project studio where you’re most likely going to record one or two sources at a time, then a two-microphone input interface will be ideal. Something like the Focusrite Scarlett 2I4 or the M-Audio M-Track would be great starter interfaces. Check both of these out in the Home Recording section of the Best Buy online Store
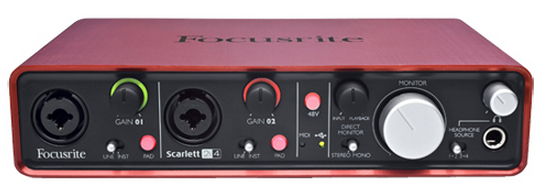
If you’re looking to have some expandability, then something like the Focusrite Saffire PRO line, or the Presonus Audiobox line. These interfaces are venturing into the more intermediate price range, but offer a few more bells and whistles that you may or may not need.
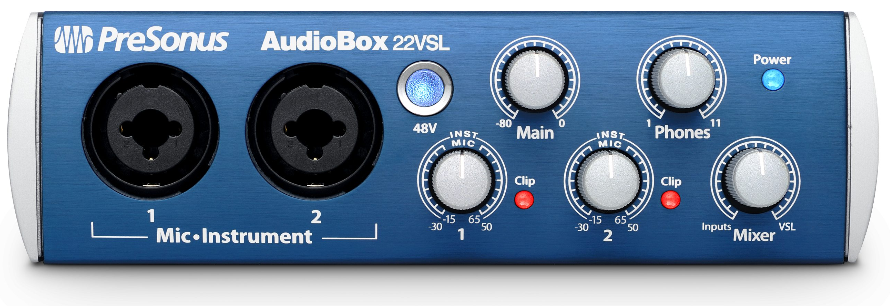
Some home or project studios need more than two microphone inputs. Say you have aspirations to record an entire band or really go to town micing a drum kit. Then interfaces with eight mic inputs might be what you’re looking for. The Presonus Audiobox 1818 and the M-Audio Profire 26|26 might be the kinds of units that would give you lots of inputs and expandability.

Treading Further Down the Path
Like always, don’t feel as though you need to make quick decisions. Read reviews and get opinions before you buy. Most stores, including Best Buy, offer no-hassle return policies if you find the product unsatisfactory.
Please feel free to get in contact with me if you have any questions or comments. I’m always more than happy to help out. Until Next week!
| What Gear Do I Need |
Learn About Audio Software |
Learn About Microphones |
Here is a link to all the articles in the home studio series The Soundboard.


