In the journey to becoming a better photographer there is one important step that will cost you nothing and yet allow to step up your game noticeably. Today I’m going to give you the low down on shooting RAW. Think of it as a way to squeeze more from your images so that you can create the most impactful, engaging images to share with the world.
Most photos are JPEGs
The default photo file that most digital cameras produce is the JPEG, which is a compressed version of the total information that is coming from the sensor. The processing engine takes all that data and applies an algorithm to convert it into a JPEG, a file that is widely recognized by many apps and programs.
JPEG stands for ‘Joint Photographic Experts Group’, a reference to the committee that came together to agree a standard for how to exchange images digitally. The first standard was agreed in 1992, and it has been the predominant image file format ever since.
The JPEG conversion is referred to as ‘lossy’ (as opposed to ‘lossless’) because some of the information coming from the sensor is actually discarded, and this information cannot be retrieved.
So, for example, the algorithm might decide to flatten a dark shadow area to all black, instead of a range of very dark greys or almost blacks. Similarly it might decide to flatten an area of highlights to all white, instead of a range of light greys or almost whites.
When you capture RAW files however, you get a true representation of all of the information captured by the sensor.
The RAW file is uncompressed and lossless
So shooting RAW would appear to be a no-brainer right? Well, yes and no. For me as a professional, I am only going to shoot RAW, because I want the most options and leeway possible to post-process my images. But I’m also someone who has the time and interest to sit down and tweak an image. You may be someone who just wants to shoot share and be done with it.
Also, RAW files are much bigger than JPEGs, so they take up more memory and hence you can fit less on your memory card. When you’re shooting, this means less shots before you need to back up and format your card.
RAW files must be processed
There’s no getting around the necessity to post-process RAW files. They are not designed to be widely usable, so you can’t upload them to your favorite social network, or insert them in your blog post or send them off to be printed.
In order to process them you need a special piece of software that can decode and display the file as an image and then allow you to make changes to it to suit your tastes. The program I use is Adobe Lightroom, and it’s an absolutely integral part of my workflow. There is so much functionality in there that you don’t necessarily need to have Photoshop anymore.
For example, if I’m working on a headshot, I will open my file in Lightroom, adjust the exposure, maybe darken the shadows to increase contrast, reduce highlights if there is a lot of glare on the skin, and change the white balance if I don’t like the shade of my grey background. I can also use the spot healing tool to work on skin blemishes, the local adjustment brush to whiten teeth and sharpen the eyes to make them pop a little more. I can even blur the skin a little bit to remove texture and make it look a bit smoother.
Now I don’t strictly need a RAW file to do all of these tasks, but I know that it’s preferable and that I’ll get better results than if I use a JPEG. For sure I want to have a RAW file for my exposure, shadow and highlight adjustments. You can actually make a faux HDR shot by pumping the shadows way up and bringing back any blown out highlights.
Adjusting white balance with RAW files
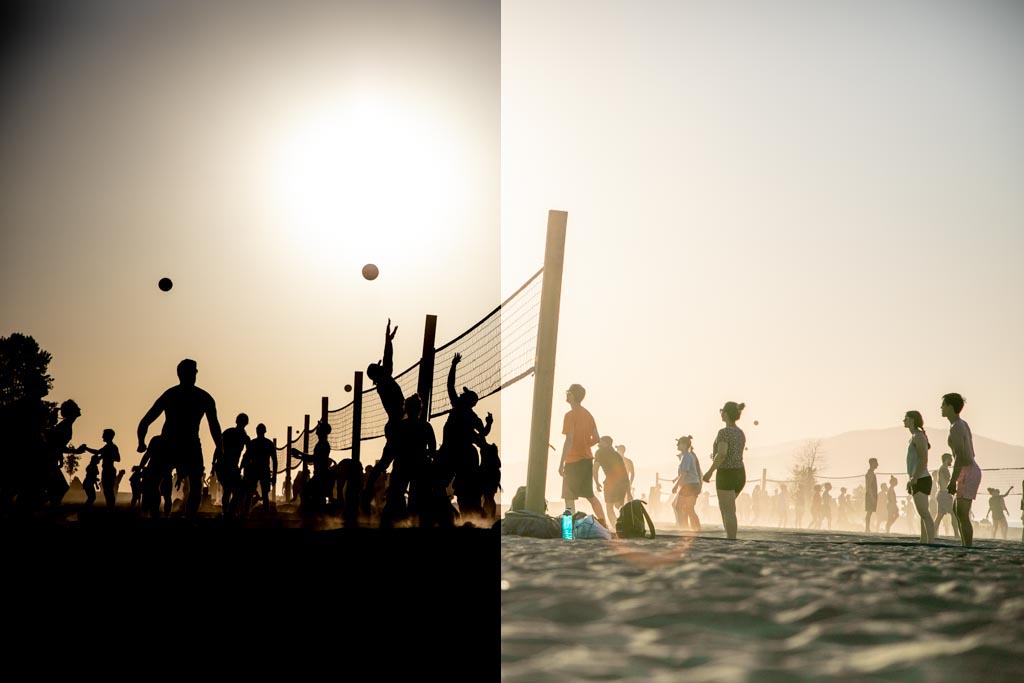
The most important adjustment I can make with a RAW file is the white balance.
White balance essentially equates to the “warmth” or “coolness” of an image in terms of the colour hue. We generally like our family portraits warm for example, to invoke a warm, nostalgic feeling.
White balance is connected to colour temperature and this in turn is a function of the lighting conditions. A candle gives off very warm light for example, as does a setting sun. The light from a blue sky (in the shade of a house on a sunny day for example) is quite cool.
On your camera you will likely have a white balance setting that you can adjust based on the prevailing conditions. Or you can set it to auto and let the camera make a best guess.
It has happened to me in the past when shooting a wedding that I forgot to change my white balance when transitioning from outdoor natural light to indoor artificial light. The result was that the indoor shots under tungsten bulbs looked way too warm. But because I shoot RAW it was a trivial matter to fix this in Lightroom.
RAW files allow you absolute leeway to adjust and correct your white balance after the fact.
JPEGs on the other hand kind of bake the white balance in. Sure you have some leeway to tweak it, but not nearly as much as a RAW file.
There are numerous RAW processing programs
Lightroom isn’t the only game in town when it comes to processing RAW files. Most manufacturers have their own proprietary software to do the job, although they’re not generally as feature-rich or well-designed as Lightroom. A lot of photographers like Capture One Pro and DxO Photolab too. And if you search online for “free RAW processing programs” you find some worthwhile resources there.
Consider the DNG for archiving photos
Before I wrap up, I just want to point out that all the major manufacturers have their own standard for creating RAW files and their own file types and extensions. Canon uses CR2 files, Nikon uses NEF files, Sony uses ARW, and Fujifilm uses RAF for digital cameras. The only thing approaching a standard for lossless image files is the Adobe DNG (digital negative) file type. Some photographers believe that this is the best way to store your photo files as it will always be supported by Adobe products, whereas other file types may become obsolete.
Well I hope I’ve given you enough information to help you decide whether RAW shooting is right for you. Fell free to hit me up in the comments with any questions!

