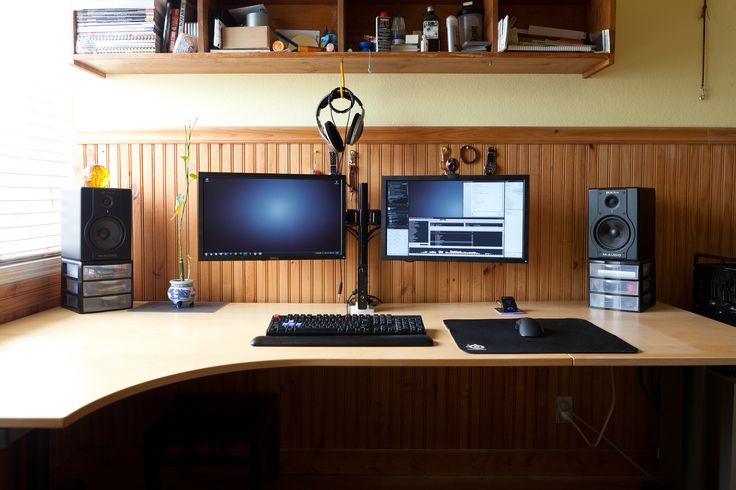
I’ve been a big fan of multiple monitor workstation setups for decades, since they were mainly just a novelty you would see in movies about hackers. There are so many great reasons why they’re worth setting up. Today it’s easier than ever to get started and there are plenty of options to help you get a custom setup perfectly suited to your needs.
A multiple display workstation can have many benefits. If you ever multitask then you should certainly consider it. Have two monitors lets you have multiple programs running on multiple screens simultaneously. Even if you just want to watch movies on one screen while you browse the web on the other, it can be very handy indeed.
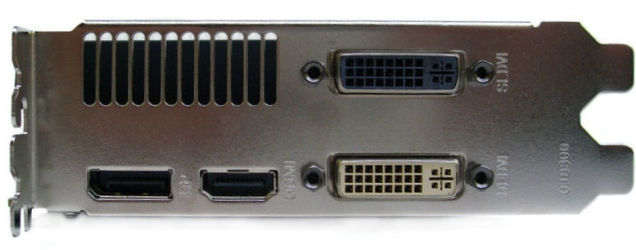
Let’s start by considering monitor size and resolution. I personally suggest that if you’re buying an extra monitor that you consider getting something as close as possible to matching your existing monitor. Having two or three of the same screen looks good and keeps your setup feeling harmonious. It also ensures that you’ll be running at the same resolution on each screen so that you get a seamless experience dragging across the screens. Alternately you can consider simply getting a new HDTV to plug in to your computer if you just want to use it for movies and stuff like that. HDTVs don’t generally have as high resolution as PC monitors but if you’re principally using this screen for movies, you’ll be fine with your 1080p HDTV being lower resolution than your existing PC monitor. When shopping for a monitor you’ll also have to consider compatibility. Generally an HDMI monitor should serve you well but not all monitors support HDMI inputs. You’ll have to make sure that the inputs on your new monitor have corresponding outputs on your PC.
Once you have your extra display you’ll need to set it up. I suggest getting a nice, long monitor cable to connect to your PC so that you have lots of flexibility for placement. You may want to re-arrange them in the future and if your cables are too short that could hold you back. You’ll also need to check the ports on your computer. Many new laptops have HDMI ports built in for external displays, and lots of desktop PCs can support extra monitors out of the box. You’ll need to check your system for the specifics. Some machines support multiple HDMI outputs simultaneously. Other machines have lots of outputs but only support running on two at any given time, rather than all at once. It typically depends on the specifics of the video card your system runs on.

If you find that your computer isn’t sufficient to run all the displays you want to then now would be a good time to consider installing a new video card. A lot of newer video cards support multiple monitors, and it may actually be possible to install multiple video cards in your PC simultaneously so that you can add more and more monitors to your glorious new setup.
When looking at how to arrange the monitors on your desktop, I recommend at least a basic monitor stand to elevate the height of your screen. Old multiple monitor setups used to take up a lot of desk space with CRT screens but even with flat panel displays, you’ll want to be cognizant of desk space and ergonomics (check out our post on preventing eyestrain for tips on PC monitor ergonomics). With multiple screens it’s worth taking a look at a monitor mount which can completely lift your screens up off your desk, and give you added adjustability on articulated arms with VESA mounts, if all your monitors support VESA mounting brackets.
One of my favorite new trends is having one or more monitors pivoted to portrait orientation. This is ideal for people working with a lot of text (reading or coding for example) as it reduces scrolling. Widescreen (landscape) orientation is not ideal for all applications after all. A lot of people are starting to keep one screen in portrait orientation and another in landscape with their multiple display setups. A good monitor stand can incorporate pivot, and there are many monitors you can get with pivoting integrated out of the box.
As far as setting up the software goes, In Windows you’ll want to make sure everything is plugged in and turned on properly. Once Windows is booted up and you log in, right click your desktop and click “Display settings” in the popup menu. A settings box will open showing your extra displays with numbers on them. You can click on any one then the ‘identify’ link to have a big bold number pop up on that screen to help you identify which one it is. If you want to extend your desktop across multiple displays (which is what is recommended) you’ll want to select “Extend these displays” in the “multiple displays” drop down box. With that done you can simply now select each display by clicking on the corresponding box, and select the orientation you want to use on it. Windows will attempt to select the native resolution automatically, but if you want to tweak this, go to advanced display settings for that and other options like colour calibration, cleartype, and advanced sizing.
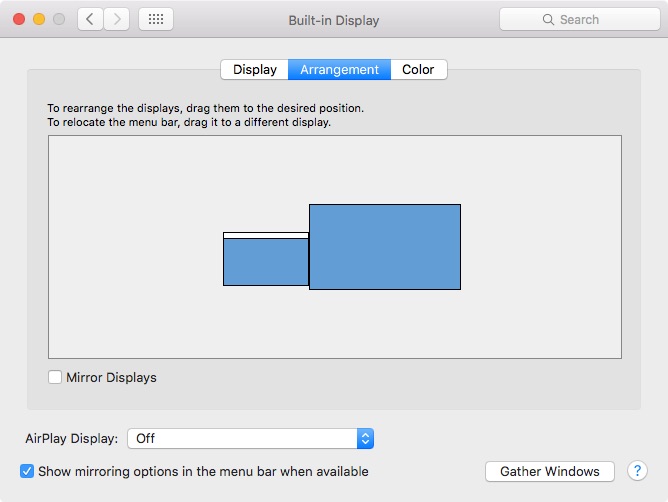
 On an OSX device it’s not much different. Connect and power up the displays as needed. Power up your machine and log in to OSX. If your display isn’t automatically recognized, go to the Apple menu then click system preferences. Click displays then display. Here you’ll see a ‘detect displays’ button. If you don’t, try holding down the option key to make it appear. Clicking this button should initiate display detection on your machine. With your displays detected, you can now arrange your displays as needed and create your extended desktop by going to the Arrangement option in the displays section of System Preferences. With that done you’ll be ready to go on your new multiple display workstation.


Or just get one of those 4K monitors…. it’s like having 4 monitors on your desk.
http://www.bestbuy.ca/en-CA/product/asus-asus-28-4k-uhd-60hz-1ms-gtg-tn-led-gaming-monitor-pb287q-black-english-pb287q/10301525.aspx
Comments are closed.