 I’m a huge fan of all things KitchenAid. I was hooked from the moment I received my first KitchenAid Stand Mixer 8 years ago, and I’m an even bigger fan after upgrading to the Aqua Sky KitchenAid Artisan this past Christmas. There’s something so quick and easy about using a stand mixer, and I really feel as though I’m much more inclined to bake everything from scratch when I know I can pour everything in the bowl. flip it on, and mix everything together quickly and easily. In this article I will review the KitchenAid Deluxe Spiralizer attachment for this mixer.
I’ve made cakes, cookies, bread dough, and more, but that’s only scratching the surface of what a KitchenAid Stand Mixer can do in the kitchen. I knew there were attachments available for the stand mixers, but I had never really tried them beyond using a pasta maker attachment one time.
What I didn’t know was how many attachments there were for the KitchenAid, so when I was asked to try them all out and write a review of each one, I was shocked by what showed up at my door. There are grinders, ravioli makers, ice cream makers, and multi-tools designed to chop and peel, plus KitchenAid makes juicers and food processors that pop right onto your mixer and make every kitchen task easier.
Naturally I did what any other appliance-enthusiast would do: I jumped up and down a little bit and started unpacking boxes. It wasn’t long before I knew the KitchenAid Spiralizer would be my first review, and I’m so impressed with what a cool accessory it is.
Appearance and features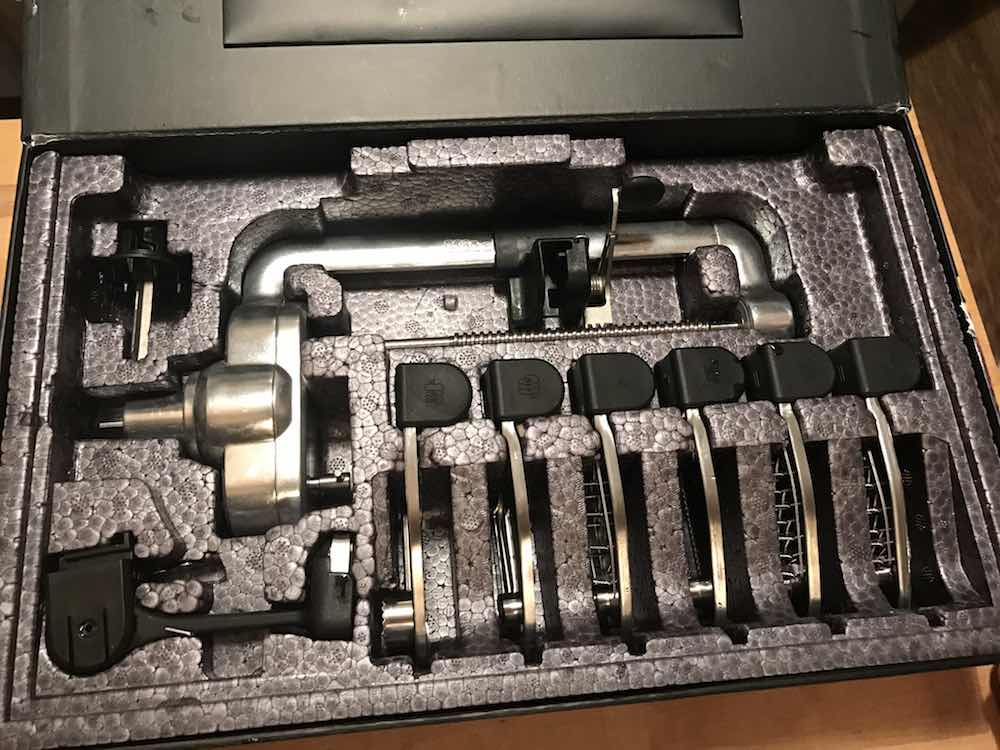
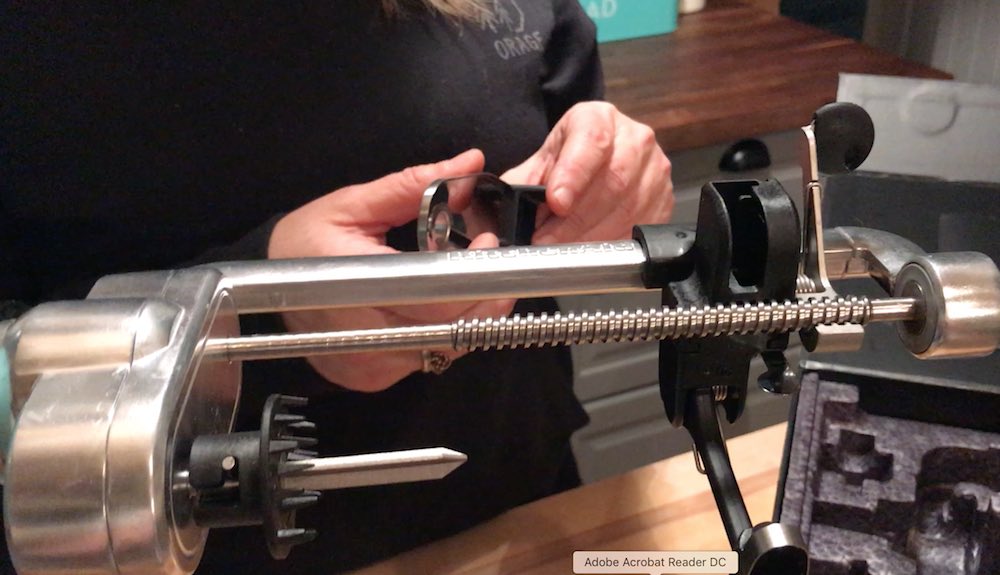
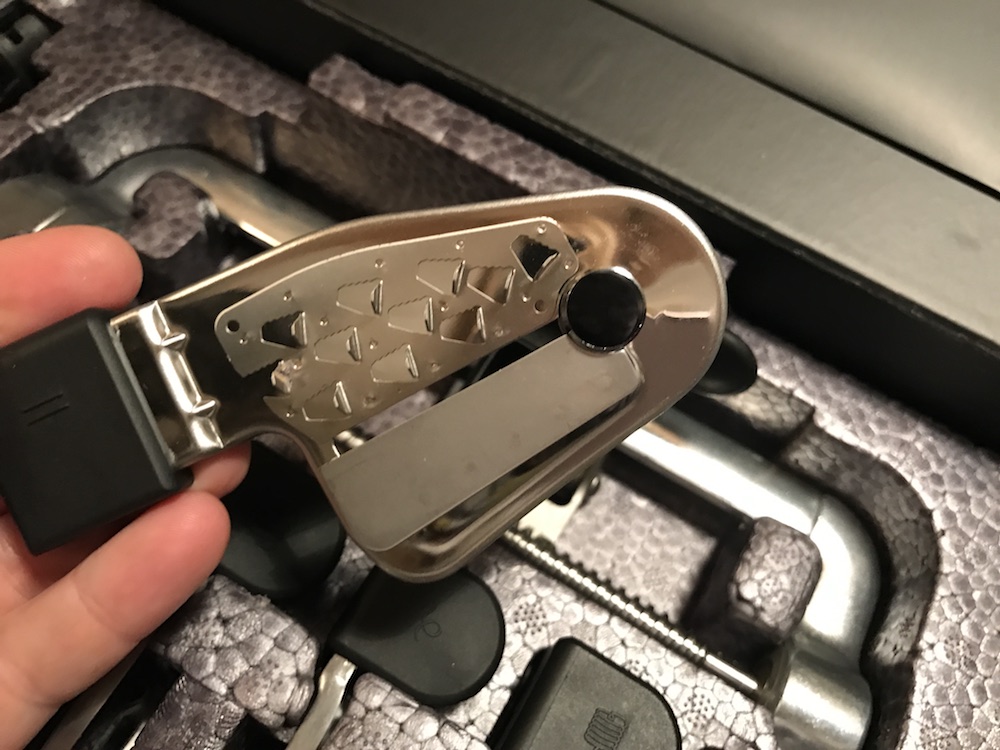
The KitchenAid Spiralizer is an attachment for your stand mixer that lets you peel, core, slice, and spiral your fruit and vegetables. It’s a long metal attachment that pops right onto the front of your mixer, and you can add six different blades, a peeler, and a skewer to the spiralizer to achieve different results.
The KitchenAid Spiralizer includes:
- Fine Spiraling blade that creates spaghetti like strands
- Medium Spiraling blade
- 12 mm Spiral slicing blade for ribbon style fruit and vegetables
- 23 mm medium spiral slicing blade for larger core fruit and vegetables
- Peeling blade
- Coring skewer
In total, there are 10 different combos you can use to slice, peel, core, and create cool spirals with your fruit and vegetables.
Testing the KitchenAid Deluxe Spiralizer
Installing the KitchenAid Spiralizer takes about 2 minutes. You take the cap off the front of your stand mixer, pop on the spiralizer attachment, tighten the bolt, and you’re ready. The slicing blades are easy to take on and off, and it’s also very easy to add the skewer and peeler.
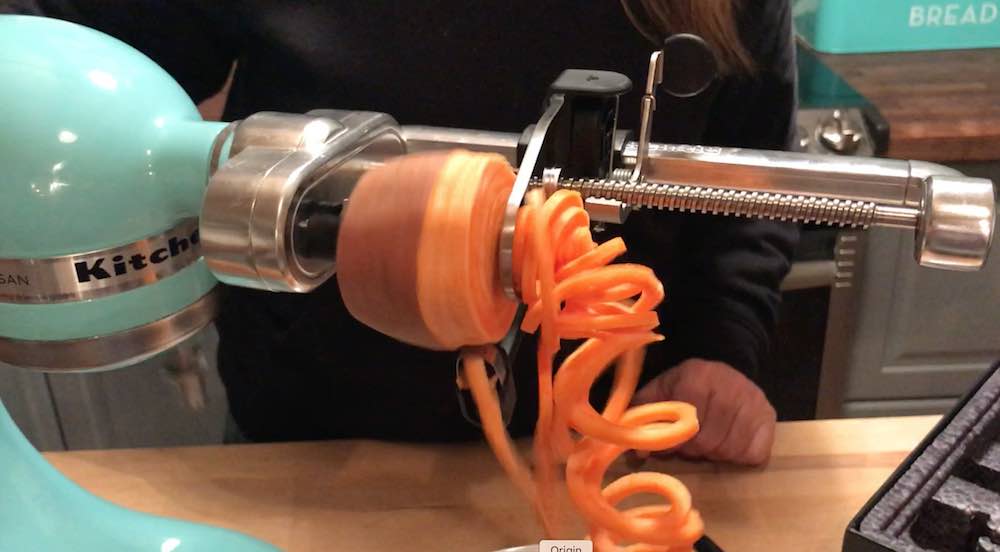 The first slicer I added was the medium spiralling blade. I choose to use the peeler as well so I didn’t have to peel the sweet potato I was spiralling. Before you begin spiralling you’ll have to prepare the sweet potato by slicing off the ends, removing any eyes or bumps, and putting it on the skewer.
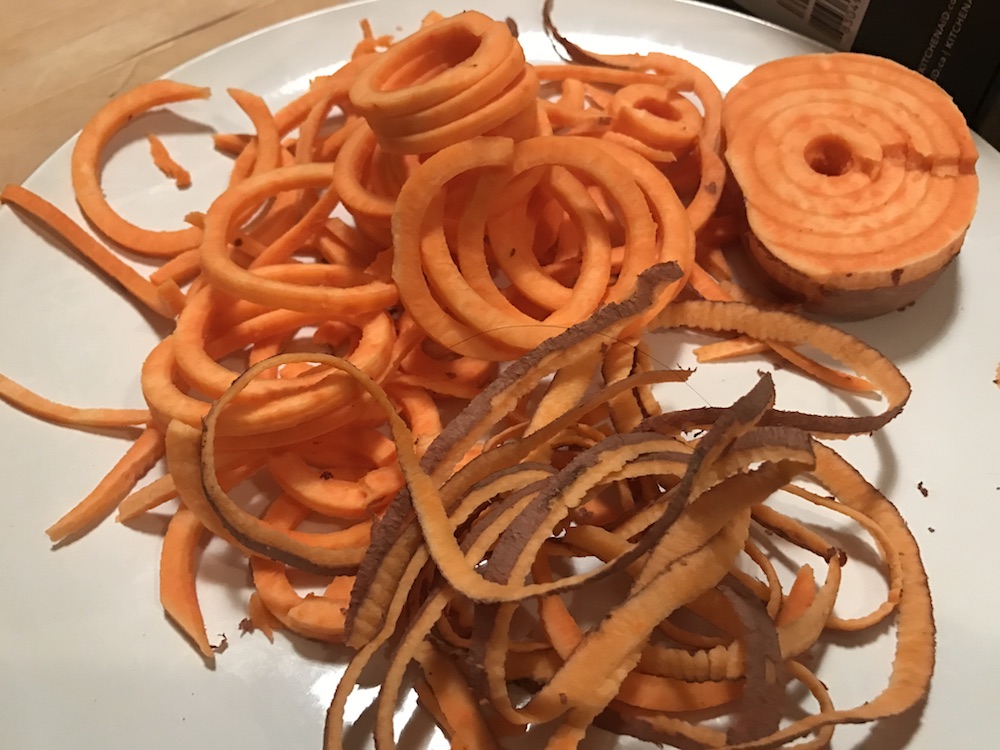 In the KitchenAid booklet there is a recommendation for each blade, and you can use vegetables like potatoes, sweet potatoes, yams, beets, zucchini, and cucumber. For fruit the most obvious choice would be an apple, but you can also try pears too.
I put the medium spiralling blade onto the spiralizer, added the skewer and the peeler, and popped on my prepared sweet potato. Once everything was ready I turned it onto speed 4 and the spiralling began.
I think the shape of your fruit or vegetable is really important when using the spiralizer with the peeler. As long as it’s fairly round you’ll be able to peel 100% of it, but don’t be surprised if there’s a small bit of skin left on the slices. It’s very minimal though.
When the spiralling was complete my sweet potato was in perfect curls, and it would be great to use as sweet potato curly fries or steam as a fancy side dish.
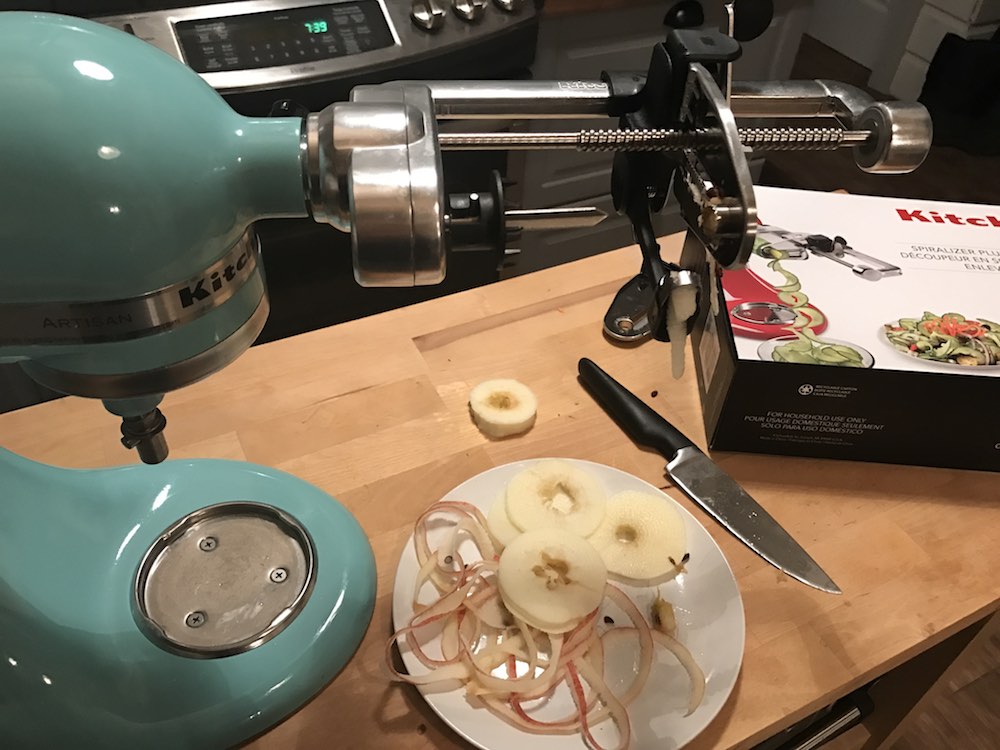
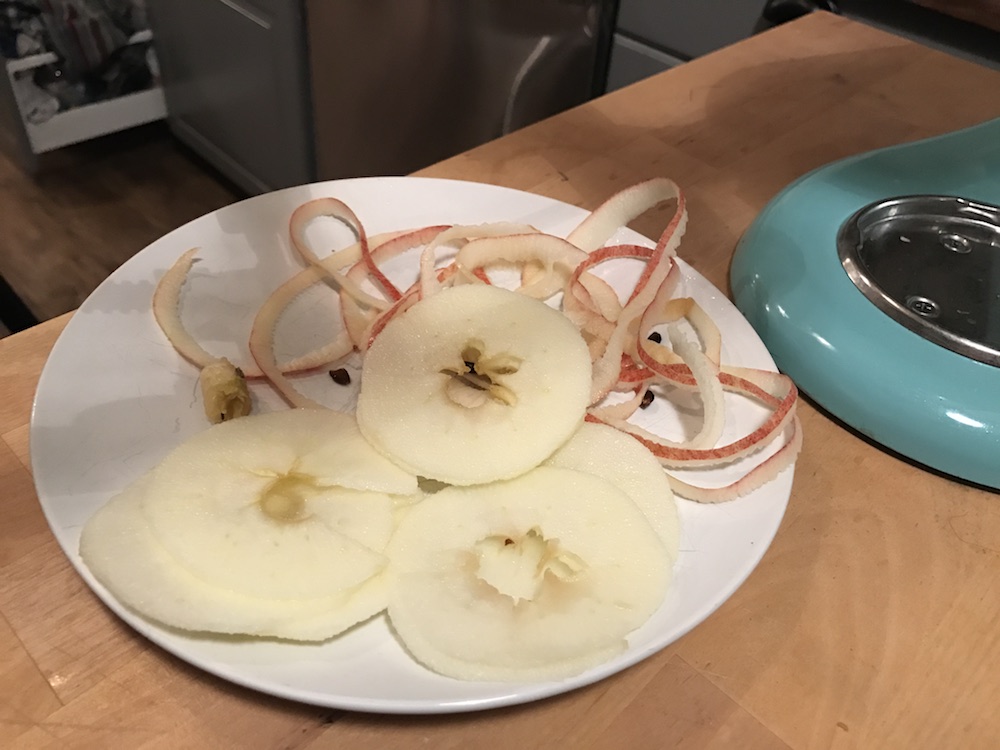 Next I tried the spiral slicing blade with an apple. I prepped the apple in the same way I did the sweet potato and put it on the skewer. It sliced very easily and cored and peeled the entire apple at the same time.
I’ve always thought that it was easier to just peel an apple with a paring knife, but after trying the spiralizer I’m not sure I’d ever do it that way again. To peel, core, and slice all in one movement? It’s so easy, and the slices are so thin that they make for the best apple pie.
 Cleaning the KitchenAid Spiralizer
Clean up is very simple when you’re using the KitchenAid Spiralizer. The main body of the device can be cleaned with a damp cloth, and you just whip it down and put it back in its case. The blades themselves are all dishwasher safe, but you have to put them on the top rack or third rack of your dishwasher so keep that in mind. I don’t recommend washing them by hand because the blades are very sharp and you could easily cut yourself.
The skewer and the peeler are also dishwasher safe, so everything is really easy to clean.
Overall thoughts on the KitchenAid Spiralizer
What’s not to like about a device that spirals, slices, cores, and peels your fruit and vegetables in one quick and easy motion?
For me the real test of an appliance or an attachment for an existing appliance is whether or not it justifies the time it takes to set it up. Because you can attach the Spiralizer and blades in less than 5 minutes, it’s well worth the amount of time it would take to set it up and use it.
With the Spiralizer the sky’s the limit for what you can create: veggie pasta strings, unique salads, and thin slices of fruit and veggies for snacking. It’s all quick, easy, and fun.
You can find your own KitchenAid Deluxe Spiralizer on Bestbuy.ca right now, and check back next week when I test out another KitchenAid Attachment by making homemade pasta with the KitchenAid Ravioli maker.

