 Taking photos with the Fujifilm X-T4 can be satisfying when you learn enough of its features to get the best shot possible. For those in the know, there is an ongoing debate over whether it’s better to go with a mirrorless camera that has a full-frame or APS-C sensor. That’s beyond the scope of this review, but suffice it to say, the X-T4 makes a strong case for the latter. This is a camera made for more intermediate and advanced photographers, as Fuji has squeezed in plenty here. It’s also the kind of camera you would graduate to after using something more entry-level where you’ve learned the ropes. Fuji’s X-T3 is still a popular model, and a worthy option, but the X-T4 adds some important extras.
Fujifilm X-T4 design similar to X-T3
I never had the chance to shoot with the X-T3, but you can read a review about it here on the blog. Much of what Justin points out in his assessment rings true with this model as well. Fuji clearly based the X-T4 on its predecessor, which means there are more similarities than differences.
So, what is different? For one, there’s now in-body image stabilization, taking that job away from the lens exclusively. Second, you get better and faster autofocus. And for the vloggers out there, you also get a new flip-out 3-inch touchscreen in the back that you can orient either way. Indeed, some of Fuji’s changes and additions are aimed at users who want better video. However, there are benefits for still photos, too.
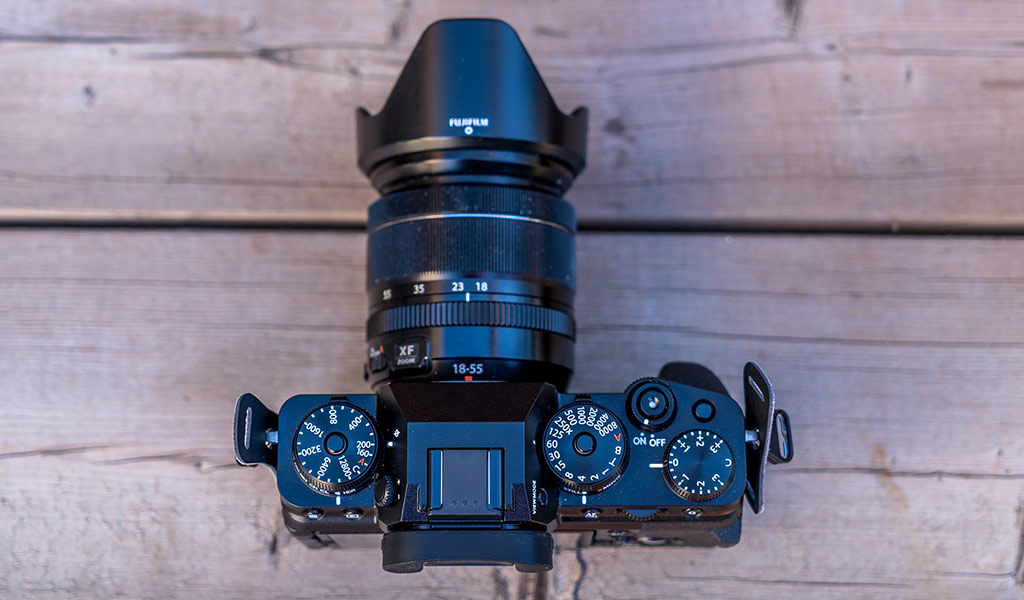
The body and overall design are similar. Fuji went with the same 26-megapixel APS-C sensor found in the X-T3, and naturally, the same X-series lens system. The body is wonderfully constructed, making this one of the most comfortable cameras I’ve personally shot with. I also appreciated the dials at the top to control ISO, shutter speed and exposure compensation.
It’s those dials that make it abundantly clear who this camera is for. It leans heavily toward manual control, eschewing special scene modes that are more automatic by design. There is an auto mode, mind you, but if you get this camera, you should completely ignore it. Physical buttons and controls are key to using the X-T4, but so is the sometimes confusing menu system onscreen.
This is a camera loaded with features, except many are buried in the system, which is why I would recommend downloading a digital version of the instruction manual on your phone to have with you at all times.
Setup and layout
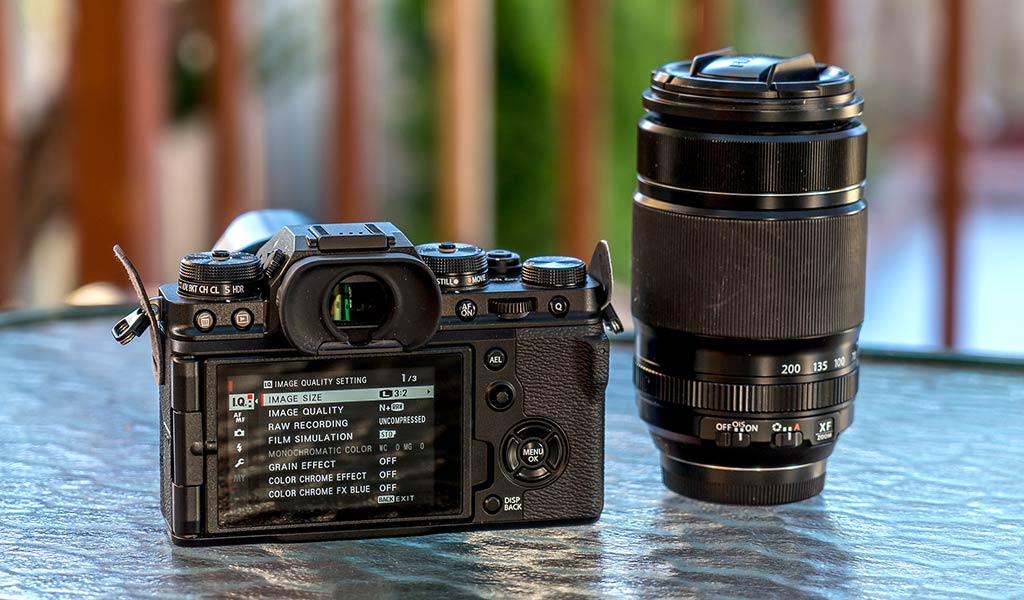
A good example of what I’m referring to is in the phase-detection points. By default, Fuji sets the X-T4 to 117 points, whereas you also have the option to shoot with 425. That means you can move the focal point around to more precise portions of the frame. And if you want to expand or tighten the point, just click the joystick, and then use the rotating dial above it. Doing this pays real dividends when shooting certain subjects, especially at a distance or in long exposures.
Other nuances do come into play. For instance, I was initially lost on how to switch to manual focus, thinking that switching it on the lens itself was enough. It wasn’t, and that’s because the switch is at the front of the camera body. I thought it would be something to change in the menu system, like in other cameras, but not in this case.
Under the ISO dial is a separate dial to toggle through different shooting or drive modes. Advanced shoots with filter effects. Bracketing can shoot multiple frames at different settings in one sequence for better output. Burst shooting can be high (CH) or low (CL). HDR captures a scene at different exposures to merge them together into one dynamic range image. And then you have just a regular single frame (S) mode.
As always, Fuji includes Film Simulation modes, adding another one (Eterna Bleached Bypass) to make it an even dozen. This latest one is artistic in that it desaturates the photo to give it more character. Your experience may vary with these modes depending on what you’re shooting, but they are well worth experimenting with.
Autofocus
Fuji set out to improve the autofocus (AF) in the X-T4 by not only making it faster, but also more precise. I would argue this is more impactful for following a subject with video, but there is more to it than that.
You can choose to shoot a single point, zone or wide/tracking (or even all of them). Face and eye detection are fairly quick, and kick in regardless of the mode you use, which is great with people. But I preferred to shoot at a single point or wide area because I couldn’t always trust the tracking would stay locked onto the subject. The speed of the lens does matter, which is why my results would vary from the 18-55mm and 55-200mm lenses I used.
I kept face and eye detection on because I could always override it by moving the focal point where I wanted it. That’s great for situations where you want to capture a person and background scene for bracketing or focus stacking purposes.
If you’re not familiar with Fuji’s system, it may take some trial and error to learn how it works. That goes for video, too. Face or eye detection may not be on by default, and if you want a continuous focus to stick with a subject, you could adjust that to AF-C in the settings.
Storage and processing
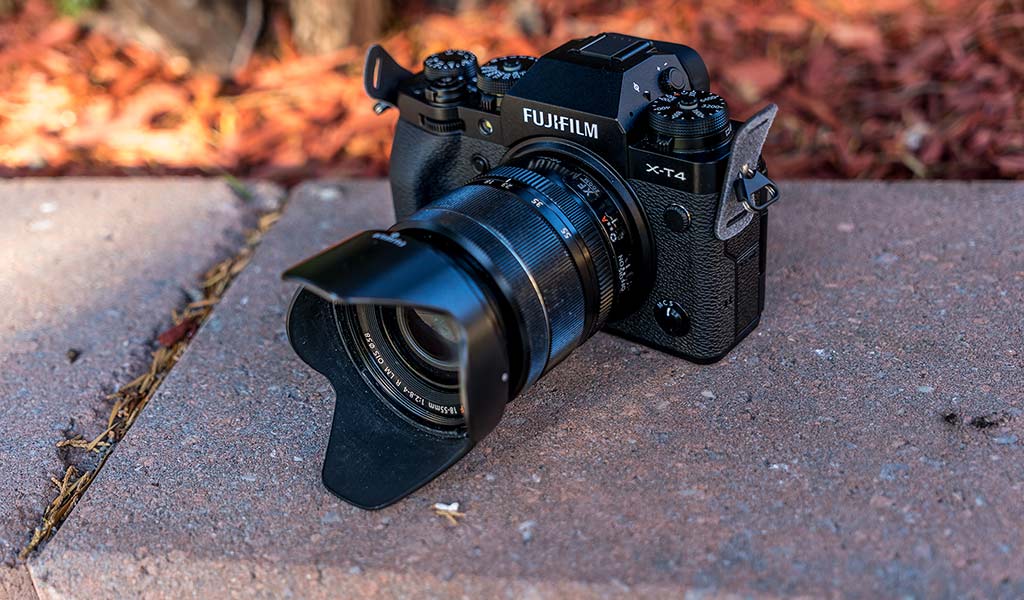
The X-T4 has dual SD memory card slots that support both UHS-I and UHS-II cards. With the latter, you get faster read and write times, which is also great for shooting faster bursts or video in 4K at higher framerates. They are pricey, especially compared to UHS-I cards, but there is demonstrable difference between them.
Either way, with two slots available, you can make it so that you shoot video on one, and stills on the other. You would need to switch between the slots in the camera, which isn’t terribly convenient. You could also use two cards as redundancies, meaning that whatever you shoot saves to both, so that you don’t lose what you have if one fails. Again, this is the kind of thing that works better on UHS-II cards, but you can do it with UHS-I cards, too.
A card’s speed also matters if you’re shooting in RAW. For a camera at this level, I don’t see how you can’t shoot in RAW (at least some of the time), but shooting bursts this way does lead to a delay to save the shots before it can capture more. That’s less of a hindrance with the faster UHS-II cards.
Bear in mind that Fuji’s Photo Transfer app doesn’t work with RAW files, so you would need to move them to a computer first. Then you could edit them using Lightroom, Capture One or another application.

Photo quality
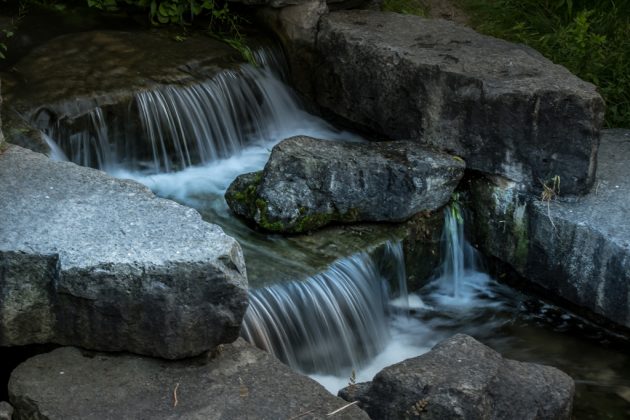
As I’ve noted in other camera reviews I’ve done, I always shoot in RAW. It gives me the flexibility to edit and process photos the way I want. JPEGs come out from the in-camera processing. Fuji has had a pedigree in making images look good, regardless of the format, and it’s great to shoot in both. The examples I share here were RAW images edited in Lightroom.
The X-T4 impressed me with its ability to capture a variety of scenes. Daylight, sunset, moonlight, people, animals, architecture, nature—it was solid consistency. I grew to love the dials up top for quick shifts in ISO or shutter speed, letting me change on the fly.
Because the camera has so many tools, you may feel like you missed something. For instance, I was shooting a challenging sunset without realizing I could try it in HDR mode. That would have taken a few shots and combined them into one RAW file I could edit later. In another example, I forgot to try bracketing when shooting a landscape to gauge the results. And those are obvious features. Never mind the tweaks hidden in the menu system, or the Film Simulation modes.
Capturing action also carried a learning curve because I had to learn the AF tracking. Admittedly, I’m more comfortable with how it works on Sony cameras, but it wasn’t bad here.
What is absolutely crucial to using this camera is patience, for the simple fact there’s so much in it. When you get the right settings and composition, the results can be outstanding. It’s also worth exploring Fuji’s lenses to get more variety and optical prowess to improve photos further.
Video
I’m not sure photo quality is all that different from the X-T3, though video certainly benefits from the changes. In-body stabilization makes a big difference maintaining a steadier shot when holding the X-T4 in hand. You can shoot in 4K and save in either h.264 or h.265 formats. Shoot faster action or go low with slow-motion at 240fps.
There’s lots to experiment with on the video side, and I came away impressed with the quality footage I got. But I wasn’t crazy about the way focus tracking works. Coming from a Sony system that does a great job locking onto a moving subject, I had to work harder for it here on the touchscreen.
I already mentioned the face and eye detection, and beyond that, there are two AF modes: Area or Multi. Neither of these is the same as the X-T4’s wide-tracking option when shooting photos. Area lets you set the size of the AF box to keep the subject within it. Multi looks at the whole frame to track subjects. The menu also lets you configure sensitivity and tracking speed for them through AF-C settings.
If you know your way around shooting video, this will also sound familiar. If not, it’s something you’ll need to learn before you do anything. The shutter also acts as the recording and stop button. Half-press it and you can focus on something while shooting, but you do need to be careful you don’t accidentally stop filming.
The new articulating screen is better suited to video than stills. It was more challenging to try taking photos at low angles, yet far easier with video. If you want to do selfie videos, that’s easy enough by flipping the screen toward you. And to protect the screen during transport, flip it in toward the body.
Battery life
Fuji rates the X-T4 at about 500 photos per charge. That’s on “Normal” mode, whereas “Economy” mode can push it up to 600. I never used Economy mode for any real stretch of time because it reduces the speed of the AF and the screen to 30fps. It also goes to sleep faster at just 12 seconds. If you’re in a power crunch, I could see its use, but I prefer to have every feature available.
Battery life is better than what the X-T3 offered, and on par with other cameras in the X-T4’s range. Your mileage will really vary if you’re also doing video, and it’s impossible for me to approximate how long it would last in that kind of scenario. Either way, you should feel more than confident that you can get 400 stills before charging up.
Final thoughts
The X-T4 came from a camera line that already laid the groundwork. What you have here isn’t revolutionary, by any means, but it’s highly functional and reliable. This is the kind of camera you graduate to, even from an entry-level DSLR. The physical dials force you to know what you’re doing when taking photos. Though I would say the X-T200 is the better option if you’re looking for a step up from a smartphone or entry-level camera.
I would recommend this camera if your intention is to do both stills and video. It’s the best combination of the two Fuji currently offers. While I’m not as big a fan of the video features as I am of other brands, this is still a solid step forward in the right direction.
The Fujifilm X-T4 is available now in black (body only), silver (body only), with the 18-55mm kit lens, and with the 16-80mm kit lens (silver or black).


