I scream, you scream, we all scream for ice cream!
The summer ain’t over yet (thank goodness), and the heat is a perfect excuse to have more ice cream—not like that stops you in the winter! But when it’s hot outside, the chimes of the ice cream truck make your inner child jump for joy.
When I was a kid, I obsessed over those classic rectangular ice cream sandwiches. Remember those? Vanilla ice cream and two thin layers of doughy chocolate cake, delicious! And when Oreo came out with their ice cream sandwich, I was overcome with gluttony. My family loved ice cream so much that we’d order an ice cream cake for everyone’s birthday. Now, however, though I do enjoy my old favourites once in a while, I’ve started to appreciate high-quality ice cream with natural ingredients. I can make healthier, better-tasting treats by using more chocolaty cookies or Haagen Daz Tiramisu Gelato.
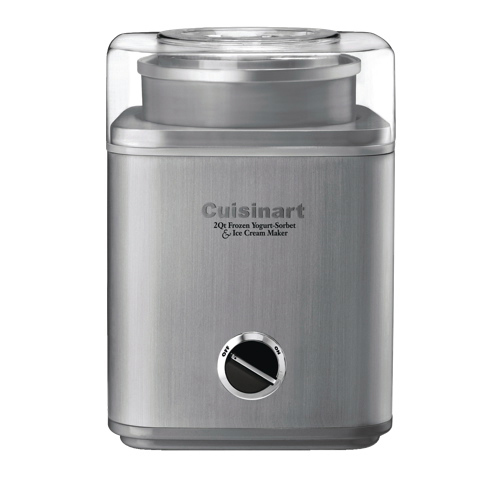
 I’m not expecting you to make your own ice cream, only to choose your favourite flavours. However, I know that some of you are ambitious bakers (I salute you) who would like to go the extra mile. First off, you’ll need an ice cream maker, such as this one from Cuisinart. Then, check out this simple recipe from Southern Living for vanilla bean ice cream. Yum yum!
As I mentioned before, my family would order a cake from Dairy Queen for everyone’s birthday. It was tradition, and we loved it. I especially liked the bottom half of the cake, the cookie fudge. I would cut my slice on an angle so I could get more of the chocolate layer and less of the vanilla. If you make your cake instead of ordering it, you can control how much of your favourite ingredients you get, which for me are extra fudge and cookies. I love this recipe from Kitchn, which is fittingly titled How to Make Ice Cream Cake Better Than Dairy Queen. If you have kids, they’ll have a lot of fun making the cake with you.
|
Ingredients: 2 quarts vanilla ice cream |
Directions
- Set up your pan: Lay a sheet of parchment or wax paper on a baking sheet, and place your cold springform ring (without the bottom) on top.
- Whip the vanilla ice cream: Whip the vanilla ice cream with a mixer for about 2 minutes, or until fluffy but still frozen.
- Create the vanilla ice cream layer: Spread the whipped ice cream up the sides of the pan, creating a thick layer of vanilla all around. Spread the rest in the bottom, and smooth out. (A little ice cream may puddle out the bottom as it melts. This is fine; we’ll take care of that later.)
- Add 2 cups crushed cookies: Spread a thick, even layer of cookies over the ice cream and lightly press in.
- Add 2 cups fudge sauce: Warm the fudge sauce just enough to make it easily pourable, but not too hot, then pour over the cookies.
- Freeze for 4 hours: Freeze for at least 4 hours, or overnight if you have the time. (For more, check out Kitchn).
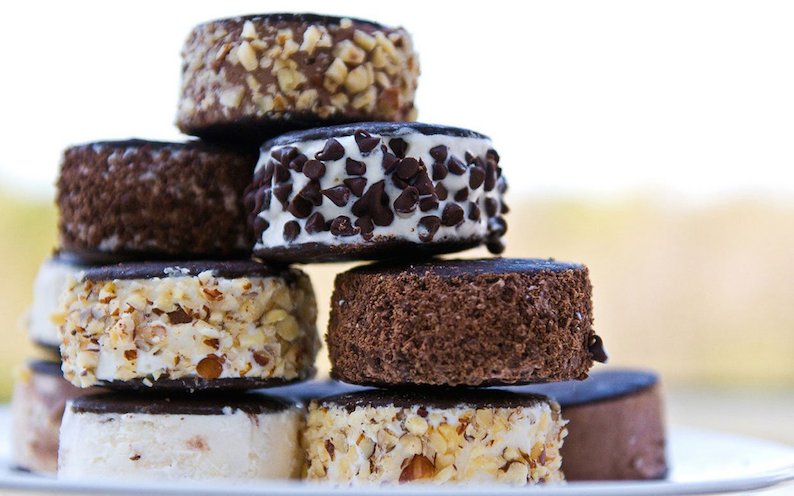
 Ice cream sandwiches are the Mecca of my heart’s desire. So let’s take two of your homemade cookies and put your favourite ice cream flavour in between for the ultimate combination. I’m sorry if your mouth is drooling; mine is right now. Chocolate chip cookies are everyone’s favourite, so check out this simple recipe from the Food Network. I like this one because it encourages you to cover the ice cream part with chocolate candies, like mini M&M’s, crumbled cookies or Skor bars.
|
Ingredients: 1 cup firmly packed brown sugar |
Directions
Preheat the oven to 375 degrees F.
In a mixer, combine the brown sugar, white sugar, butter and margarine until combined. Add the vanilla and eggs, and stir together.
In a separate bowl, stir together the flour, baking soda, instant coffee and salt. Add to the wet ingredients in three batches, mixing gently after each addition. Stir in the chocolate chips, flax seed and millet.
Drop balls of dough on a cookie sheet and bake for 11 minutes. Remove from the cookie sheet and allow to cool.
Using a kitchen scoop, take one scoop of ice cream and place it onto the flat side of a cookie, then top with second cookie, pressing to allow the ice cream to spread slightly. Immediately roll the edges of the cookie in chocolate chips or candies so that the ice cream is coated. Wrap individually in plastic and freeze until the ice cream is very firm, at least 4 hours.
 Popsicles are the most refreshing treats, especially if they’re made with real fruit. Say what? The chances of getting real fruit popsicles at a convenience store are slim. However, you can prepare great popsicles in your home that everyone will love. This recipe is both creamy and fruity, while being perfect for those who are lactose intolerant. Dairy-Free Cherry Almond Pops from Real Simple are a wonderful treat. All you need are pitted cherries, almond milk and lemon juice, and you are ready to go.
|
Ingredients:
2 cups pitted cherries (fresh or frozen)
2 1/2 cups almond milk
1/4 cup sugar
2 tablespoons fresh lemon juice
1/4 teaspoon almond extract
pinch fine salt
|
Directions
- Puree the cherries, almond milk, sugar, lemon juice, almond extract, and salt in a blender until smooth.
- Pour the mixture into 10 3-ounce or 8 4-ounce ice-pop molds, dividing evenly. Insert ice-pop sticks and freeze until firm, at least 4 hours and up to 4 days.
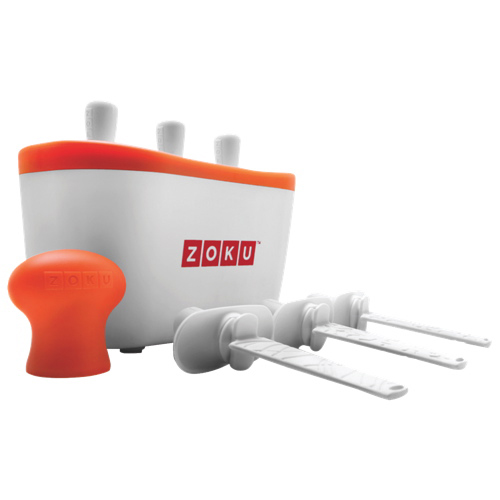
You’ll need to invest on a good popsicle maker set, and Zoku is the best.
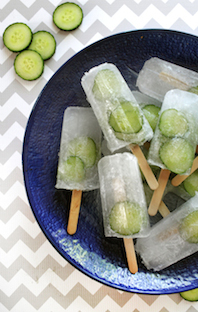
 Those who like refreshing summer cocktails will love this recipe for gin and tonic popsicles from Port Fin. It’s genius!
|
Ingredients:
|
Directions
- Mix together tonic, gin and lime juice.
- Place cucumber slices into popsicle moulds, then pour in tonic mix. Freeze overnight before serving.
Enjoy your summer time treats before it gets really old outside.


