
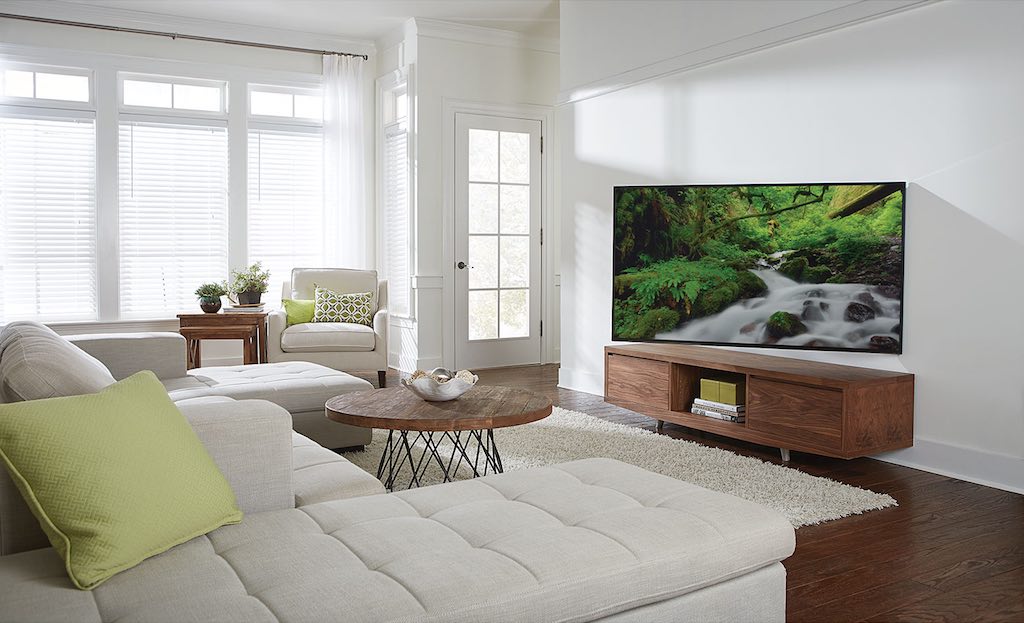
 Recently I got to install and test a product quite unlike anything I’ve ever tested before. It’s the SANUS 42″ – 90″ Full Motion TV Wall Mount, and in today’s review I’m going to give you full details of the product itself as well as the story of my installation of it. Read on if you’ve ever dreamed of mounting your big-screen TV to the wall but haven’t quite committed to doing so just yet.
SANUS Full Motion TV Wall Mount Parts & Components
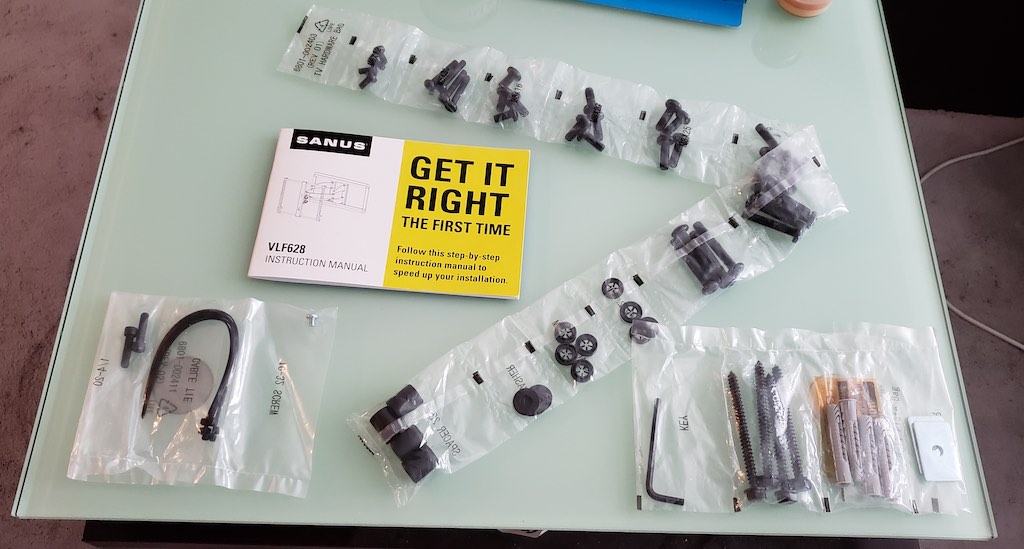
Numerous different components come with the SANUS TV mount, including the three major sections that the mount initially comes in (the TV bracket, the wall plate, and the arm assembly). There are also several different bolt sets, though many of these you won’t need to use because SANUS provides bolts in a variety of different sizes for use with different TVs.
There’s also a helpful template (shown further down the page) for hanging the wall plate properly and some additional parts like cable ties, washers, spacers (in a few different thicknesses for use with the TV bracket), and an Allen wrench.
While the sheer volume of parts can be a bit overwhelming at first, one needn’t worry too much as the mount comes with an excellent and highly detailed instruction booklet (shown directly below) that makes installation a breeze.

Helpful tools for wall mounting your TV
A few items that do not come with the mount but that you will need for the installation include a stud finder, a level, a pencil, a drill with a 7/32 inch bit, a socket wrench, a screwdriver, and an awl (I didn’t have this last one myself, but I was pretty confident in my stud finder and got by without it).
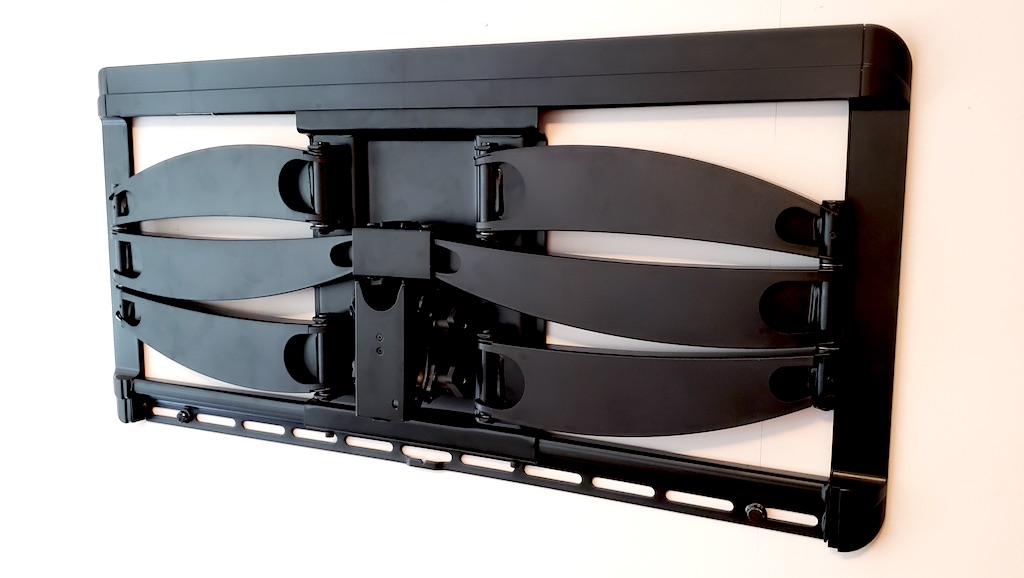
Features of the SANUS wall mount include the ability to hold TVs weighing up to 150 lbs (68 Kg) and with screen sizes between 42 and 90 inches, plus the ability to tilt up and down between +4 and -15 degrees, the ability to extend up to 28 inches (71 cm) out from the wall, and the ability to rotate from side to side to provide views of the screen to pretty much any part of the room.
The Sanus also features solid steel construction and is VESA compliant, so its general feel and overall build quality certainly inspire confidence. Once this thing is up, it isn’t going anywhere!
My SANUS Installation Experience
When the SANUS first arrived, I was somewhat shocked at its large size and hefty weight. This thing is HUGE, and rather heavy as well, weighing just over 51 pounds. Picking it up left me wondering whether it might bring the entire wall down around my ears. But then I saw the bolts that fasten it to the wall (they must have been 4.5 inches long) and read in the instructions that this mount can handle TVs up to a maximum weight of 150 lbs, which immediately had me feeling better.
Needless to say, you don’t want to install this mount on a drywall only wall, but either drywall with wood studs (be sure to anchor your bolts directly into the studs—as near to their centre as possible) or a concrete wall is fine.
Step 1: add brackets to the TV
One of the first steps in the installation process is to bolt the TV bracket to the back of your TV. This may or may not require using spacers (to keep the bracket further out from the back of your TV, which are necessary if your TV is curved or otherwise uneven at the back). Washers are also included for the process, and you’ll have to eyeball the many included attaching bolts to determine which are the best fit for your specific TV.
(This process is not unlike the one Erin used when she reviewed another SANUS mounting option the Swivel TV Base, on that gives the illusion of wall mounting, without actually drilling anything into the wall! Read more here.)
Step 2: affix wall plate
Once this is done, you can go about affixing the wall plate to your wall. This is probably the biggest part of the job and requires the most outside tools. Unfortunately for me, I own neither a stud finder nor a drill, but was luckily able to borrow both.

As far as the process went, I simply located and marked my studs with the help of the stud finder, determined where to drill using the included wall template (shown above), drilled my guide holes with the recommended sized drill bit, moved the wall plate into position and made sure it was level, and then screwed in the massive anchoring bolts using a hand held socket wrench.
Note that two good sized rectangular washers came with the kit for use with the bolts holding the top of the wall plate into position. There were no washers included for the bottom two bolts. There’s also a nice strip of plastic that goes along the top of the wall plate as a sort of finishing piece. And, similarly, there’s a nice looking bottom strip as well.
These strips are easily removed before installation of the wall plate and later put back into place without any difficulty. The photo below shows the top strip back in place while the bottom one is still removed, exposing the heads of the lower two anchor bolts.
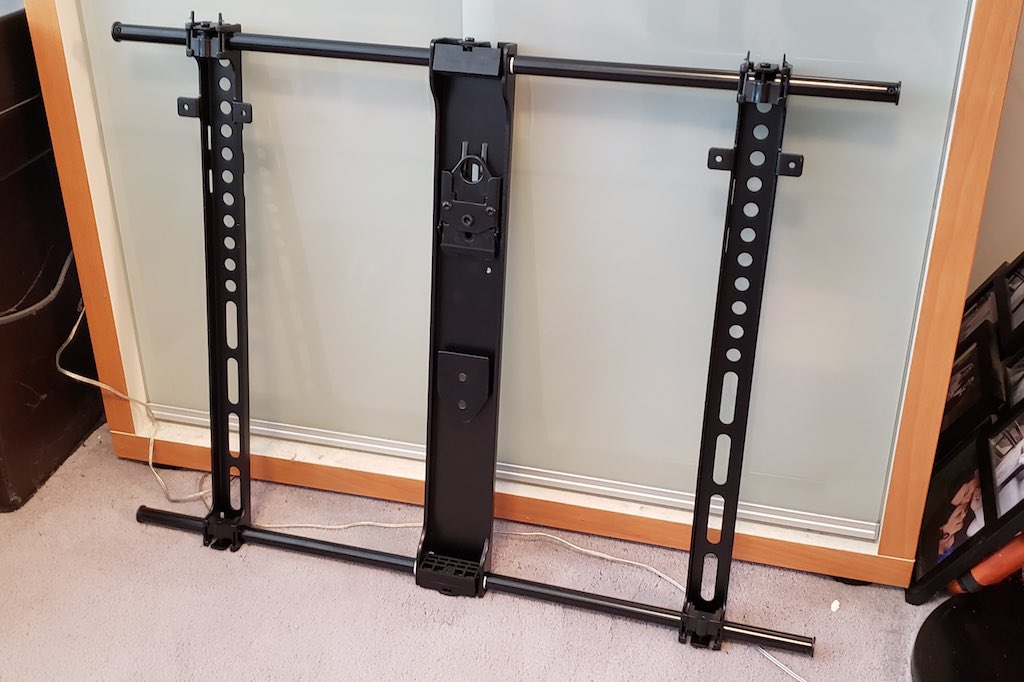
Step 3: add arm assembly
With the wall plate firmly affixed to my wall, I next had to properly place the arm assembly, which simply fits into position over a large lip along the top of the wall plate before being screwed firmly into place where the bottom of the plate and the assembly meet. The result of what this looks like (again, with the bottom finishing strip missing) is shown in that image above.
Step 4: hang the TV
The final step in the process is to place the TV itself onto the assembly arm and insert a few final securing screws. You basically have to lift your TV into position and lower it over the part of the assembly arm that looks (in the image above) like an upturned horseshoe. With everything sitting in its proper position, you’re ready to attach your power and cable (or satellite) wires and begin watching your big screen.
I have to admit, I don’t do a lot of these kinds of installations myself as I live in a private apartment and many such projects are not permitted. However, installing the SANUS really could not have been easier, and I’m so happy to now have it up and working as intended. It allows me to tilt the TV toward the kitchen so I can watch hockey games while washing dishes, which I may now have reason to gladly do more often. Win, win!
Examining the Video Evidence
For a better understanding of the SANUS’ features and benefits, as well as a look at the end result of my installation, please take a few minutes to watch my brief video overview of the experience:
Overall review of SANUS Full Motion Wall Mount
I’ve never had a TV wall mount before, but I’m pretty confident in saying that the SANUS 42-90 inch Full Motion TV Wall Mount is an absolutely top of the line product. It’s easy to install, makes my TV much easier to watch from virtually anywhere in the room, and I’m reasonably satisfied that it’s solidly affixed to the wall for many years to come (barring any major disasters).
If you’d like to learn more about this excellent TV wall mount, Best Buy recently published an informative showcase article on it. Beyond that, take a gander at Best Buy’s TV & Home Theatre section for all of your screen related entertainment needs.
Find the SANUS 42″ – 90″ Full Motion TV Wall Mount at Best Buy.


