
 I’ve been using Mysa smart thermostats in my home for a few years. We’ve had electric baseboard heat since we renovated 8 years ago, and this past year we added a heat pump. Most of my Mysa smart thermostats are V1, but I was just sent Mysa smart thermostat V2 to install and test out. It’s smaller than V1 so I can fit it in tighter spots, and it uses a different type of heat relay so it has an audible click when you adjust the temperature.
Here’s a look at the installation process and what I thought of Mysa smart thermostat V2.
Features of Mysa smart thermostat V2
Mysa is a Canadian company that manufactures different types of smart thermostats for electric heating systems. They currently have Mysa smart thermostat V1 and Mysa smart thermostat V2 for electric baseboard heaters, Mysa for air conditioners and mini-splits, and Mysa for electric in-floor heating. Mysa V2 is 40% smaller than Mysa V1. It measures a width of 8.9 cm (3.50 inches), height of 12.32 cm (4.85 inches), a depth 4 cm (1.57 inches), and weighs 31 grams.
- Smart thermostat connects to your home’s Wi-Fi via an app for easy control
- Easy to install and can be connected and switched on within 15 minutes
- Can be used with high/line voltage electric heating including electric baseboard heaters, fan-forced heaters, self-contained hydronic baseboard, and in-ceiling radiant heating
- Works with Google Assistant, Alexa, and HomeKit so you can control your home’s temperature from anywhere you are
- Mysa app lets you set a schedule for heating, adjust heating, turn heating off and on, and see your electric consumption so you can monitor your power cost
- Zone Control lets you group your heaters into zones so you can control individual thermostats together
- Shared access lets everyone in your home control heat
- Geo location and vacation mode save you money on heating when you aren’t home
Installing Mysa smart thermostat V2
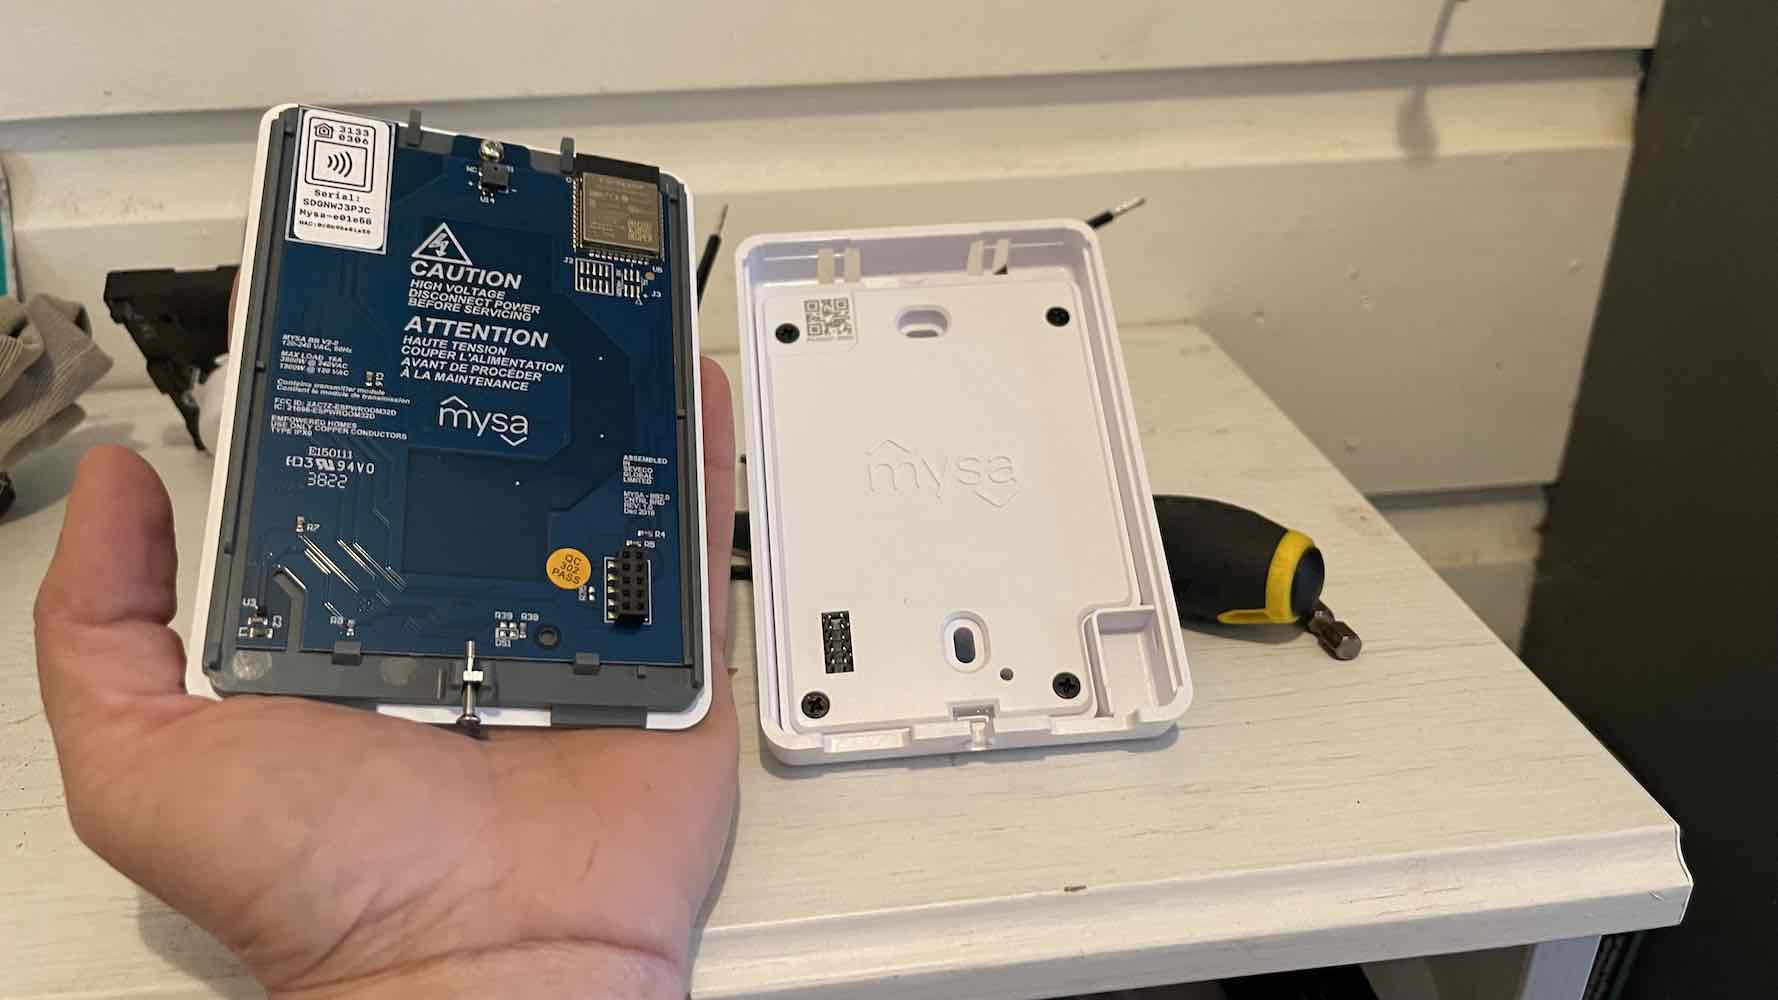
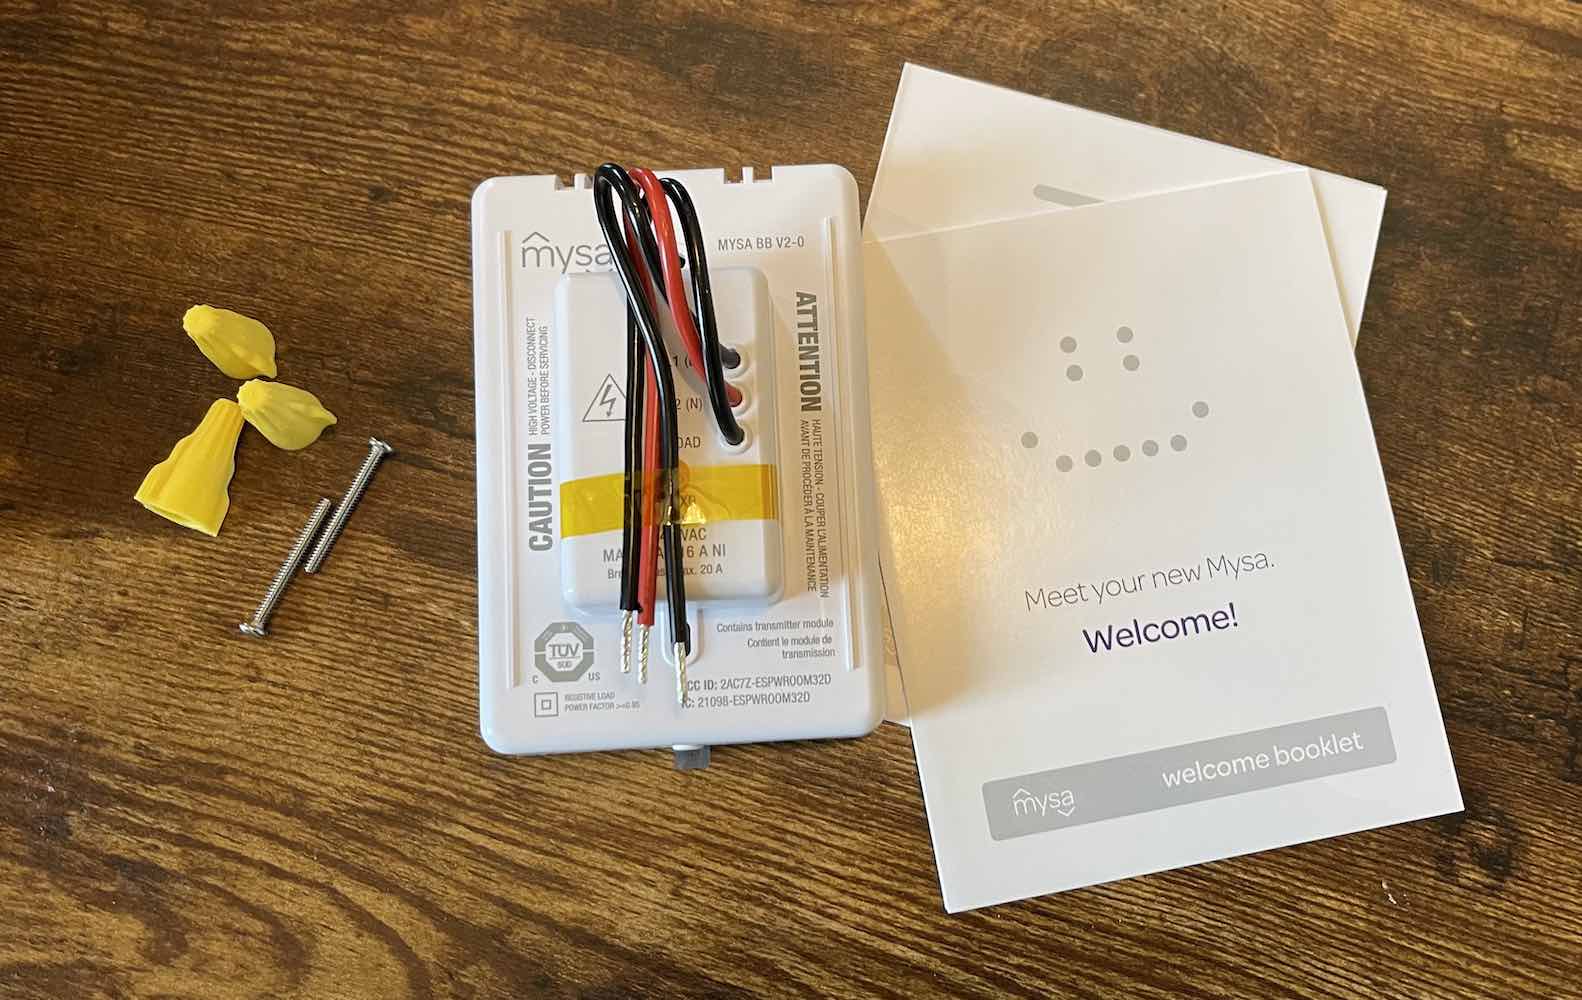
Mysa smart thermostat V2 uses a different heating technology than V1, but the installation process seems to be the same. Once you turn off your breaker you’ll remove your older thermostat. Mysa V2 is packaged with mounting screws and wire nuts and there are two black and one red wire on the back of the thermostat.
You’ll connect your wires according to the wires you have in your wall, but before you connect your wires you’ll need to remove the cover of the thermostat. There is a small screw at the bottom of the device that you’ll loosen slightly. Don’t completely remove it, but loosen it so the cover can come off. Take the cover off and keep it with you while you install the thermostat.
I also had two black wires and one white so I found it easy to connect my Mysa. The black connected to black and the red connected to white. The great thing about the Mysa app and documentation is that they show you different configurations. If your wires are different, you’ll be able to look through the app to see how to properly connect your thermostat.
I used the included wire nuts to connect the wires and pushed them back into the box. Then I used the included screws to attach the thermostat to the wall. One of the features I noticed was added to Mysa V2 is a small green light inside the thermostat. When the thermostat is correctly installed and has power the light is green. It’s a nice visual to let you know everything is up and running.
Once the thermostat was attached to the wall I attached the faceplate. Before you do though, you’ll want to take a photo of the QR code inside the thermostat. It’s OK if you don’t because the same code is also on the included manual. You’ll want to keep it with you as you’ll need the code to add it to the app if you’re using HomeKit.
Adding Mysa V2 to the Mysa app
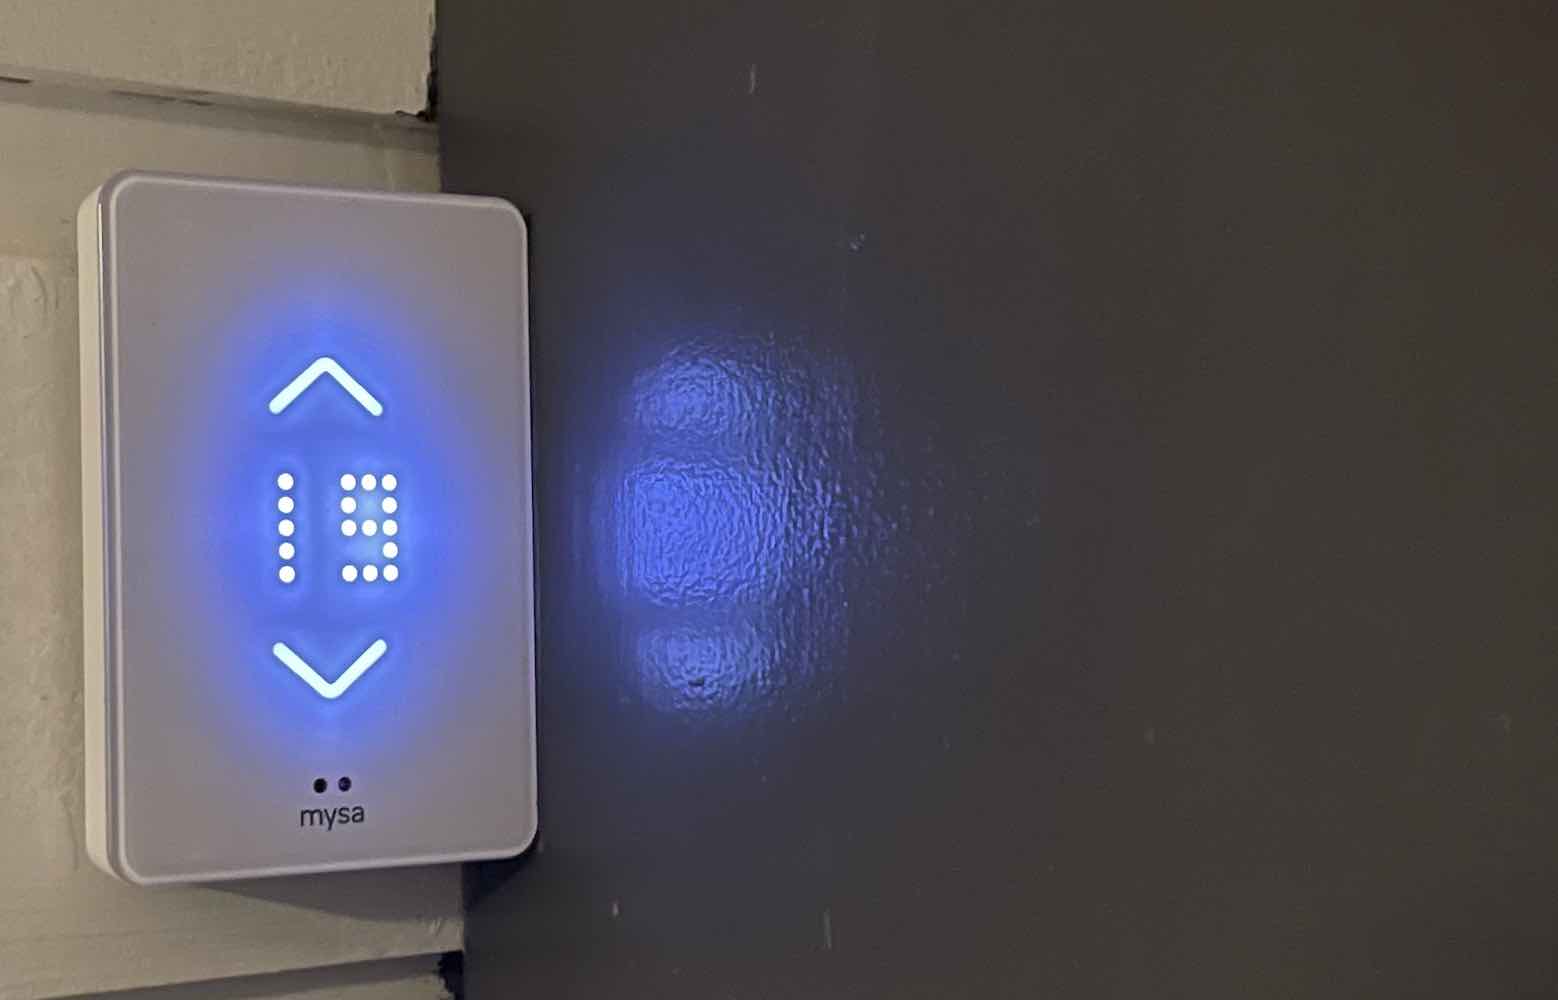
Once you’ve installed Mysa and the face plate lights up, it will transfer to pairing mode. You’ll see a triangle to indicate pairing mode. When you see it you’ll open the app and walk through the steps to pair the device. This is where you can scan the QR code to add it to your Mysa account. You can pair it via HomeKit or Mysa. I like pairing it via Mysa. Once you add the thermostat to your Wi-Fi network it’s ready to control.
Testing Mysa smart thermostat V2
Until I started using Mysa I had to use dial-style thermostats that couldn’t be programmed. As anyone can tell you, there’s nothing like older thermostats to make your heating bills soar. At one point during a very cold winter, I had an electricity bill that was $1400 for two months. That’s what prompted us to install a mini-split heat pump last winter, but as per our installer’s recommendation, we kept the baseboard heaters as a backup. I currently have a Mysa Smart Thermostat for every baseboard heater as well as a Mysa thermostat for mini-splits.
Mysa V1 vs Mysa V2
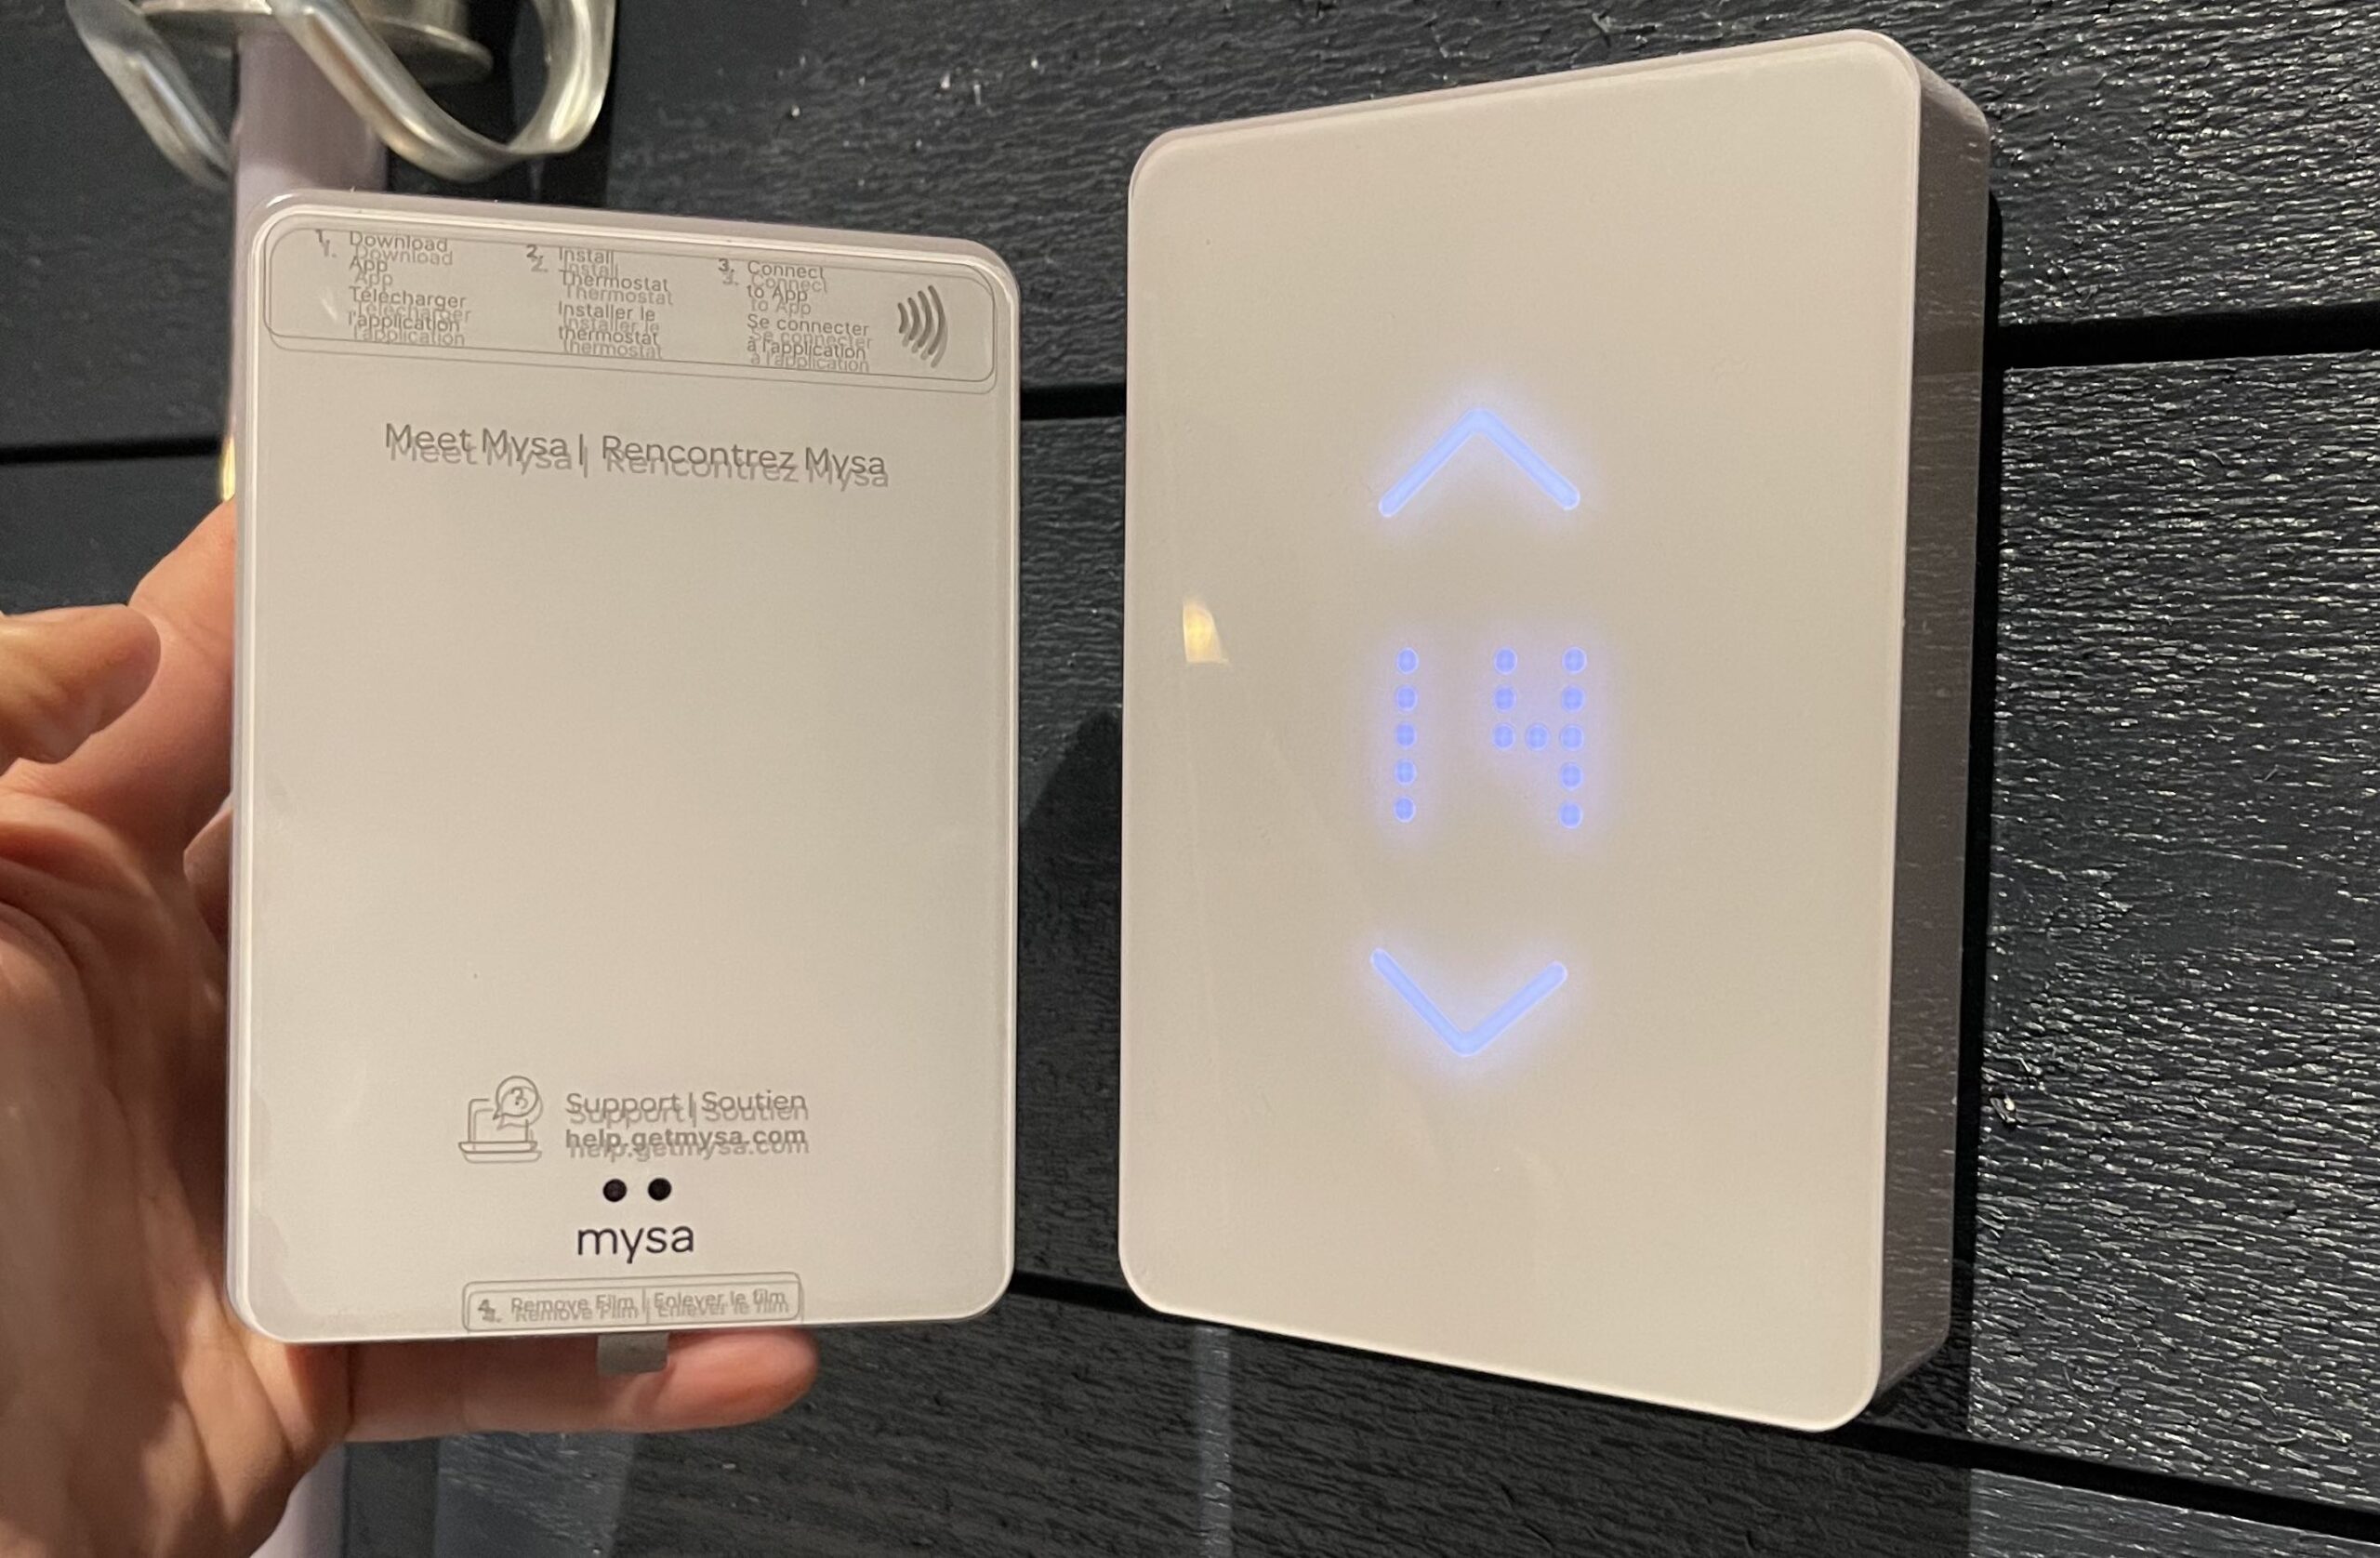
My first thought when unboxing Mysa smart thermostat V2 is that it was definitely a lot smaller than V1. It’s actually 40% smaller, and when you hold the two thermostats side by side you can see the difference between Mysa V1 vs Mysa V2. I was pretty happy to see the smaller size. I have a tight area beside a shoe hutch in the hallway I have always wanted to add a Mysa to. Because of the new design, I was able to fit my Mysa V2 there.
The thinner, smaller design isn’t the only change between V1 and V2. Mysa V1 uses TRIAC technology (solid state relay) and Mysa V2 uses Relay technology (mechanical relay). Relay technology has moving parts so there is a ‘click’ when you adjust the temperature. I don’t mind the click. It reminds me a bit of older thermostats that click when the heat turns on.
Mysa V2 also has ambient display technology and a proximity sensor. The light on display will dim when you’re not around it and light up when you are. I like how it does that. It’s a lot better than having to turn the screen right off or have it always dim like V1. The other difference between Mysa V1 vs Mysa V2 is that there is NFC pairing on V2.
Mysa app
 |
 |
 |
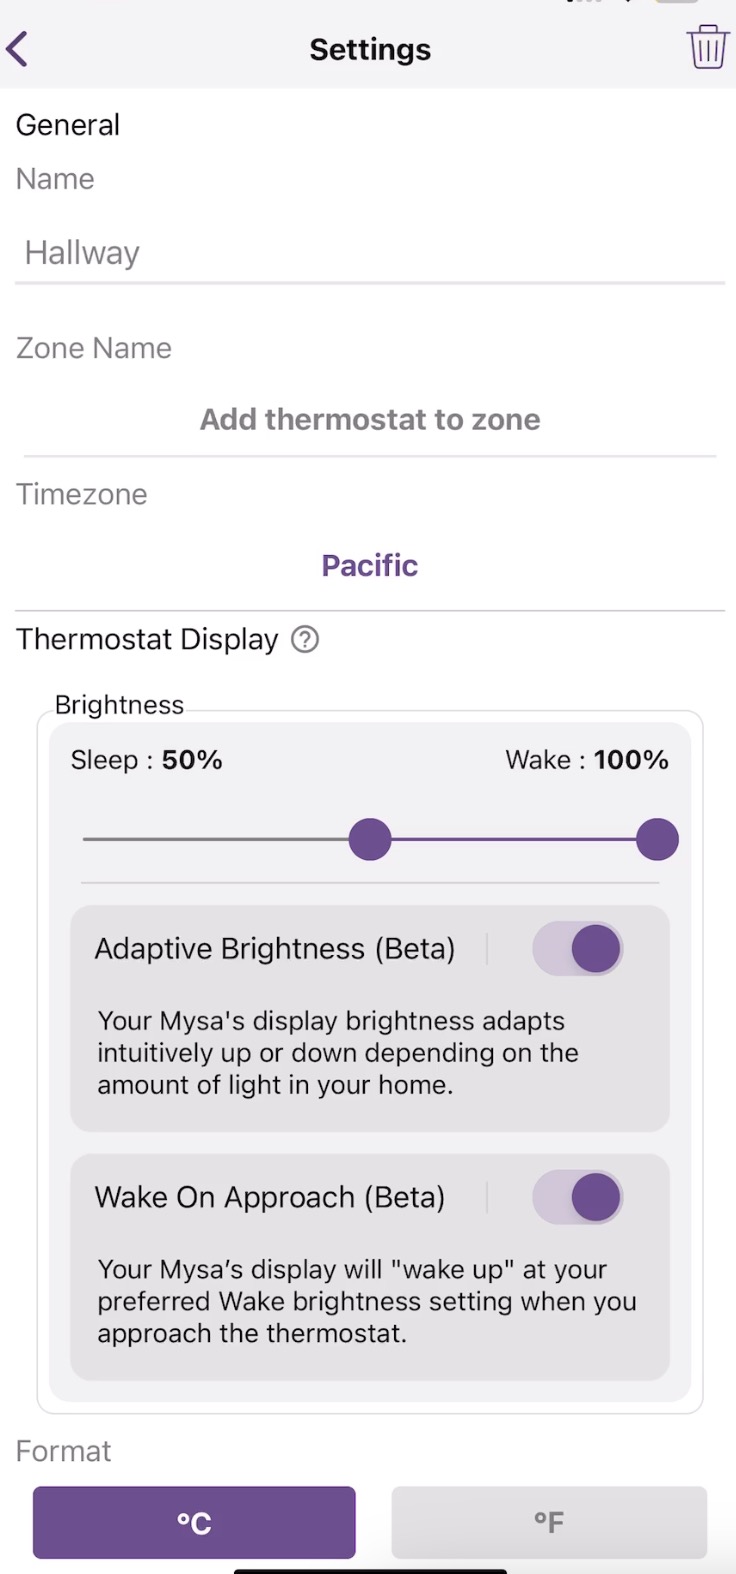
There are quite a few options within the Mysa app. You can set a schedule for your thermostat or pair it with other Mysa thermostats in your home to control zones. All Mysas V1 and V2 should work together if you’d like to group them into zones.
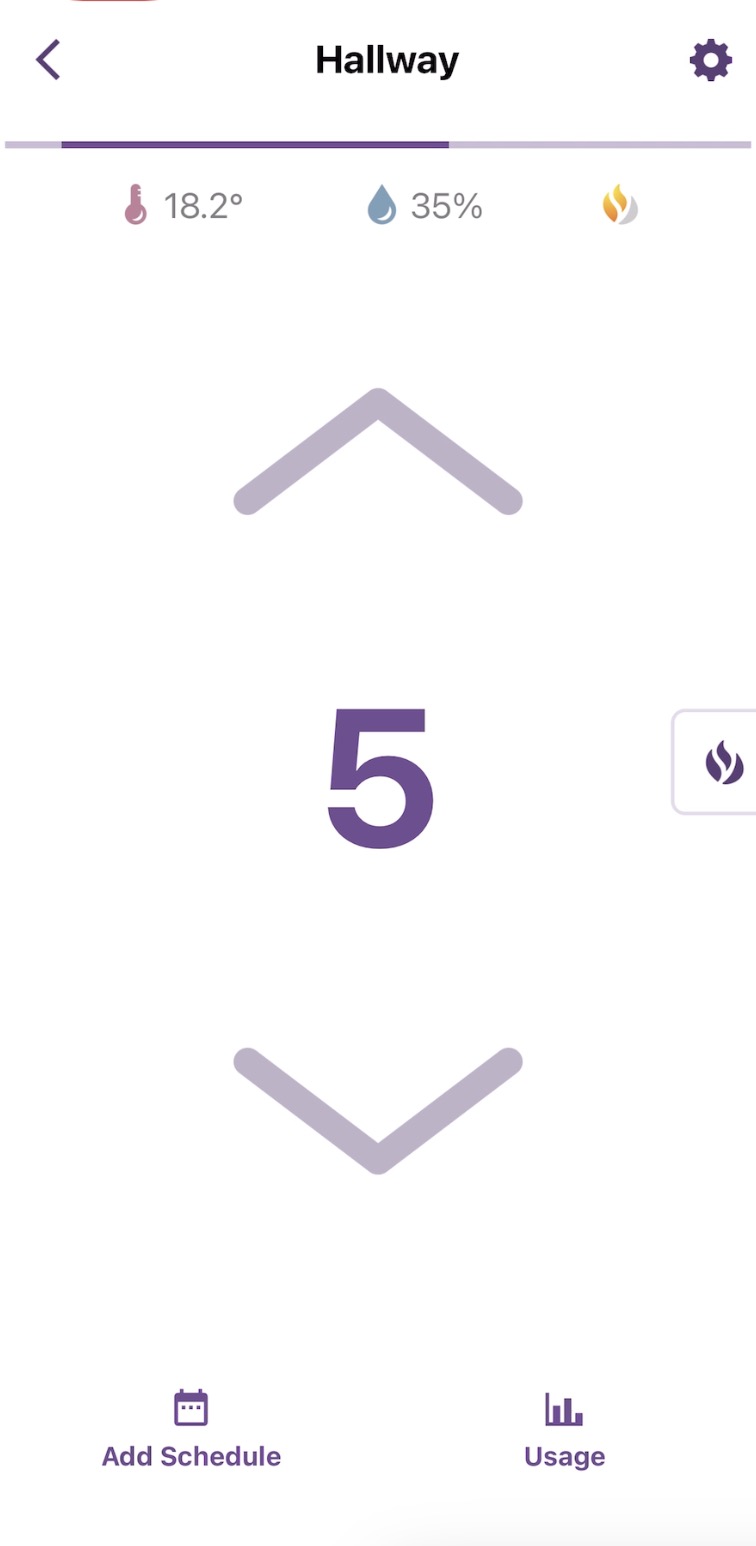
You can turn your heat up or down right on the thermostat, switch it from Celcius to Fahrenheit, or add a set point for when you want the heater to turn on and when you’d like it to turn off. You can turn the heaters completely off in the app too, so if it’s summer and you don’t want to run the risk of them turning on, just tap the button and turn them off. I haven’t used geo-location yet as someone is always at home, but I like the idea of being able to automatically turn down the heat when we aren’t around.
One of the best parts of having Mysa smart thermostats is that you can set them on a schedule. I have my Mysa for mini-splits turn on at 6 am and turn down at 11 pm. It helps keep the heating bill under control because I would never remember to turn it down. If it gets too cold in the back hallway, I have the Mysa V2 scheduled to turn on at 18 degrees and turn off if it gets warmer than 24.
My opinion on Mysa smart thermostat V2
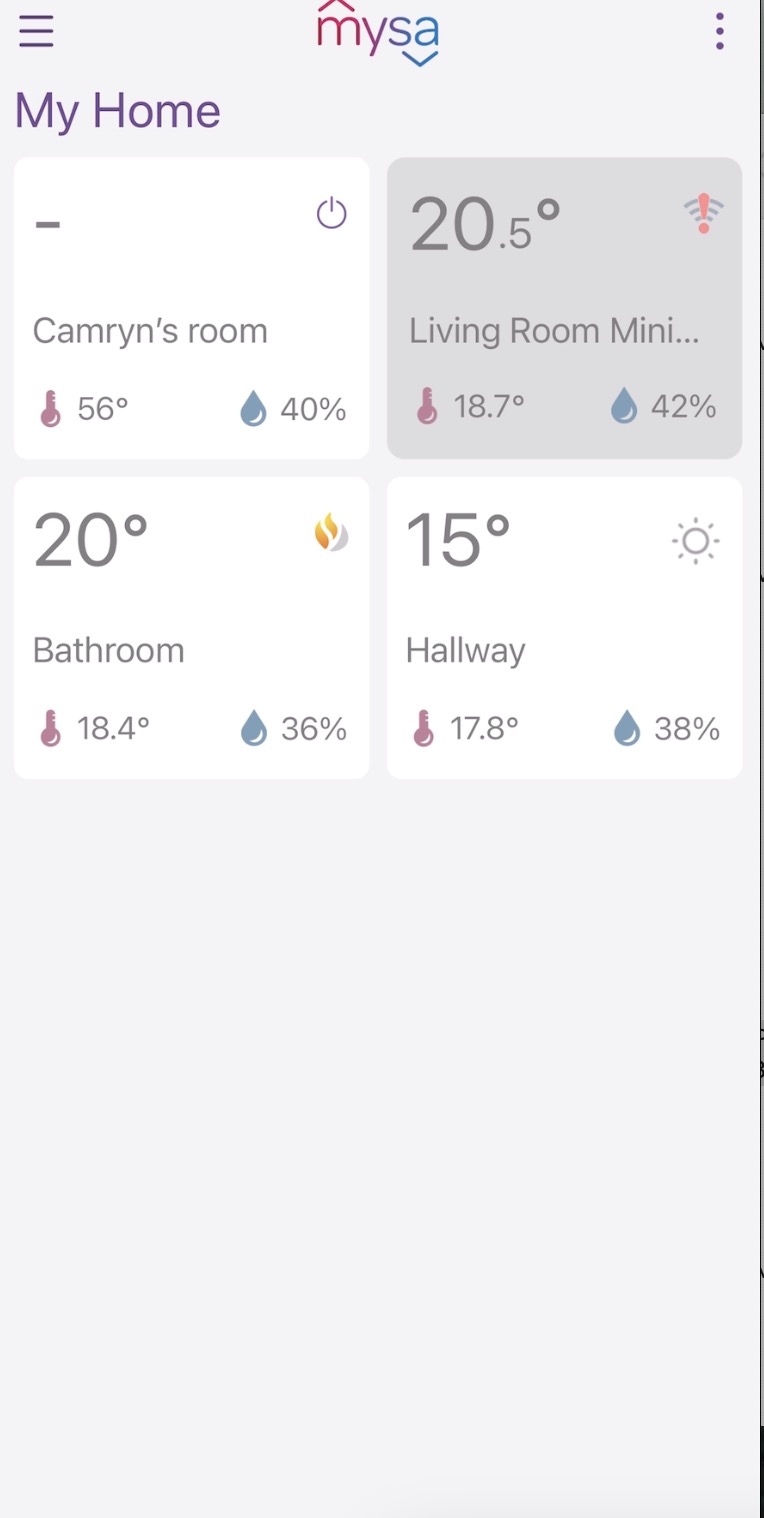
One of the best parts of having Mysa is the visual indicator of how warm or cold it is in the house. It’s a little thing, but it’s nice to see what the temperature is in different areas. I like that I can approach my thermostat and it lights up with the temperature.
I have Mysa V1 in the bathroom and Mysa V2 in the hallway for my baseboard heaters. These are zones that the mini-split doesn’t seem to heat so I have both set to turn on whenever the temperature in that area gets too low. Before I installed the Mysa V2 in the hallway we would walk in and feel a cool breeze, only entering a warm zone when we were in the kitchen. Thanks to Mysa V2, now my hallway keeps consistent heating with the kitchen.
I also like the design of Mysa V2 a lot. The smaller size means it doesn’t take up as much wall space and it fits in tiny spots. I couldn’t have a smart thermostat in the area I added my Mysa V2 because it was too small, but this version of Mysa fits perfectly.
Having your heating set on a schedule really helps manage your electricity bills, and with Mysa V1, Mysa V2, and Mysa for mini-splits, I feel as though Mysa is the best option to manage my home’s heating.
You can find Mysa Smart Thermostat V2 at Best Buy right now.


The Mysa V2 Smart Thermostat review was insightful. It provided a thorough understanding of the product and its compatibility with baseboard heaters. The pros and cons were well-balanced, making it easier to make an informed decision when considering this smart thermostat for your home.
The change from solid state relays to electro mechanical relays is a big step backwards. Solid state relays are known to be more durable and the also have the advantage that the heating output can be modulated (not sure if the V1 employed it or not) rather than just full on or full off. A lot of other baseboard thermostats equipped with solid state relays do provide proportional output. The decrease in size is nice to keep the thermostat less conspicuous.
the instruction is really easy to understand so that I can install it myself and no help needed.
I like the Zone Control so I can control different zones in my house.
The installation section is easy to understand and Makes it easy to install by myself
I really like the thermostat can be connected with Wifi and can be controlled by app.
As in almost any job installation is key to success. That is why I found how detailed she described the installation very valuable. As tech challenged as I am I think I could do this!!
The part about Zone Control, definitely a feature we could benefit from.
The part of the article that I find most helpful is the comparison between the Mysa V1 and Mysa V2 because it helps me to make an informed choice about which model fits my needs.
Thanks for explaining how to install the thermostat it was the most useful for me. Now I would love to try to install that thermostat in my place.
The Installing Mysa Smart Thermostat V2 section is the most useful to me.
Zone Control lets you group your heaters into zones so you can control individual thermostats together
the thermostat can be connected with Wifi ! Controling it with an app Would be nice
the thermostat can be connected with Wifi ,Controling it with an app
Maybe the Geo location and vacation mode save you money on heating when you aren’t home
I liked the installation section as I am sure that I could hook this up with no trouble.
The installation section was the most useful to me because it confirms that it is not a difficult task.
The installation section is easy to understand and very helpful since I always have trouble with installation.
The Installing Mysa smart thermostat V2 section is the most useful to me.
I love the personal opinion from the end of the article.
I liked the installation section as I am sure that I could hook this up with no trouble.
I find most helpful in this article is a real user opinion. It is one thing for the company says their product works, it another when a real person says it works.
In the installation part of the article, I found the most helpful as changing technology can be a burden, but as Shelly explained, it is easy!
Could imagine that the thermostat can be connected with Wifi ! Controling it with an app is also a new thing to learn !
I really like that the Smart thermostat connects to your home’s Wi-Fi via an app for easy control. It makes it easy to adjust the temperature no matter where you are.
Comments are closed.