 Welcome to the first in a four part series here at Plug In. Over the course of the next few blogs, I’m going to take you through the ins and outs of setting up a Smart Home. By the end of these four blogs, it’s my hope that I have left you with enough information and knowledge to turn your home into a smart one (or your existing smart home into a smarter one.)
Please note that all of the great smart home cameras and devices that I mention are just a few clicks away, online at Best Buy.
In this first part of the series, we’re going to take a look at assessing your home’s needs. Before your jump head first into a smarthome project, you need to make sure you have the proper tools (both physical and virtual) and understand your home space before deciding which products are the right fit for you. A quick assessment ensures that you do things right the first time and don’t have to worry about whether you’ve made a mistake after the fact.
Step 1: Walk around and inspect your home
This is a step that a lot of people miss but really should be the first thing you do. Having grand plans to replace everything with a smarter version of itself is great until you realize that you may not be able to support it at all. Smart lighting is a great example of this. Just about every smart bulb out there can’t be set on a multi-switch fixture. If you have one switch upstairs and another downstairs for the same bulb (in a foyer, for example,) avoid setting it up with a smart bulb. You also shouldn’t be installing your smart bulbs in closed fixtures because of the style in which they heat. Offering a personal example, both of these are issues in my home. I originally had plans to buy a dozen smart bulbs and install them everywhere but by the time I finished disqualifying closed fixtures and multi-switch fixtures, I was basically left with the fixture hanging over the kitchen table and one in the master bathroom. So much for those plans!
It really helps to understand what sort of products you want to bring into the home too. A walk around and visual inspection can help you disqualify some products in your eventual plans (such as smart locks if your door’s deadbolts or lock setup cannot support them) before you get them. Smart thermostats are a good example of a product you might have some issues with. Many of these thermostats need a dedicated power source and since they can’t be plugged in anywhere, require a 3 wire, 24 volt system to run them. This is most common nowadays with dual purpose heating and air conditioning systems. If your furnace is a standard 2 wire heat-only service, you’d have to contact a technician to see if it’s possible to have a 3rd wire extended or quite honestly, just find a smart thermostat that works off 2 wires whether it consumes low power or is powered by batteries.
You may also be able to identify certain tasks you need to add to your installation list. For example, if you have plans to run a security system through the home (or around the perimeter) and need to have outlets installed or wires hidden in the process, you can budget them into your estimate right away.
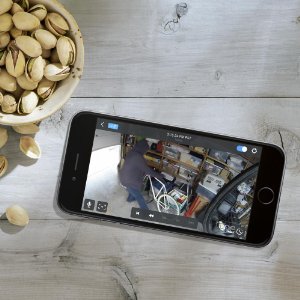
Lastly, walking around the home will also help you visualize and pick out good spots for your installation, especially when it comes to security and cameras. If you’re ever seen these newer in-home IP cameras, you’ll know that they look out at your designated space at a very wide angle. Getting the most out of these cameras may require you to have to rearrange furniture or place them up high to get the best vantage point.
Taking a half hour or hour to map things out in your head or on paper may save you hours of extra work later on.

Step 2: Research, Research, Research!
If I could offer you one crucial piece of advice to take away from this blog, it is to do some research into what you want before you buy it. Don’t get caught up in flashy packaging or promises of features you don’t need. More importantly, make sure you can support what you’re buying. For example, that lifesaving Chamberlain MyQ garage door opener does not work on many models that were built before 1993. If your automatic garage door opener is older than that, you might not be able to use it at all.
The most common hiccup you’ll have is in the supporting software itself. You’re bound to find smarthome gadgets that only work on iOS devices or only work on Android devices. Some gadgets may only work on newer versions of mobile operating systems and if your phone or tablet is older, you won’t be able to run them. We’re hopefully past the days where Android OS and Bluetooth didn’t cooperate with each other, but that has been a problem with devices in the past. You may still find overall that Bluetooth reliant smarthome gizmos (like locks) have limited or slower functionality supported by an Android platform over iOS.
If you have a list of products you want, spend some time in Best Buy’s Smarthome category learning more about what’s out there and whether you can (or can’t) run them before you commit.
Step 3:  Aligning products to your needs
The next step in building your smart home is figuring out where you’re going to start and aligning those products to your needs. When I got my first few products 3 years ago, it was like the Wild West. Every product line had its own app and nobody played in the proverbial sandbox together. In 2016, smarthome manufacturers have found strength in numbers by working together. Whether it’s sharing the same app, or interfacing with each other through the use of their own programming (or online applications like IFTTT,) the sheer creativity and interactivity of smarthome technology has catapulted leaps and bounds in mere months.
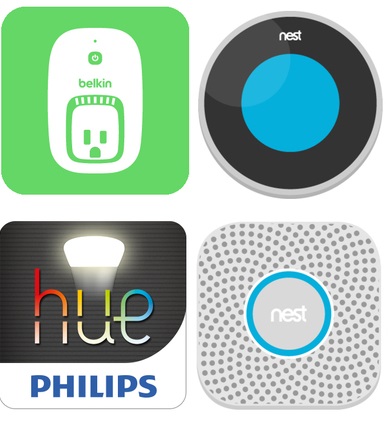
Find a starter product that you can work with and see if it aligns to the others you intend on buying with it or soon after. For example, if you take a product like the Nest Learning Thermostat, it’s like a gateway product that you can use to combine forces with dozens of other products out there through its “Works with Nest” program. You may not have a need for a new thermostat though and might just want something that acts as a hub for different pieces of hardware (like water sensors, smart bulbs and motion sensors.) In that case, you probably want something closer to what a company like Insteon brings to the table.
That is the first part of Setting up your smarthome in a nutshell. In the next installment, I’ll take a look at the actual preparation piece and getting your home ready. There are a few things that you need to know and must consider doing to ensure that you have a great and well functioning smarthome. I’ll look at those and more in Part 2.


