


Installing a gate is one of the best steps I’ve ever taken for home security. When you get home, you can drive in, close your gate behind you, and you don’t worry about someone walking up to your door or driving into your yard. The only problem? Opening the gate and closing the gate can be a pain if you have to get out of your car to do it.
That’s where iSmartgate LITE gate controller comes in. All you have to do is attach it to your existing gate arm, and it lets you remotely open and close the gate, and keeps a log of your activity. If you have the iSmartgate IP camera, you can also keep an eye on whoever is coming and going.
From install to daily use, the iSmartgate LITE takes all the effort out of opening and closing your gate. Here’s how to install and use iSmartgate LITE gate controller.
Appearance and Features iSmartgate LITE
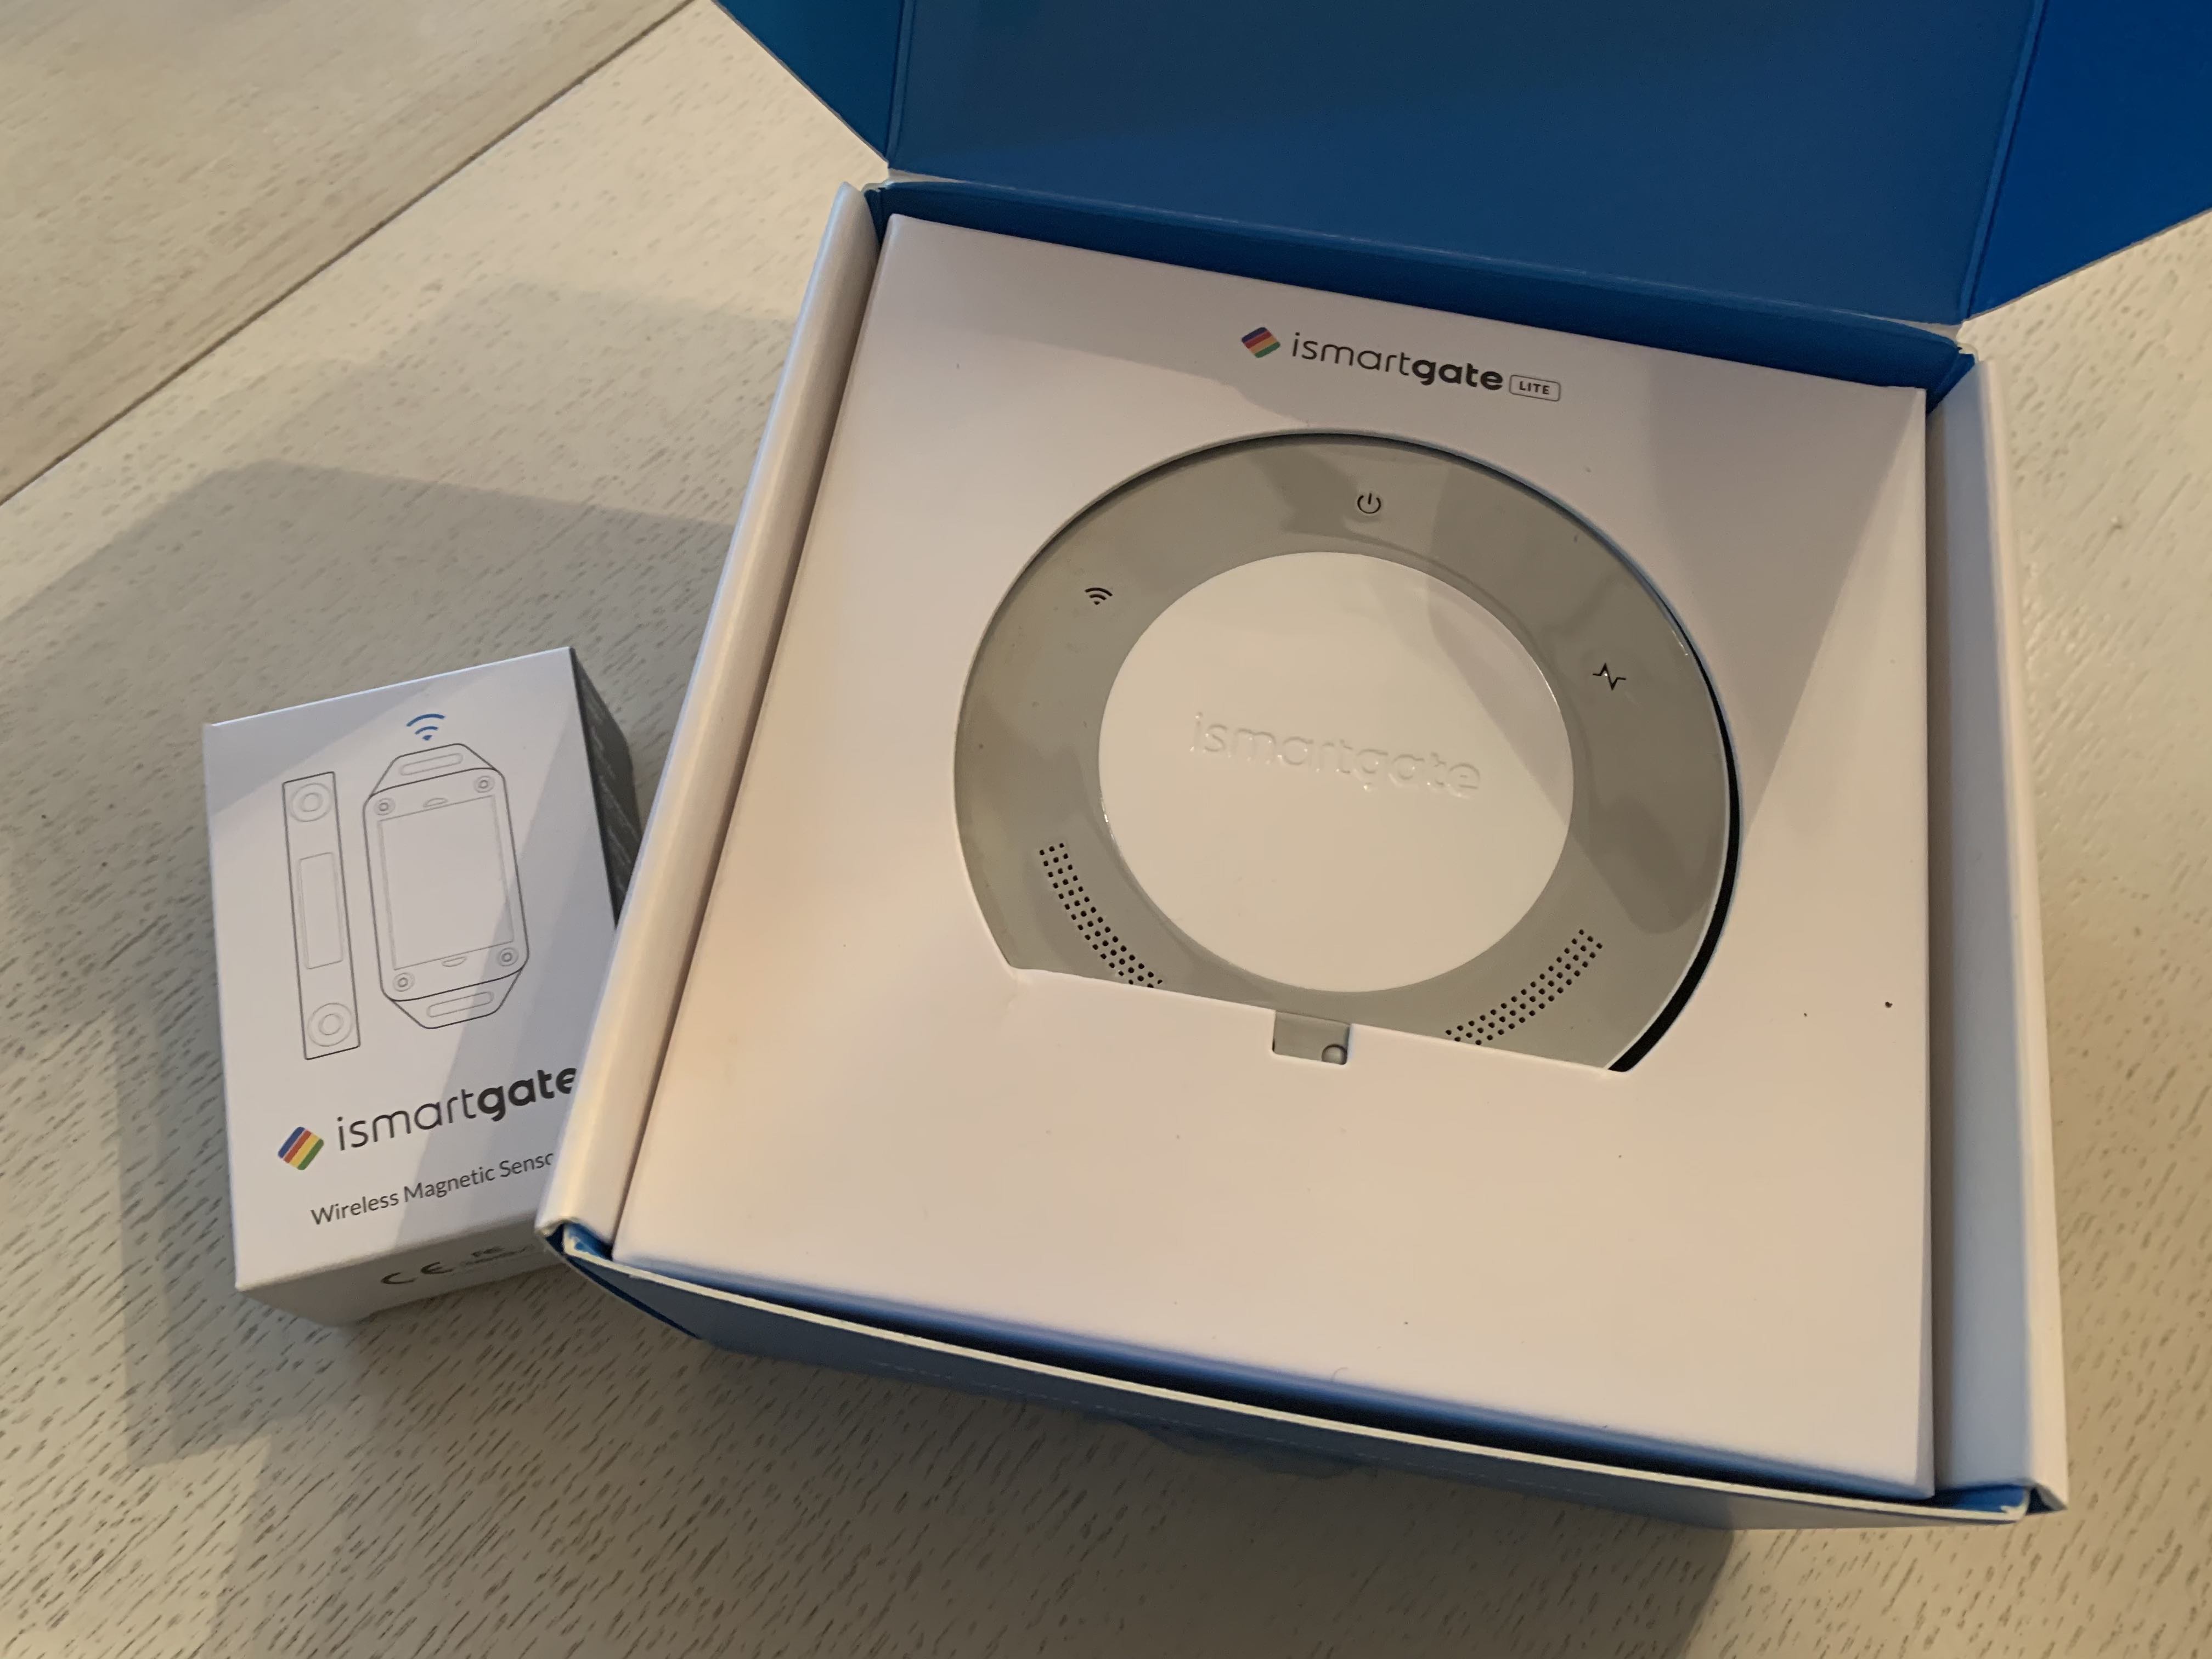
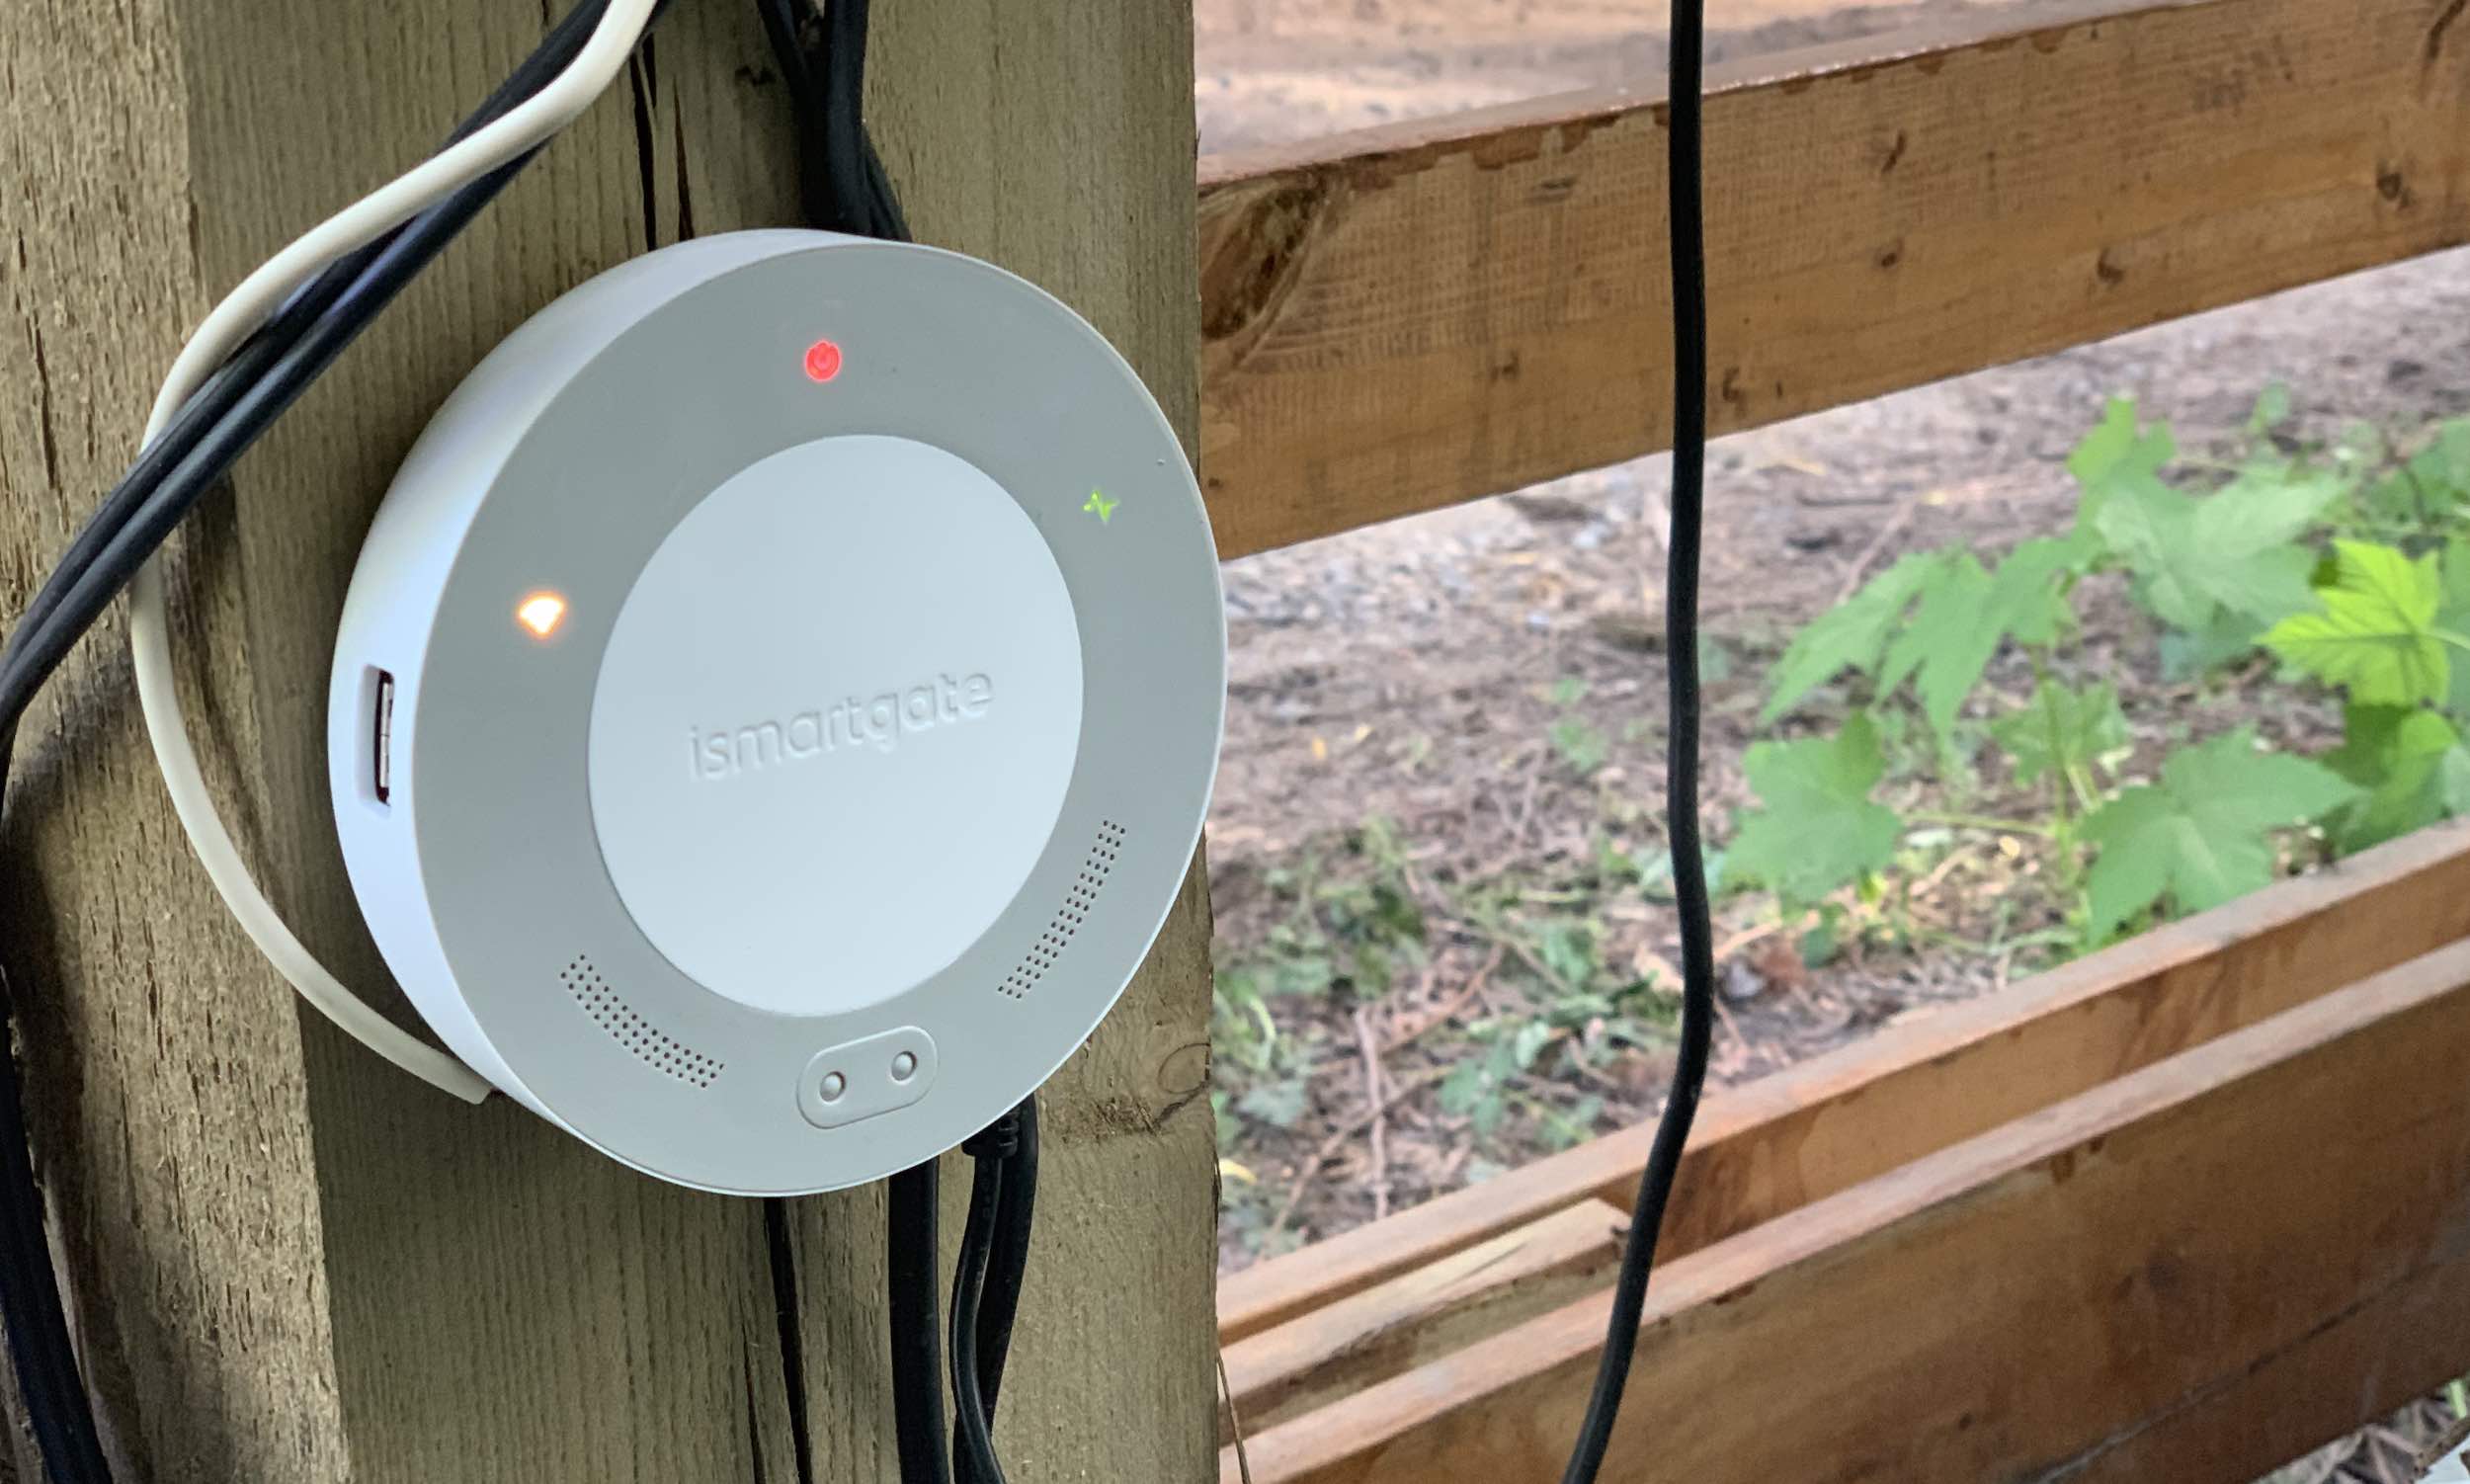
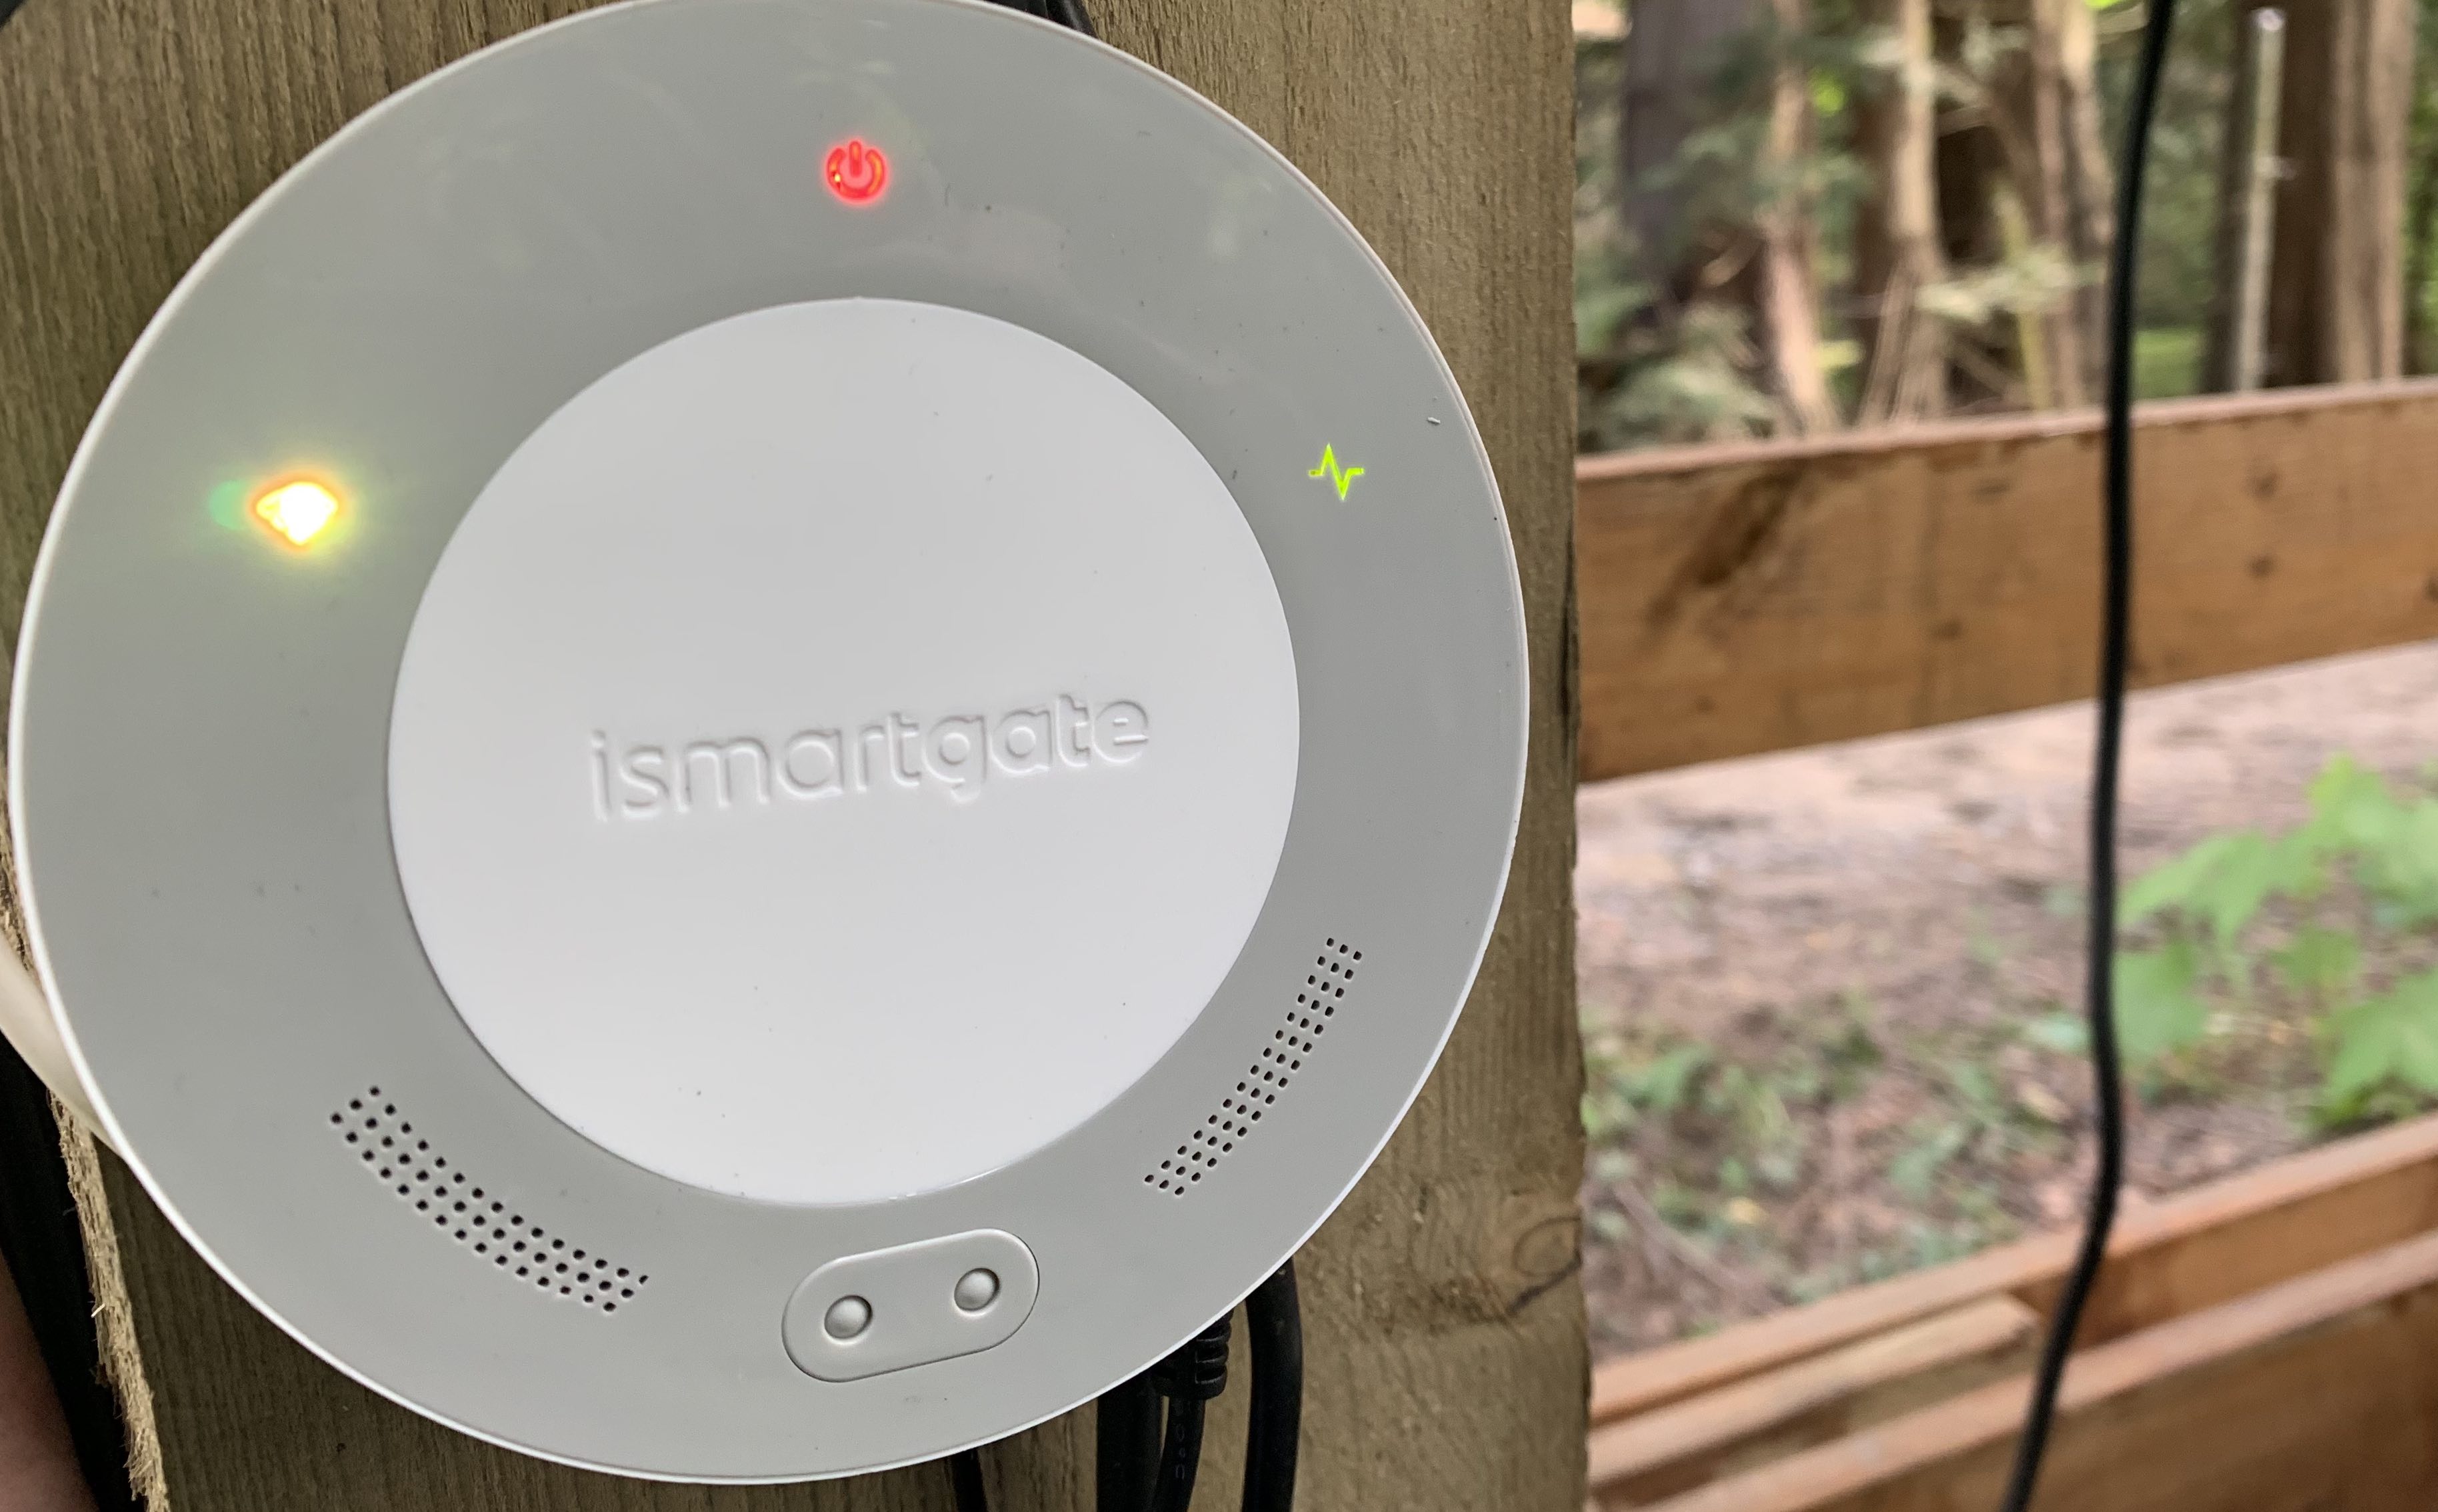
iSmartgate LITE is a small, round device that’s made from plastic. It’s the same shape as a disc, and there are several indicator lights on it: Wi-Fi connectivity, power, and sensor indicator.
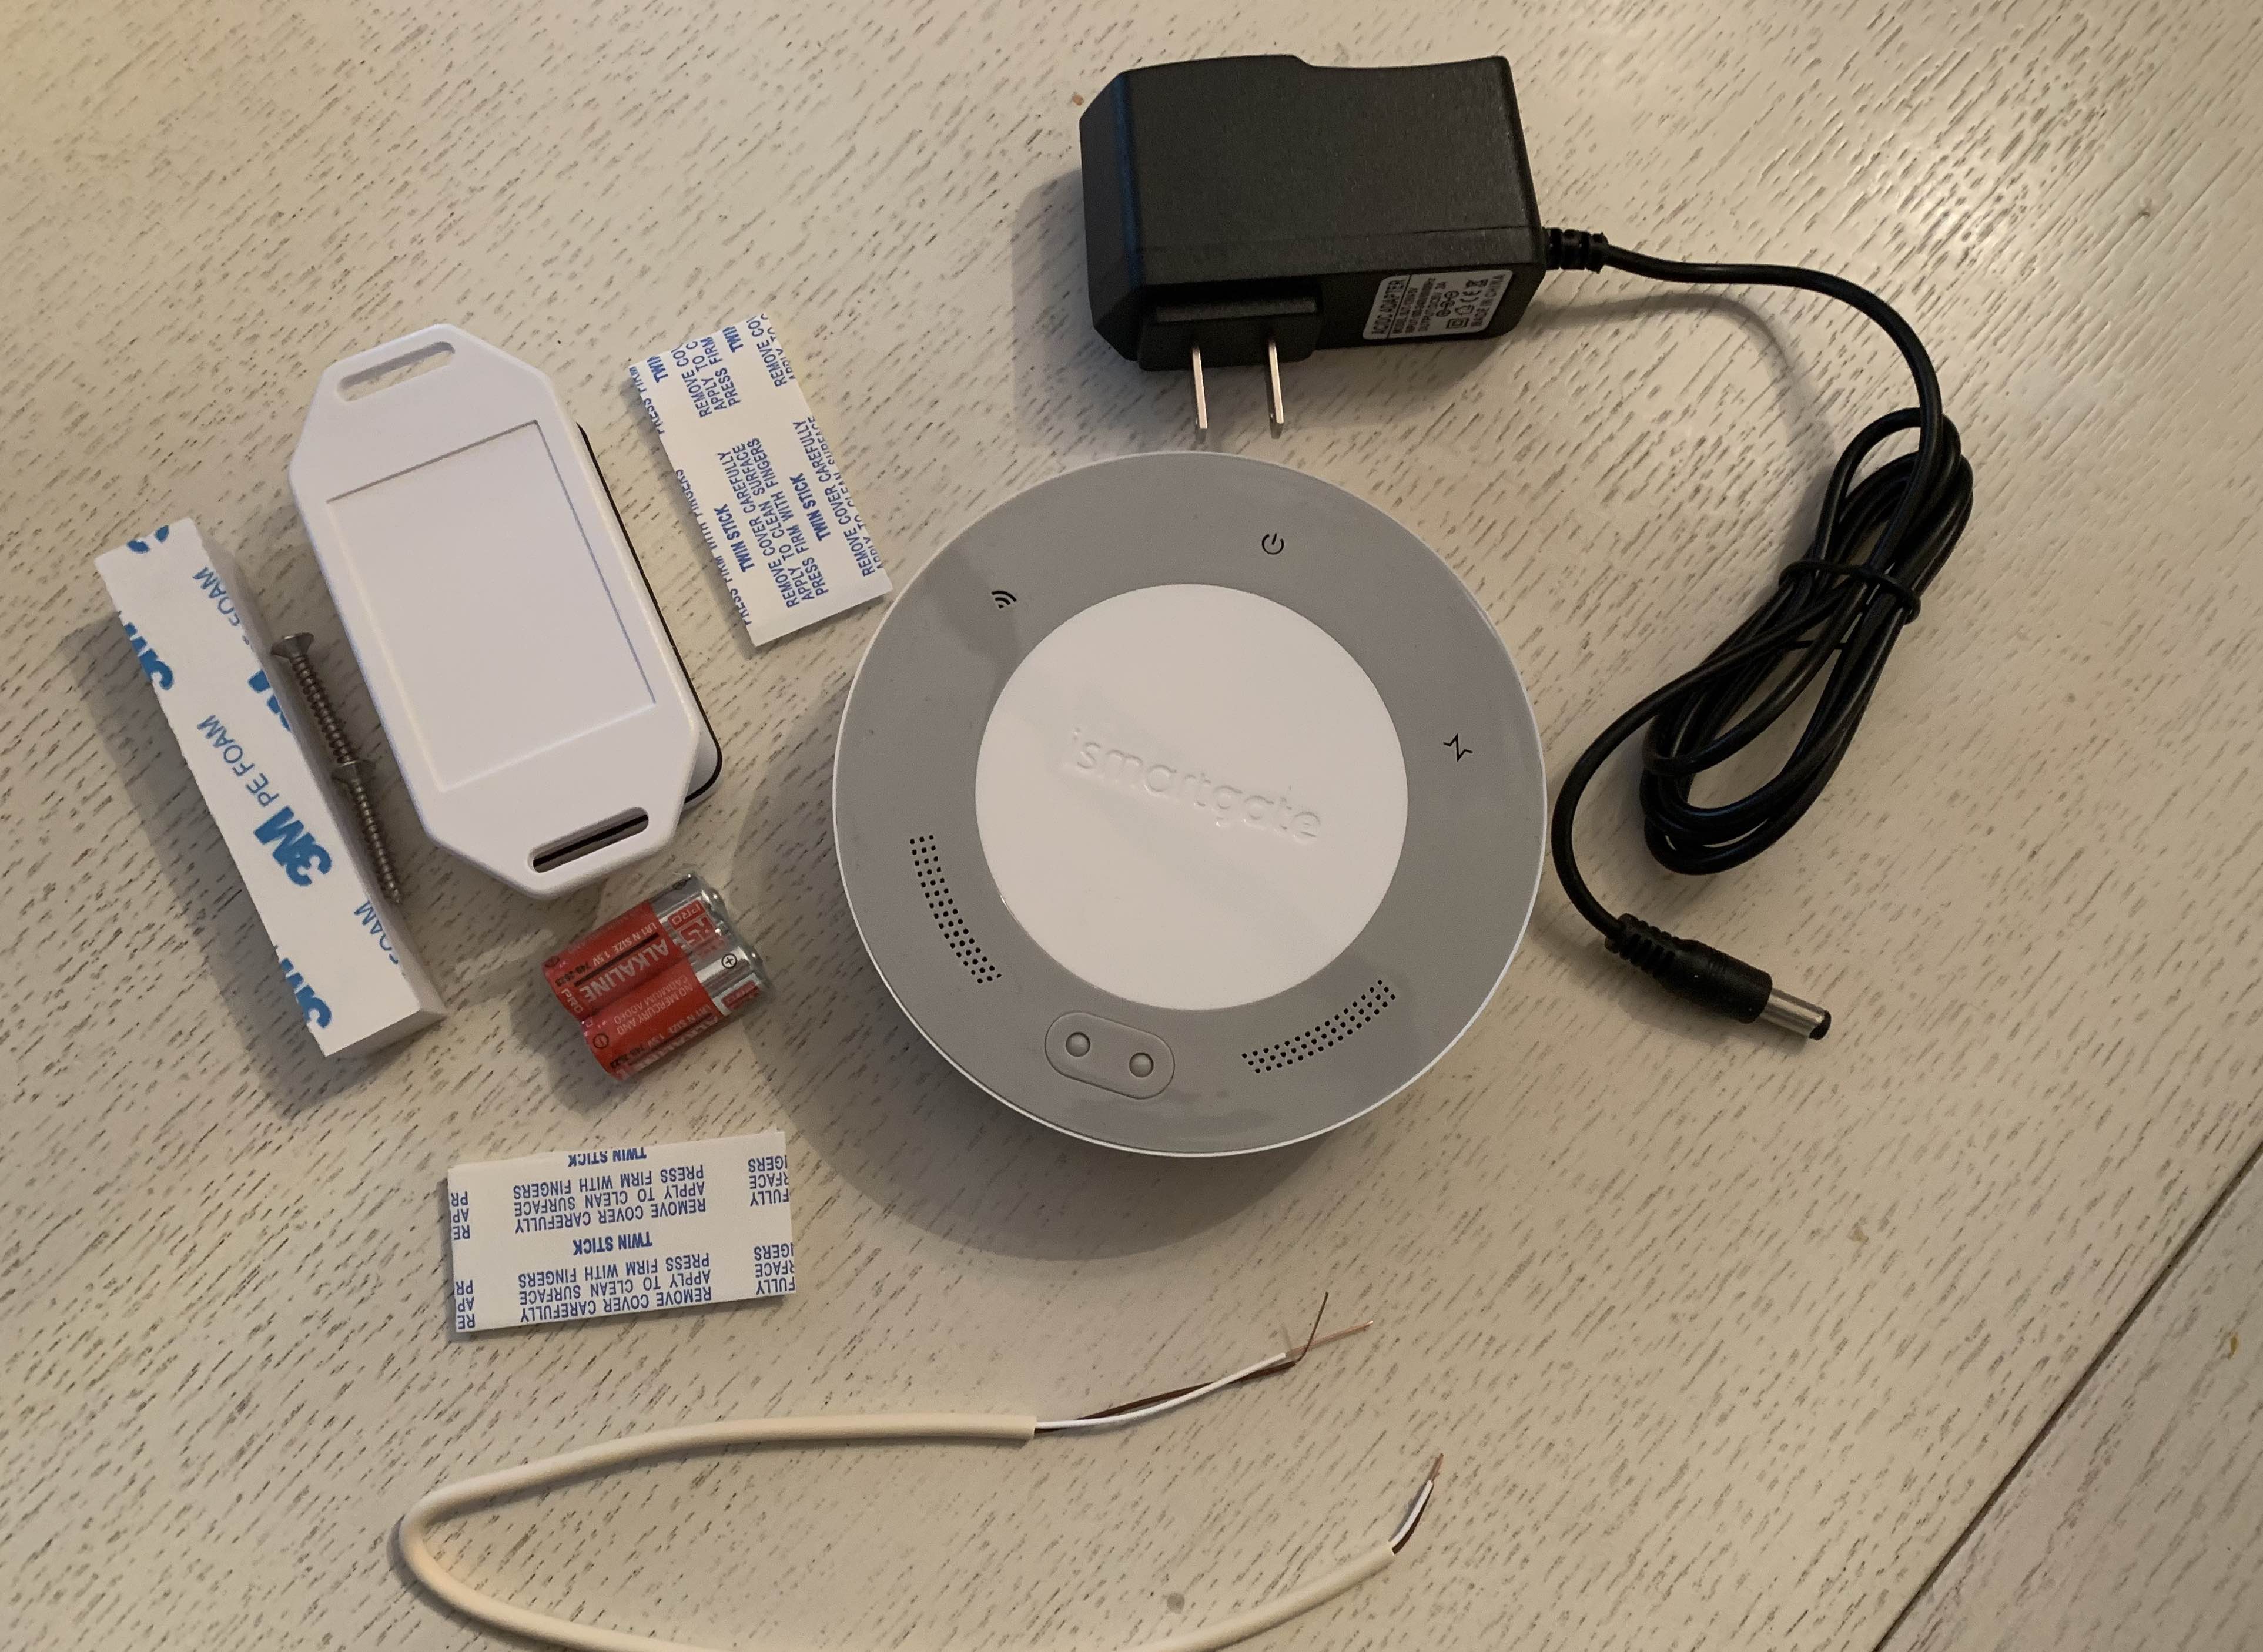
When you unpack the box, you’ll see the iSmartgate LITE gate opener hub, battery-operated wireless sensor, and batteries. You’ll also see an instruction sheet that lets you know you’ll have to download the app for full install instructions.
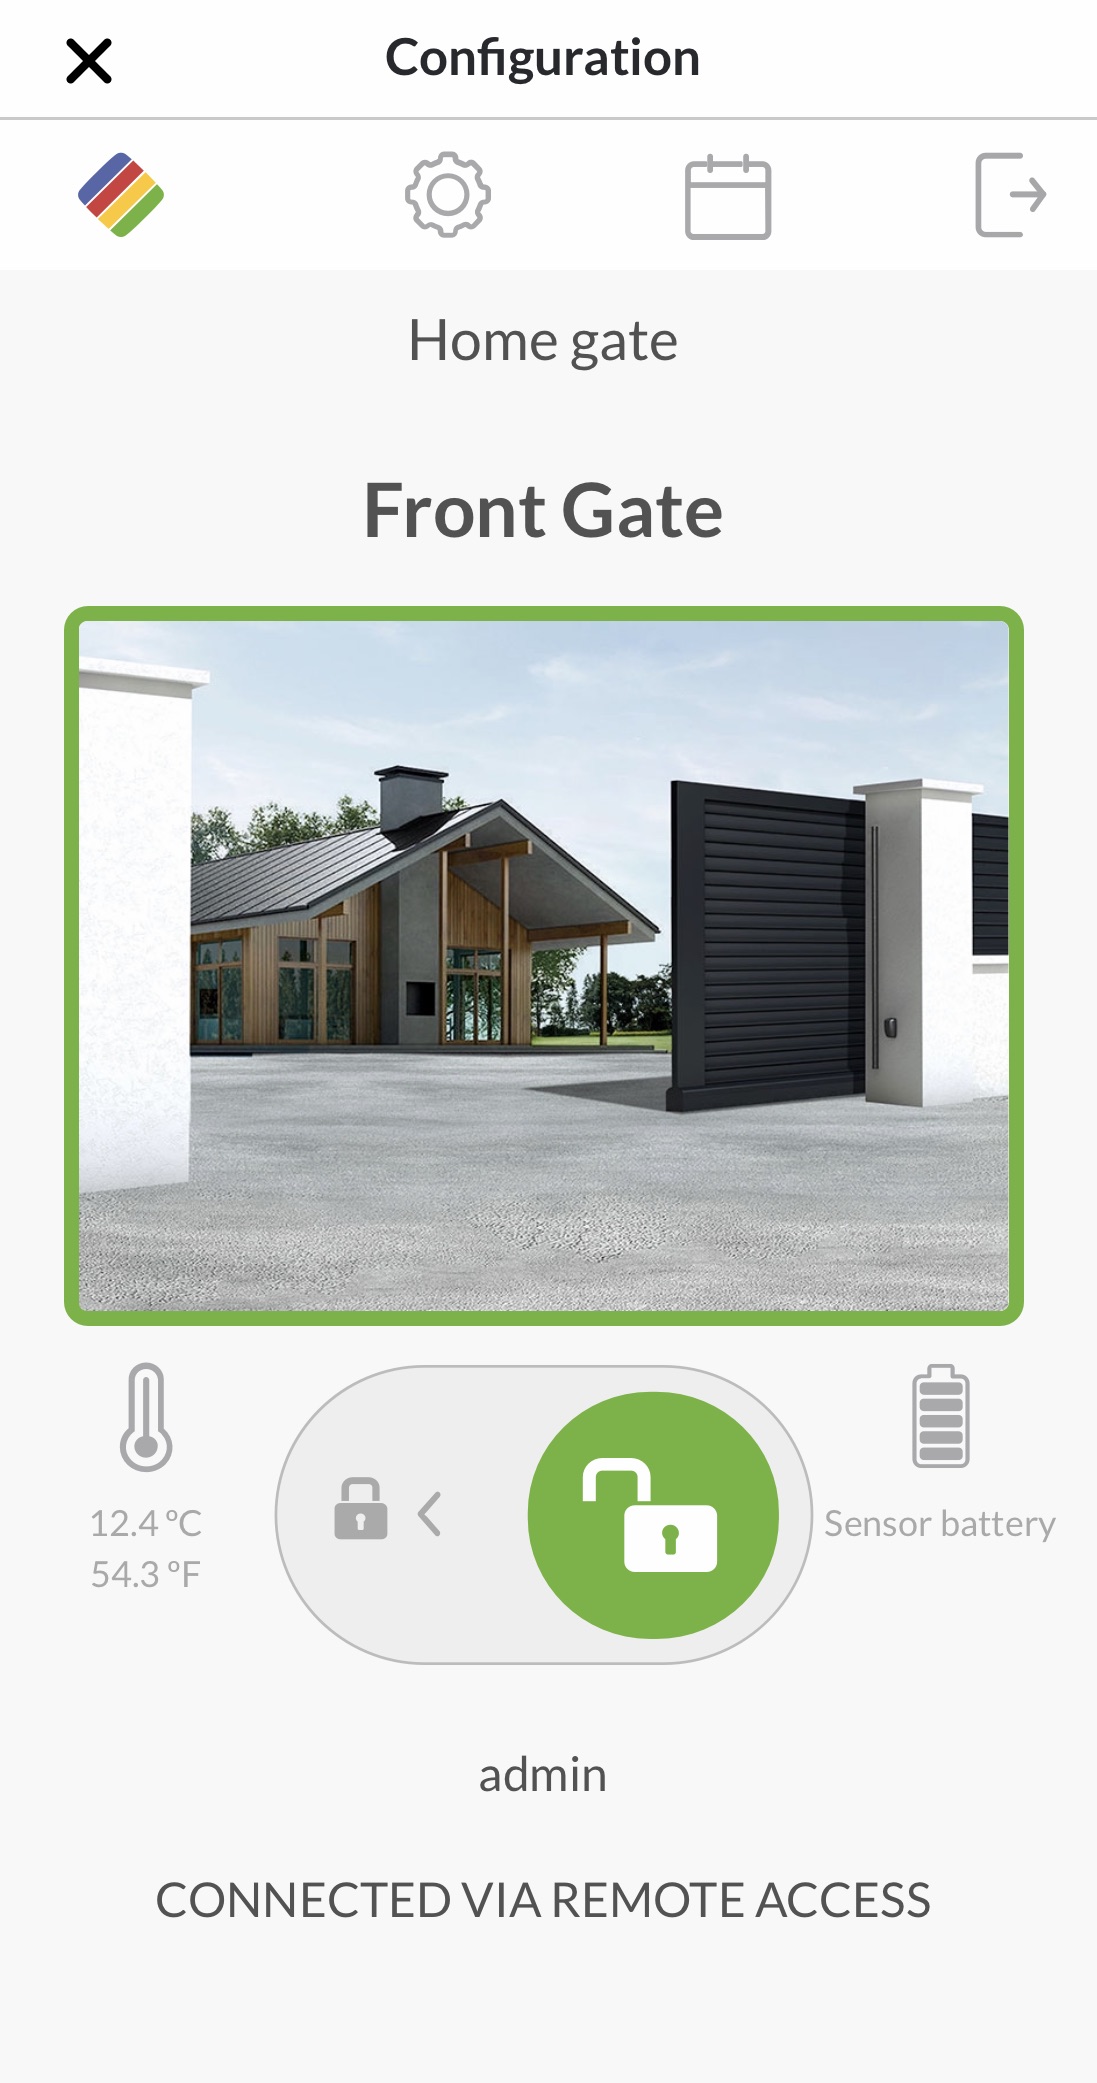
iSmartgate LITE gate opener will work with most gate openers and gives you the power to open and close your gate from your phone or tablet.
- iSmartgate LITE is compatible with many different gate openers
- Works with one gate only
- Offers voice control via Google Home, Alexa, and works with Apple HomeKit
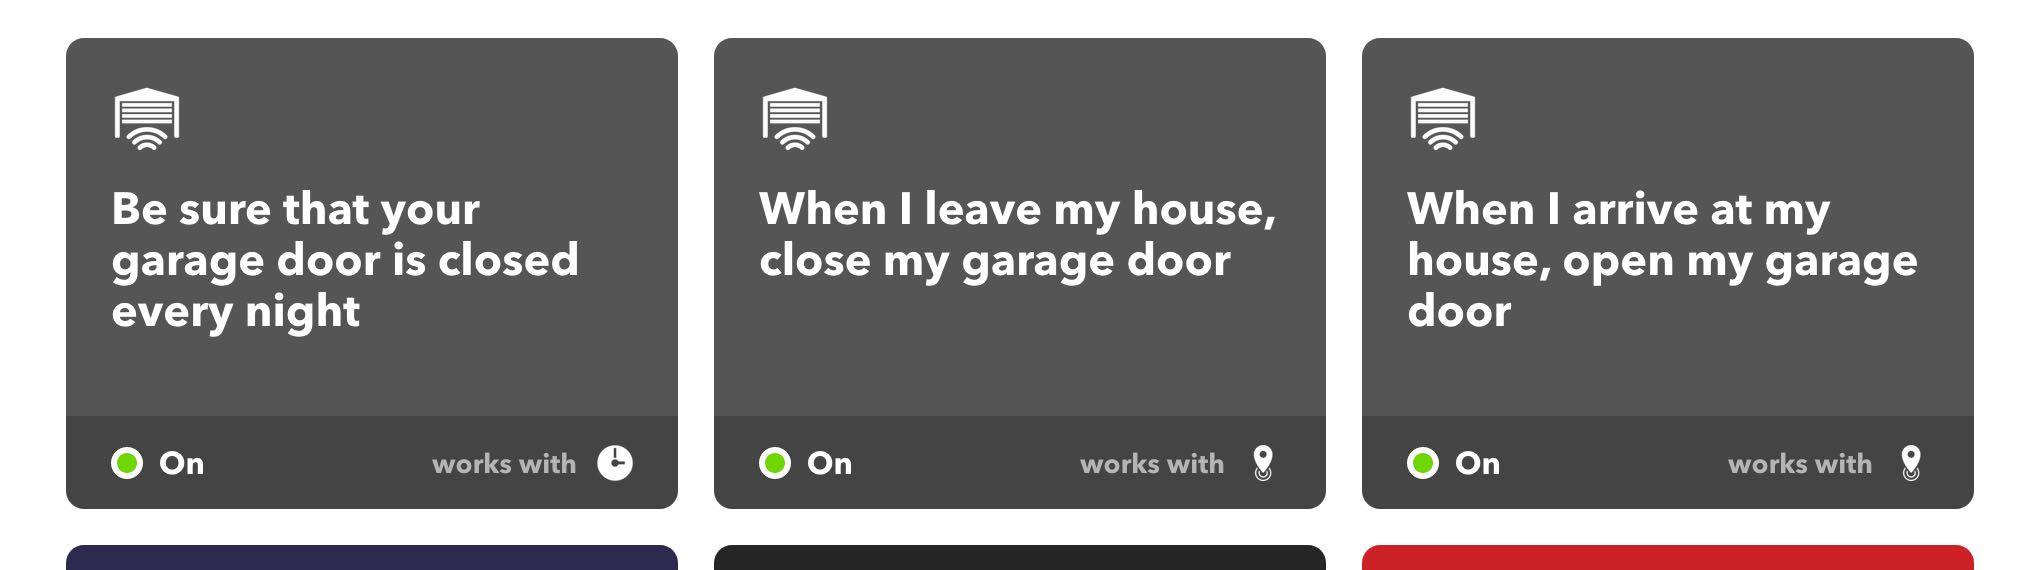
- Compatible with IFTTT applets for enhanced usability, including opening and closing your gate when you arrive home, leave, or at a certain time of night
- You can add users to your account so that everyone in your household can open and close the gate
- Notifications are sent when the gate opens and closes (for enhanced security)
- Add an IP camera, and you can keep an eye on your gate
Installing iSmartgate LITE
iSmartgate LITE is the next generation of gate opener from the company that makes Gogogate2. Because I’ve installed and reviewed that model, I knew when I unpacked the box how the install process works. Here’s the 3 step process I used to install the iSmartgate LITE gate opener.
1. Check the compatibility of your gate opener
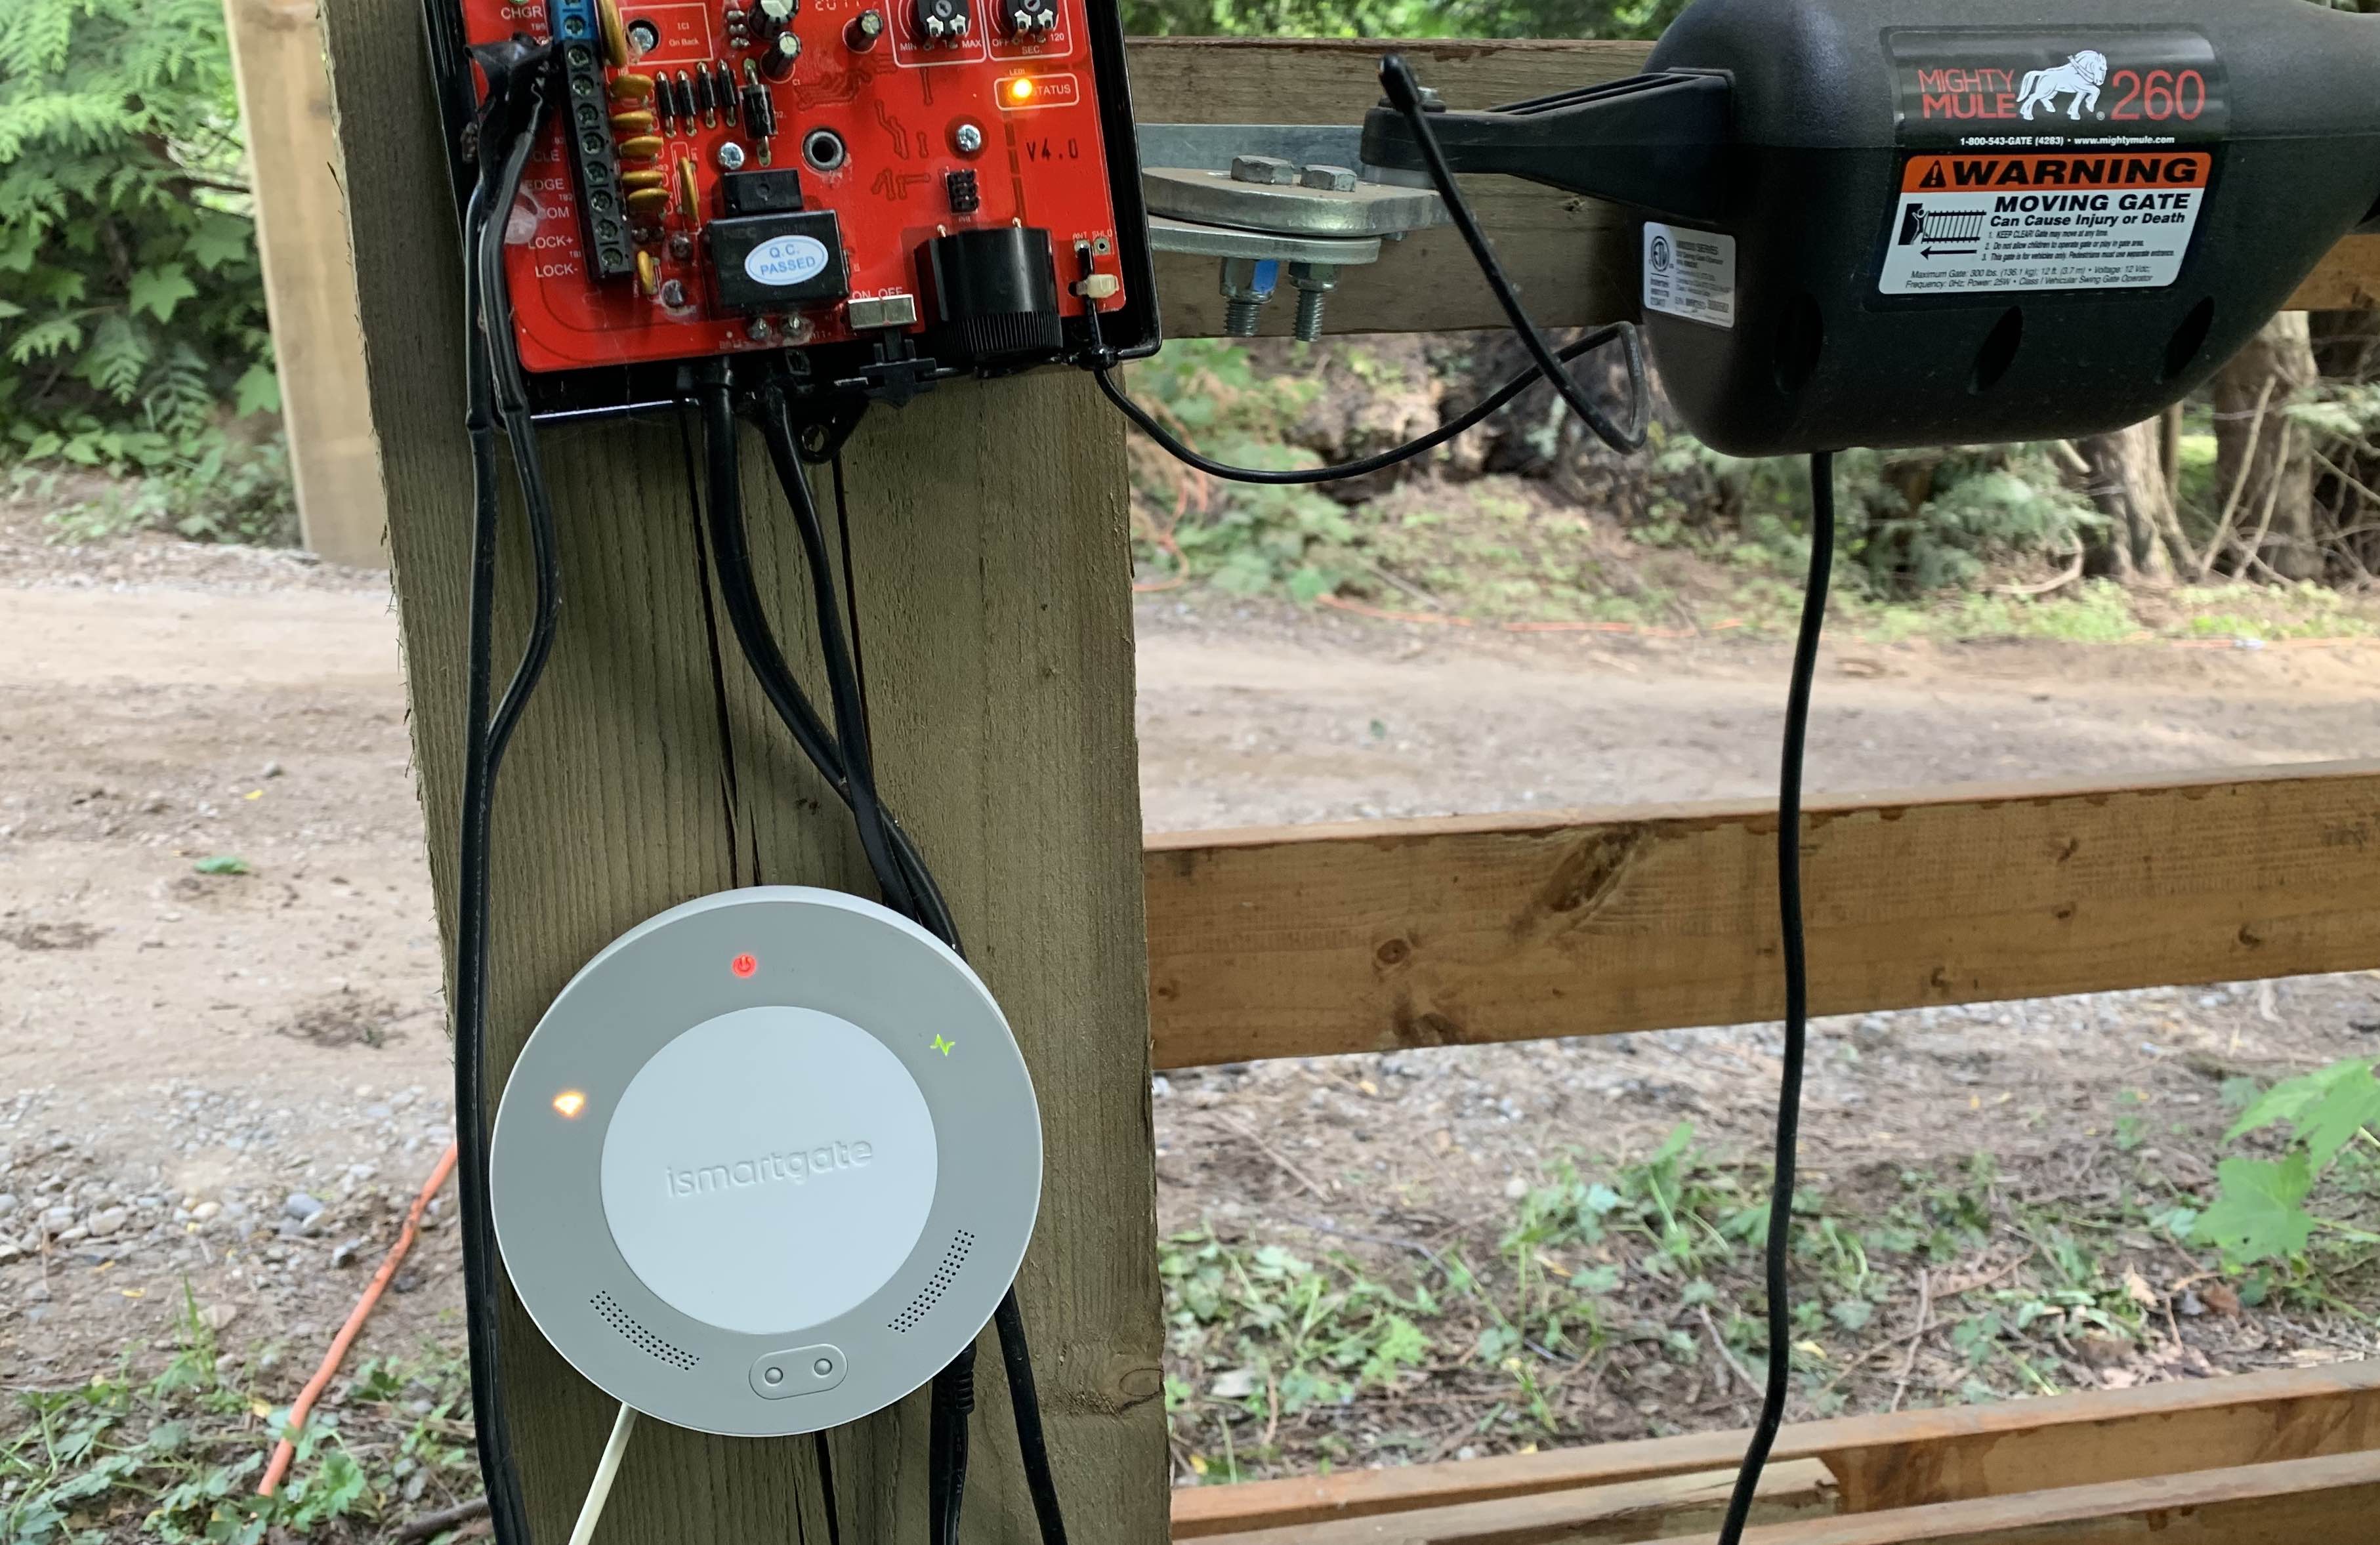
Your first step is checking the compatibility of your existing gate arm. I have a Mighty Mule gate opener on my gate, and I knew it was compatible because I had already installed Gogogate2. You can check to see if your own gate arm is compatible on the iSmartgate website compatibility checker.
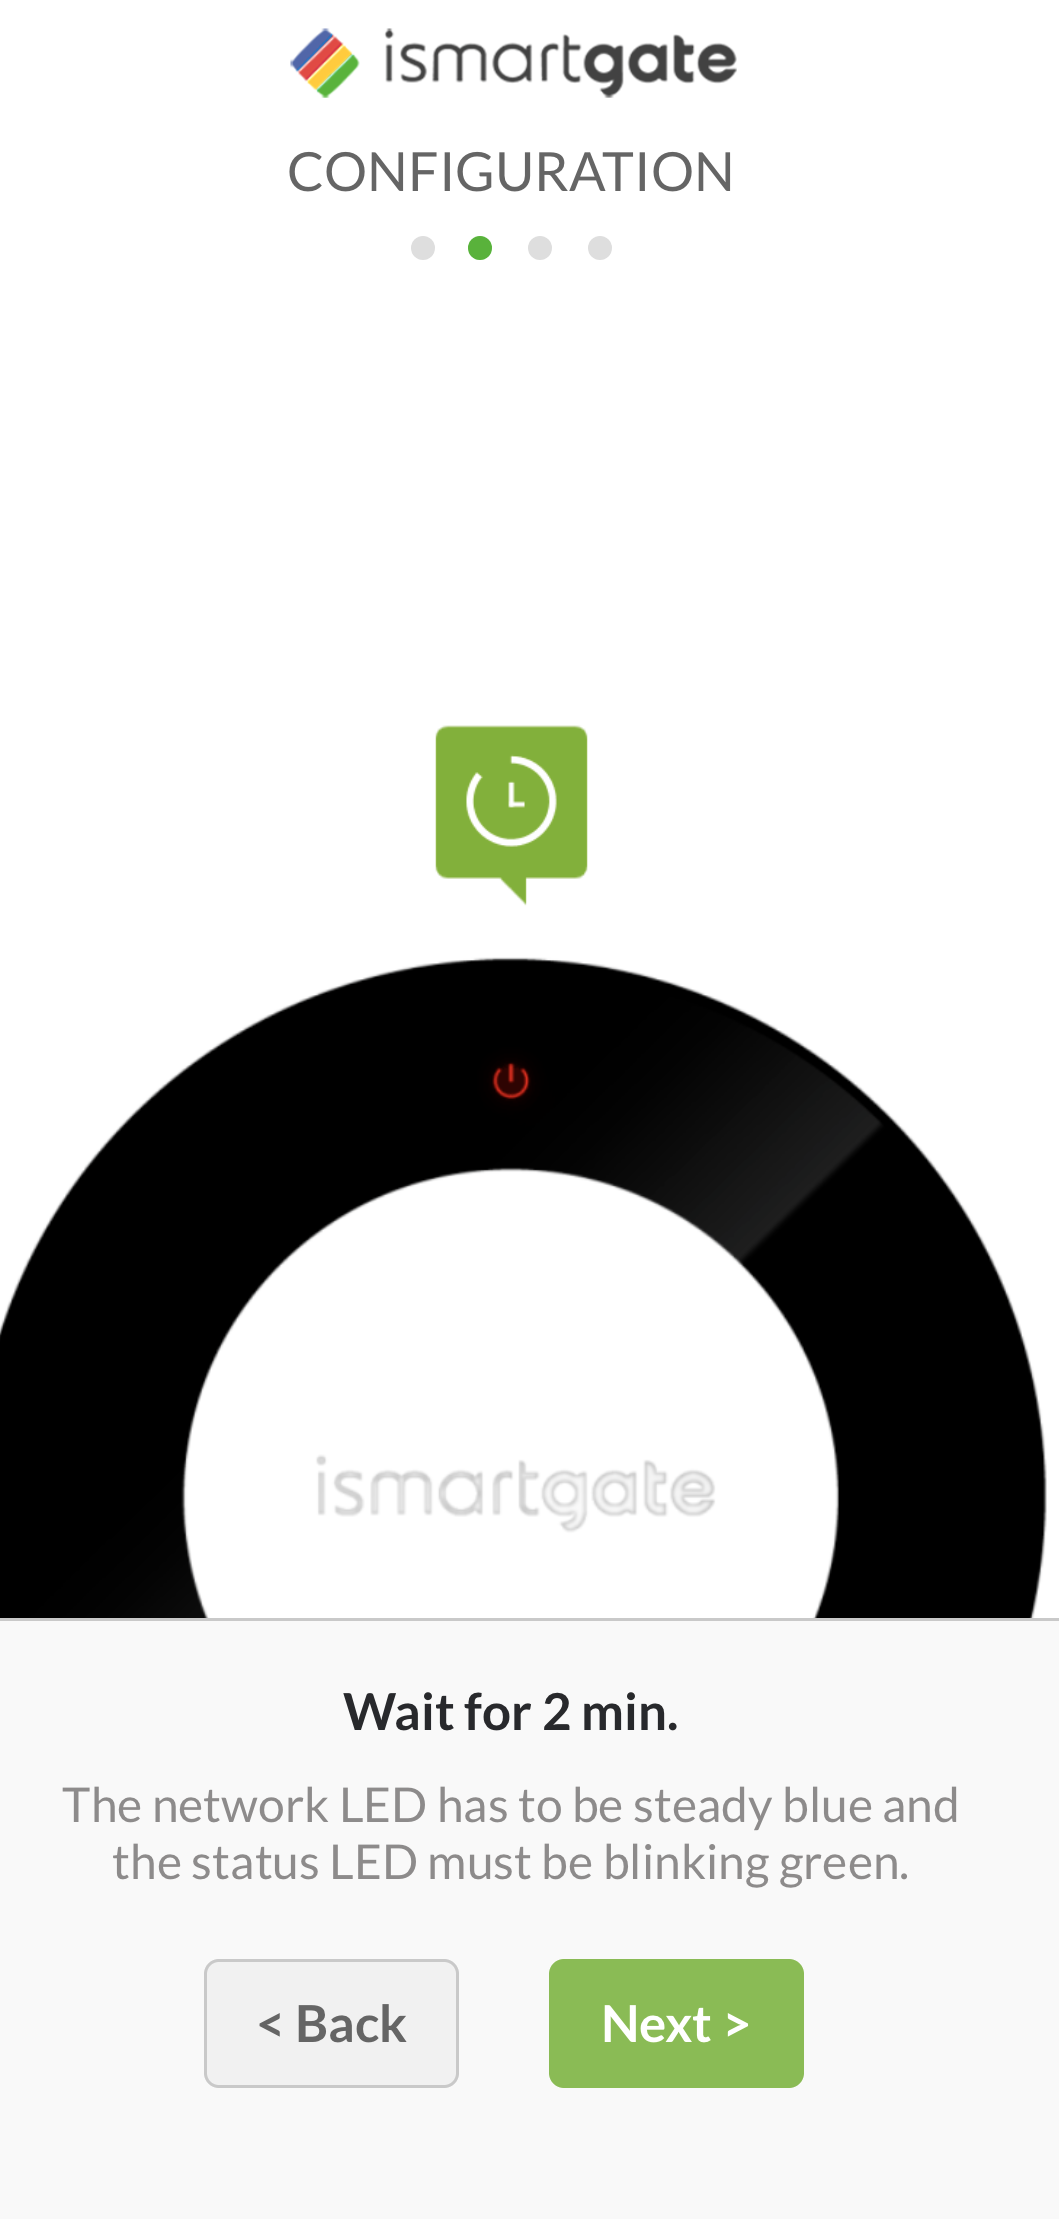
2. Plug in the iSmartgate LITE hub near your router
You’ll want to plug your iSmartgate LITE hub into a wall inside your house first. That way you can establish your Wi-Fi connection and set up your account before taking the device outside.
This gate opener must be connected to a 2.4GHz Wi-Fi connection. I set up a separate 2.4GHz guest access connection on my router that I called ‘Gate.’ To maintain a strong connection and avoid any drops in service, an Ethernet connection would be ideal. At my house, I can’t do it unless I string a 200-foot cord from inside my house, so I’ve stuck with Wi-Fi.
3. Attach wires and sensors to your gate opener
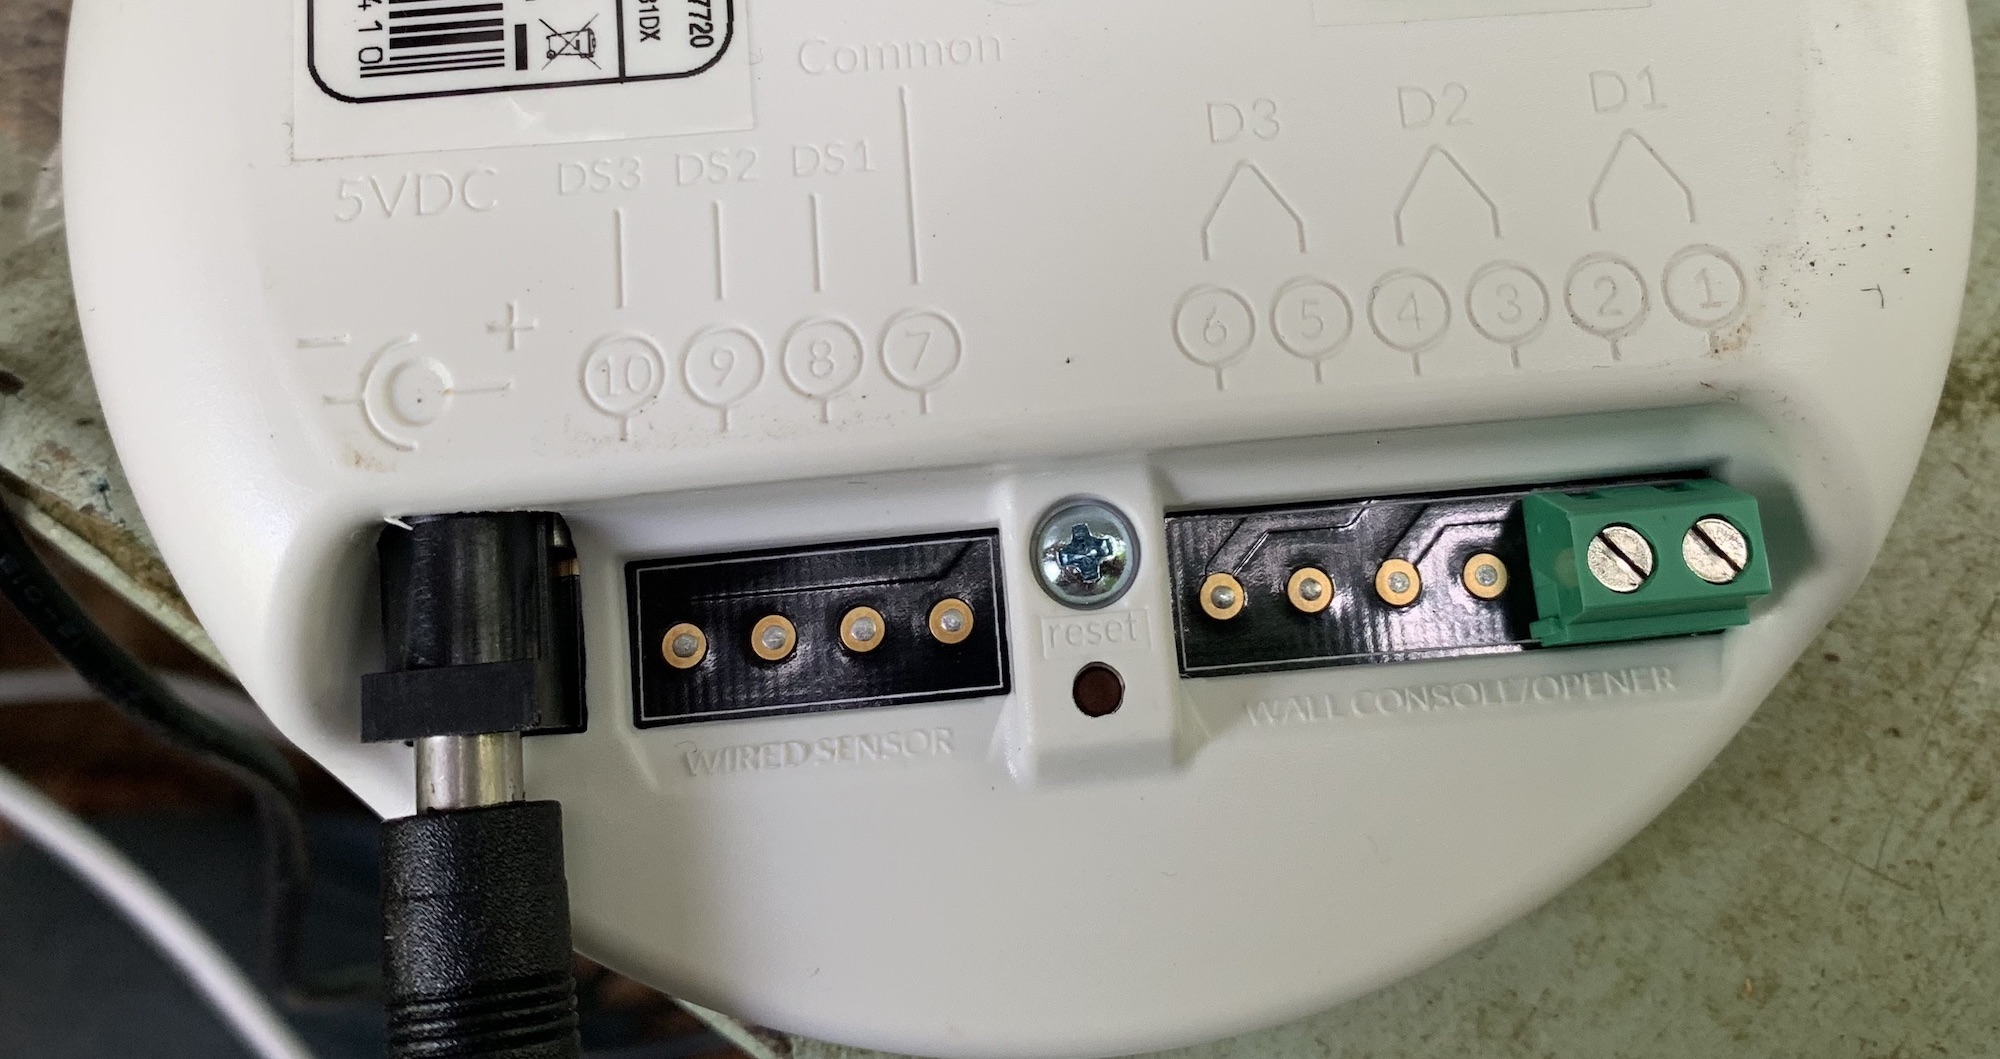
You can see how I connected iSmartgate LITE in my review video, and there are detailed instructions in both the app and on the iSmartgate website. Your install could be slightly different than mine, as each gate arm has slightly different controls, but I found the connection process quite simple.
Once I had my connection established, I took my iSmartgate LITE out to my gate and mounted it near my gate arm. As per the instructions, I connected two wires inside my Mighty Mule control box and also connected those two wires to the iSmartgate LITE hub. Once connected, I plugged in the iSmartgate LITE to power.
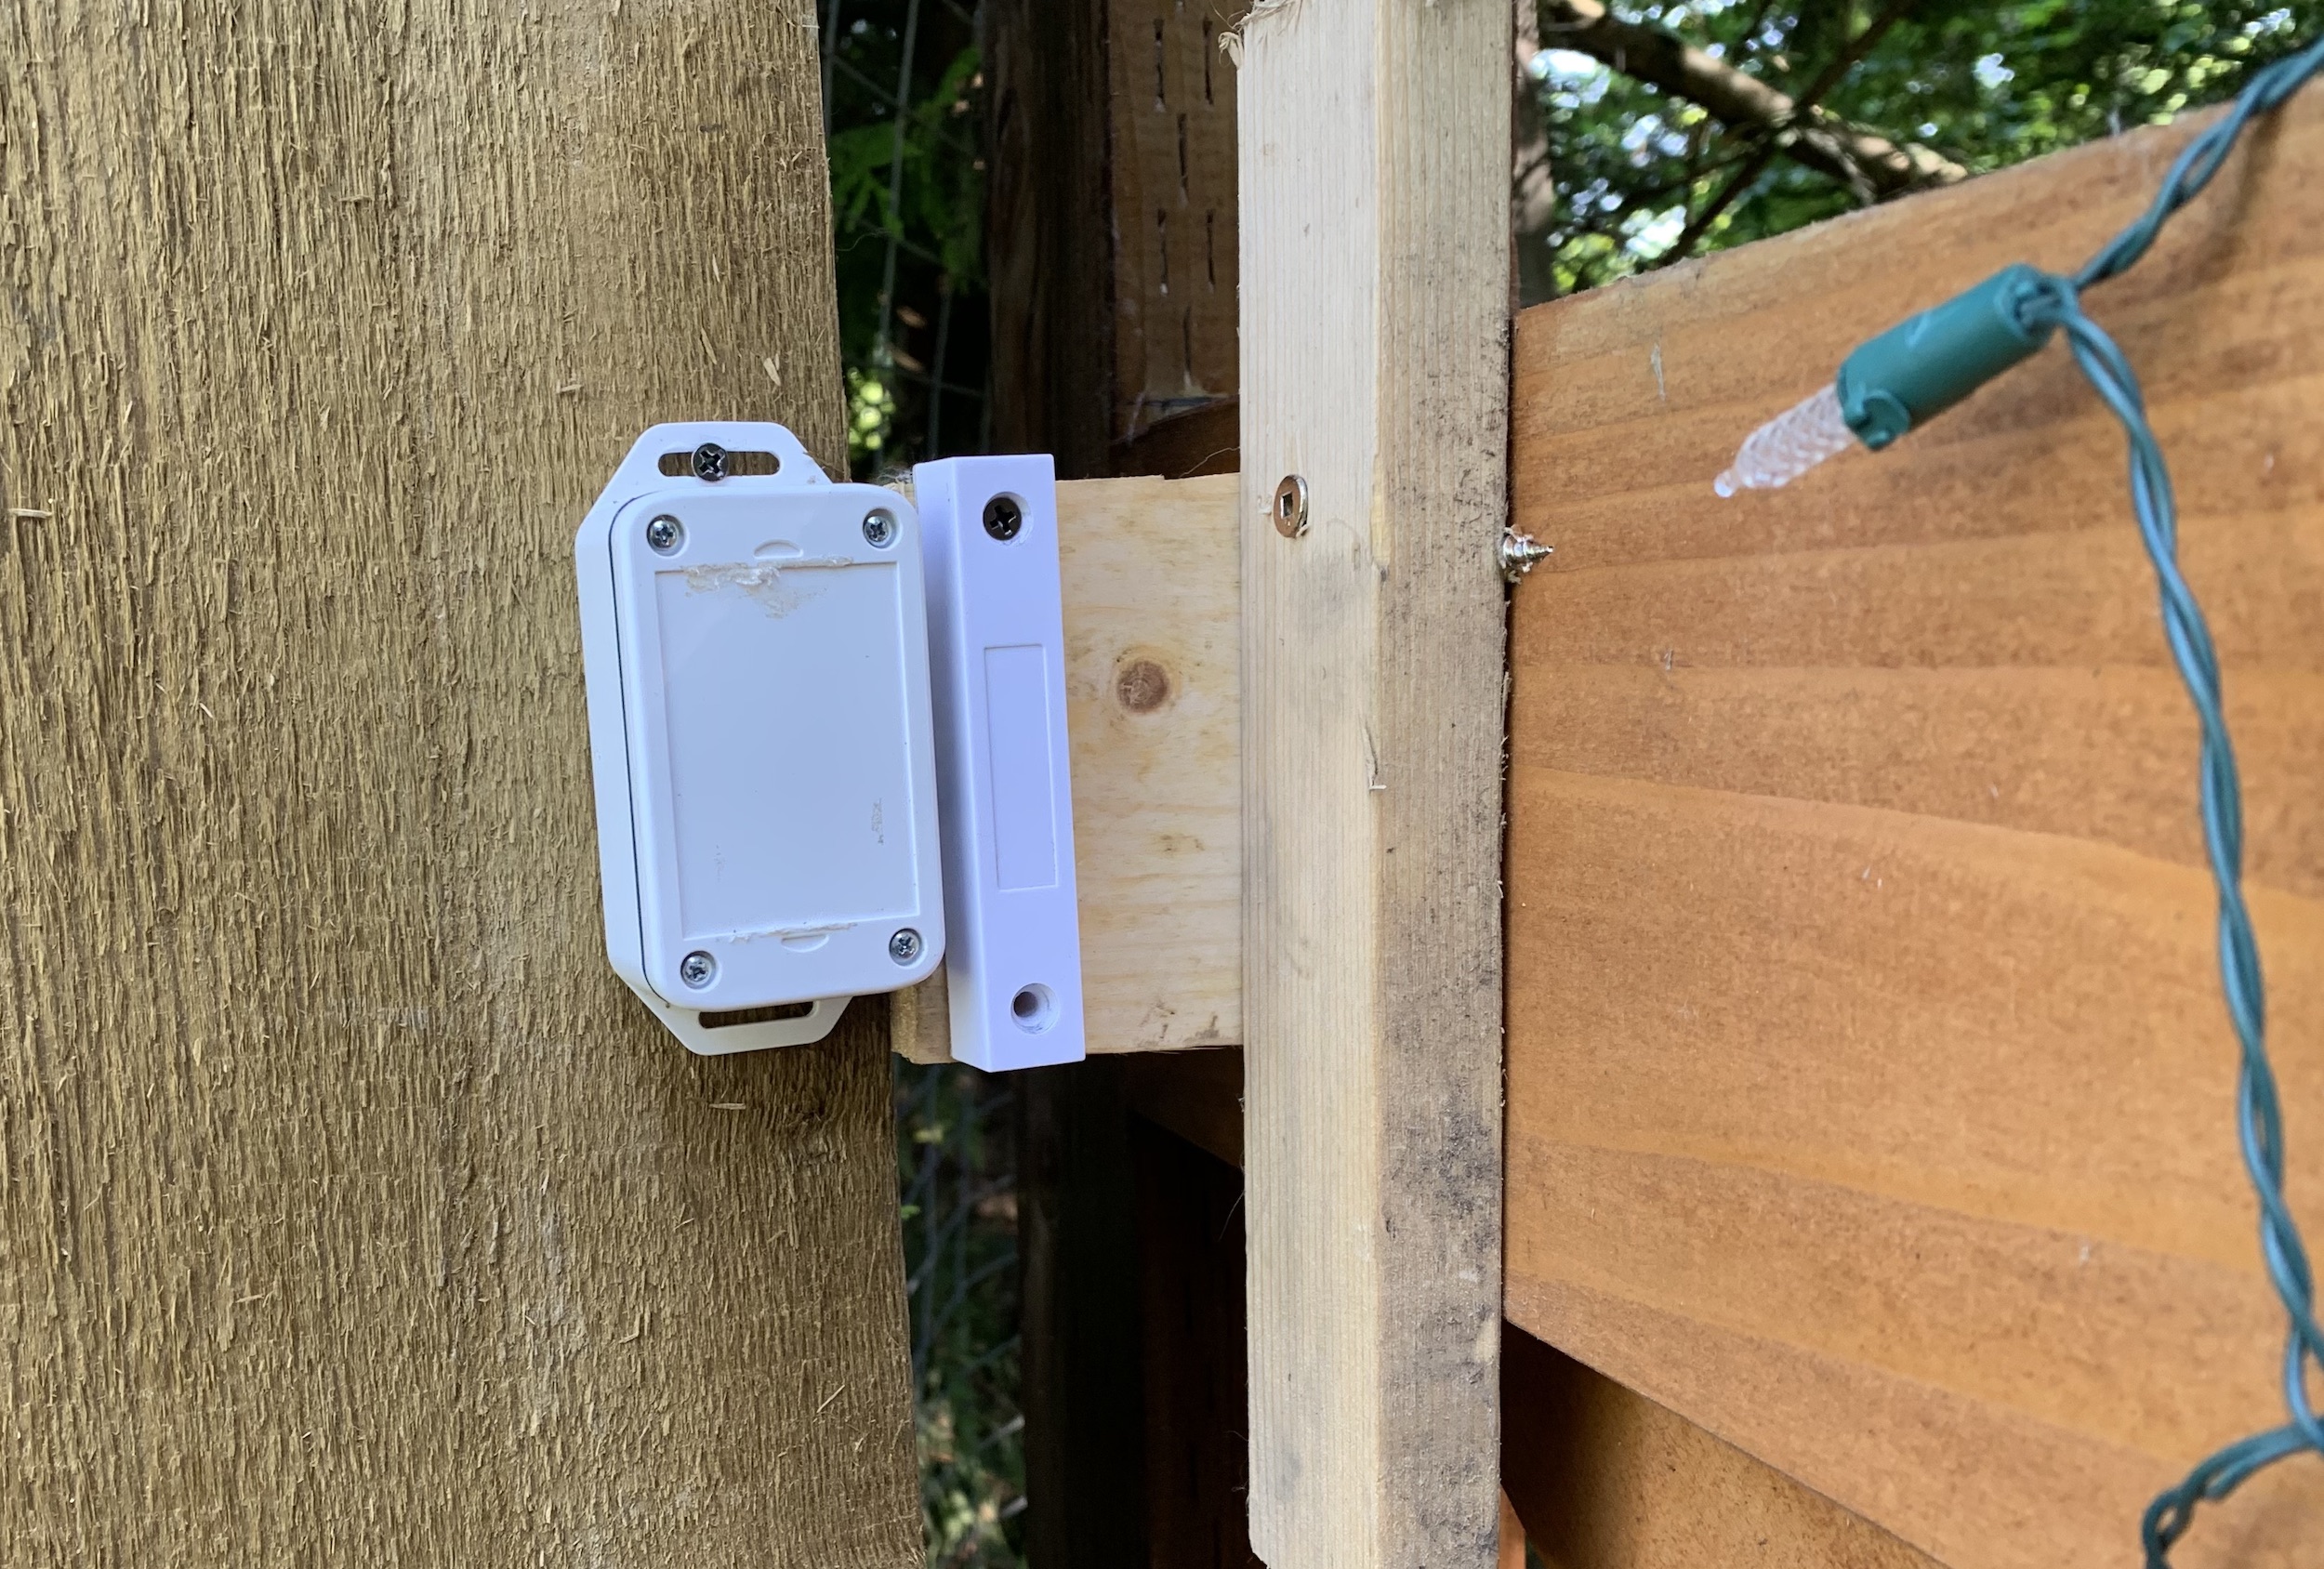
The lights flash from yellow to green when it finds its Wi-Fi connection. Once I knew I had Wi-Fi, I installed the sensors. The sensor is waterproof and weather resistant, so you won’t have to worry about having it out in the elements. You’ll need to place it close by the iSmartgate LITE hub so they can maintain their connection, and you can use the double-sided tape to do so.
I placed my sensor on the opposite side of the 6×6 post that holds my gate arm. I then placed the contact sensor on the gate itself, making sure the sensors lined up when the gate was closed. When your wireless sensor has a connection to the iSmartgate LITE hub, you’ll see a green light flashing on the right hand side of the device.
Testing Out the iSmartgate LITE Gate Opener
This is where the fun starts. I was really excited to test out this new release because I was sure it would be a decent improvement over the original Gogogate2. The iSmartgate LITE definitely has many strong points (and a few things that could be improved upon).
When Open is Closed and Closed is Open
 |
 |
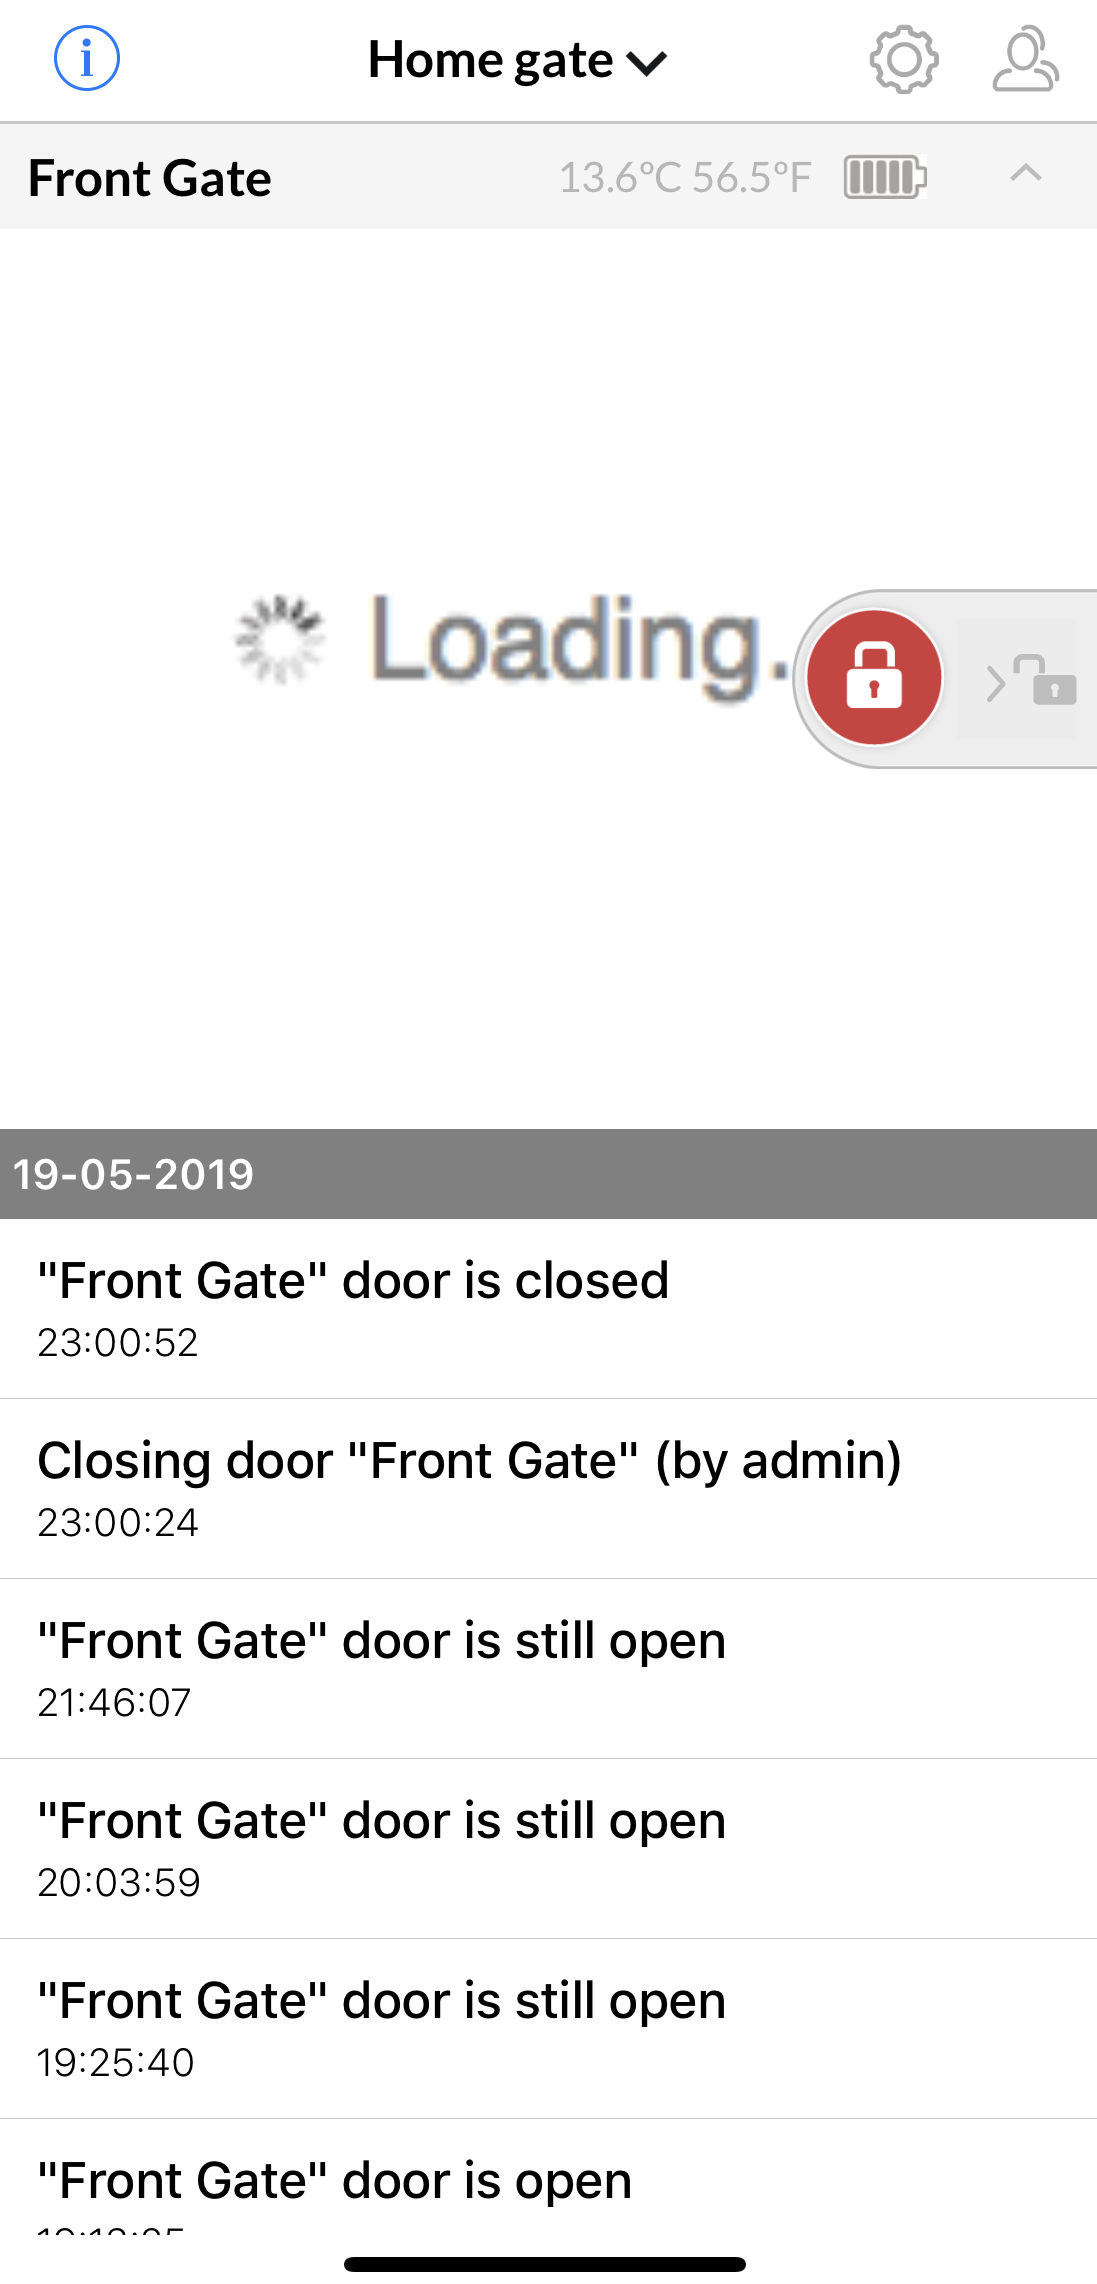 |
I didn’t have any issues installing iSmartgate LITE, and I was very impressed at how strong a connection it had to my Wi-Fi. But, when I was opening and closing the gate I noticed something strange… The app registered the gate as open when it was closed, and vice versa.
Although this wouldn’t be a big deal for the home user who just opens and closes the gate, when your gate is mixed up in the app, it prevents you from really utilizing the additional smart services and voice control.
I don’t have a traditional style gate. My gate is a 12 foot country farm gate, and it only swings open one way. The gates detailed in the instructions either swing together or come together via rollers. I think that’s why I had such a hard time getting the sensors set up correctly.
To fix the issue, I tried quite a few different things:
1. Un-Install and Re-Install the Gate Opener
I completely uninstalled and re-installed the device in both Apple HomeKit and the iSmartgate app. I used my gate remote to line the gate up with what the app said the current status was. It registered as open, so I opened the gate before connecting the iSmartgate LITE.
For some reason, when I opened the app to close the gate, the app now registered as closed.
2. Move the Sensors
When the uninstall and re-install didn’t work, I moved the sensors around. I wanted to make sure they were close enough together or far enough apart to register the right state.
I contacted iSmartgate’s customer support and asked them how far apart the sensors could be. With the Gogogate2 they had to be pretty close to the hub, and they told me the iSmartgate LITE sensors should be placed side by side and less than 1 inch apart when the door is closed.
I lined them up preciously, but my gate didn’t firmly close when it was in the closed position, so that didn’t work. Before that placement I had moved them to several spots while still keeping them close to the hub, but that didn’t work either. I even flipped the waterproof sensor around to see if a different position would work because my gate was different.
Ultimately, I had to add an additional piece of wood to bring the sensors close together so that they registered open and closed properly. Once I did that, I noticed the connectivity wasn’t as good, so it could be that the senors have to be even closer to the hub than I have them. The Wi-Fi connection is still strong, but the app says it can’t connect to the gate.
3. Trick the Gate
I disconnected the wires connecting the iSmartgate LITE hub to the gate arm, but I didn’t disconnect the power. The hub maintained a connection to the Wi-Fi, but I closed the gate with my remote without the sensor ‘knowing’ I did it.
When I opened the app, the gate was open when it was supposed to be open. That part of it is working great now. The sensors are lined up next to each other when it’s closed and are far apart when it’s open. It does still seem to register as open in the logs when it’s actually closed, but that doesn’t happen all the time now.
Long story short: every gate is different. I had to improvise to get mine to work, but I think it was well worth the effort.
Maintaining a Wi-Fi Connection to iSmartgate LITE
Given that it’s a gate opener (and that anyone with a gate is going to have it outside and away from their house), having a strong antenna to connect to Wi-Fi is important. I was happy to see that iSmartgate LITE has an improved antenna. Even though I placed the iSmartgate LITE around 100 feet from my house, once I established my connection to Wi-Fi, I only saw it drop the connection a few times.
That being said, there were quite a few times when I would clearly see that the green Wi-Fi light was on, but I couldn’t connect to the gate opener. It would just tell me the connection failed and ask me to try again. When this would happen, I would close the app off completely, re-open it, and the connection would be established.
Occasionally the connection would lag slightly and it would take quite a while to switch from the gate opener to the settings, but overall I was able to consistently open and close the gate from wherever I was.
Using IFTTT with iSmartgate LITE
The additional smart home services added to iSmartgate LITE are what really sets it apart from other gate openers. I was excited to see that you can use IFTTT, Google Home or Alexa, and Apple HomeKit.
When you’re using IFTTT, you can connect to several applets from Garage Wi-Fi & Gates. I connected IFTTT to my iSmartgate LITE to use Geofencing so the gate will open when I get home and close when I leave. IFTTT also has an applet that ensures the gate is closed at a certain time every night, and it’s so great to know that I’ll never have to worry about leaving it open all night.
It takes a few hours for IFTTT to kick in, but once it does the applets work really well. I had one instance where I came home and it didn’t open, but I’ve seen it close behind me.
Voice Control and iSmartgate LITE
It was easy to connect iSmartgate LITE to my Google Home for voice control. To open or close the gate, all you have to do is say, “Hey Google, open the front gate.” I found it took almost a full minute to make a connection to the gate, and sometimes Google Assistant would say it couldn’t find the front gate, so it wouldn’t be able to open or close it.
8 times out of 10 it will work, but I did notice that after I fixed the open/close issue on the app, Google is still confused whether it’s open or closed. I’ll ask for it to open, and the assistant will occasionally say it’s still open.
Weatherproofing and iSmartgate LITE
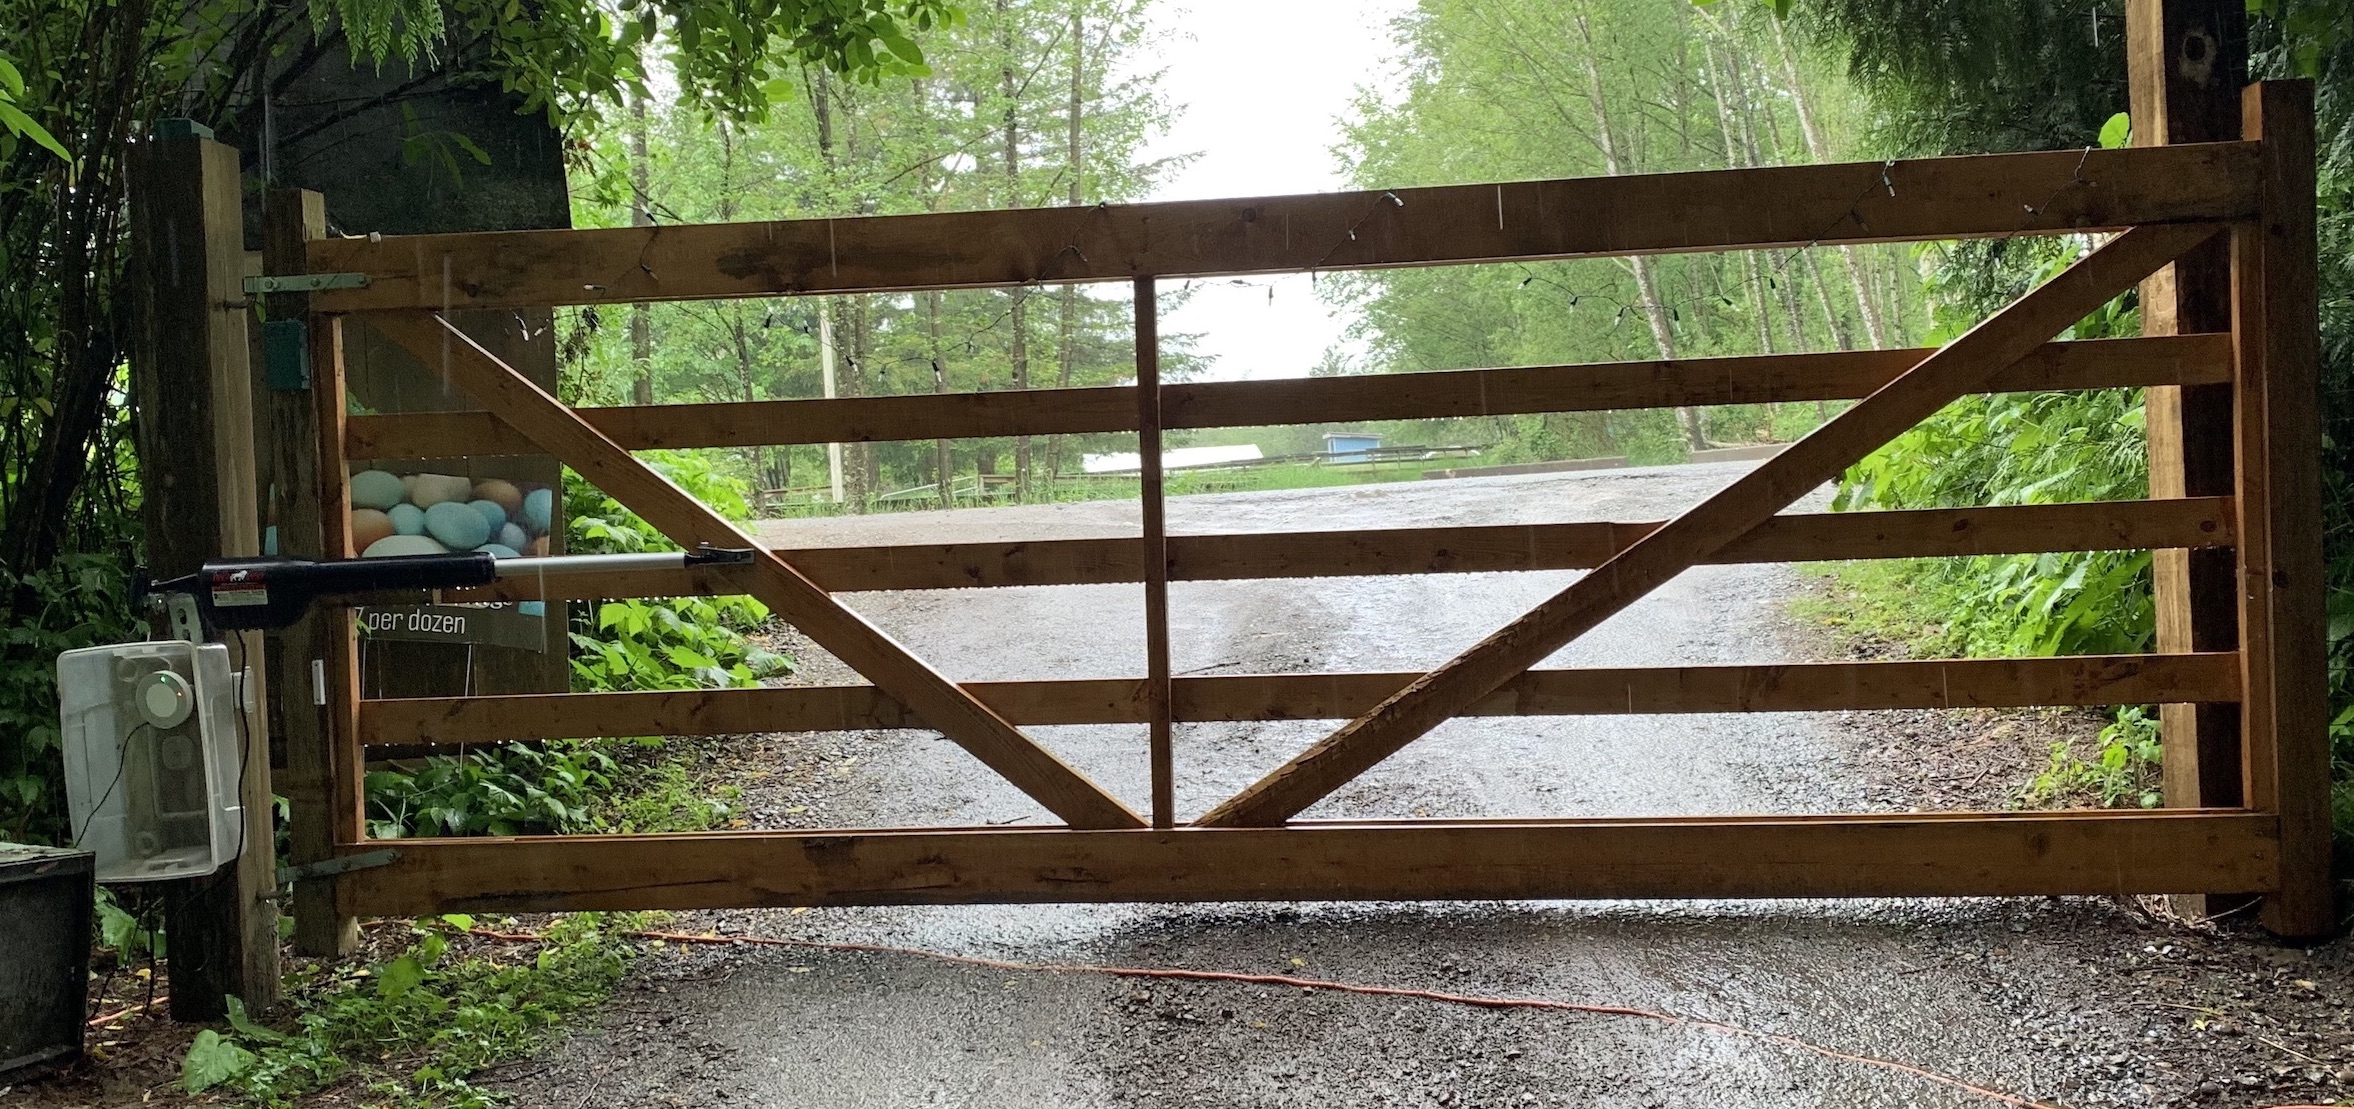
When using iSmartgate LITE, there’s one thing you’ll need to keep in mind. While the sensor that sits on your gate is waterproof, the actual iSmartgate LITE hub is not. You’ll need to protect it from the weather somehow.
We had several days of sunny weather when I was testing it, but when the rain hit, I placed it inside a plastic container on the 6×6 post that held the gate arm. That protects it from rain temporarily, but I believe that putting it in a square plastic case would better protect it from heavy rain or snow.
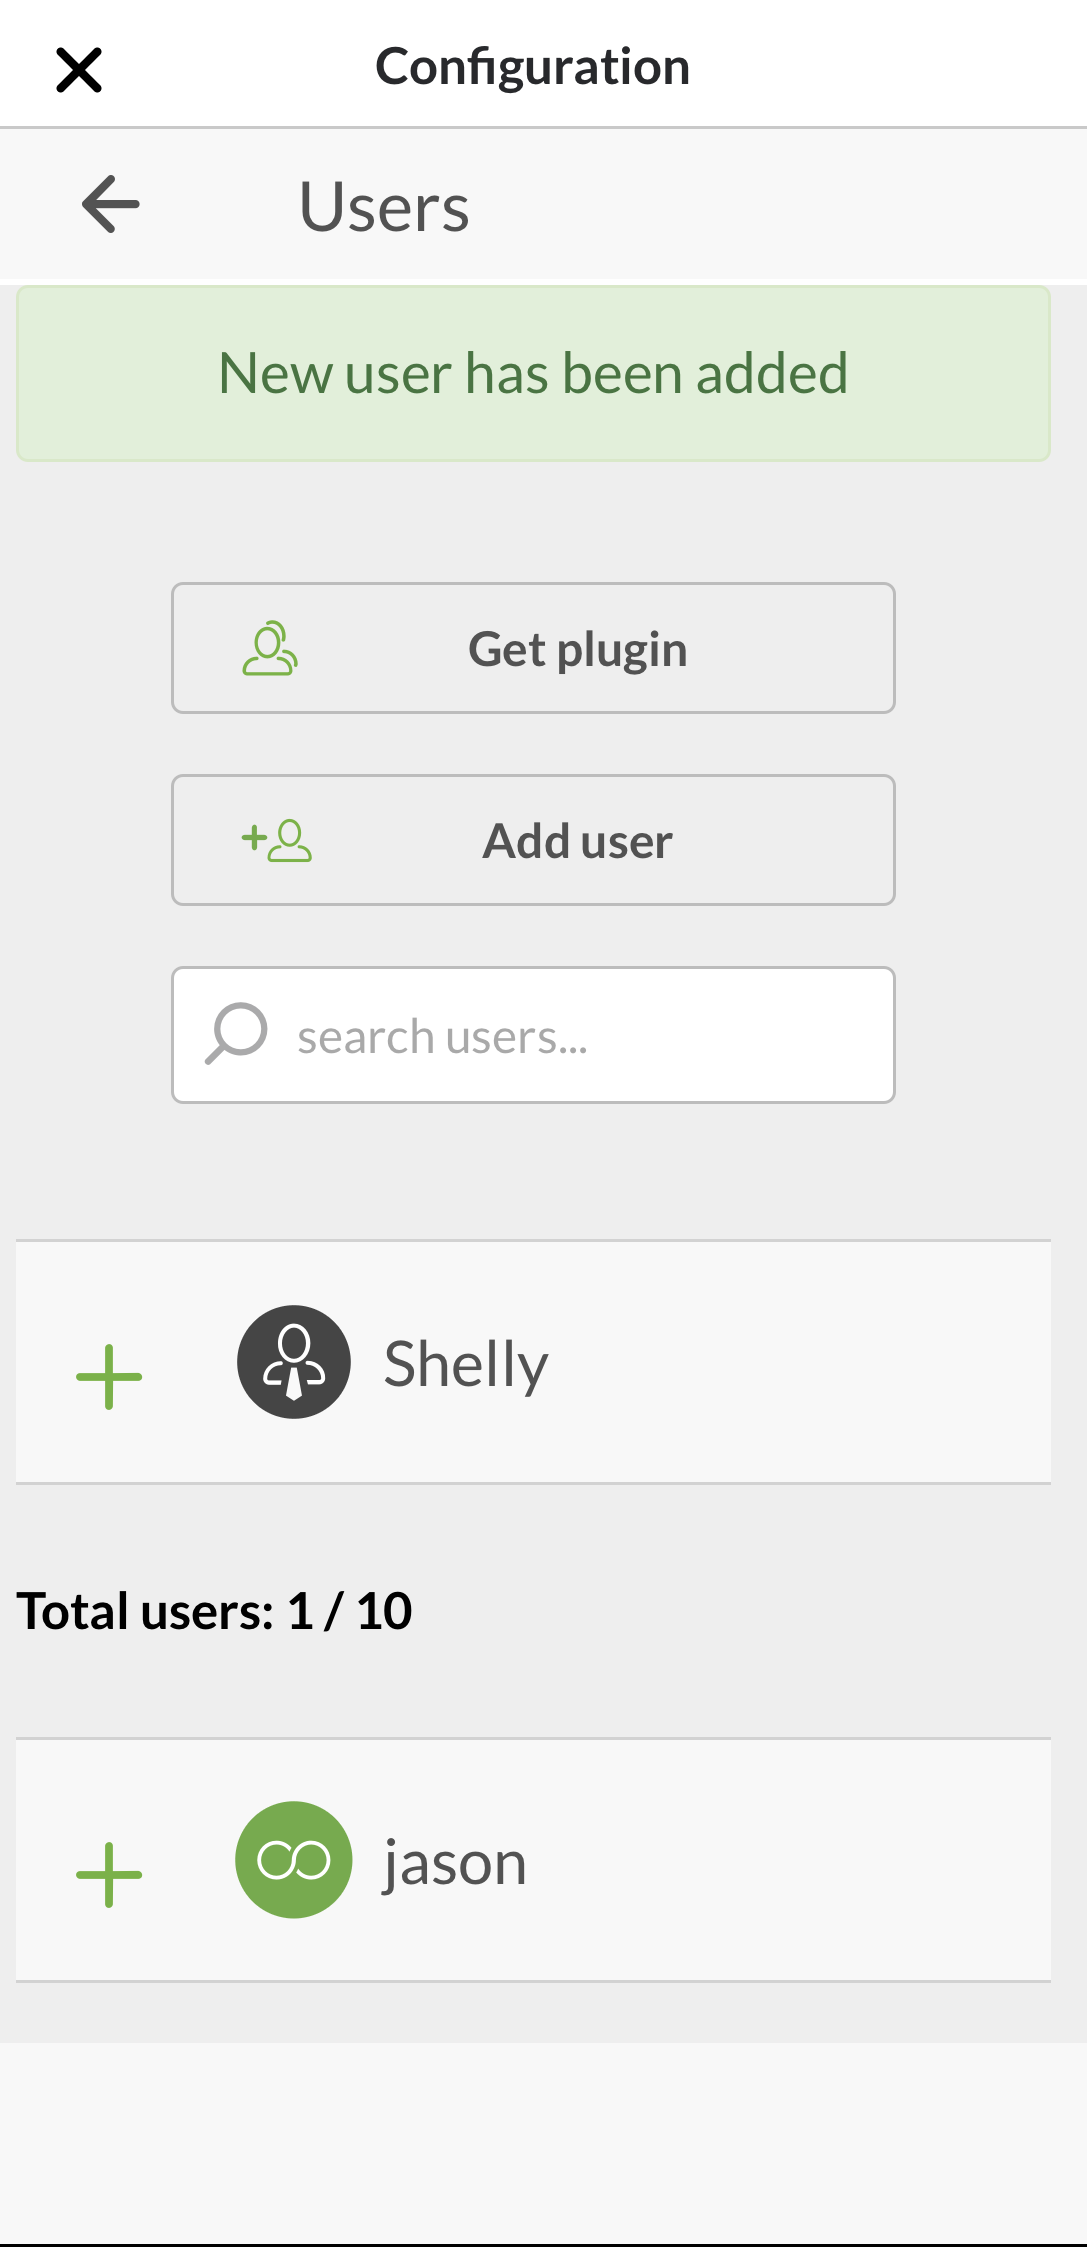 Adding Users to iSmartgate LITE
You can add up to 10 different users who can have access to your gate. You can also set the access type, restricting them from opening and closing it during certain times if you’d like to.
Should You Buy iSmartgate LITE?
If your goal is to open and close your gate without needing a remote or having to get out of your car, iSmartgate LITE is a great, price-conscious option. It’s such a useful device, especially when you can open and close the gate remotely from anywhere. I’ve opened the gate for delivery people (and closed the gate so my dogs don’t leave), and I’ve been hours from home.
The bug in the app where it registers open and closed incorrectly is generally due to sensor placement, but there could also be a bug in the user interface.
Overall, this is definitely a device that I’ll be using long term. I’m excited to see what they’ll add to it next.
If you have a gate and you want to control it via your phone or tablet, take a look at iSmartgate LITE. It’s available at Best Buy Canada right now.


