
 I’ve always been a huge fan of Netgear Arlo Pro home security cameras. We bought our first Arlo back in 2015 when they were the only wire-free, weatherproof home security camera on the market. Although that version of Arlo didn’t have sound and lacked a siren built into the base station, we still use it because it has incredible range and extremely sensitive motion detection.
When Arlo Pro was available, we added those cameras to our existing lineup, and I really appreciate the two-way audio, HD video, and siren that you can trigger with just a tap on the app. I also loved that the Arlo Pro home security camera came packaged with a rechargeable lithium battery. It makes charging the cameras and keeping them online even easier.
Now Netgear has made it even easier to use Arlo Pro. They now offer the extremely durable Arlo solar panel to charge your Arlo Pro home security camera.
Here’s a look at how to set up the Arlo Solar Panel and how it works.
Appearance and Features of the Arlo Solar Panel
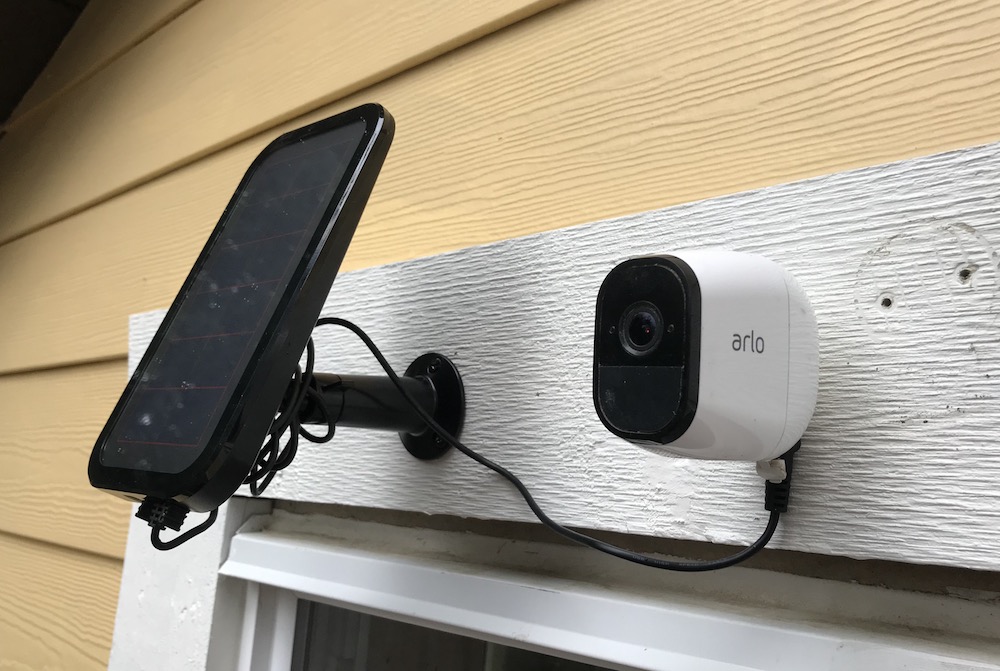
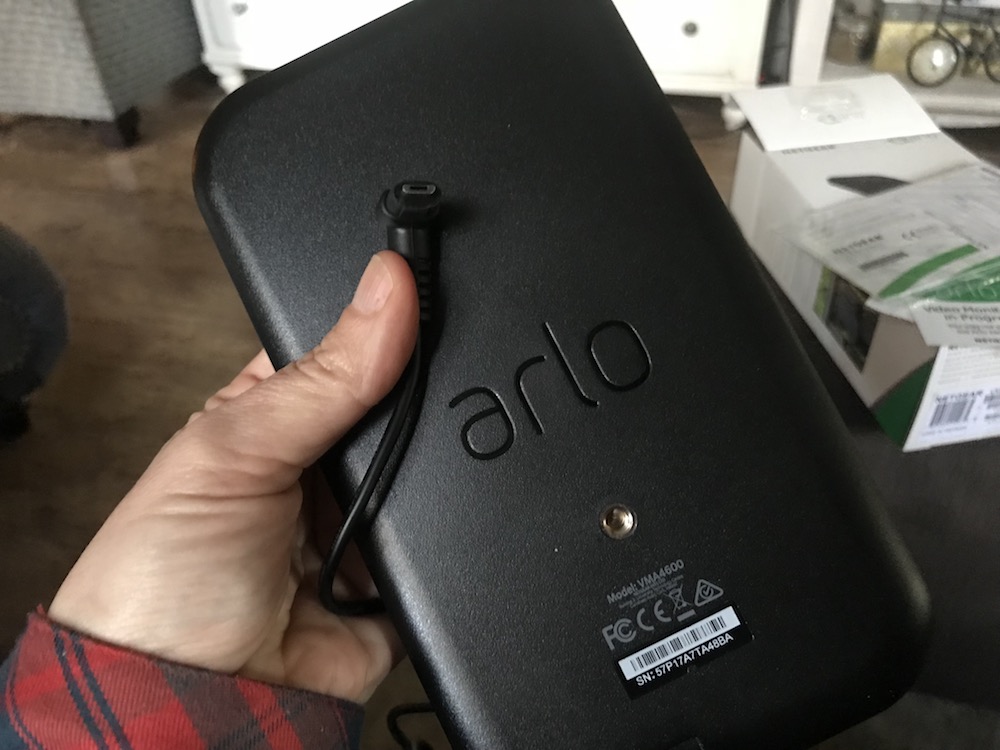
The Arlo Solar Panel is a simple device. It’s only function is to provide continuous battery power to your Arlo Pro or Arlo Go camera. It does this via a weather-resistant, thin solar panel that’s 11.43 cm wide x 20.06 cm high x 2.18 cm. It’s lightweight too, weighing only 307g.
The Arlo Solar Panel includes an adjustable mount and a 6ft. long power cable that plugs into the battery of your Arlo Pro home security camera.
Installing the Arlo Solar Panel
 In terms of installation, I’ve always found Arlo cameras to be extremely easy to set up. Once you hook up your base station, all you have to do is charge your Arlo Pro, sync the camera via the app, and you’re ready to place your Arlo Pro camera anywhere.
The Arlo Solar Panel is just as easy to install. It comes with the same outdoor mount that you can purchase as an accessory for the Arlo Pro home security camera. You just need to choose a spot that’s within six feet of where you’d like to have your camera and drill the mount into wood.
Netgear has a few best use recommendations for mounting the Arlo Solar Panel. If you live in the northern hemisphere, they recommend you face the solar panel true south. When in the southern hemisphere, they recommend you face it true north. If you’ve never heard the term true north or true south, true north is defined as being found according to the Earth’s axis, not the magnetic north.
 The basic idea is to place it so it can sit in full sunlight for as long as possible each day. It comes with screws and drywall anchors, so you don’t need to have anything other than a drill to mount your solar panel, and you can mount it on your fence, on your eaves, or wall.
Once you’ve attached the outdoor mount to your wall, you need to screw the Arlo Solar Panel to the mount. That’s easily done with a few twists of the bolt. When it’s attached, you just adjust the angle of the solar panel to maximize the capture of sunlight, and tighten the bolt so the solar panel doesn’t move.
The last step is plugging the solar panel in to the charge port of the Arlo Pro camera.
Using the Arlo Solar Panel on Your Arlo Pro Home Security Camera
 Arlo Pro cameras make it really easy to continually monitor your home and yard, and the Arlo Solar Panel keeps your camera fully charged so you never have to climb up a ladder and pull it down or have it offline for a few hours.
My Arlo Pro home security camera was at 50% battery when I installed the Arlo Solar Panel. It’s been a really cold and cloudy week, with only a few hours of sun each day. Those few hours were enough to get my camera up to speed, and it’s now sitting at 100% charge.
If you log in to the Arlo App during periods of sunlight, you’ll see the charge icon next to your camera, showing you that your camera is currently charging via solar energy.
What Can Affect Your Arlo Solar Panel Performance?
 Since I installed the Arlo Solar Panel, my Arlo Pro camera has increased in battery power until it hit 100%. I’ve had enough sunlight to maintain that charge. The only thing to keep in mind is that there are a few different factors that can affect your solar charging.
The Arlo Solar Panel can’t charge your camera’s battery if the temperatures are below freezing. It will work extremely well with operating temperatures between 0° to 50°C. The charge also depends on whether or not there’s too much shade where you’ve placed it, if there is dust on the surface of the panel, or if you have low average sun exposure in your area.
If you find there’s too much shade, you can easily move the solar panel, and dust or debris is easy to remove with a quick wipe of the panel.
Overall Thoughts on the Arlo Solar Panel
What’s not to like about solar energy? If you have the original Arlo, you know that replacing the batteries, even if they last a long time, can be expensive if you have several cameras. I loved the design change to rechargeable batteries with the Arlo Pro, and now that the Arlo Solar Panel is available, keeping these cameras up and running has become even easier.
Arlo Solar Panels are easy to install, effortless to use, and given where I’ve placed my Arlo Pro home security camera, it’s a relief to not have to worry about scaling a ladder on uneven ground to pull down the camera for charging. The six foot cord is long enough to hook up your solar panel in direct light, even if your camera is in the shade, and if you don’t need the extra length, you can wind the cord around the outdoor mount like I did.
You can find your own Arlo Solar Panel for the Arlo Pro and Arlo Go cameras in home security camera accessories right now on Bestbuy.ca.


Good article. Not to be picky but your notes on the lightweight nature of panel has a typo… “It’s lightweight too, weighing only 307 kg”. If that panel weighed 307 kilograms it would be a beast! 😉 I assume you meant 307 grams (g).
Otherwise great article.
Hi Daniel, I’m glad you like the article and thanks for pointing out the error.
Best regards,
Martin
Comments are closed.