


I remember when my Grandma used to cook turkey for the entire family. She’d get up at 5 a.m. to prep the bird and have it in the oven by 6 a.m. It would cook almost all day on low heat, and the turkey would be ready in time to eat dinner with 30 extended family members. Times have definitely changed, and thankfully they’ve changed for the better. Although I don’t cook for that many people, cooking the perfect turkey isn’t as difficult as it used to be.

Instead of cooking all day, the average turkey only needs 3 or 4 hours in a convection oven. You don’t have to be an expert chef to cook one either – I cook a medium-sized turkey for my family of 6 every Thanksgiving, Christmas, and Easter, so it’s a meal that anyone can prepare. For best results, all you have to do is follow these step-by-step instructions on how to cook the perfect turkey.
Step one: Thaw your turkey
After you go to the store and pick out a big, beautiful turkey, your first step will be to thaw it out. Health Canada recommends you always defrost the turkey in ice-cold water in your sink, in your refrigerator, or in your microwave if you have a larger-sized model that will fit a turkey. Anything that drips out of the turkey could be contaminated, so disinfect any surface that’s been touched by drippings.
How long does a turkey need to thaw?
It’s very convenient to buy a frozen turkey, but you can’t cook a turkey from frozen so you’ll need to make a plan to thaw it out a few days before you plan on cooking it. There are, as noted, three ways to thaw a turkey – refrigerator thawing, cold water thawing, and if available, microwave.
When refrigerator thawing, you’ll want to keep your turkey in its wrapper and place it on a tray so it doesn’t leak. You’ll need to let it thaw for at least 24 hours for every 5 lbs., so if your turkey is 20 lbs., it needs to thaw for 4 days in the fridge.
Cold water thawing is slightly different. When thawing this way, fill your sink up with ice-cold water and completely submerge the turkey in the water. I always add cold water and throw in a bunch of ice to keep it continuously cold.
To maintain a safe temperature you’ll need to change the water in your sink every half hour (adding ice as well helps), and you’ll want to cook the turkey as soon as it’s properly thawed out. Cold water thawing requires a half hour of thawing time for every 1 pound of turkey, so to thaw a 20 lb. turkey, it would take 10 hours to thaw in a cold water bath. Cold water thawing is a good option to use if you’ve been thawing the turkey in your refrigerator and it’s not completely thawed out yet.
You can also thaw your turkey in a microwave, but you’ll need a microwave that’s large enough to fit it. I have thawed small turkeys in my microwave using the poultry setting. It takes approximately 6 minutes to defrost one pound of turkey. You’ll just want to keep in mind that microwaves can unevenly defrost poultry so be sure to check it frequently.
Step two: Clean the turkey
Once your turkey has thawed, it’s time to clean it and remove the innards. Any turkey you buy at a grocery store should have the neck and giblets inside one or two packages. They’ll be tucked inside the turkey, so remember when cleaning to reach inside and pull them out. You may have to lift the flap on one end of the turkey to fish out anything that could be hiding.
Once you’ve removed the neck and giblets, put your turkey in your sink and give it a good rinse with ice-cold water. This removes anything left over and gives you a sparkling clean bird to bake. It’s also a good idea to wipe down and dry off the inside cavity.
Step three: Add some extra flavour to your turkey
On its own, turkey is very similar to chicken. You can eat it without any extra flavouring, but it will taste better if you jazz it up a bit. You can choose a turkey at the store that’s already pre-basted for ease of cooking. These “butterballs” have butter injected into the skin, but if you want to season the turkey on your own, you can try a number of seasonings.
- Use an injecting needle to inject water and butter into your turkey skin. This makes the meat moist, and if you like a touch of sweetness, you can also add some honey. My colleague Christine Persaud will sometimes add tiny slits in the skin with a knife and stick butter inside.
- Massage your turkey with herb butter and sprinkle some rosemary on it before baking
- Brine your turkey by soaking the turkey in a brine solution. Brine involves immersing your turkey in salt water and spices like peppercorns, mustard seeds, coriander, and onions. Some people will also add wine. You’ll need a large stock pot to immerse your turkey overnight, and if it won’t fit into your fridge, place your pot in a large cooler with ice packed around it.
- Some people love to cover a turkey with slices of bacon. This adds not only great moisture but also flavour to both the turkey and the drippings that you can use to make a killer gravy.
Step Four: To stuff or not to stuff, there is no question
I have always made stuffing before prepping my turkey so I can stuff it once it’s clean and ready to bake. Keep in mind that this will increase the baking time of your turkey, so if you’re in a hurry, you may not want to stuff your bird (you can always make and serve the stuffing separately as well). If you love stuffing the way my family loves stuffing, it’s definitely something you’ll want to do. I find that adding it to the turkey before cooking is the way to make delicious stuffing.
I prepare a large bowl of stuffing, put half in the turkey for cooking, then place the other half in a slow cooker and let it cook on low all day. If you’re cooking extra stuffing in the crockpot, always add extra moisture in the form of water, butter, or whatever your recipe calls for, and mix it frequently throughout the day. This will ensure your slow cooker stuffing cooks through.
In addition to traditional stuffing, you can also stuff your turkey with all sorts of goodies, like onions, fruits (oranges and lemon slices), garlic segments, fresh herbs – go wild!
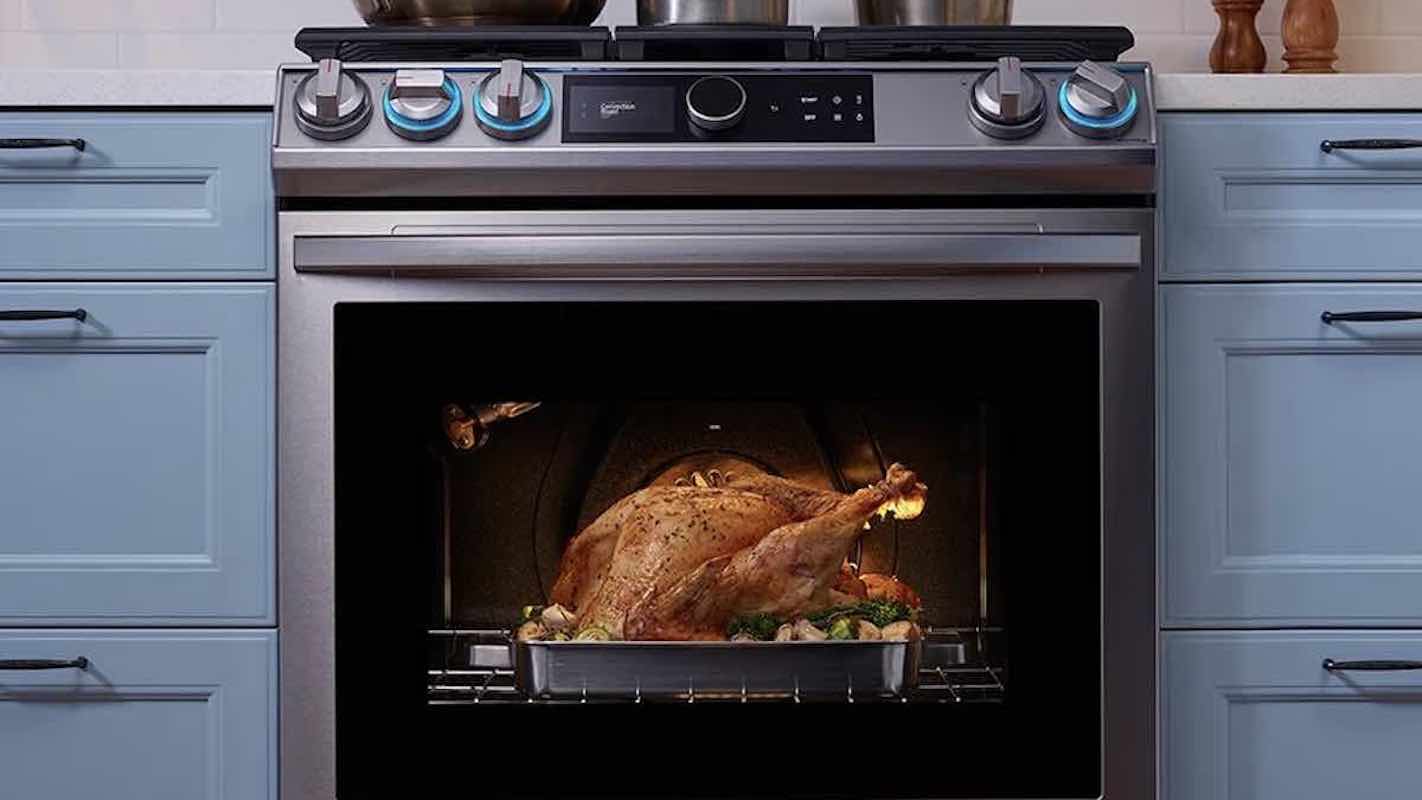
Step Five: Bake up your perfect turkey
When Grandma was baking her turkey for 30 back in the ’70s and ’80s, she definitely didn’t have an oven like the ovens we have now. The latest wall ovens and ranges cook or bake food efficiently and take less time so you won’t have to get up at 6 a.m. to ensure your dinner is on the table by 5.
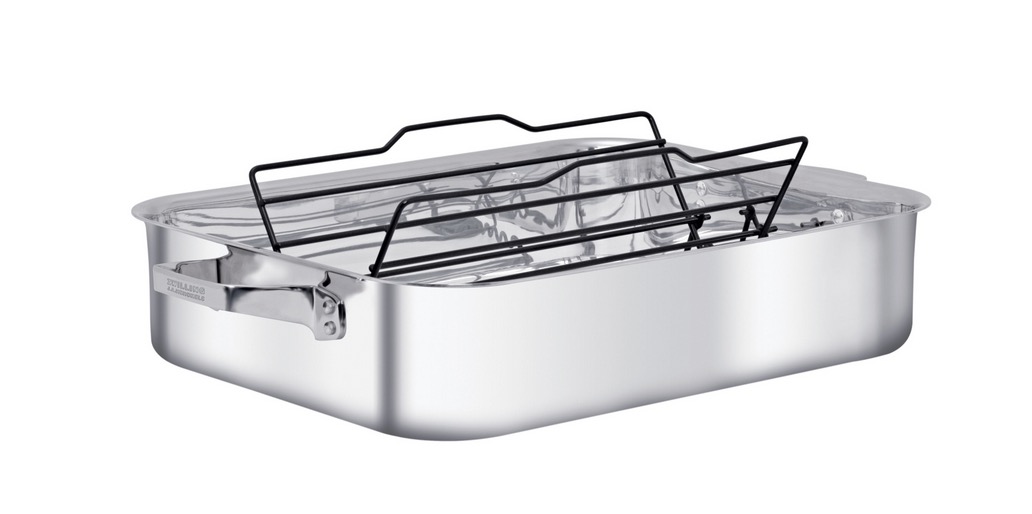
Place your turkey in a roasting pan and set your oven for the recommended amount of hours. Here’s a handy chart for turkey cooking times. I always cook turkey at 325 degrees but some prefer 350.

There are also a number of other ways to cook your turkey including in a turkey fryer or rotisserie. A fryer will quickly and safely fry your turkey with propane fuel, and a rotisserie will rotate a turkey on a skewer so it is evenly cooked. You can also air fry a turkey if you have an air fryer that’s large enough to accommodate the turkey. I have an air fryer as part of my double oven and that’s the way I plan on cooking my own turkey this Thanksgiving.
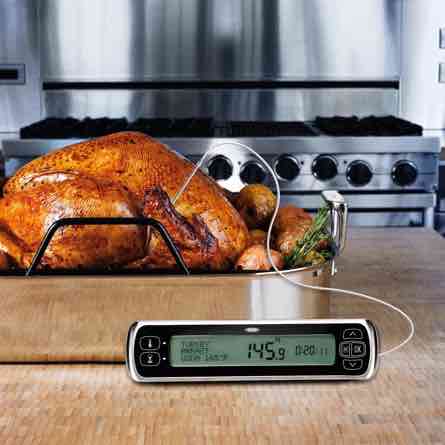
No matter what type of cooking method you choose, make sure you have a good kitchen thermometer to ensure your turkey is cooked all the way through.
Step Six: Prepare to serve your turkey
Your turkey is finally baked to perfection and you’re ready to put it on the table. Take your perfect turkey out of your oven and let it rest for a few minutes while you set the table and finish your final prep work on other dishes.
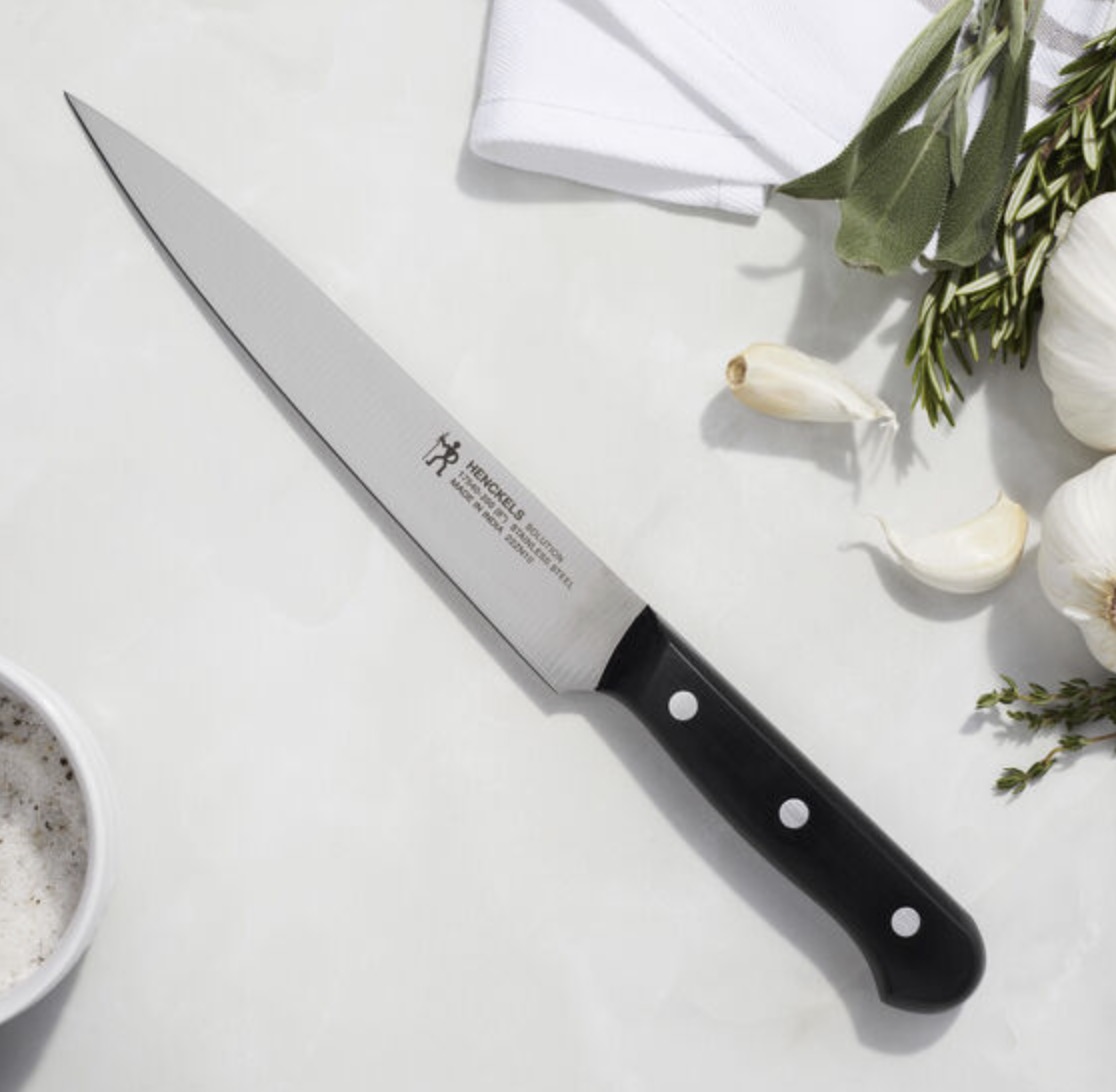
Some people like to serve their turkey whole and slice it right at the table. You can also slice it up and serve it in pieces. No matter your chosen method, you’ll need a large serving platter and a good set of knives to carve it. Before you get busy with your knives, check out this YouTube video on how to properly carve a turkey.
Cooking the perfect turkey is easy
It might seem like a lot of steps, but once you’ve cooked a few turkeys, you’ll see that it’s an easy process. For Thanksgiving, Christmas, or just for a Sunday night dinner, everyone will appreciate the effort you went through to serve the perfect turkey.
You can take a look at Best Buy right now for everything you need to cook your holiday turkey.


